All,
It's 0615 on 1 Feb 1990, and CLA Special Operations Forces' A Squadron is on the outskirts of Havana (6). Their mission is to infiltrate and destroy a Castro-regime Surface to Air Missile (SAM) battery atop Hill 55, just west of Havana. This mission is in support of B Squadron's upcoming mission, which will see them insert via helo (CLA UH-60s) into southern Havana to seize a radio station later this morning. But this will be no walkover; the SAM site on Hill 55 is guarded by elite troopers Castro's Bodyguard: 1st Airborne Rifle Company, 1st Airborne Battalion, some of the few Cuban troops trusted enough to be be stationed in the capital of Havana.
So far we've had:
1) B Squadron SOF destroyed a radar site in support of amphibious landings at Playa Colorada (5). B Sqdn then egressed and linked up with CLA rotary wing assets for their follow-on mission in Havana (6).
2) C Squadron SOF destroyed a the Cuban military's communications center.
3) 1st Para Battalion dropped in and seized a bridge to screen the landings at Playa Colorada (5).
4) 2nd Para battalion dropped in and eliminated a Castro-regime garrison to screen the landings at the Bay of Pigs (just west of (4).
5) 1st Marine Company, 3rd Infantry Battalion, made an amphibious assault at Playa Colorada.
6) B Squadron SOF attacked a Castro-regime SAM site near Havana.
The opposing forces, with regime forces on the left and CLA on the right. A pretty even up fight, which is not good for the attacker, particularly as the CLA SOF had only a slight quality edge over the Cuban paratroopers.
 Commander, A Squadron: Captain Stelosavo
The CLA forces have a Command Stand, five rifle stands, a jeep-mounted HMG, and a SMAW.
The regime's paratroopers have a Command Stand, five rifle stands, an MG, and a mortar. The mortar would play hell with the CLA commandos...
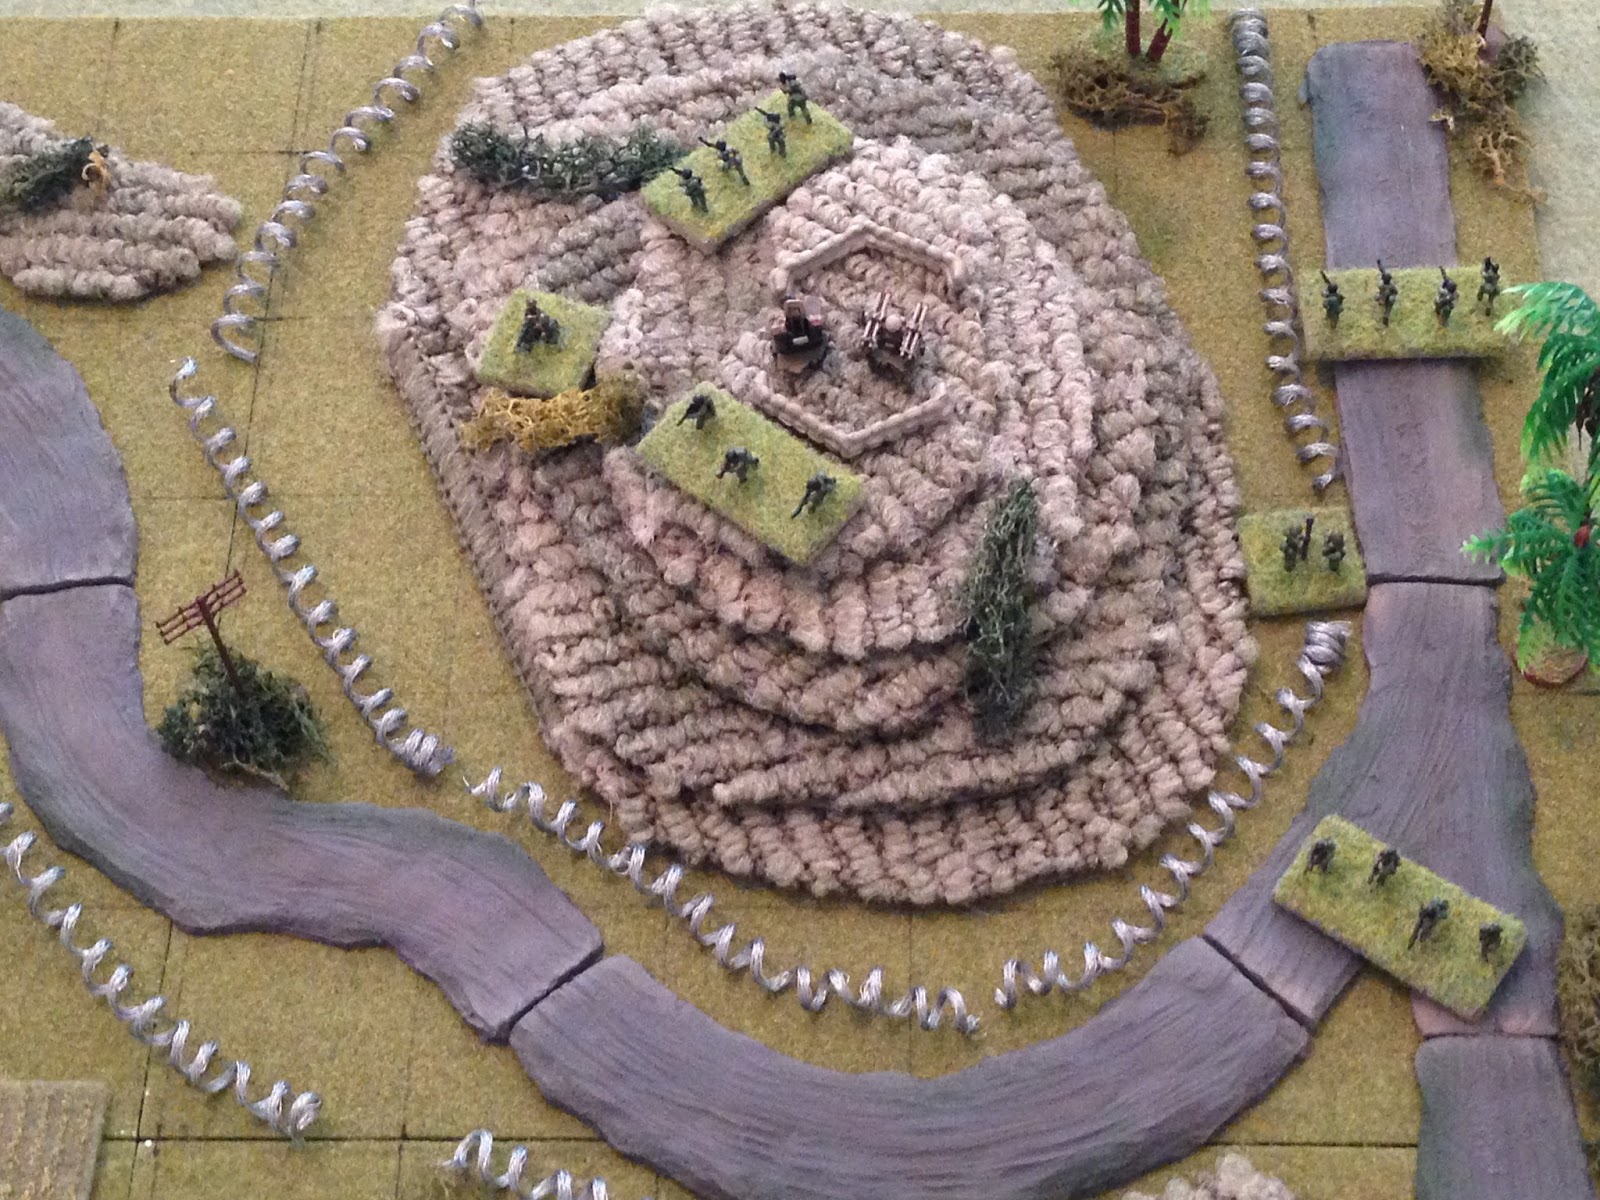
Overview, north is up. Hill 55, the location of the SAM battery, is at top right, with a small village at top left. The CLA SOF enter at bottom left near Hill 20. Regime forces are spread across the board, as are civilians.
The CLA entry positions, with SOF teams 1-5 from left to right, and the CO, HMG jeep, and SMAW team at bottom center. Being grouped up like this is not a good idea when enemy mortars are around...
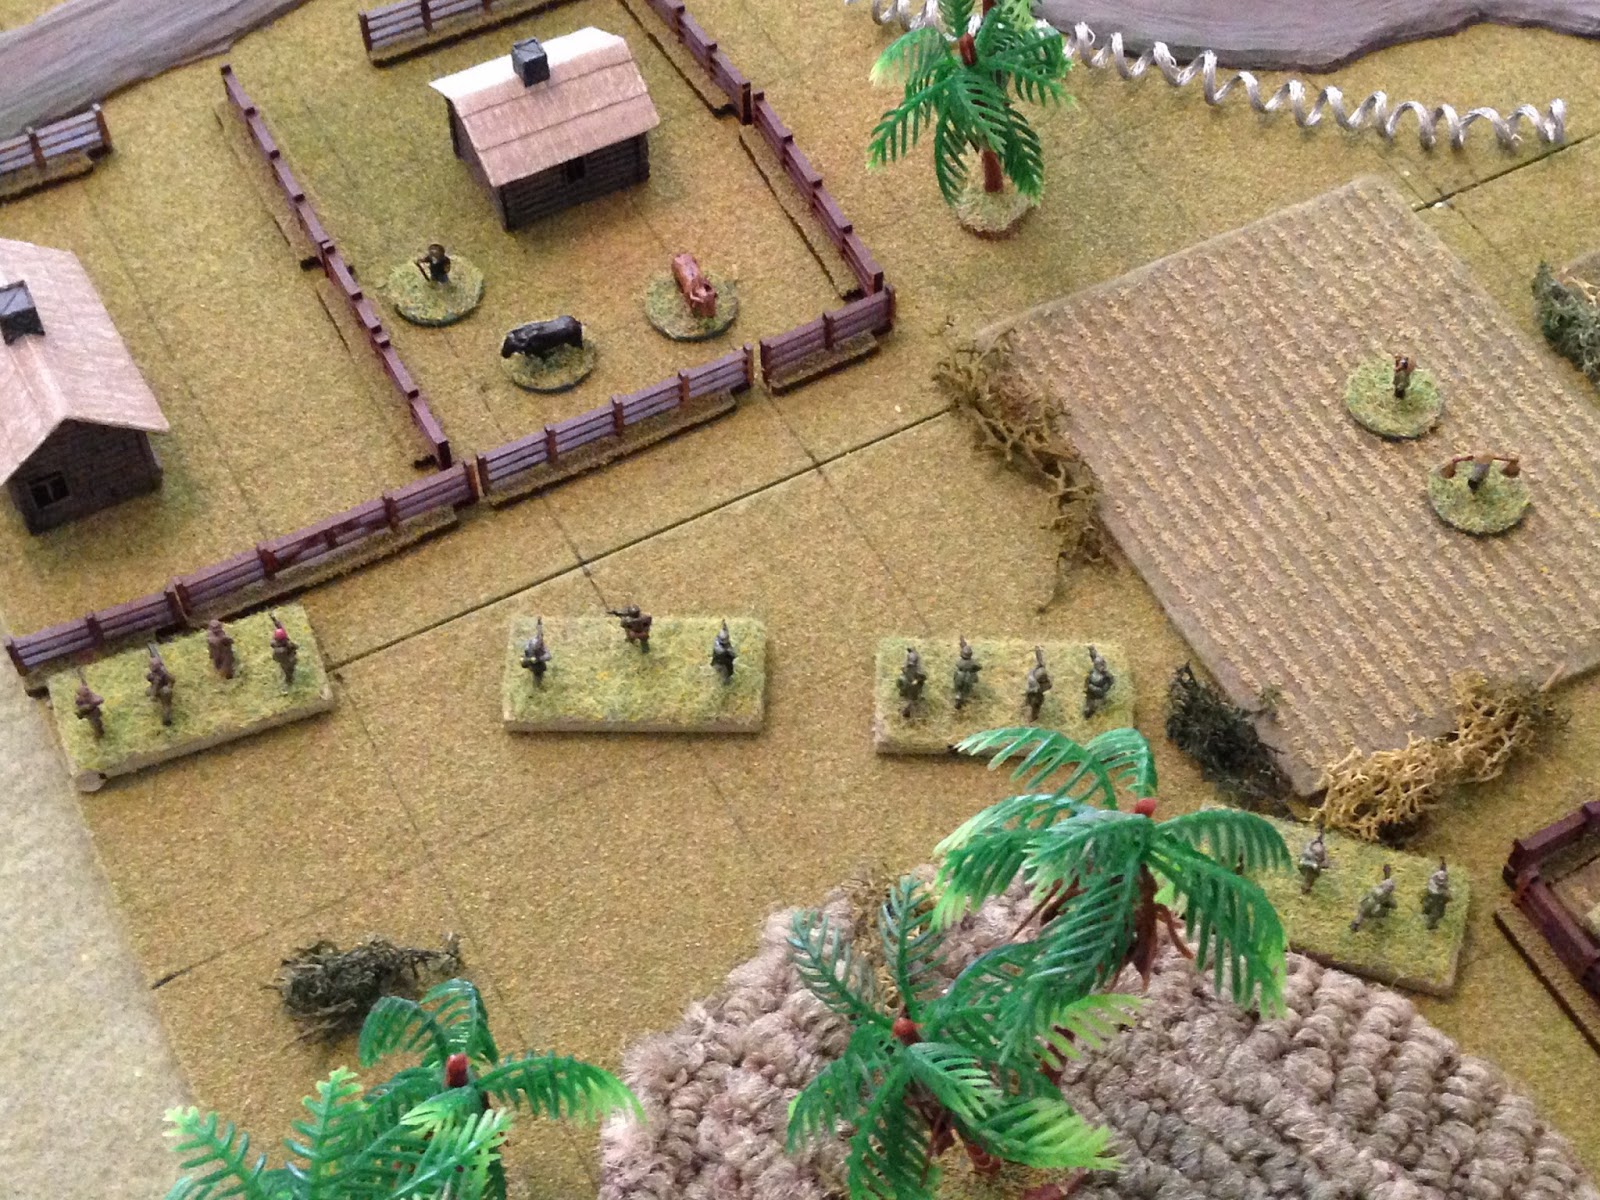
The northwest (top left) corner, some civvies and an enemy rifle team.
Hill 55, with the SAM, their CO, their MG, their mortar (just right of the hill, and three rifle teams nearby.
The southeast corner, which has a single enemy rifle team (bottom right) and some civilians working the field.
The fight starts with the CLA moving full speed ahead, trying to close with the enemy, spread out (to avoid the mortars), and get the civilians out of the way. Left to right is Tm 1, the CO, Tm 2, and Tm 3.
The CO (bottom right, with Tm 1 just to his left) yells to the farmer to get inside and get his family on the floor.
Tm 2 tries to get the civvies out the crossfire.
Tm 4 (top left, with Tm 3 to their left, facing away) and Tm 5 (bottom center) try to get the civvies in the east out of the line of fire.
The SMAW moves to the crest of Hill 20 while the HMG jeep sits tight.
The enemy team in the northwest (top left) falls back into cover opposite Tm 1, the CO, and Tm 2.
While the enemy takes up positions on and around Hill 55.
And the enemy team in the southeast (bottom right) corner falls back into cover.
And then the enemy mortar (top right) targets Tm 4 (bottom left)...
Forcing them to fall back (bottom left, from puffs at top center).
The enemy MG (top right) sets its sights on Tm 2 (white puff at far left)...
Gunning them and one of the civilians down. Tm 3 (bottom center) returns fire...
Forcing the enemy MG to fall back (top right from white puff at far left).
Tm 5 (bottom center) moves up, trying to shield the civilians, while Tm 4 (off camera to left) tries to rally but only gets 'up' to pinned.
While Tm 3 (center) pushes forward hard, with the SMAW team (bottom left) following.
While on the far left, the CO and Tm 1 push ahead.
But the enemy team before them simply falls back towards Hill 55.
While the enemy troops in the east (top right) also put space between them and the CLA forces, in this case Tm 5.
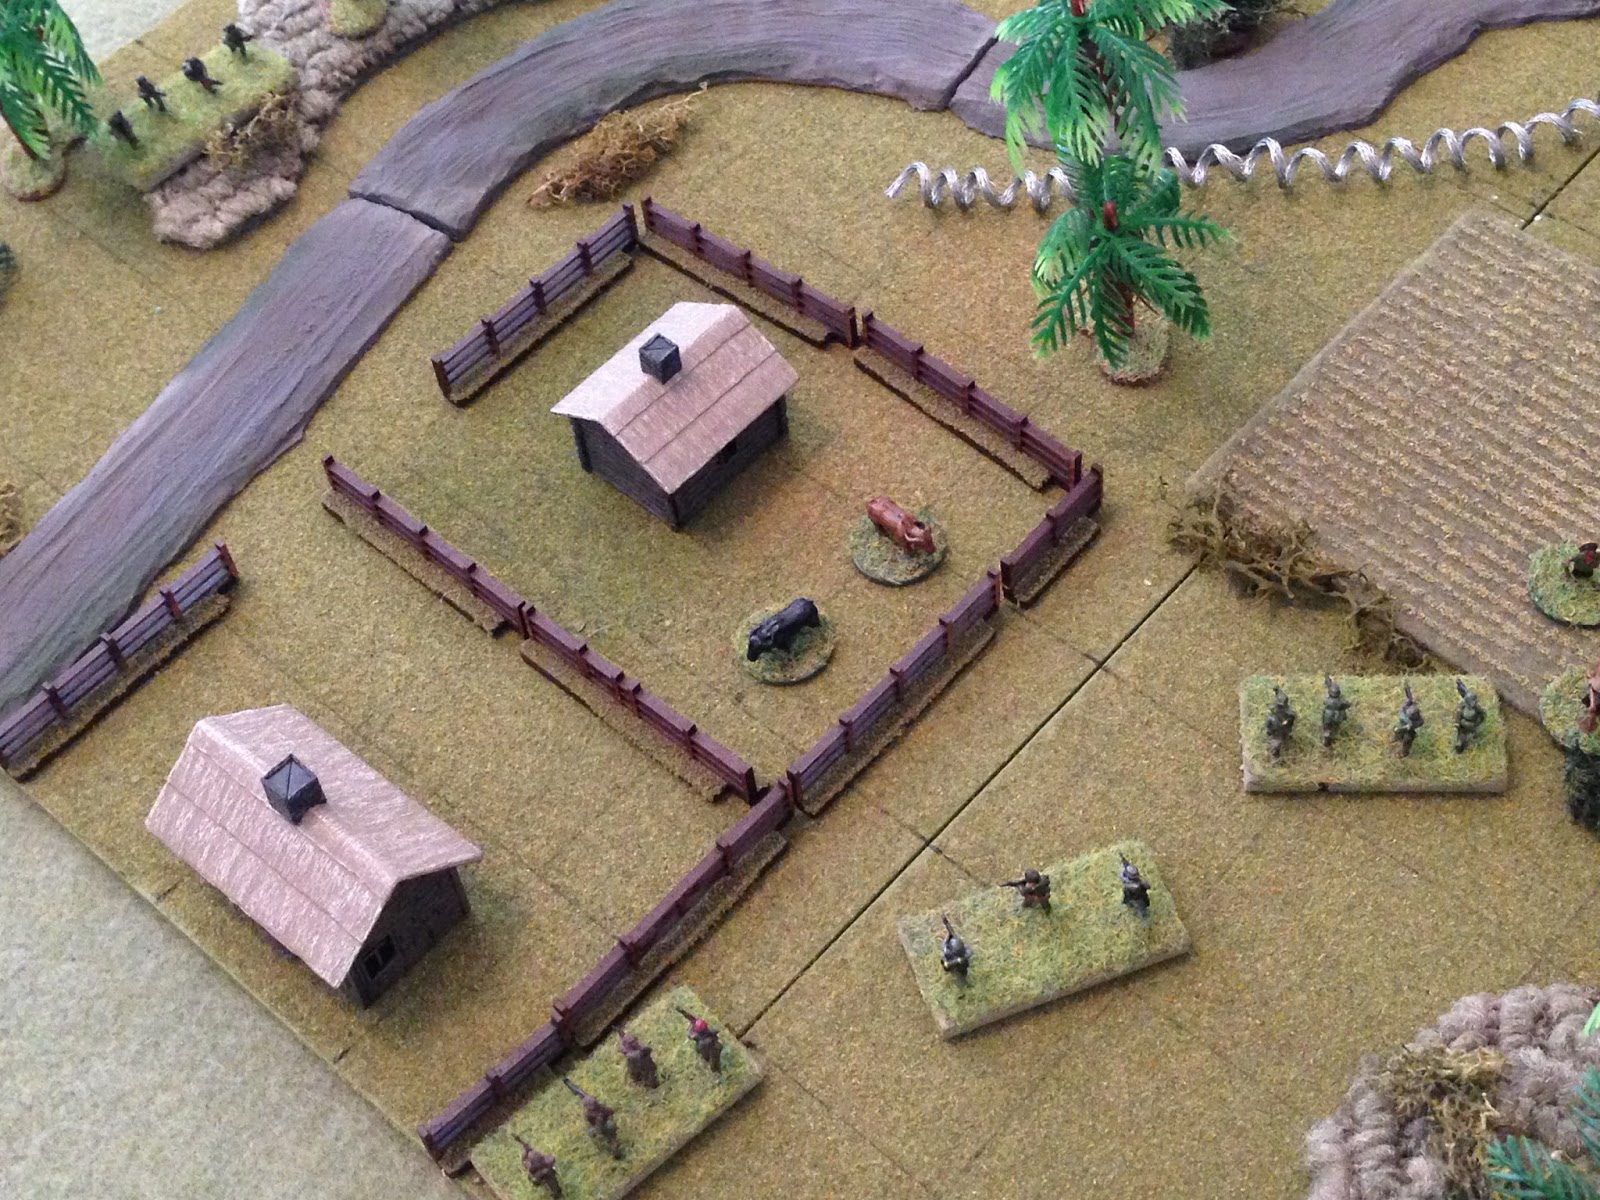
The HMG jeep moves around Hill 20, up to the village (CO/Tm 1 at top left, Tm 3 at far right, SMAW at bottom center).
The enemy CO moves back to rally the MG (red bead), but they fail and run off the table!
The enemy fires an RPG at the HMG jeep, pinning it.
While enemy troops in the east fire on Tm 5, pinning them.
The HMG jeep tries to rally but fails (stays pinned), while the CO and Tm 1 confidently advance in the northwest.
On a side note, the CLA have not been firing because they've rolled three straight 'scurries.'
Tm 3 (center left), proving every bit as bold as the CO and Tm 1 (top left), continues to press towards Hill 55, with the SMAW once again in tow (bottom center left). Those are enemy rifles at bottom left (there are two teams there, and Tm 5 is off camera at bottom right, pinned.
Tm 4 (off camera to left) once again tries to rally, but stays pinned, while Tm 5 tries to unpin, fails, and falls back (bottom left, from far right).
Seeking to maximize their momentum, the enemy paratroopers focus their mortar fire on Tm 5...
Putting them out of the fight.
One of the enemy teams in the east (top right) exchanges fire with the SMAW (bottom left), to no effect.
The HMG jeep rallies then hauls ass back to Hill 20 (far left), looking to lay down fire on the two enemy teams in the east...
But the enemy (off camera to right) guard fire and force the HMG jeep to retreat off the hill! On a positive note, Tm 4 (bottom center) finally rallies.
The SMAW team fires on one of the enemy teams in the east, and the enemy team is knocked out.
That's great, but overall I'm having some bad luck with the dice, and it's really got me dancing to their tune. That is, they're in my OODA loop, and I'm reacting to them instead of pushing my own initiative. I didn't get to use my HMG truck on Hill 55 because Tm 5 got KOed and Tm 4's been pinned the whole fight, then I didn't get to use my SMAW on Hill 55 because the HMG truck didn't even get a shot off, got forced back by enemy fire.
Return fire from Hill 55 missed the SMAW team; eliminated enemy rifle team at bottom left.
Tm 1 and the CO move up and fire in the north...
And it's fantastic: they knock out one team (top left), get 'men down' on another (white bead at top center), and pin the enemy mortar team (top right, with enemy CO between the two). Maybe I'm going to pull this off after all!
The CO and Tm 1 move up to the wire, eager to get at the enemy troops in bad shape...
But the enemy CO moves over and rallies them, then they open up on Tm 1...
But they miss, and Tm 1 returns fire, getting 'men down' again! Please let me get into close combat with those @#$holes!
The enemy mortar team puts the SMAW team out of action...
And then enemy riflemen on Hill 55 open up and put Tm 3 out of the fight...
And then the last enemy rifle team in the east fires on my last rifle team, Tm 4, in the east...
Forcing them to fall back and hunker next to the HMG jeep, who's also hunkering...
Good grief, things couldn't have gone much worse for me there.
All I want/need to do is get the CO and Tm 1 over the wire into those 'men down' riflemen, which should be a walk in the park, then I can push up and take out the enemy mortar team, who's pinned, and also should be a walk in the park. But I roll a damned 'firefight,' which means no one can move, only shoot. So Tm 1 opens up, but nothing happens. The enemy CO tries to rally his rifle team, but they melt away, so he falls back.
Just when I'm ready to withdraw, I get a little luck! But then Tm 4 tries to rally, and they run off the map. The HMG jeep rallies, and I also rolled up a random event, but it didn't affect anything. I'm hanging on by a thread; if I can just get the CO and Tm 1 over the damned wire and up the hill I stand a real good chance of pulling this off.
The regime forces pull a solid rifle team (bottom right) back to Hill 55 to shore it up. They're sitting tight, waiting for the CO and Tm 1 to come through the wire and up the hill.
While the enemy team in the east (bottom center), with nothing to worry about from CLA forces in the southwest, moves over to get a bead on the CO and Tm 1 (top left).
Tm 1 and the CO finally get through the wire and creep up Hill 55 (far left), still out of sight of the enemy troops at right.
But then Tm 1 loses its nerve and falls back down the hill! (I rolled up a random event, and it was Panic!. I rolled to see if it would affect Tm 1 or the HMG truck, the only troops I have left besides the CO, and of course it was Tm1, who's through the wire and up the hill, and not the HMG truck that's still hiding behind Hill 20)
Then, the damn-nigh impossible happens again: for the second time in this game, the HMG jeep climbs Hill 20 (top left) to deliver HMG fire, but the enemy rifle team in the east (bottom right) guard fires and forces the damn jeep to fall back!!!
And there it is, hiding behind Hill 20 again...
The enemy CO leads a rifle team over the crest, and Tm 1 (who the CO just rallied) snap fires and misses.
The enemy opens up, and Tm 1 takes casualties...
At that point the CO pops smoke and falls back with Tm 1. The enemy held, A Squadron is forced to fall back!!! My first mission failure of the invasion; now Captain Stelosavo will have to go and commit ritual suicide as the shame is too much to bear. Nah, just kidding; what a fight! It certainly hurts to have lost, but it was a helluva fight, and even though I lost, the enemy paratroopers only had their CO, two rifle teams, and their mortar left, so it's not like we got spanked and ran away with our tail between our legs.
But there is a problem: there will not be a re-fight of this one. There's no reason to, this was a one-off mission to clear the way for B Squadron's aerial insertion, and we've got a problem because those birds are already in the air, on their way to the LZ. We'll see how this shakes out. At this point, A Squadron is re-forming and re-fitting to move into Havana to take on other targets.
Casualties:
Friendly: ~20 KIA/WIA
Enemy: ~15 KIA/WIA
More batreps on the way.
V/R,
Jack


Another great report...you must be having a blast!
ReplyDeleteThanks Jim, and yes I am!
ReplyDeleteI can't wait to start seeing some Company Command batreps from you ;)
V/R,
Jack
Ok, I have swapped roles at work again and also have a nagging chest cough. So I am waaay behind in cvatching up on blog posts. This was an interesting battle with the focus on one hill rather than two or more objectives. And with effective mortars to deal with as well. Was it the Klink games you could never get them to be effective, or is it even earlier? I remember you complaining about mortars and dice a lot in the past. And to make it worse, it is the other side that gets good mortars - Hah!
ReplyDeleteGood grief, man! Time to relax, curl up on the couch with a laptop or tablet, and get all caught up ;)
DeleteYeah, mortars don't usually go my way, but when they do...
V/R,
Jack