All,
AKA, the 14th fight of Operation Payback
It's 0534 on 20 July 1990, and the invasion of Avalor, a small Caribbean island-nation near Cuba, upon which Castro-regime holdovers have been organizing, training, and launching attacks on the homeland, is underway. Previously three Reconnaissance and Surveillance teams from 10th Special Forces Group were inserted to support the invasion; one is in position in OP India, but the second team was compromised and extracted, and the third team (Rebel 33) was ambushed and wiped out. Now 1st Lieutenant Huerta's 18th Grenadier Guards of the 6th Parachute Battalion are jumping from C-130s onto three separate Drop Zones (DZs) in the pre-dawn darkness. They will immediately form up and march on their objectives, the terrorist training areas and barracks on Avalor, manned by terrorist trainees and their Venezuelan and Iranian trainers.
In the last two fights we saw Lt Jaramiho's 1st Platoon successfully seize DZ Crow and Lt Escobedo killed in action while trying, unsuccessfully, to secure DZ Bluebird. Here we pick up the action at DZ Albatross, where bad guys alerted by the earlier firefights are watching paratroopers of 2nd Lieutenant Reyna's 3rd Platoon descend and crash to the earth.
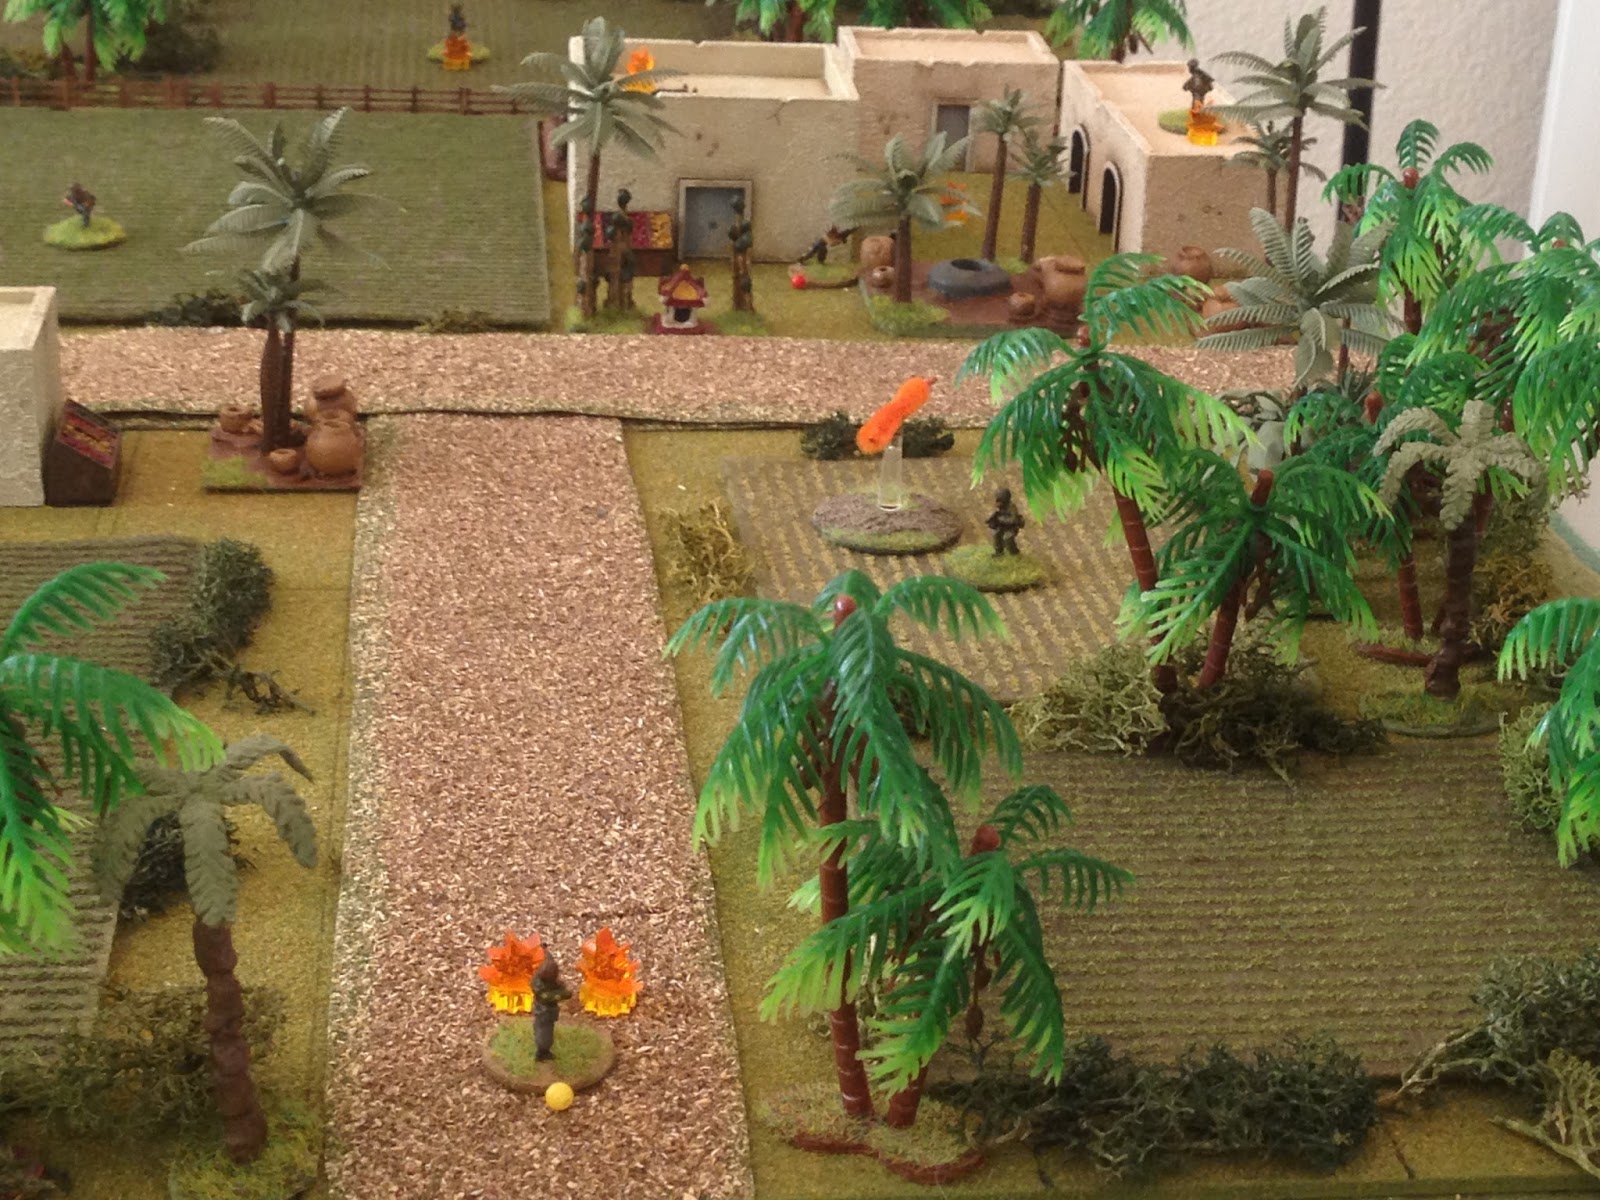
Overview, north is up. We've got a small village spread across the map from south to north, a dirt road running east-west with a sub-net running south and back west off of it, several crop fields, and scattered jungle. The table is 3' x 2' and I'm playing these fights solo using Ivan's "Five Men at Kursk," slightly modified to get a more modern (and deadly) feel.
The opposing forces, with bad guys on the left and good guys on the right, all in 15mm. The bad guys are Eureka Miniatures' Modern Chechens, while the good guys are Battlefront Vietnam-era US Infantry.
The good guys, but it's not that simple! This is a para-drop, so who knows who and how many are actually going to show up on the DZ for the fight. I will have a maximum of ten men and a minimum of five, decided by fate, which is also how their locations on the map will be determined.
The bad guys. There are ten of them present here, comprising an RPG, a PK machine gun, a sniper, and seven riflemen. I don't know the composition or quantity of what I'll face on the tabletop though. I have a marker for each of these guys, and I have five 'dummy' markers. I mix them together, count out ten of them, and place them on the board. Then I flip them over and see what I've got. At minimum there will be five bad guys, with the marker determining the mix of rifles and RPG, PK, and sniper; at max will be all ten men shown. These guys represent the Cuban hardliners (and other mercenaries/terrorists) being trained by the Venezuelans and Iranians.
The northwest, where we can see three bad guys (bottom left, top left, and center), and two good guys (Julio at far right and Sarge at center top right).
The northeast corner, where we see the good guys from the previous photo at far left (Julio) and top left (Sarge), then another two good guys (the Lieutenant at bottom center and the M-60 gunner at far right) and two more bad guys (bottom left and top right).
The southeast, where only two new guys are shown, both at bottom left, where a bad guy sentry is between two buildings, and a Cuban paratrooper (Billy) landed atop one of the buildings. Top left is Julio, center is the LT, and top right is the M-60 gunner.
And lastly, the southwest corner, where there is only one new guy, Cuban paratrooper that landed in the field at bottom left (Jimmie).
Time to fight! So far we've had four fights: in the first two, Cuban Special Forces teams were ambushed and 1) forced to flee and 2) wiped out. In the second two, Cuban paratroopers 1) secured the first drop zone, and 2) were forced to flee from the second. The invasion of Avalor, with its goal of destroying the joint Venezuelan/Iranian training base, is not exactly going according to plan. We really, really, really need to secure DZ Albatross in this fight.
The fight begins in the east, where the Cuban M-60 machine gunner (bottom center right) is the first out of his harness. His eye is drawn to the west, where he spots an enemy soldier atop a roof (top left). He sees his Lieutenant (center) struggling with his chute; the bad guy raises his rifle, but, before he can, the M-60 launches a burst of eight rounds in his direction. You can see Julio at top center.
Billy (bottom center) looks on as the enemy soldier (center) goes down! Julio and Sarge are to top left.
But a sentry in the northeast (top left) spots the Cuban machine gunner (bottom right) and cuts loose...
The rounds skip off the ground and ricochet into the sky; the Cuban machine gunner (bottom left) swings round and returns fire with another long burst...
The enemy soldier suddenly realizes how vulnerable he is, standing out in the road. The rounds snapping past his head quickly convince him to dive behind some nearby bushes.
Fresh from cleaning out his drawers after the the -60 gunner pointed the gun directly at him then sent a stream of tracers a mere foot over his head, the Cuban LT (bottom center) pulls his trousers back up, pivots, spots a bad guy (top left, on the ground between the two buildings, with another Cuban, on top of the building at top left), and opens fire.
The bad guy, previously focused on the Cuban on the roof (off camera to bottom right), is caught totally off guard, and while the LT's rounds miss, they're close enough to drive the bad guy back (red bead at left).
As the enemy soldier hunkers down, suppressed (at top center right), one of his compadres (bottom center) spots the LT (top center) and returns fire...
The rounds kick up dirt all around him (bottom right), but the LT hangs in there and returns the fire, calmly squeezing off rounds at the bad guy that shot at him (top left)...
The bad guy (top left) is pinned by the LT (off camera to right). Billy, on the building at bottom center, fires on the same guy. Jimmie, the paratrooper in the southwestern field (left) flinches as his buddy's rounds flash by.
But he (top right) misses. The target (bottom center) flips his AK to full auto and sprays and prays...
And a (un)lucky round skips off the building and into the young paratrooper's abdomen, putting Billy out of the fight!
Having just watched his buddy go down, Jimmie (bottom center) turns on the bad guy and fires...
The enemy rifleman goes down in a hail of M-16 fire (bottom right), but a bad guy machine gunner creeps out of the shadows (top left) and sprays rounds in Jimmie's direction...
The rounds are high, and Jimmie charges (center, from bottom right) the terrorist, firing as he goes.
The rounds smack into the adobe walls, and the enemy PK gunner falls back, suppressed (far left, from explosion at right).
But that places the PK gunner squarely in the sights of the Cuban Sergeant, who promptly opens fire.
Somehow, despite being at point blank range, Big Sarge (top left, with the PK gunner just below him) misses the enemy machine gunner! Another bad guy (bottom center) spots the Cuban NCO towering over his suppressed buddy and fires...
Big Sarge goes down (bottom center), and the PK gunner dashes across the clearing and dives into cover in the treeline (top center).
Seeing his Sergeant go down (center), a Julio (bottom center) moves up, takes a knee, and fires on the PK gunner (top left), but he doesn't have a clear shot at the cowering terrorist and he misses.
From the northwest corner, the bad guy there (bottom left, with the PK gunner off camera to left) fires on Jimmie (top right), pinning him.
One enemy rifleman is in good fighting shape (off camera to bottom left, he just shot at Jimmie, who's at bottom center), but they've got three men suppressed: bottom left, far right, and top left. Those three all self rally; the guy at bottom left gets up to 'pinned,' and the other two are good to go.
But right away the enemy troops are running into more trouble; the guy at top left...
Had a big Cuban carrying a machine gun coming at him (bottom right), firing it Rambo-style as he goes...
The bad guy is hit and knocked to the ground (white bead at top right) as the Cuban machine gunner moves up and turns west (bottom left).
In the center, The Cuban Lieutenant (bottom center right) ignores the incessant bleating of the old goat (bottom left) known round these parts as Quixote, and draws a bead on the enemy PK gunner (top left). He squeezes off several rounds...
The PK gunner is pinned (off camera to top left, with Billy at top center, Jimmie pinned at far left, and a bad guy creeping around the building at bottom center). The LT hops the wall and moves up, thinking seriously about putting a few rounds into that damn goat (bottom right).
Meanwhile, Jimmie (bottom center) is still pinned down, but he rolls left and opens fire on the enemy rifleman in the northwest (top left, with PK gunner at top center).
The bad guy hunkers down, suppressed.
But as Jimmie (center left) is firing on that bad guy (top left), another terrorist (bottom right) sights in and fires, knocking Jimmie down! The Cuban rifleman at top center, Julio, says a quick prayer...
Then charges the pinned PK gunner!
The enemy PK gunner is subdued!
The Cuban rifleman's blood is up! After finishing off the PK gunner (bottom right), Julio cleans his bayonet off and begins moving (center) towards the suppressed enemy rifleman in the northwest (top left). The bad guy takes one look at the seething paratrooper and books it off the table!
The bad guy tried to self rally but failed and left the map.
Back in the southern center, the bad in the ville (right) moves up (center left) to finish off Jimmie (top left), who's knocked down.
But as he (bottom right) closes in on Jimmie (center), the bad guy notices Julio (top left) moving to kill his comrade! The bad guy cuts loose with his AK, and Julio is knocked down too!
But the LT (bottom left) hears the commotion and peers around the building to find the source of the AK fire (top right; Julio is off camera to right). The two spot each other and and exchange fire harmlessly.
The LT fired, missed, then the bad guy returned fire, also missing.
In the northeast, the Cuban M-60 gunner moves west (bottom left), leaving the knocked down enemy rifleman in the northeast (top right) to be dealt with at a more convenient time.
But the bad guy (bottom left; just to be clear, this is the last bad guy in the fight, and he's the one that knocked down both Jimmie and Julio) spots the M-60 gunner (top right, with the LT just visible to the left of the goat pen at center). Once again the sound of bullets exiting the muzzle of his AK pierce the pre-dawn darkness...
The 7.62mm rounds shred nearby palm fronds as the M-60 gunner (bottom right) takes a knee and returns fire...
The terrorist is not so stalwart, and so he ducks out of the line of fire, suppressed (right, from the explosion at left).
As M-60 rounds continue to zip past, impacting at far right, the LT moves up and around the corner (bottom center), where he catches the bad guy cowering (center, kinda hidden by the canopies of the trees). The LT sights in...
And finishes off the bad guy! Lt Reyna's 3rd Platoon has secured DZ Albatross. Jimmie and Julio walk up just as the M-60 gunner joins the LT. Lt Reyna orders the M-60 gunner to provide security as Julio and Jimmie police up their casualties (Billy and Sarge) and the LT sets off to roll up the stick, locating the rest of his platoon and getting them ready to move on the objective.
That was a pretty fun fight, not least of which is due to the fact it provided a badly needed win! This means the mission can go on with a decent chance at success; if this fight failed, I was really wondering about how I could pull off the narrative of going after the enemy barracks and training camp. I suppose I would have had to call in the reserve, probably have them insert via helo into the one DZ we were able to secure. In any case, that is not necessary now as the Cubans have two full platoons available for the assault on the objectives, a single R&S team available to provide situation awareness and help control the battle space until a Command Post can get up and running (they had to jump in also), and ODA 525 to provide Direct Action support to the assault. Somewhere in there, Lastly, Unit 101 will be floating around, looking to police up two High Value Targets (HVTs) believed to be on the island.
Lt Huerta, the paratrooper Company Commander, is already on the deck and has established comms with his two remaining platoon commanders, Lt Jaramiho (1st Plt, DZ Crow) and Lt Reyna (3rd Plt, DZ Albatross), and he's sent his 1st Sgt out to try and round up stragglers from 2nd Platoon after the debacle at DZ Bluebird. Captain Wallestre and his team from ODA 424 are in position and have checked in on the network now that radio silence is off, and Lt Estevez's ODA 525 (the shooters) is inbound in helos, having completed their QRF mission in support of the R&S insertions. No one has heard from Unit 101, but their primadonnas, they'll show up when and where they want ;)
I took a bit of extra time to go back and name (or at least ID) all the Cuban troops, hopefully it made for an easier read. I'm looking at about four more fights to seal up Operation Rush Deliver: two platoon+ sized fights, one to take each objective, and two small SOF hits (Unit 101 taking down the HVTs). Coming right up!
V/R,
Jack