It's 1930 on 5 Feb 1990, and troopers of the CLA's B Company, the Unconventional Warfare Group, are on the move just east of the town of Bayamo, in search of a renegade regime General and his two fanatical sons.
Immediately prior to and immediately following C Squadron's successful capture of El Presidente, CLA Intelligence came upon information from multiple sources which explained that the enemy's plan was for General Guapos, near Bayamo and with a bodyguard of Venezuelan paratroopers (they couldn't be sure who the CLA had co-opted) planned on continuing the war, and resorting to an insurgency if circumstances dictated.
Generalissimo Waraldonez immediately called a staff meeting to determine the CLA's best course of action. The Commanding General turned once again to Colonel Quilveras, commander of the CLA's Special Operations Forces, and ordered him to prepare another Direct Action Team to carry out a decapitation strike, to end the war once and for all. Colonel Huistrella, commander of the CLA's Unconventional Warfare Group, catching wind of this, arrived at Generalissimo Waraldonez' Command Post and lobbied to have the mission directed to the UCW. "Hector," said Waraldonez, addressing Colonel Huistrella, "you know this is a job for the Direct Action shooters." "Sir, after all the UCW has been through, all we've done for you and this army. We bled white in the Escambray to hold the line, keep your flank secure so that you could secure this victory. Let us finish this."
After much politicking, made possible by Huistrella's 'moles' in the Commanding General's Command Post, and by his arrival by helicopter at said Command Post, Waraldonez awarded the mission to B Company, UCW. Of course, Colonel Huistrella would personally lead the assault. Colonel Quilveras rolled his eyes and muttered a curse under his breath...

So far we've had:
...
D+1
...
20) 2nd Airborne Battalion, attacks north of Sandino to eliminate the regime's 4th Infantry Battalion.
21) 7th Infantry Battalion, attacks north of Sandino to eliminate the regime's 5th Territorial Infantry Battalion.
22) Colonel Huistrella's Unconventional Warfare Group fight another desperate holding action in the Escambray Mountains, this time against the regime's 10th Territorial Infantry Battalion.
D+2
23) The 5th Tank Battalion squares off against the regime's 2nd Armored Battalion just west of Artemisa.
24) 9th Popular Force Battalion holds the line at Matanzas as the enemy's 7th Infantry Battalion attempts to break out to reinforce Havana.
25) 6th Infantry Battalion, with support from 5th Tank Battalion, engages the enemy 6th Armored Battalion's spoiling attack.
26) The 5th Tank Battalion and 4th Infantry Battalion take part in heavy street fighting in Artemisa against the regime's 2nd Armored Battalion.
D+3
27) The 5th Tank Battalion and 3rd Infantry Battalion are stymied by a spoiling attack east of Artemisa by the regime's 2nd Armored Battalion.
28) 10th Popular Force Battalion and the regime's 7th Infantry Battalion trade supporting fires in eastern Havana, then grapple in heavy street-fighting.
29) The 6th Infantry Battalion, supported by the 3rd Troop, 5th Tank Battalion, defeats the regime's 6th Armored Battalion in fierce fighting to secure the city of Cienfuegos.
D+4
30) 1st Airborne Battalion secures Artemisa, then pushes into Havana, where they run into unexpectedly heavy resistance.
31) CLA SOF carries out a bold plan to secure El Presidente in northern Havana, as Venezuelan paratroopers seek to whisk him away to safety.
32) Just east of Bayamo, on the eastern end of the island, CLA UCW carries out a daring strike against a fanatical, hold out regime officer, in an aatempt to end the War of Liberation.
 The opposing forces, with CLA on the right and regime forces on the left. The CLA force is comprised of Battlefront's Vietnam-era SEALs, while the regime force has the same Peter Pig troops as last game. General Guapos and his sons are from rebel Minis' "armed assassins" pack. And I just noticed that, in my haste to get the troops ready, I forgot to put a blackwash on the bases of the General and his sons. I'm also going to have to re-do the basing of the Peter Pig troops; usually I paint the pennies, let it dry, then put grass on them. Being in a hurry I skipped the 'paint the pennies' stage and just grassed them; you'll see in some of the photos that the pennies' bronze is showing through the grass on quite a few of the bases...
So I'm once again using 15mm and Five Men in Normandy. But these are not CLA Direct Action shooters, so both forces are being treated as 'ordinary' soldiers as per the rules. The only mod is that two of the CLA troops have M-14s, so I'm using them as Designated Marksmen. I've doubled their firing dice, and allow them to hit multiple targets.

Commander, B Co: Captain Galban (son of Colonel Galban, Commanding Officer of 3rd Infantry Battalion)
 The CLA force: 12 troopers, two with M-79 grenade launchers and two with M-14s. Several troopers are carrying LAWs, but I forgot about that and never used them... The two men on the left are Colonel Huistrella and Captain Galban.

They are, of course, joined by their Commanding Officer, the heavily decorated (Cruz Servicio Distinguido, Estrella de Bronce, and Corazon Purpura) Colonel Hector Huistrella.
 The enemy: there are ten Venezuelan paratroopers, one with RPG and one with LMG, General Guapos, and his two sons.
 I'm very happy with how these guys turned out, though, as mentioned, I need to put a wash on their bases.
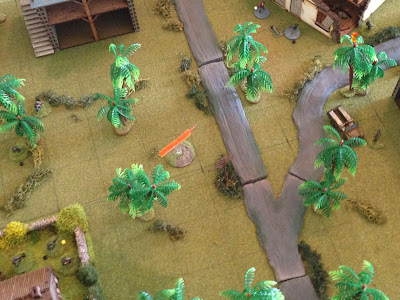
 Overview, north is up. General Guapos has made his Command Post in a bombed out farmhouse (top left). He, his sons, and a few Venezuelans are there, while the rest of the Venezuelans are spread across the top of the board. The CLA is spread across the bottom of the table; Colonel Huistrella has half the men on the left, while Captain Galban has the other half on the right.
The farmhouse is at top left, the barn at top center, the pig sty at top right, Hacienda 1 at bottom right, Hacienda 2 at bottom center, and the stables at far left.
 Bottom left corner, showing Colonel Huistrella and his men.
 Bottom right showing Captain Galban and his men.
 Top left, showing the General, his sons,and a few Venezuelan sentries.
 Top right, showing the remainder of the Venezuelan troops. There are two men, including the LMG, in the barn at top.
 General Guapos and his sons conversing with the Venezuelan commander.
CLA is up first, and the fight is on!
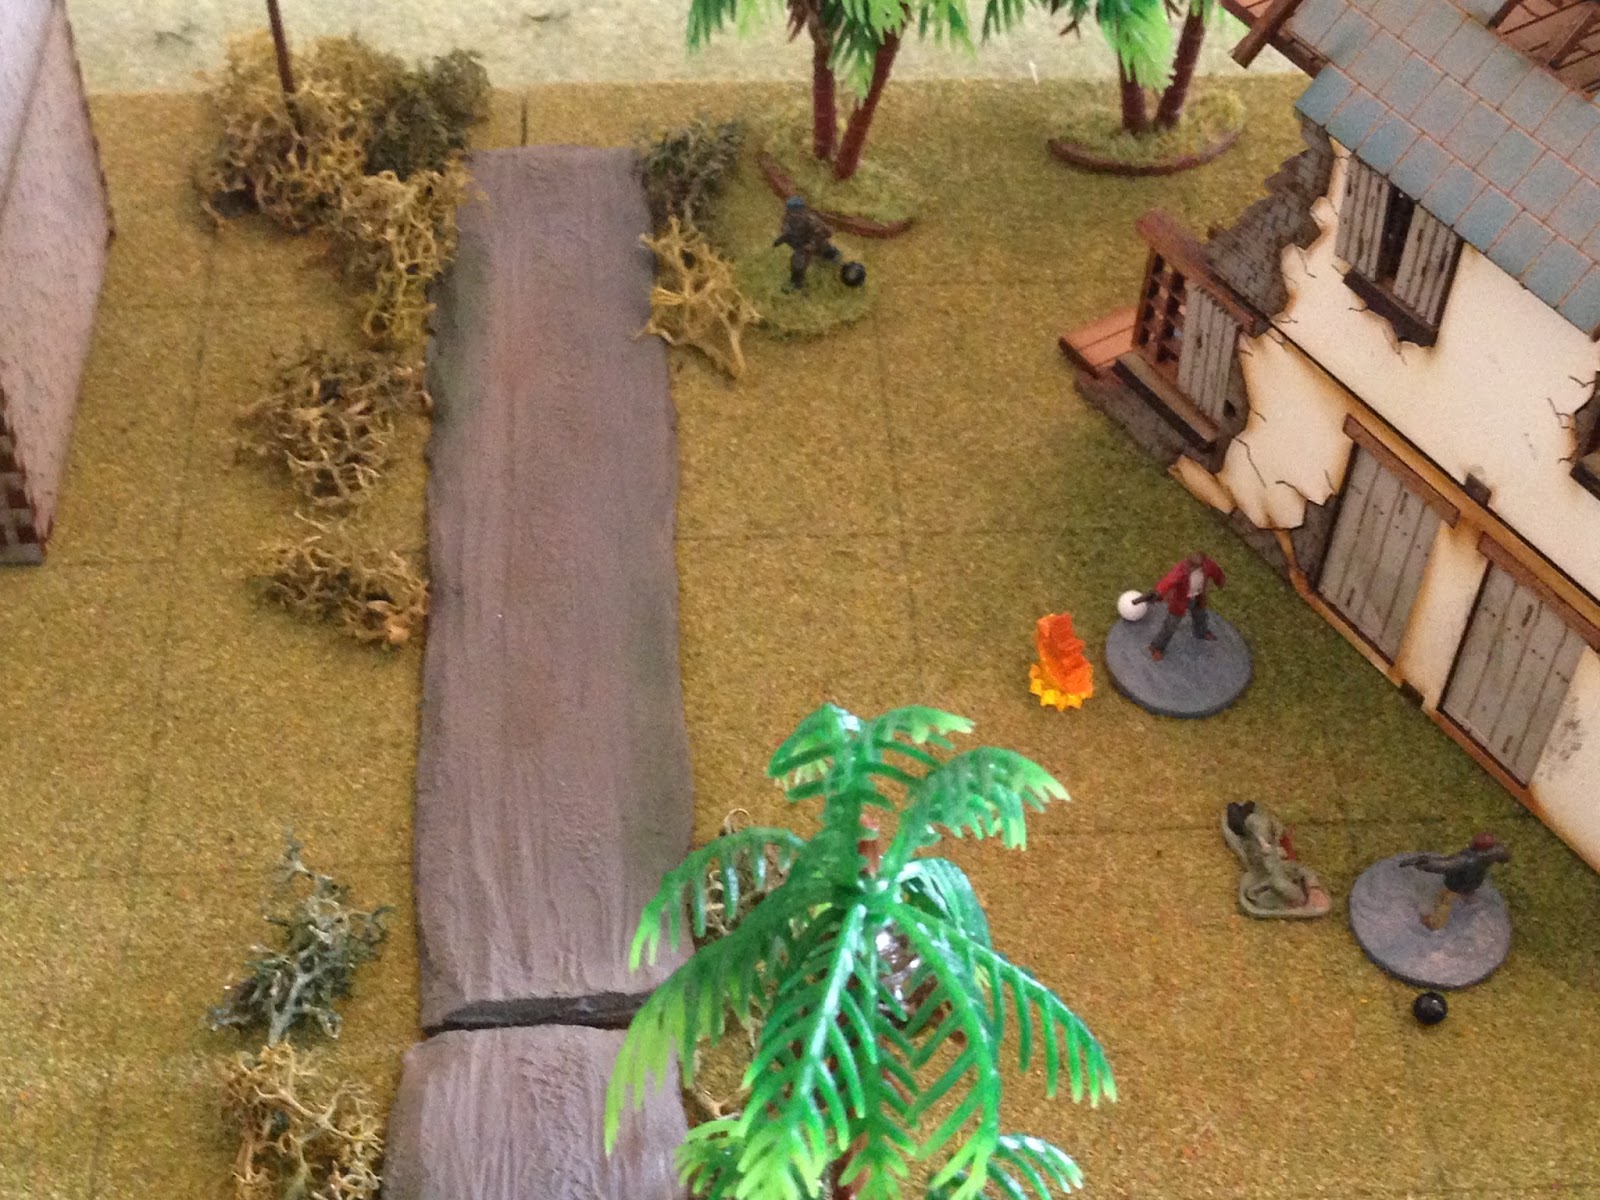
 The battle starts like a champ: from Hacienda 2, one of the Designated Marksmen (bottom center) spots General Guapos (top center) running his trap...
 And puts him on his back. The Venezuelan commander is scared @#$%-less and runs around the corner (far right, red bead).
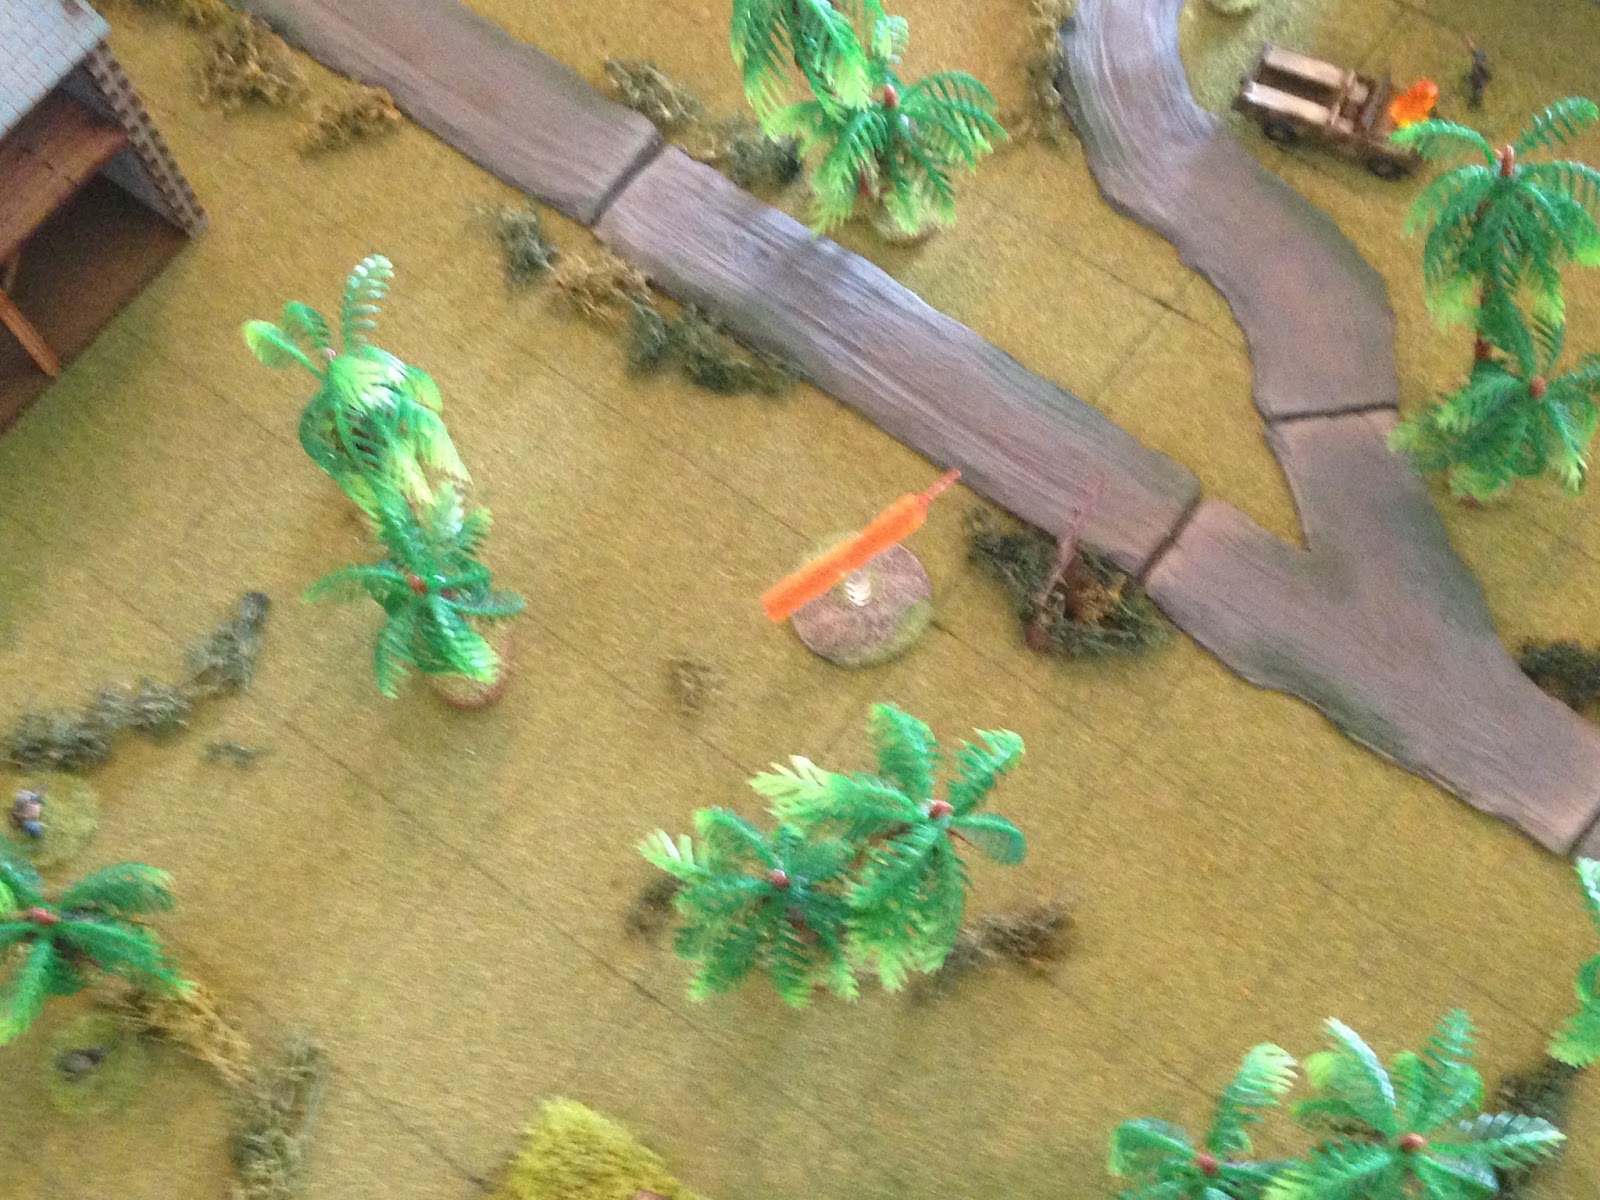
 A Venezuelan sentry (far left) returns fire, pinning the DM (bottom right).
 At bottom right, Colonel Huistrella goes charging forward, busting brush, and opens fire on the Guapos' sons...
 Victor takes a round (white bead), while Vector returns fire...
 But misses the Colonel.
 The other DM moves up (to left), drawing Guard fire from a Venezuelan rifleman (far right), which misses.
 The DM (bottom left) fires, and he also misses (top right).
 On the far right, a CLA rifleman moves up near the pig sty and fires (top center, note other enemy soldier at top left)...
 Getting 'man down' (white bead, bottom right), and forcing the other enemy soldier to fall back (top center, red bead).
 An enemy rifleman (top left) returns fire (far right), but misses.
 The enemy sentry on the far left (of table) feels a bit vulnerable and falls back to cover (top center, from far left, with CLA off camera to left). This was a random event, "Hit the Dirt!"
 On the far right, the enemy RPG gunner moves up and rallies his buddy.
 But a CLA rifleman (bottom right) in Hacienda 1 Guard fires and pins the RPG gunner!
 But then the enemy LMG gunner, in the barn at far left, fires on that CLA soldier...
 Putting him out of the fight and pinning his two squad mates.
 On the left, a rifleman sprints across the road to rally the Venezuelan commander...
 But he runs away! (top center right, from center left)
 Captain Galban (bottom left) Guard fires on the brave enemy trooper that tried to rally his boss, but misses.
 As does the enemy's fire (enemy at top left, Captain Galban at bottom right).
 On the far right, an enemy rifleman moves up (top right) and fires (bottom left)...
 Getting 'man down' on a CLA rifleman (white bead) in Hacienda 1, and forcing a grenadier to fall back (top left, red bead).
 Captain Galban (bottom left) braves enemy fire to move over and rally the hunkering grenadier.
 And then Captain Galban (bottom left) opens up on an enemy rifleman (top right)...
 Forcing him to fall back (top right, from explosion marker at center left).
 The recently rallied grenadier (bottom left) moves up to check on his 'man down' buddy, but draws Guard fire...
 Which forces him to fall back (top left) right back to where he started...
 The CLA rifleman on the far right (bottom right) opens fire on the enemy RPG gunner...
 Knocking him down (white bead).
 And then the CLA trooper rushes forward (far left), looking to get at the enemy 'man down' soldier on the road, but he draws fire from the barn (top right), which misses...
 The CLA trooper closes the distance...
 And puts him out of the fight before taking cover behind the pig sty.
 On the far left, the other M-79 grenadier sprints up the steps of the stables (top left).
 Once again the enemy LMG in the barn (top left) is causing trouble: it opens fire on Hacienda 2...
 Knocking one CLA trooper out of the fight (top right), and forcing one of the DMs to fall back (bottom left, red bead).
 The enemy rifleman in the barn sees something needs to be done to help his buddies at the pig sty (bottom right) get back in fighting shape; he sprints over (top center, on stairs, from far left)...
 Then flies down the steps to his comrades. All three successfully rally.
 A CLA rifleman (bottom left) Guard fires at the sprinter, but misses...
 On the far right, one of the recently rallied enemy riflemen at the pig sty moves up to deal with the CLA rifleman seeking shelter there, but he spots the Venezuelan and opens fire at point blank range...
 Gunning him down!

 Pinning Vector. Vector tries to resuscitate Victor, but he stays down (but not out of the fight).
 On the far left, the grenadier is about to enter the top story of the stables when rotting wood gives way! He falls, but checks himself and is unhurt (this was a random event).
 Colonel Huistrella takes another shot at Vector, but misses.
 So the CLA rifleman behind him opens up (bottom right)...
 And puts Vector out of the fight!
One more to go.
 One of the Designated Marksmen (bottom left) opens fire on a Venezuelan near the barn (top right)...
 Forcing him to fall back.
 The CLA rifleman on the far right pops around the corner and once again puts the RPG gunner 'man down.'
 Captain Galban (bottom left) also opens fire on the pig sty (top right), but doesn't hit anything.
 A CLA rifleman in the center (bottom right, near Hacienda 2) opens fire on the enemy rifleman on the far left (top left), getting 'man down.'
We're shooting all kinds of holes in the enemy, but can't seem to put them out of the fight. This would fuel widespread rumors the Venezuelans were taking narcotics prior to the battle ;)
 At bottom left, Victor finally comes to, only to find his father and brother on the ground beside him, bleeding profusely. The Venezuelan commander (top center) also rallied.
 An enemy rifleman at the farmhouse (top left) opens up on the CLA rifleman at the pig sty (far right), pinning him.
Uh-oh, this makes him very vulnerable to the nearby enemy troops...
 But they don't close assault him, they just open up at point blank range...
 Knocking him out of the fight...
 An enemy rifleman at the pig sty (top right) makes an incredible shot, putting Colonel Huistrella (bottom left) 'man down.'
 And then that damn enemy LMG (top left) went to work again, this time on the CLA center...
 Pinning a rifleman (yellow bead) and getting 'man down' on Designated Marksman.
All these white beads fueled rumors by the Venezuelans that the CLA Unconventional Warfare soldiers took narcotics prior to the battle ;)
 Having such a good time, the enemy LMG (top right) again fires on the CLA center, getting 'man down' on another rifleman (bottom left, white bead).
 Captain Galban (far left, between Hacienda 1 and 2) returns fire on the Venezuelan LMG (far right), but misses.
 On the far right, an enemy rifleman at the pig sty rallies the RPG gunner...
 Then moves over (top center, from top right) and fires his AK at the CLA troops in the center (bottom left)...
 Putting another rifleman 'man down.'
Man, we are shooting each other to pieces, but look at all those damn 1s I rolled!!! No one is dying!
 A CLA rifleman on the far left (bottom left, with little white 'man down' beads everywhere) returns fire (top right)...
 Forcing the enemy soldier to fall back (top right, red bead, from bottom left).
 But then the enemy RPG gunner moves over to clear his line of fire (top right), and launches a rocket directly at Captain Galban (far left, between the Haciendas)...
 Galban and the grenadier are both knocked out of the fight.
 The other CLA grenadier, on the far left, having recovered from his fall off the steps, dashes up the side of the stables. He calmly loads a buckshot (flechette) round into his M-79, levels it at Victor, and fires...
 The grenadier is off camera to bottom left, with his line of fire from bottom left to top right. The buckshot blast gets 'man down' on Victor (bottom left), an enemy rifleman on the other side of the farmhouse (center), and pinned the Venezuelan commander (top right, yellow bead).
That Victor is one tough sonuvagun...
 In the CLA center, a rifleman moves up to try to rally some of the many 'man down' troops (top left), but he draws Guard fire from an enemy rifleman at the pig sty (bottom right)...
 Which forces him to fall back and hunker (red bead)...
 We're at a very sensitive point in the fight, both sides are beat to hell. In the CLA center, another rifleman (bottom left) moves up to try to rally a bunch of CLA troops (including Colonel Huistrella) to get them back in the fight. The enemy LMG gunner (top right) can see the CLA trooper; the enemy doesn't really want to Guard fire with its LMG, as Guard fire is weaker than 'normal' fire (firing during your own activation), and he won't be able to fire during his side's activation. But that CLA rifleman has to be prevented from rallying the CLA troops in the center, and no other enemy troops are in position to take a shot.
So the enemy LMG opens up; because this is such a big deal, I give him 2S dice instead of the normal 1...
 But the gamble doesn't pay off for the enemy. The LMG rounds do pin the CLA trooper, which will prevent him firing this turn, but it didn't force him back, meaning he made it to his suffering comrades, and will be able to allow them to try to rally.
But wouldn't you know it? While the Designated Marksman (center right) is back in action, Colonel Huistrella (center left) fails and stays 'man down.' What the hell?
 Victor tries to recover himself, but he's too badly hurt and he finally succumbs to his wounds, next to his father and brother.
For what it's worth, mission accomplished!
 Back on the right, the enemy RPG gunner (top right) moves up, drawing Guard fire from the Designated Marksman (far left), which misses...
 Another rocket is launched, at the CLA rifleman that just rallied the DM...
 And he is now 'man down' next to Colonel Huistrella (only the white bead is visible; the DM is at far left).
 A CLA rifleman moves up to Colonel Huistrella (bottom left), and an enemy rifleman (top right) Guard fires, but misses. Colonel Huistrella and a rifleman both recover and are (finally) back in the fight.
 The CLA rifleman that rallied the Colonel fires on the enemy rifleman on the far left, getting 'man down' (of course).
 But that rifleman (top left) took the enemy rifleman (top center, white bead) out of the picture, which allowed the remaining CLA grenadier (top center, just right of the stable) to move up and fire a 40mm grenade into the barn (bottom right)...
 Forcing the enemy LMG gunner to flee the barn (top center, red bead, next to a rifleman with red bead, and another rifleman hunkering with red bead at far right)!
 The grenadier then left the shelter of the stable, sprinting across the street...
 To finish off the enemy soldier there (bottom left), then move up to the farmhouse (center right).
 In the center, the remaining Designated Marksman fired on the enemy RPG gunner...
 Putting him out of the fight, which broke the back of enemy resistance at General Guapos' Command Post.
 The grenadier moved up into the enemy center, capturing two riflemen and the Venezuelan commander, while the three remaining Venezuelan troops on the far right fled.
Victory! Very bloody, but mission accomplished and a tactical victory by Colonel Huistrella's UCW troopers. Man, that was knock down, drag out, which literally could have gone either way, all the way up to the end. I thought sending the first CLA trooper up to rally the guys in the center would be the turning point; the enemy LMG gunner took his shot, but he missed, but then Colonel Huistrella failed to recover. Then I sent a second guy up to rally them, and it worked, but really the big deal was him getting 'man down' on the far left sentry, which allowed the M-79 gunner to put a grenade into the barn, which pushed the LMG gunner out of position (and suppressed him and a rifleman), which cleared the way for the Designated Marksman to take out the RPG gunner. Wow...
Both sides took quite a few casualties, and I've got to be honest, I didn't even count them up, I was too worn out by the end of that damn fight. The sad news is that Captain Galban was killed in action, fueling a potential feud between his father, Colonel Galban, and the UCW commander, Colonel Huistrella. Colonel Galban believes Huistrella's glory-seeking led him to act rashly in the attack, an attack in which the UCW was not the right tool for the job.
Well folks, that's it, we did it, the war is over. Thirty-two fights over about three months; it could have dragged on for years, but I've got too much other stuff to do. I hope you had as good a time as I did, and look for more 'Cuba Libre' stuff in the future: this was just the start. The plan is now for Cuba to organize an Expeditionary Force, then became the most war-mongering nation on Earth, sending troops to and fro, simply for the glory of it (or to satiate my wargaming needs/desires).
V/R,
Jack
D+3
27) The 5th Tank Battalion and 3rd Infantry Battalion are stymied by a spoiling attack east of Artemisa by the regime's 2nd Armored Battalion.
28) 10th Popular Force Battalion and the regime's 7th Infantry Battalion trade supporting fires in eastern Havana, then grapple in heavy street-fighting.
29) The 6th Infantry Battalion, supported by the 3rd Troop, 5th Tank Battalion, defeats the regime's 6th Armored Battalion in fierce fighting to secure the city of Cienfuegos.
D+4
30) 1st Airborne Battalion secures Artemisa, then pushes into Havana, where they run into unexpectedly heavy resistance.
31) CLA SOF carries out a bold plan to secure El Presidente in northern Havana, as Venezuelan paratroopers seek to whisk him away to safety.
32) Just east of Bayamo, on the eastern end of the island, CLA UCW carries out a daring strike against a fanatical, hold out regime officer, in an aatempt to end the War of Liberation.

So I'm once again using 15mm and Five Men in Normandy. But these are not CLA Direct Action shooters, so both forces are being treated as 'ordinary' soldiers as per the rules. The only mod is that two of the CLA troops have M-14s, so I'm using them as Designated Marksmen. I've doubled their firing dice, and allow them to hit multiple targets.
Commander, B Co: Captain Galban (son of Colonel Galban, Commanding Officer of 3rd Infantry Battalion)

They are, of course, joined by their Commanding Officer, the heavily decorated (Cruz Servicio Distinguido, Estrella de Bronce, and Corazon Purpura) Colonel Hector Huistrella.


The farmhouse is at top left, the barn at top center, the pig sty at top right, Hacienda 1 at bottom right, Hacienda 2 at bottom center, and the stables at far left.


CLA is up first, and the fight is on!


Back on the left, brother Vector moves over to check on brother Victor. Colonel Huistrella Guard fires...


One more to go.


We're shooting all kinds of holes in the enemy, but can't seem to put them out of the fight. This would fuel widespread rumors the Venezuelans were taking narcotics prior to the battle ;)


Uh-oh, this makes him very vulnerable to the nearby enemy troops...


All these white beads fueled rumors by the Venezuelans that the CLA Unconventional Warfare soldiers took narcotics prior to the battle ;)


Man, we are shooting each other to pieces, but look at all those damn 1s I rolled!!! No one is dying!


That Victor is one tough sonuvagun...


So the enemy LMG opens up; because this is such a big deal, I give him 2S dice instead of the normal 1...

But wouldn't you know it? While the Designated Marksman (center right) is back in action, Colonel Huistrella (center left) fails and stays 'man down.' What the hell?

For what it's worth, mission accomplished!


Victory! Very bloody, but mission accomplished and a tactical victory by Colonel Huistrella's UCW troopers. Man, that was knock down, drag out, which literally could have gone either way, all the way up to the end. I thought sending the first CLA trooper up to rally the guys in the center would be the turning point; the enemy LMG gunner took his shot, but he missed, but then Colonel Huistrella failed to recover. Then I sent a second guy up to rally them, and it worked, but really the big deal was him getting 'man down' on the far left sentry, which allowed the M-79 gunner to put a grenade into the barn, which pushed the LMG gunner out of position (and suppressed him and a rifleman), which cleared the way for the Designated Marksman to take out the RPG gunner. Wow...
Both sides took quite a few casualties, and I've got to be honest, I didn't even count them up, I was too worn out by the end of that damn fight. The sad news is that Captain Galban was killed in action, fueling a potential feud between his father, Colonel Galban, and the UCW commander, Colonel Huistrella. Colonel Galban believes Huistrella's glory-seeking led him to act rashly in the attack, an attack in which the UCW was not the right tool for the job.
Well folks, that's it, we did it, the war is over. Thirty-two fights over about three months; it could have dragged on for years, but I've got too much other stuff to do. I hope you had as good a time as I did, and look for more 'Cuba Libre' stuff in the future: this was just the start. The plan is now for Cuba to organize an Expeditionary Force, then became the most war-mongering nation on Earth, sending troops to and fro, simply for the glory of it (or to satiate my wargaming needs/desires).
V/R,
Jack