All,
AKA The reduction of Dubrovna, Fight #5
It's 0715 on 2 July 1990 and Battlegroup Elias is inching through Dubrovna, clearing the city house by house. 1st Platoon just completed its mission of breaking into the city, and now 2nd Platoon was passing through them to continue the momentum forward. However, 2nd Platoon was entering Old Town, the oldest portion of Dubrovna, a sniper's paradise of narrow, cobblestone streets surrounded by two story buildings with nooks and crannies everywhere. The Platoon Commander called a halt, established 360 security (there was now a gap between them and the other platoons of Battlegroup Elias), and called out "2nd Squad, you're on point." He gave a quick brief to the squad leader, then 2nd Squad pushing into Old Town, with 1st Squad providing rear/flank security and 3rd Squad standing by to support by fire (an almost impossible task in the densely packed terrain), reinforce, and perform CASEVAC.
2nd Squad's leader briefed his men, finishing with "up and at'em boys."
This fight is going to be played out much differently than the previous and following fights. As usual, the enemy has a total of 8 potential bad guys on table (to the good guys 8 troops), but I'm using poker chips as 'blinds.' There are 8 'real' blinds and 10 'dummy' blinds. I scattered 10 over the board, and the Cubans have to move forward and uncover the blinds, clearing Old Town. I'm using an abstract mechanism for firing for both sides:
-If Cubans are moving where a blind has LOS to them, the bad guys will roll 1K 1S at the Cubans (sometimes I go down to 1S if it's a really poor shot, or up to 2K 2S if it's a really good shot/the Cubans are bunched up).
-The Cubans may fire on blinds, but only with Shock dice, usually just 1S, 2S for the SAWs or if a rifleman is at point blank range.
The Cuban fire may pin or suppress the man, but not the blind. That is, as long as there is a blind there, it will continue 'shooting' at the Cubans as normal (1K 1S). But when the Cubans 'spot' the blind, I'll flip it over to see if it's a real bad guy or just a dummy. If the blind was pinned or suppressed, AND it's a real bad guy (not a dummy blind), the real bad guy will be placed on the board, and he will be pinned or suppressed.
And spotting pretty much equals stepping into the same room as the blind, nothing long range, certainly nothing beyond what would be a few meters in 'real life.' So the Cubans have to move up a narrow street (and through buildings as much as they can, but the area has been smashed by air and arty, so there are buildings/rooms that are not able to be entered) clearing out potential bad guys, and trust me, ten blinds in such a small space is A LOT, particularly when even the dummies are shooting at you!
Also, we pretty much did away with any semblance of a normal activation process and turn sequence. First, the bad guys don't get a turn, they're just using their blinds to fire in reaction to Cuban movement and firing (as you'll see, pretty much all 'real' bad guys are killed immediately, as they are only placed on the board when a Cuban or two are literally on top of them). And with the Cubans, we could have done 'normal' 5Core-style activation rolls, but I figured that would make it too hard (and I was right!), so, in the overall scheme of things, I would activate my four guys, one at a time, then he would activate his four guys, one at a time (or in pairs, it sped things up a bit, though we did it as a 'group activation,' so the pair could only more OR shoot, not both, which made it a bit more difficult), doing a 'normal' activation (i.e., move and fire or fire and move, or self rally, but no 'firefight' or 'scurry' equivalents).
I think the game would have been cooler, more realistic, if there's only one or two actual troops, but I couldn't get my head around the idea that only one or two guys (on the map) were actually covering all that dense, complex terrain by themselves. So we bumped it up; it worked, so think of the bad guys as hardliners that needed to be cleaned out, rather than a sniper.
So stand by, this fight was a real bastard, with an incredible finish!
Overview of table, north is up. We're looking square at Old Town, which is separated from the newer developments to north and south by a city park. 2nd Squad is entering Old town from the east (right), and their mission is to clear every last nook and cranny, right to left, flipping over every blind, to secure Old Town.
The opposing forces, with bad guys on the left and good guys on the right. The Cubans will always have eight men (so that my son and I can always control four guys, each), while the bad guys will roll to see if they get 6, 7, or 8 guys. In this fight though, I have no idea how many bad guys will end up being on table. There are eight 'real' blinds (each representing a single Communist soldier), and ten 'dummy' blinds (no one is actually there). I shuffled them up and placed a total of ten blinds on the table; so all eight bad guys could be in there, or it could actually be ten dummy blinds. I suspect it will be a mix of both ;)

The Cuban squad, eight men in two fireteams, 15mm Modern Marines from Peter Pig, painted up in temperate MARCAM. These are anonymous squads within Battlegroup Elias, not named characters, so I'm going to use a generic set of names through each of this series (of six) battle reports. We are not following a single squad, or even a single platoon; I just don't feel like trying to come up 48 different names for this set of fights. So, please bear with me ;)
Team 1:
Team Leader: Corporal Lira
SAW Gunner: LCpl Galban
Assistant Gunner: PFC Aguilar
Scout: Private Salazar
Team 2:
Team Leader: Corporal Lupe
SAW Gunner: LCpl Garcia
Assistant Gunner: PFC Abrera
Scout: Private Solis
The bad guys, 15mm Modern Russians from Eureka Miniatures, painted up in 'Sun Bunny' camo. Once the Cubans stumble onto a blind, we'll flip it over to determine if it's an actual bad guy or a dummy. If it's a real bad guy, he will be placed on the board and, more than likely, a close combat will be fought immediately.
Overview of map, this time with troops. You should be able to count a total of ten black poker chips strewn across the board, and the two Cuban teams are at far right, right at the edge of Old Town. Team 1 will take the northern side of the road, Team 2 the southern.
A closer look at the Cuban start point.
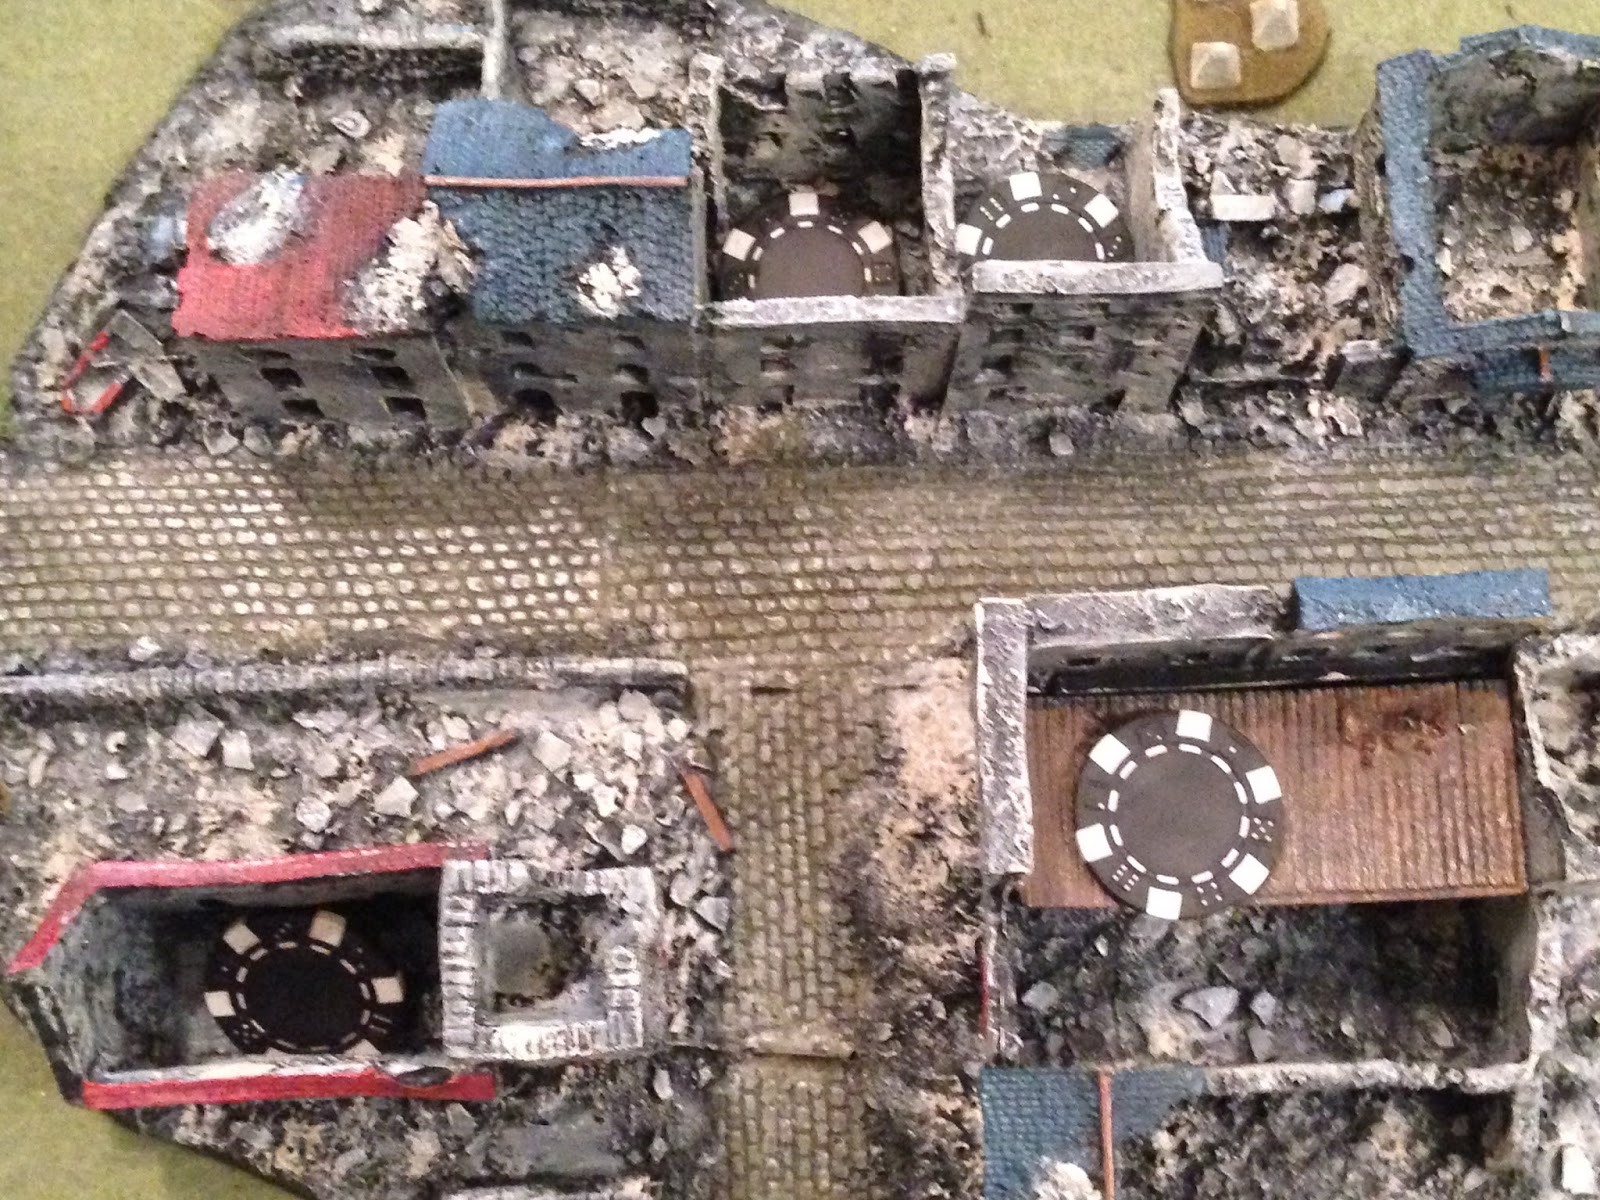
The center of town, so you can see the blinds more clearly. Remember, anytime a Cuban moves in LOS of a blind, he gets shot at.
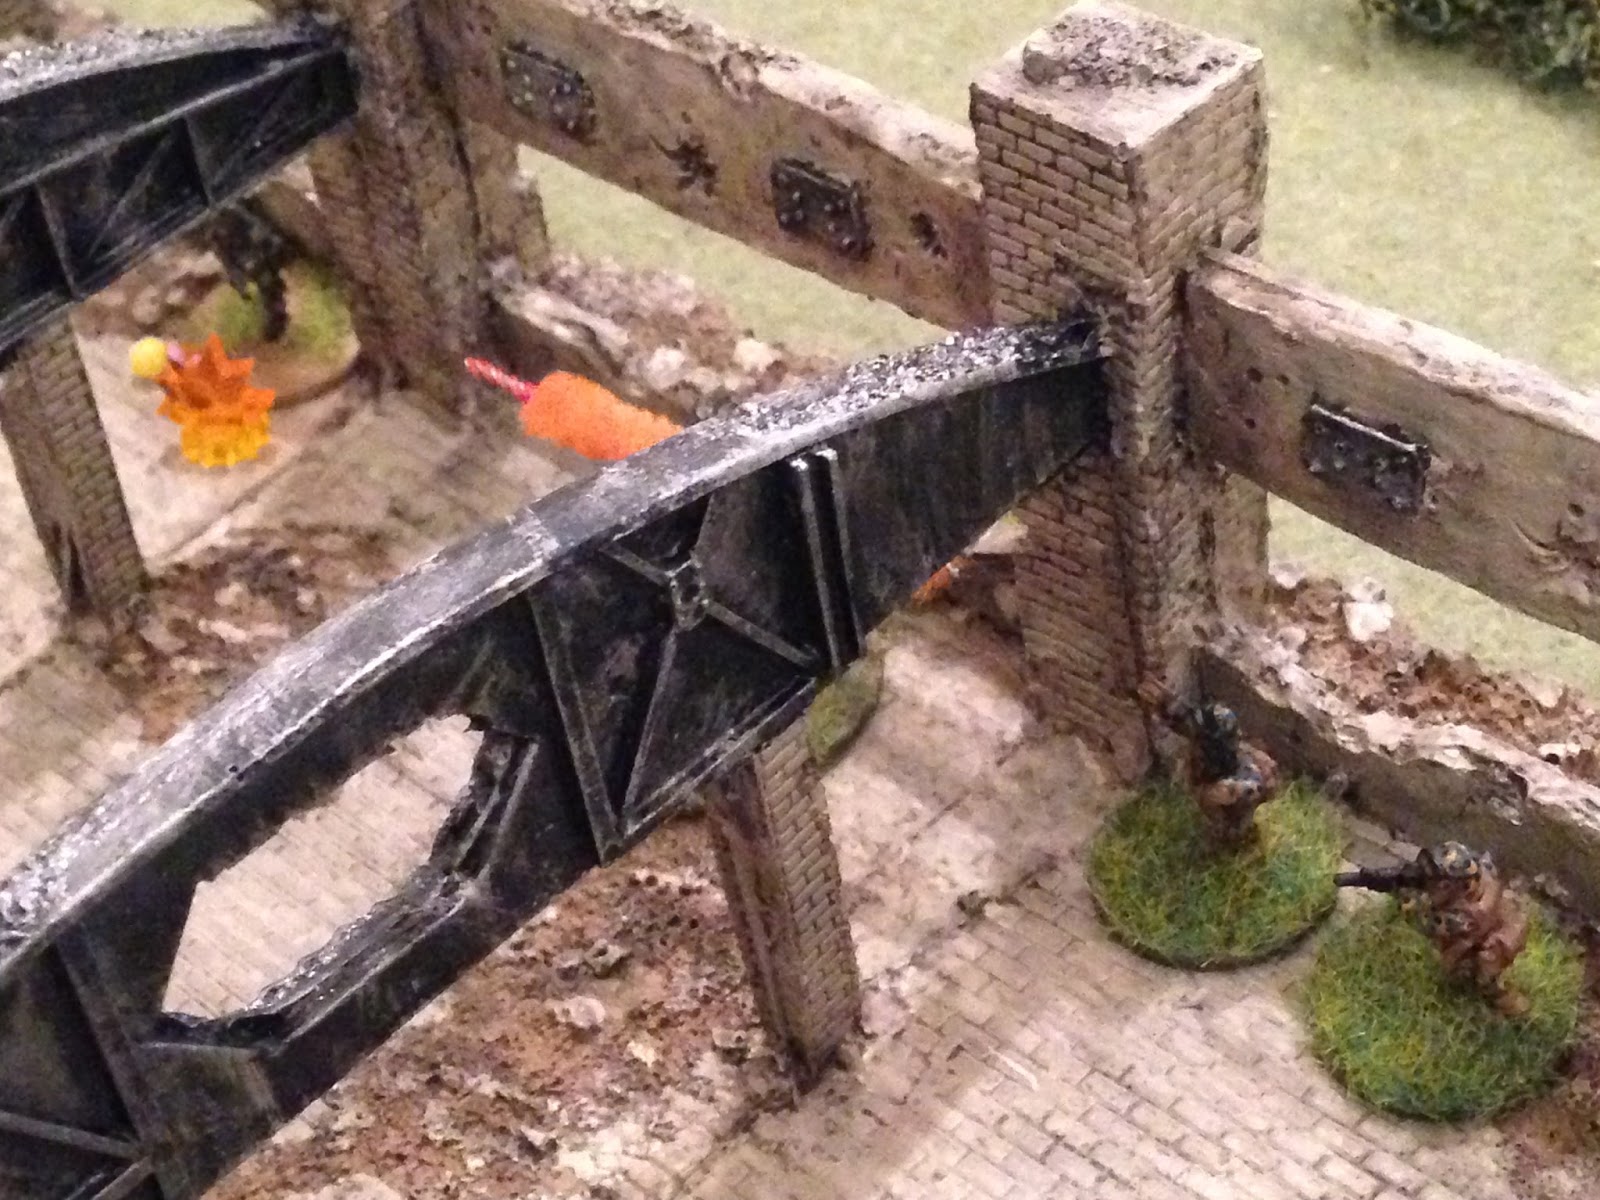
The west side of town, showing the deadly 'T' intersection.
And with that, it's time to get our fight on. Like I said, there's no real turn sequence, just the Cubans moving up and getting shot at. Time ta make da donuts.
Already with the combat shots, eh? Sorry. The fight starts on the northern side of the street with Team 1, where their SAW gunner, LCpl Galban, and his A-gunner, PFC Aguilar, move into the nearest building (center). The Team Leader, Cpl Lira, and their scout, Pvt Salazar, hunker down at bottom right.
Cpl Lira and Pvt Salazar begin slinking up the street; LCpl Galban and Salazar are in the building to their right, and Team 2's leader, Cpl Lupe, is visible at bottom left.
An AK roars to life, 7.62mm rounds careening off the cobblestone streets. Pvt Salazar sprints forward then dives for cover, suppressed (red bead at top left, with LCpl Galban visible at top center). Cpl Lira calmly takes a knee and scans for targets.
On the Cuban left, Team 2's scout, Pvt Solis (bottom center) thinks he sees movement and opens fire. To his right is the A-gunner, PFC Abrera and the SAW gunner, LCpl Garcia, while above them is Cpl Lupe.
With Solis (far right) laying down cover fire, Garcia and Abrera move into the nearest building (top left). More AK fire comes in (explosion at far left), but no one is hit.
Team 1 supports Team 2: LCpl Galban (top center, with Salazar suppressed at top left and Cpl Lira below him) opens up with his SAW on another shadow (bottom left). Team 2's SAW and A-gunner are in the building just visible at bottom center.
With Galban's SAW ripping (top center), Cpl Lira moves up (center bottom), trying to get to Salazar and rally him (red bead just visible at far left). But another AK barks...
And Cpl Lira dives into the rubble next to Salazar, also suppressed.
Back on the south side of the street, LCpl Garcia PC Abrera decide enough is enough, and brashly dash headlong into a suspected enemy position.
Phew, nothing there. One blind down.
Cpl Lupe and Pvt Solis move up below them (bottom center).
With LCpl Garcia and Abrera on overwatch (bottom right), Team 1's SAW team begins moving up the street (center), but are taken under fire by an enemy rifleman.
LCpl Galban falls back, suppressed, to Cpl Lira and Pvt Salazar (three of four men from Team 1 are lying in a heap, suppressed, at center right), while LCpl Aguilar hastily dashes through the closest door to escape the enemy fire, but he finds himself in a suspected enemy position (top left). Luckily, no one is there.
Cpl Lira and Salazar try to self rally. The Corporal is good to go...
But Salazar falls back (red bead at right, from center, where LCpl Galban is still suppressed).
LCpl Garcia and PFC Abrera (bottom center) spot enemy movement on the north side of the street (top left) and open fire.
And receive some stray AK rounds for their trouble, though no ill effects are felt.
But Garcia and Abrera (top center) keep laying down fire, so Cpl Lupe and Pvt Solis decide to haul ass across the street. But they also come under fire (bottom center).
Cpl Lupe gets safely across the street (bottom left), but Solis is forced back, suppressed (red bead at far right).
Back on the north side of the street, Cpl Lira rallies LCpl Galban, and Pvt Salazar tries to self rally again (top right, with PFC Aguilar chilling at left).
But Salazar fails again and falls back again (top right). One more and he runs off the map like a coward (and you know what that means, Vicki: curtains!)...
Cpl Lupe (bottom center), hanging out outside a bombed out Church, calls out over the intra-squad radio that he's feeling like there might be someone inside the bombed out Church. Cpl Lira (top right) begins pumping rounds into it.
Cpl Lira (center right) keeps up a sustained rate of fire while LCpl Galban and PFC Aguilar push ahead into the next building (top left).
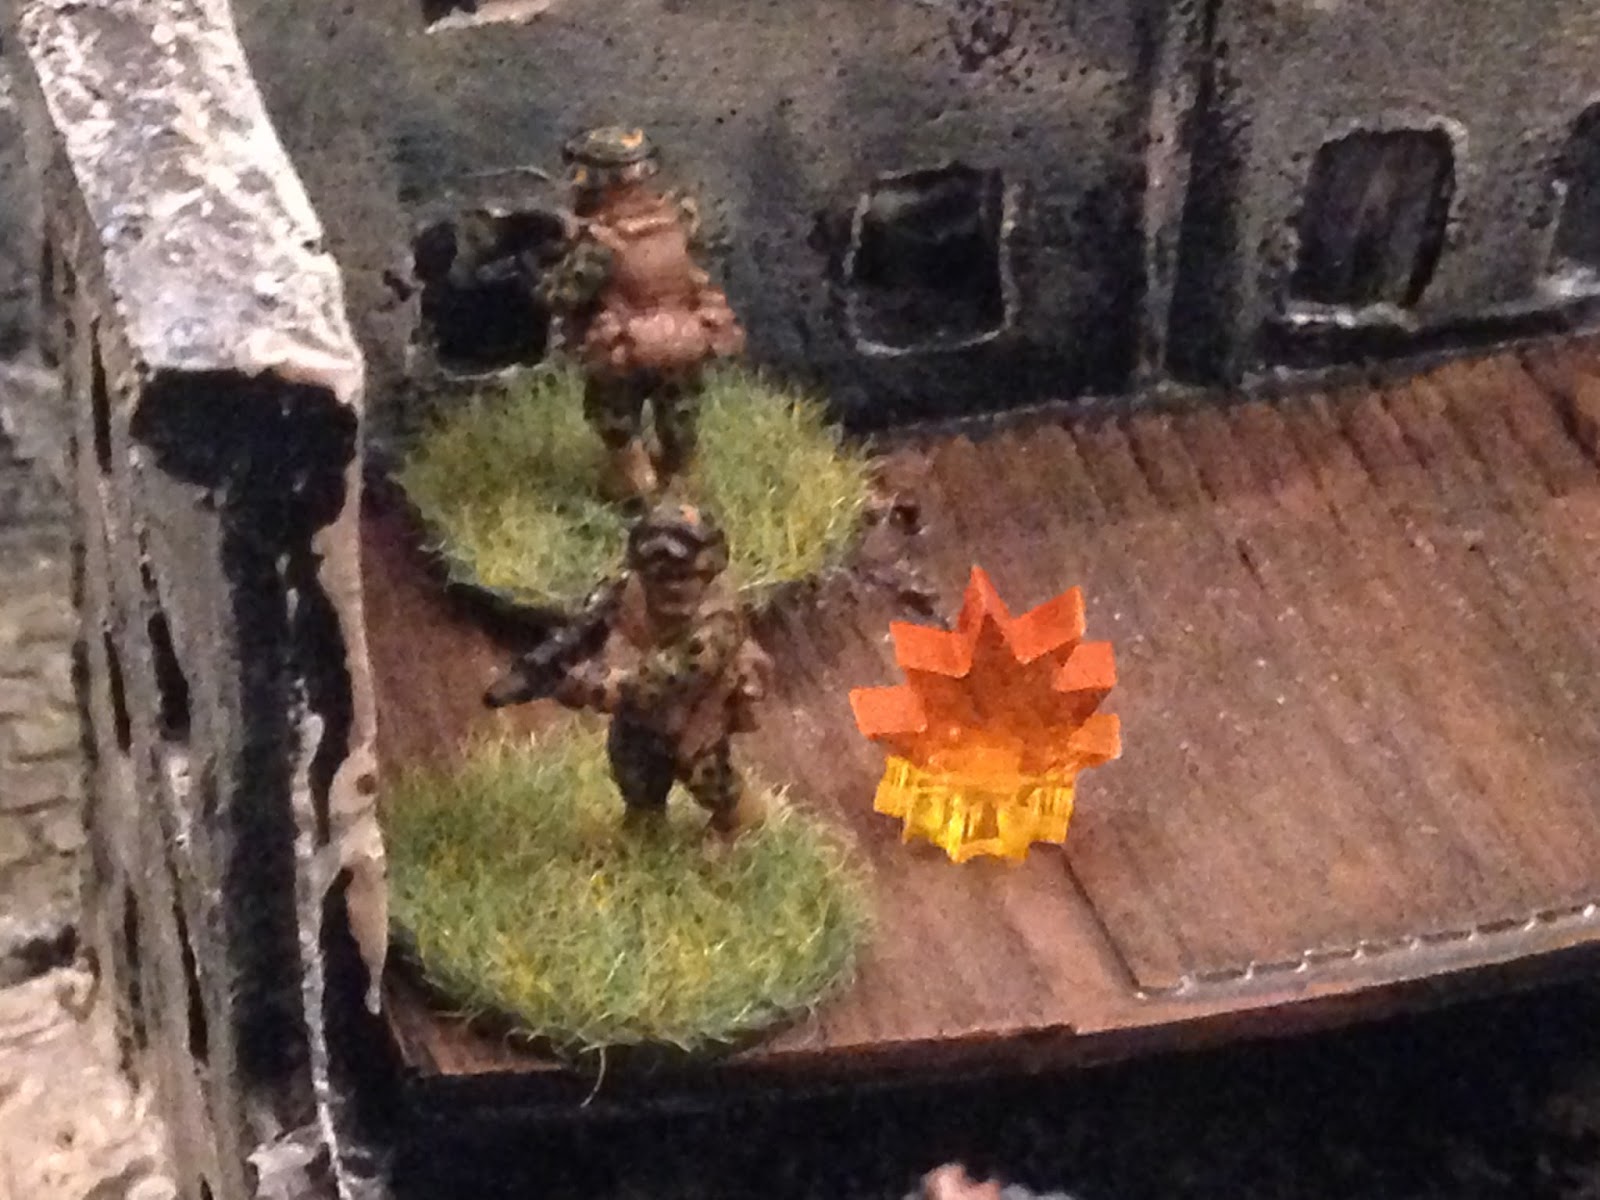
CONTACT!!! Yes, ladies and gentlemen, Galban and Aguilar have found themselves a real-life bad guy. A tussle immediately ensues.
The bad guy whacks Aguilar, but Galban whacks the bad guy.
For Ivan and all you 5Core lovers out there, here's how I did it: normally the bad guy (not pinned/suppressed) would roll one D6 with no modifier in this situation; I stuck with that, used a red D6. Normally the good guy would get a +1 for initiating the assault, but I dropped that since they were surprised to find someone there, so no modifier for the good guys either.
But what I did different was both simple and effective: I gave Galban a white D6 and Aguilar a black D6 and rolled all three simultaneously. The bad guy beat Aguilar, Galban beat the bad guy. Simples. I used this mechanism a couple times this game.
Though worried about what is exactly is in the Church, Cpl Lupe spots movement across the way, near where he figures the fire that drove Solis back came from. He levels his M-203 and starts popping out 5.56mm rounds.
Team 2's SAW team has no suspected targets and decides to sit tight on their side of the street to let Team 1 reorganize and catch up on the north side. Off camera to right, Pvt Solis manages to successfully self rally himself.
*The boy runs Team 2 in all these fights; I was right proud of his patience here, sitting tight, rather than dashing off where I couldn't support them.
Then some movement on the north side (top left) draws their eye, and LCpl Garcia and PFC Abrera start bustin' some cap.
While from the north side, Cpl Lira (top center right) and LCpl Galban (just visible at top center, in the white building with no roof, two buildings left of Cpl Lira), while Pvt Salazar (just visible at top right) finally manages to rally himself back into the fight.
In the south, Pvt Solis dashes across the street, joining up with his team leader, Cpl Lupe.
Then, perhaps a bit hastily, Cpl Lupe dashes into the Church, rifle blazing.
And good thing, too, as there's a Commie in there!
Cpl Lupe drops the bad guy and moves up to take up to see what he can see.
Wow. First, I wish the boy had exercised just a bit more patience, gave Team 1 another shot at pinning or suppressing the Church, allow Cpl Lupe to rush in with Solis by his side. Second, this is pretty damn tense, dealing with all these blinds.
LCpl Garcia and PFC Abrera maintain station in their perch, which has a pretty decent field of fire. They continue pouring fire into a suspected enemy position in the north (top left), and this time it feels like they may actually be accomplishing something.
*Of all the times the boy and I have fired at enemy blinds, this is the first time we've received an actual Shock result. I put a yellow bead on the poker chip. If an when we actually reach that poker chip, I'll flip it over, and if it's a real bad guy (not a dummy blind), he'll be pinned.
In the north, Salazar dashes up to join Cpl Lira.
Who picks his way forward through the rubbled buildings, avoiding the street, to join LCpl Galban (left, with Salazar at far right).
Cpl Lira bumps him, so LCpl Galban steps out into the courtyard. Immediately an AK opens up.
Cpl Lira (bottom left) looks on as Galban calmly takes a knee, 7.62mm rounds impacting all around him, causing rubble dance and shatter, and returns fire. Again the fire is effective (will pin a bad guy, at top right. The other one is at top center).
From the Church, Cpl Lupe contains to pour fire into a nearby suspected enemy position, effectively (another pin!).
Pvt Solis joins Cpl Lupe in the Church.
Team 2's SAW team, LCpl Garcia and PFC Abrera, finally leave their perch (top right), moving into the street, up to the Church (left).
But enemy fire on the north side targets Abrera...
Knocking him down (white bead) and suppressing Garcia (red bead). Well, it was bound to happen. Hell, I can't believe none of our guys have been knocked out by enemy fire (just Aguilar in the close combat).
Back on the northside, LCpl Galban keeps hammering away with his SAW.
*Even though I've put a pin marker on each of the enemy blinds in view over here, I keep firing because I can still get a 'suppression.'
Pvt Salazar moves up to join LCpl Galban (bottom left), drawing fire.
But he makes it to the shelter of the wall.
Cpl Lupe (in the Church at top center, with Abrera knocked down and Garcia suppressed at top left) gets on the radio and tells Cpl Lira that he and Solis are ready to close assault the next enemy building (top right). Cpl Lira replies "roger," then bloops a 40mm grenade into it.
Cpl Lupe and Pvt Solis break cover, looking to get into the suspected enemy position (you can just see the white puff from Cpl Lira's grenade at left). An AK chatters...
But both Cubans make it safely into the suspected enemy position.
Nobody home.
Back at the Church, LCpl Garcia tries to self rally, but only gets up to pinned.
Back on the northside, LCpl Galban and Pvt Salazar continue laying down suppressive fire, keeping the left suspected enemy position pinned, and suppressing the right.
With Galban and Salazar (top center) laying down fire, Cpl Lira moves up, immediately drawing fire.
Cpl Lira (bottom left) dodges rounds like Neo in the Matrix, then returns fire, keeping the suspected enemy position pinned.
Back at the Church: previously LCpl Garcia tried to rally off his suppression, but only got up to pinned (yellow bead). This time he moves over to check on his knocked down comrade, PFC Abrera, but Garcia fails again and Abrera remains knocked down...
This one is actually looking west to east (right to left on the board). With their last little jaunt into a suspected enemy position, Cpl Lupe and Pvt Solis (bottom center) made it up to the deadly T intersection. They spot several new suspected enemy positions, and open up on the far left (top left, southwest), what we'll hereafter refer to as "The Lion's Den."
I'm not big on lit, but there's a little foreshadowing for ya.
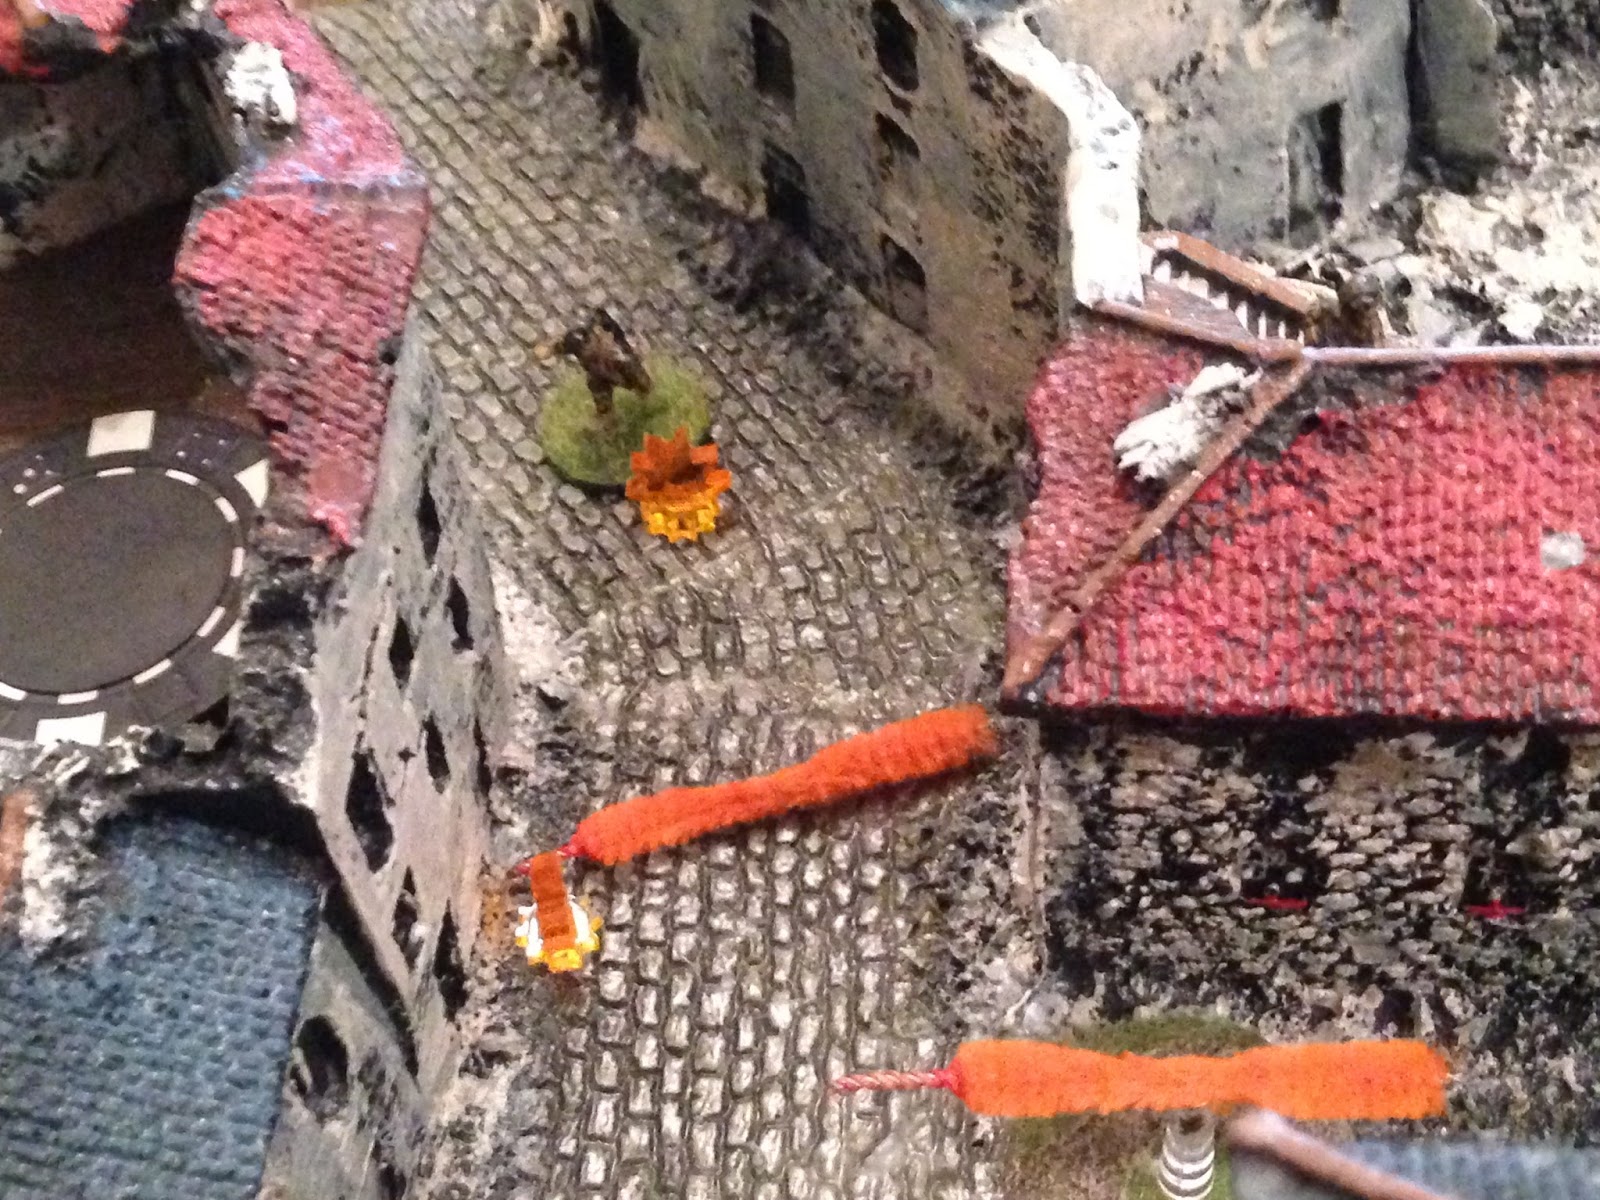
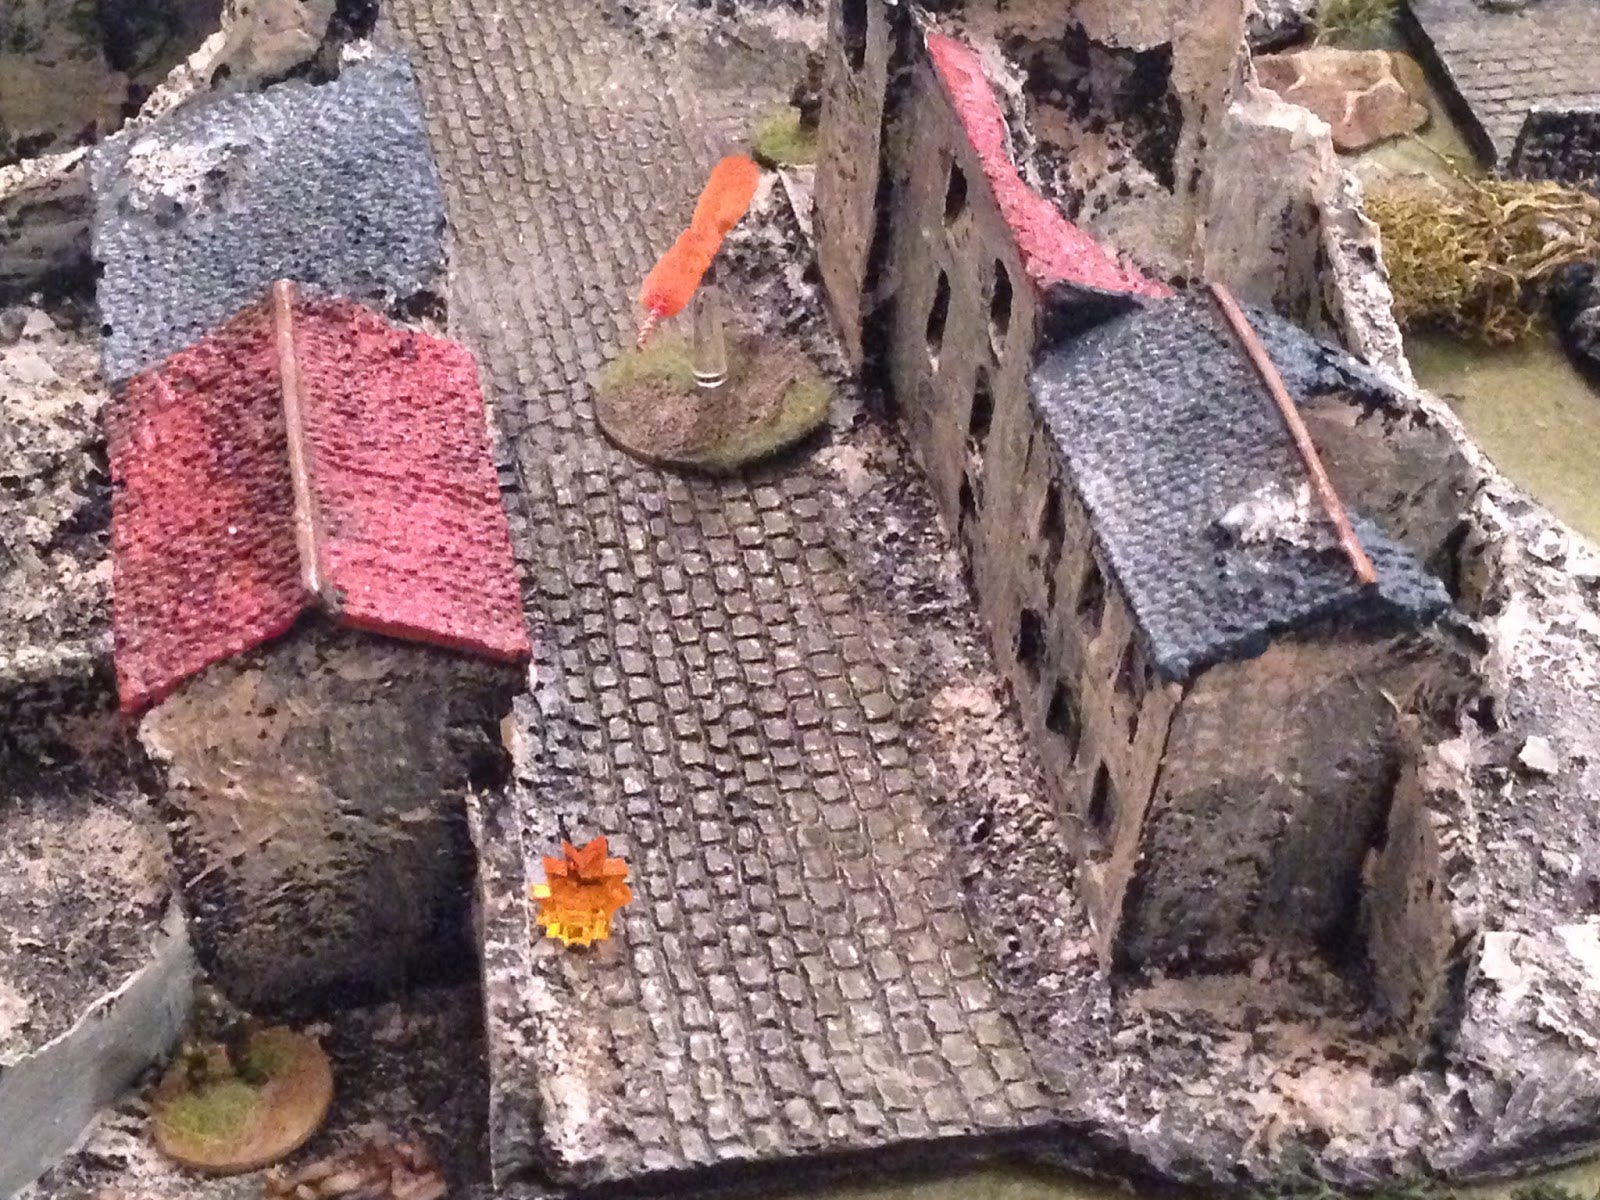
Back on the northside, LCpl Galban (bottom center left) pours fire into the left-hand suspected enemy position, over Cpl Lira's head (he's just visible below the orange tracer. Pvt Salazar (next to Galban) looks on.
*This would be key in just a moment.
Cpl Lira dashes forward, drawing fire once again.
He dashes up the stairs and turns (you can see the yellow 'pinned' bead on the poker chip)...
Holy crap, another bad guy! But at least he's pinned.
The enemy's fire (top center) drives Cpl Lira back! He hops down and curls up behind the wall, suppressed!!!
Though sickened by his Corporal's lack of intestinal fortitude (red bead at center), Pvt Salazar (bottom left) sights in on the bad guy (top right) and fires, knocking the Communist down.
It was pretty cool to actually SEE a bad guy this game and be able to engage him from distance, but it wouldn't have been possible if I hadn't held Salazar back. I almost used him to fire with Galban at the enemy blind, which would have added another Shock dice, but I didn't. So when Cpl Lira got thrown back I was able to use Salazar to fire. Not sure what I had planned for Salazar, what I was going to have him do, but glad that's how it worked out ;)
Back on the south side of the street, Cpl Lupe and Pvt Solis (center right) continue to fire on the Lion's Den (far left).
That's four dice so far, no effect.
Back at the Church, Team 2's SAW team, who'd been so effective this fight, has been floundering trying to rally themselves back into the fight. LCpl Garcia (yellow bead) checks PFC Abrera AGAIN, and we've finally got Abrera back on his feet and in the fight.
On the north side, LCpl Galban and Pvt Salazar dash up to Cpl Lira, rallying their team leader.
Salazar (bottom center) tosses a frag upstairs (blue bead).
In the south, LCpl Garcia and PFC Abrera move west (left), past the Church.
Cpl Lupe and Pvt Solis (bottom center) continue firing on the Lion's Den, to no effect.
Salazar's grenade explodes harmlessly, having rolled too far on the wooden floor...
So Salazar heads upstairs to take care of it himself.
The Communist is knocked out of the fight (left), as Cpl Lira dashes right to check the other suspected enemy position.
Cpl Lira quickly sweeps the small building, nuttin' there.
LCpl Galban (bottom center) opens fire on the T intersection.
With LCpl Galban's SAW (top right) pounding out rounds and Cpl Lupe and Pvt Solis (center) pouring fire into the Lion's Den, LCpl Garcia and PFC Abrera move up to the intersection (bottom left, with Church at right).
But the boy gets a bit reckless again: while Garcia and Abrera (bottom right) fire into the Lion's Den (bottom left), Cpl Lupe and Pvt Solis dash into the street, immediately drawing a hail of fire.
But they manage to run between the raindrops, making it to the suspected enemy position known as the Lion's Den!
And I'll be damned if there ain't an unpinned, unsuppressed bad guy waiting there! A ferocious bout of close combat ensues...
Which sees the Communist make quick work of Cpl Luppe and Pvt Solis...
The boy got fed up with firing and missing, so he charged. As we used to say in the Corps, good initiative, bad judgement ;)
On the north side of the T intersection, LCpl Galban (bottom left) and Pvt Salazar (center) put rounds into suspected enemy positions on the opposite side of the street.
While further north, Cpl Lira breaks cover, hoping to get to the other side of the street. Enemy fire turns his way...
But he makes it so safety. Well, relative safety. He finds himself adjacent to one suspected enemy position, and below another!
Upstairs is clear, but a fresh Commie appears next door.
And this psychopath actually charges Cpl Lira!!!
Cpl Lira subdues the bad guy (with his MBITR ;) ); then he pops a white star cluster (hopefully you can make it out at top center) to let LCpl Galban (center right) and Pvt Salazar to shift fire, then moves south (bottom center left), hoping to flank the Lion's Den (off camera to bottom right).
Back on the southside, LCpl Garcia(right), still horrified at losing Cpl Lupe and Pvt Solis, goes cyclic on the Lion's Den (left). Beside himself wit rage (or little boy-style impatience)...
PFC Abrera clambers out of cover, into the street, where The Lion spots him and opens fire.
Abrera is hit, but keeps coming, closing the distance, slamming The Lion up against the wall!
But The Lion claims his third victim of the day!!!
Abrera wasn't actually hit on the way in, that was just for dramatic effect, and The Lion got no modifier while Abrera got +1 for initiating the combat/being super pissed...
LCpl Galban crosses the intersection (top center) and opens fire on The Lion (bottom left).
Cpl Lira (far left) looks on as Galban's (top center) rounds miss The Lion (bottom right), and The Lion returns fire, knocking Galban down!
Pvt Salazar moves to the intersection to check LCpl Galban; he's good, back in the fight.
Cpl Lira (top left) peeks around the corner and fires on The Lion (bottom right), missing.
The Lion (bottom right) returns fire, but he misses too.
On the south side, LCpl Garcia has seen his team leader, A-gunner, and scout all dropped by The Lion. Garcia mutters "enough" to himself, then drops back out of the building, into the open.
Where he (bottom right) uncorks an AT-4 and fires at The Lion!
But the rocket goes long, The Lion (top right) is totally untouched!!!
@#$%!!! Can nothing kill this guy!!!???
The Lion (bottom left) slaps a fresh magazine into his AK and returns fire...
Forcing Garcia to fall back, suppressed (red bead, from explosion)!!!
Back at the T intersection, LCpl Galban (top right) fires on The Lion (bottom left) again, suppressing him. We're finally making progress, gonna get that bastard!
Pvt Salazar cautiously moves up the street (top center), firing as he moves...
The rounds strike close to the suppressed Lion (top right), forcing him to fall back (bottom left).
We've got him now! The Lion has been driven back, out of cover, in full view of Cpl Lira (top center). Cpl Lira shoulders his rifle and begins squeezing off rounds, one each time the sights settle...
But he's gone! The Lion has escaped, ducked into some nearby trees and lost himself in the park then the buildings beyond.
How depressing! What happened is, because of the incredible shot, I gave Cpl Lira 3K 2S. No effect on any of the Kill dice, rolled a 6 on one of the Shock dice, which is what? That's right, if a hunkered target is hunkered again, he falls back, and this time the fall back took The Lion right off the map! @#$%ing incredible!!!
The squad's in tatter's, 1 KIA and 3 WIA. Cpl Lira calls in to inform HQ they've cleared the Old Town, but at quite a cost. 3rd Squad moves up for CASEVAC, while 1st Squad comes up to relieve 2nd Squad, with 3rd Platoon right on their heals, looking to clear the rest of Dubrovna. 3rd Platoon finds the going easy, particularly as they're able to make use of a couple AMX-10RCs in the wider boulevards of the newer sections of town. A couple 105mm rounds into a building makes believers rather quickly, so 3rd Platoon found itself primarily responsible for searching prisoners and shuttling them to the rear. However, as they reached the edge of town the AMXs were called off to deal with some enemy armor spotted to the south, and the Platoon Commander heard a flurry of rifle shots up ahead, from the area of 3rd Squad, the platoon's point element. Seems there were a few hardliners holed up in an old, bombed out industrial plant.
Which just so happens to be the last fight of the Cuban operations to seize Dubrovna. See ya tomorrow.
V/R,
Jack