All,
It's 0300 on 1 Feb 1990, and the invasion is set to begin. A large Cuban Liberation Army (CLA) landing force is approaching the island from the west, and so CLA Special Operations Forces (SOF) B Squadron, previously infiltrated into Cuba, have been tasked to destroy a key radar site at Las Tumbas on the Peninsula de Guanahacabibes.
The forces: the Castro Cubans have a Command Stand, five rifle stands, a general purpose (RPG-type) rocket, an 82mm mortar, and an armored car. The CLA has a Command Stand, four Special Operations stands, an LMG stand, a Gustav 84mm rocket launcher, and a Jeep mounting a .50-cal HMG.

The Commander of CLA SOF's B Squadron, Captain Villanueva.
Close up of the CLA forces.
The Castro forces, from the 27th Infantry Company, 3rd Cuban Infantry Battalion.
Overview of the table, with right being north, CLA on the bottom (east) and regime forces on the top (west), with the radar site at top right (northwest).
CLA forces in the southeast: the HMG jeep, three SOF teams, and the CO.
CLA forces in the northeast: one SOF team, the LMG team, and the Gustav team.
Regime forces in the southwest: two rifles at top, the rocket team and CO in the barracks at bottom right, and the mortar team behind it.
The regime forces in the northwest: three rifle teams, the armored car, and the radar site, oriented west towards the sea (right).
A shaky photo of the objective.
The CLA start off by moving their HMG jeep up on the far left and taking a shot with the Ma Deuce; somehow they miss (I got two games in on Saturday morning, and my die rolling was atrocious throughout, whilst the enemy managed to pull off some pretty fortuitous rolls).
SOF Team 4 moves up and fires to no effect (bottom right, firing on infantry at center), then the LMG team (just right of Tm 4) moves up and looses a hail of 7.62mm rounds on the barracks (top left).
Forcing the rocket team to fall back and hunker, and pinning the mortar team (their CO is still atop the barracks).
On the southwest hill, Hill 35, the two enemy teams in that area take up defensive positions (one falling back from the white puff at far left, where my HMG jeep fired at it). The enemy CO falls back and rallies the rocket team (top right), who immediately moves back into the barracks, but he can't manage to rally the mortar team, who stays pinned.
On the right they maneuver into fighting positions.
While the SOF teams on the left move up to the HMG jeep...
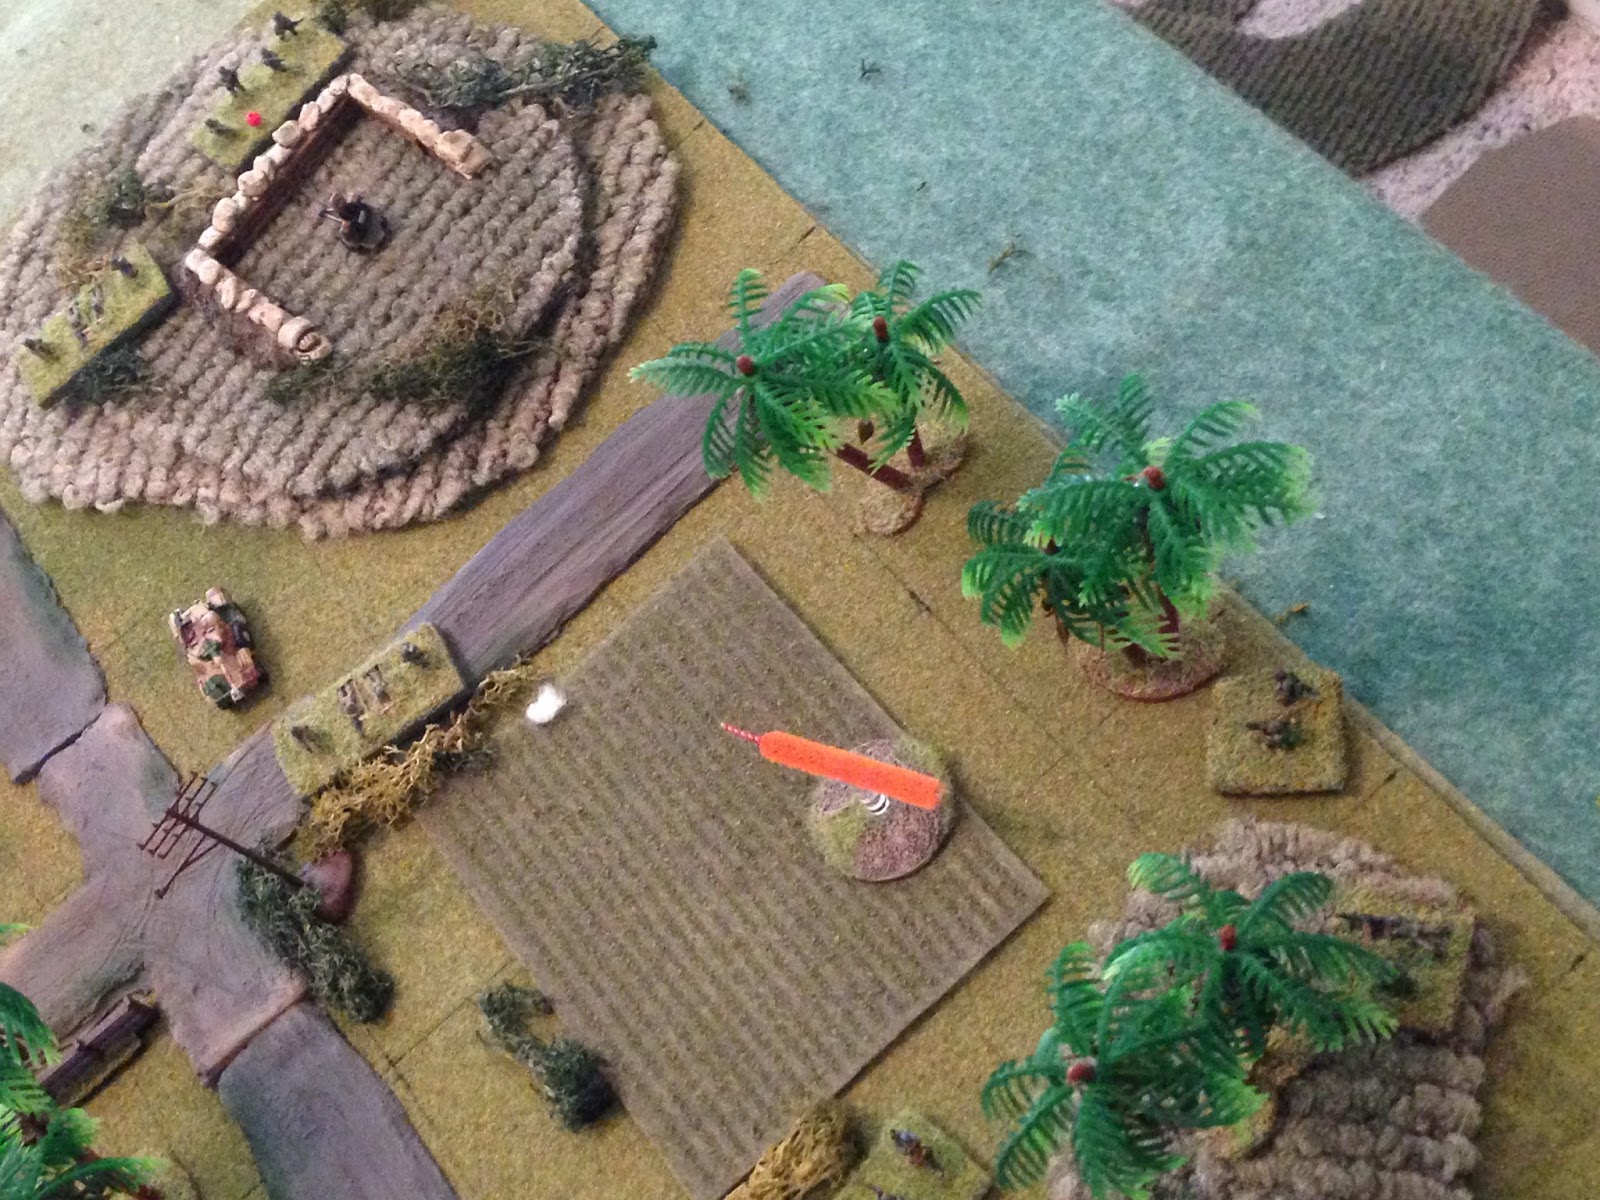
And move up a bit on the right as well, with the Gustav at far right, looking to line up a shot on the armored car (top center).
The LMG (bottom right) opens up on the enemy team at center, not effecting them but causing a rifle team on Radar Hill to fall back (top right).
But the damn armored car (top left) returns fire, pinning the LMG and forcing the Gustav to fall back (bottom right)...
The gun truck opens up on the two enemy squads on Hill 35, but only manages to pin them...
I catch a break: the enemy CO tries (again) to rally the mortar, but they run off the table!
But that luck is nullified when a single rifle team on Hill 35 fires on the gun truck, knocking out my HMG...
The enemy fires a rocket at Tm 4, pinning it. Tm 1 (off camera at bottom left) returns fire, no effect.
Then things really start to suck: an enemy rifle team fires on my pinned LMG team, knocking it out...
And when Tm tries to move up, snap fire from that same enemy rifle team mows them down (center). The CO moves over and rallies the Gustav team (bottom right).
And the Gustav team moves up and fires...
The armored car is only immobilized, but the crew bails and two nearby rifle teams are pinned.
Back on the left, Tm 1 moves up and fires, but misses.
On Hill 35 (top left), one enemy rifle team rallies but the other remains pinned. The enemy rifle team at center right rallies, but the hunkered team at top right only manages to get 'up' to pinned.
On the left, Tm 1 moves up, while Tm 22 sprints up but doesn't quite make it into cover. The pinned enemy team tried to rally, but failed again.
On the right, CO and Tm 3 move up.
An enemy rifle team moved to the barracks, while another fell back to Radar Hill from the road. The pinned team at top right tried to rally but failed and ran off the map!
Then the pinned enemy rifle team on Hill 35 trie to rally again, and ran off the map too! That has got to be frustrating ;) Off camera, the enemy CO moves to Radar Hill.
Teams 1 (center), 2 (left), and 3 (bottom right) quickly close the distance.
While the CO and Gustav (bottom left) move up, exposing themselves to fire from the right, to get a shot on the barracks. We had a random event ("lull"), but it had no impact as all my troops are in good shape.
And then the Gustav fires on the barracks...
Making the rocket team fall back, and getting 'men down' on the rifle team. This should be the break I was needing...
And it is: SOF Tm 1 rushes the barracks, eliminating the enemy rifle team, then the rocket team and capturing the armored car crew.
Tm 2 then charges Hill 35...
And eliminates the regime forces there.
Which leads to the surrender of Castro's men on Radar Hill as the CO, the Gustav team, and Tm 3 close in.
The radar site is quickly rigged to blow...
And blown, mission success! The force gathers its gear, casualties, and prisoners, then melts back into the jungle.
Casualties:
Friendly: ~15 WIA/KIA, 1 HMG Jeep
Enemy: ~20 WIA/KIA, ~15 POW, 1 Armored Car knocked out.
A great opening to the campaign. More to follow.
V/R,
Jack