Okay, standby for something a little bit different, something I've been meaning to get to for quite some time, and something we're going to have to step back in time for. Here's the deal: my intent for this massive Imagi-Nation-type alternate history was always to have a bunch of ground fights, but also some air to air fighting, and perhaps even some naval fighting. If you're reading this I'm sure you're aware of the eighty-four (84) battle reports for ground fights I've posted for Cuba Libre. Now it's time for some air fights.
If you're not aware, the Cuban Liberation Army (or CLA, as it was known prior to and during the War of Liberation) has a small Air Force. There are a few different kinds of aircraft, from fighters and fighter-bombers to reconnaissance, utility, and transport aircraft (C-130s for the paratroopers), to transport and gunship helos. My desire is to create a fighter squadron or two and follow them throughout the various campaigns, just like I do for the CLA and the Cuban Liberation Expeditionary Force (or CLEF, as it is now known, post War of Liberation).
So, to do that, I've got to go back in time. It's D-Day, 1 February 1990, and the CLA is storming Cuba to overthrow the Castro regime. The War of Liberation ran from 0300 on 1 Feb 1990, when the first CLA SOF elements assaulted their objectives, until 2030 on 5 Feb 1990, when CLA SOF elements captured Fidel Castro (a total of 32 batreps, very impressive!). Unbeknownst to you, Dear Reader, as CLA ground forces were pushing back the Castro regime on the island, F-4 Phantoms of the CLA's Air Force were busy dueling with MiGs of Castro's Air Force over the island.
I just bought a new set of air rules called "Lacquered Coffins," a set of WWII rules that (as always) I've modified a bit to suit my purposes in order to use for 'modern' aircraft (can you still call F-4s and MiG-21s modern?). My changes are thus:
-I play solo, so I need to mix it up. Rather than IGO-UGO, I'm using cards (one card per aircraft, with the aircraft tied to a particular card) for activation. So I do the mandatory move for every aircraft, then move to cards.
-I shortened the range for guns (6, Long Range 8), gave them 2D6.
-I made missiles minimum range 5, good out to 12, Long range 16, 4D6. I gave each aircraft four missiles. I know F-4s can carry more than four missiles, so if you like it better, think of it as four shots of two missiles ;) I also am not currently differentiating between IR and radar missiles, I'm just getting into some new rules and want some quick, fun games.
-I added deflection as modifiers, side and front quarter -2 (the game already has head-on and tail, which is assumed).
-I can't remember if this is in the book or not, but when a plane is going down I have the pilot make a test to bail out.
-I'm using a hexboard with 1/600 minis, so 1" in the rules equals one hex.
Everything else is as written.
So it's 0615 on 1 Feb 1990, and CLA aircraft are winging towards Castro's Cuba from secret airfields in *REDACTED*, in support of CLA troops that parachuted earlier and others preparing for an amphibious assault. The CLA Air Force had a squadron of F-4 Phantoms laden with bombs, winging their way towards various target locations in Cuba. Priority targets included command and control centers, radar sites, grounded aircraft and their support facilities, moored ships and their port facilities, artillery and tank parks, ammunition and fuel storage, anti-aircraft sites, etc...
But the best pilots, twelve of them, were selected to fly as fighter pilots. Also manning F-4 Phantoms, their job was to engage any of Castro's Air Force that made it into the air and destroy it. The Cuban fighter squadron was broken down into three four-ship flights: Boxcar, Blackjack, and Bruiser, all 01-04. As of 0615, Castro had four MiG-21s flying a Combat Air Patrol (CAP), scrambled due to growing reports of gunfire and fighting on the west end of the island. CLA ground control was busy vectoring Boxcar flight into an intercept of the Cuban CAP over Havana.
This is an even up, 4 vs 4 matchup, which I plan to do a few times while I learn these new rules, before getting into various force sizes and initial deployments. All of these will be straight up fighter duels; perhaps someday I'll branch out into other stuff, but that's what interests me right now. I'm not sure how many fights I'll play out for the War of Liberation; I'm hoping for around ten, but it could be more (if I'm really enjoying myself) or less (if I run out of planes/pilots). Right now I'll be simply referring to these guys by callsign, i.e., Boxcar 01. As they prove themselves (by surviving!) I'll become more invested and begin to actually start naming them and getting into personalia.
In any case, let's get to work!


The fight is on! It's Turn 1; I carry out the mandatory move for every aircraft, and then I go to the card deck for individual activation. As you'll see, I'm also trying out a new method for my aerial batreps. I'm not going to take a picture every single time something happens, I'll take one or a few pics per turn, explaining what happened in the narrative while graphically depicting what happened on the picture itself. It's kind of ugly, but I think it's effective and I hope you don't mind. Please let me know what you think.

The game is pretty cool in how the mandatory move works, and how you must think of power in relation to altitude. I've played plenty of games with six levels of power and six bands of altitude; normally it's fashionable for everyone to be as high and fast as possible. This set of rules really makes you ponder your speed, holding less then max. I've played two games so far and it's constantly a battle to keep speed up above stalling, with some cushion to climb, without over-stressing the aircraft. It also factors in with loss of alt/spd when you bung a roll and fail to carry out a tough maneuver. I'm not taking a shot at other rules; as a matter of fact, I'm sorta just now realizing that another set I've played a lot of has the same sort of framework; I'm not sure why this set is really making me worry more about speed than any others I've played.
Also, I end up frequently taking pilot tests (to maneuver and fire, and to go evasive), and I am failing a lot!!! I can't recall ever having such a hard time rolling a '6' on 2D6!

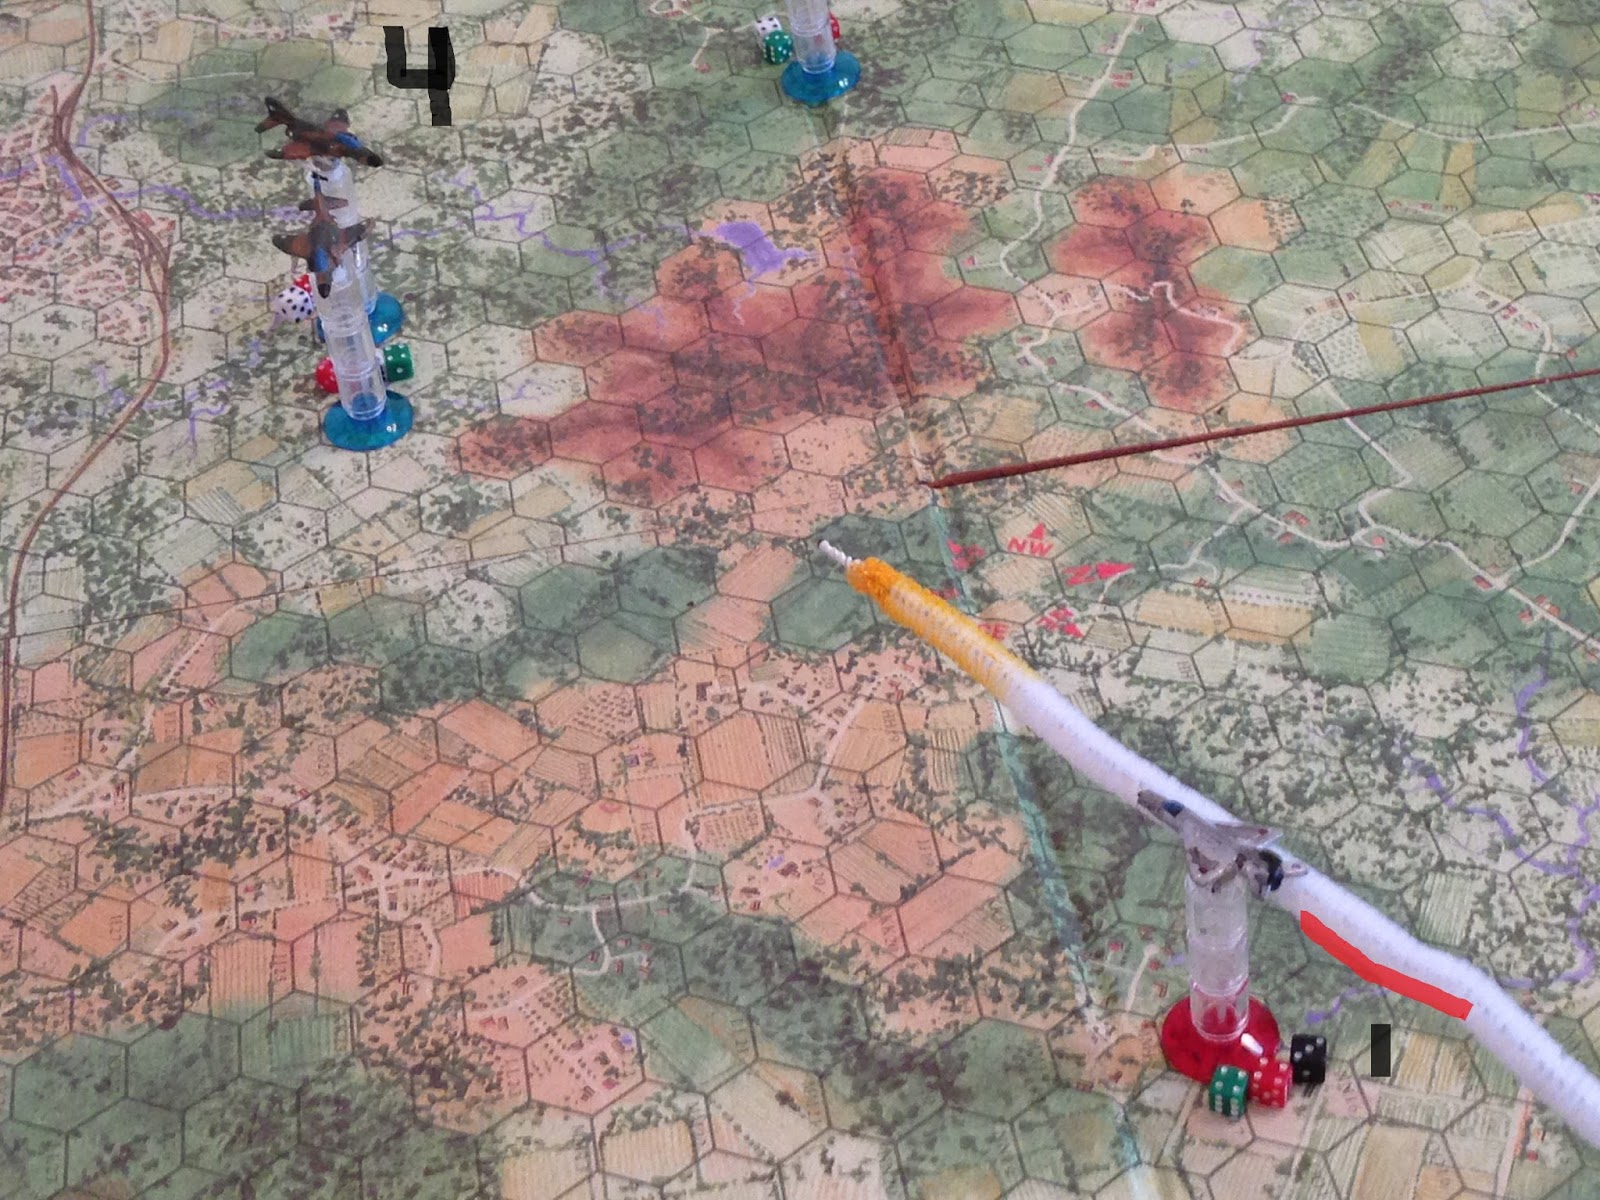
*Boxcar 04 bunged the evasive roll, too... He's now down to alt3/spd3, assuming he doesn't get whacked by the incoming missile. I'm not sure if I'm playing that right; I know if you fail a pilot test you drop an alt and spd, but do you do you drop if you fail the evasive test, too? Need to look it up.

On to Turn 3.

*Boxcar 03 failed his evasive roll...
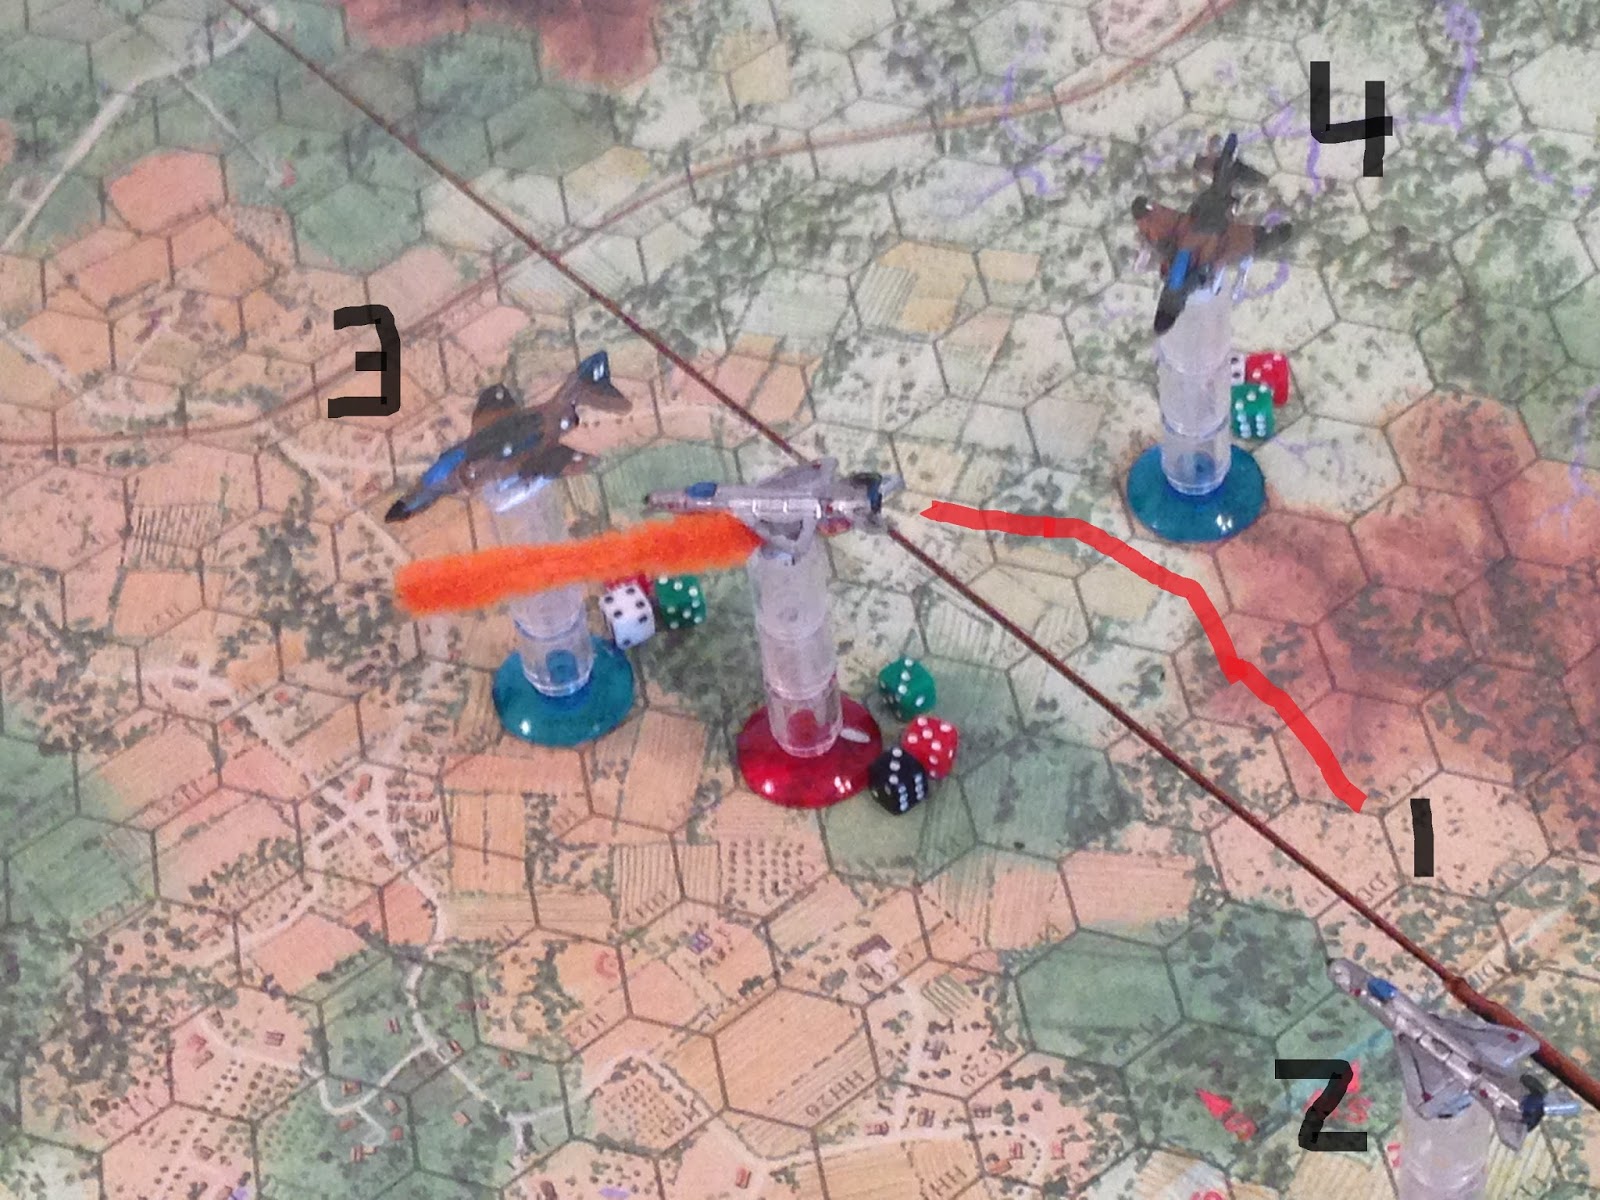
Boxcar 03 is still looking around for missiles when Red 01 cuts in and goes to guns at point blank range!!! Boxcar 03 sees him and takes evasive maneuvers, but several 23mm tracers crash into the F-4 Phantom, and the pilot of Boxcar 03 is wounded!!!

Stunned and worried about going into shock, Boxcar 03 makes a positive climb to try and get above and away from the developing furball. Looking to help him out, Boxcar 01 rolls in on Red 01's tail and looses a missile at close range; the enemy pilot tries to shake him but can't, and the missile detonates nearby, damaging his aircraft and wounding the pilot!


Score one for the good guys!

But Boxcar 03 is in big trouble: Red 03 swings around Boxcar 04, lines up a shot, and launches a missile at Boxcar 03, who can't go evasive because the pilot is wounded...


Moving on to Turn 6, potentially the final turn of the game (you roll a dice at the end of each turn from 6 on to see if the fight continues).


I didn't take a picture, but Red 03 actually pulled off a Split S of his own, right before the end of turn 6. But I rolled a dice and it turns out the CLA Air Force F-4s were bingo fuel. They both executed wingovers and headed for the barn, game over! A quick rundown:
-Boxcar 02 shot down one MiG, but then was himself shot down. He parachuted to safety and was picked up by friendly forces.
-The enemy aircraft Red 03 not only shot down Boxcar 02, he also shot down Boxcar 03, killing its pilot.
-Boxcar 04 shot down a single MiG, killing its pilot.
-Both sides returned home one damaged aircraft (Boxcar 01 and Red 01, who's pilot was also WIA), and one aircraft in good condition (Boxcar 04 and Red 03).
-Having picked up two kills in one sortie, Red 03 has been bumped up from "Average" to "Veteran" (the book calls it "Good," but I like the term 'Veteran' better).
The fight was a lot of fun; it flows well, mixing things up with the cards for activation worked like a champ, and everything made sense. It took a bit longer than I'd like; yeah, that's always the case with new rules, but I gotta tell ya, I don't think that factored in a lot, as the mechanisms were very familiar. I think more of the time is spent with the maneuvering, then manipulating the dice for altitude, speed, and missiles, which is a little bit of a pain in the butt, but worth it. Let me know what you think of me doing the batreps with the blue and red trails and black numbers (I'm already writing the next fight up the same way).
Next fight up in this series is the second flight, Blackjack 01-04, on another vanilla fighter sweep, taking on four Castro-regime MiG-21s, though I should be posting batrep number five of Operation Rush Delivery first.
V/R,
Jack
wow... that was a very tense aerial combat!!! could you explain what kind of cards are you using to play solo?? do you write orders first then draw a card or anything else?? I want to play aerial combat but I still don't know which rules I should use and where I can purchase the minis in Europe... that's why I am mostly in naval combats: I have rules and I do not use minis at all, only millimeter sheets of paper!!
ReplyDeleteHi, thanks for commenting, and I'm glad you liked the batrep.
ReplyDelete1. For cards, each of my minis has a base with a number on it. There are blue bases, 1-4, and red bases, 1-4. I take normal playing cards and write all the base colors/numbers on them. I have a card for each aircraft: Blue 1, Blue 2, Blue 3, etc... I put the cards into a deck, shuffle them, and draw one out at a time, then activate the aircraft whose card came out.
2. I don't write orders, just carry out actions for the airplane when its card comes out.
3. These rules are a lot of fun, and you can buy them as a PDF from Wargame Vault.
4. The minis can be bought from Fighting 15s or Tumbling Dice in Europe.
Hope that helps!
V/R,
Jack