It's 1100 on 1 Feb 1990, and B Company, 8th Popular Force Battalion is lying in ambush just west of Havana (#13). 8th PopFor Bn's mission is to halt/delay Castro-regime mechanized forces in Havana from moving west to the Playa Colorada beach head. At approximately 1045, CLA scouts returned to report they had not only detected elements of the 18th Tank Company and 20th Motor Rifle Company of the regime's 2nd Armored Battalion, but that those elements had halted on the road and dismounted, apparently taking a break, with very lax security.
The Company Commander, Captain Muertosa, quickly turned to his Battalion Commander, Colonel Habanera, to discuss the situation. Less than two minutes later the Popular Force guerrillas were double-timing their way to the enemy's location, keen on catching their mechanized vehicles unattended.
So far we've had:
1) B Squadron SOF destroyed a radar site in support of amphibious landings at Playa Colorada (5). B Sqdn then egressed and linked up with CLA rotary wing assets for their follow-on mission in Havana (6).
2) C Squadron SOF destroyed a the Cuban military's communications center.
3) 1st Para Battalion dropped in and seized a bridge to screen the landings at Playa Colorada (5).
4) 2nd Para battalion dropped in and eliminated a Castro-regime garrison to screen the landings at the Bay of Pigs (just west of (4).
5) 1st Marine Company, 3rd Infantry Battalion, made an amphibious assault at Playa Colorada.
6) A Squadron SOF attacked a Castro-regime SAM site near Havana, which failed to clear the way for B Squadron's helo assault into Havana.
7) 2nd Marine Company, 6th Infantry Battalion, landed at the Bay of Pigs then turned east and ran into a strong enemy force, which it handily defeated.
8) B Company of the UWG pursued and destroyed an enemy garrison in the Escambray Mountains.
9) B Squadron SOF conducted an aerial insertion into Havana to seize a radio station and broadcast news of the invasion.
10) 10th Popular Force Battalion seized and destroyed the Pedroso bridge to protect the Bay of Pigs landing site from the Matanzas garrison.
11) 1st Airborne Infantry Battalion successfully fought off a regime counterattack near the bridge at Sandino, protecting the western (Playa Colorada) landing site from the Pinar del Rio garrison.
12) 6th Infantry Battalion fought through an enemy ambush while pushing inland from the Bay of Pigs landing site.

Captain Muertosa, Commander of B Company, 8th Popular Force Battalion.
The opposing forces, with regime troops on the left and CLA troops on the right. As always, my 'Popular Force' troops are Pendraken Brit and Argentinian special forces from their Falklands range, with heavy weapons from the Vietminh/Vietcong/NVA of the Indochina and Vietnam ranges. The regime troops are Minifigs WarPac and Arab regulars mixed together, with the command stand actually being composed of Pendraken Brits from the Falklands range. The T-72s are Takara plastics, and the BMP-2s are Minifigs.
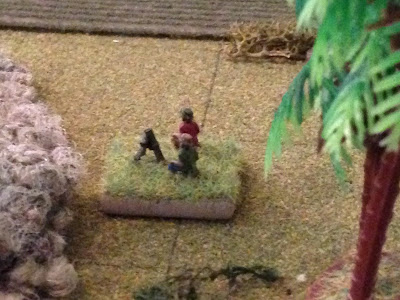
The CLA force, a Command Stand, five rifle teams, an 81mm mortar team, an RPG team, and a single leader figure representing...

8th Popular Force Battalion, Commanding Officer: Colonel Eugenio Habanera.
The regime force has a Command Stand, seven rifle stands, an 82mm mortar team, and an AT-5 Spandrel team (not sure what they'll do with that). Oh, and two T-72s and three BMPs.
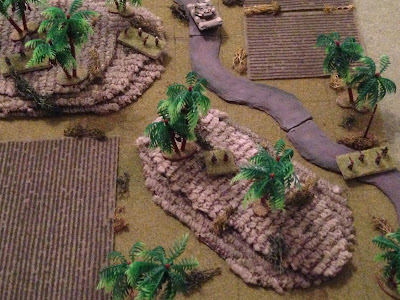
Overview, north is up, with the CLA forces having entered along the bottom (southern) edge, and some pushed all the way up Hill 32 at dead center. The regime forces have their armor on the road and everyone, including the vehicle crews, is dismounted at or north of the road.
The CLA left, with the mortar and Colonel Habanera at bottom left, and Captain Muertosa and several rifle teams at top right on Hill 32.
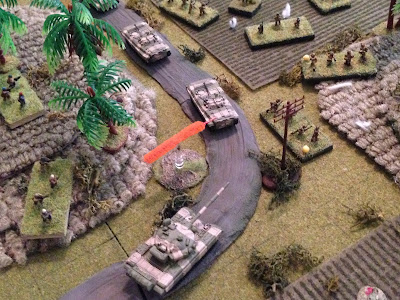
The CLA right, with Hill 32 at top left, a CLA rifle team at far right, and the RPG team at center atop the knoll. You can see one CLA rifle team very near an enemy BMP at top center.
The enemy force, spread across the top (north) of the map. The enemy single stands are the vehicle crews. At bottom center-right is Hill 32, where CLA troops are lurking.
The enemy situation on the CLA right, with Hill 32 at bottom center-left.
The overall plan for the CLA is very simple: hit quick and hard to shock the enemy and keep them from getting to their armored vehicles; with only one anti-tank weapon (a single RPG team), if the enemy manages to get to those vehicles it will likely be game over for the lightly armed Popular Force troops.
Let's see how this goes...
I've mostly been staying away from 'rules-related comments,' but I had to put this in here: of all things, the CLA catch a tremendous break by winning the opposed die roll to activate first, and then they rolled up a 'firefight,' meaning every unit gets to fire. This should be over pretty quick then ;)
The fight starts with Captain Muertosa signalling the mortar crew...
And they pound the center of the enemy's lolly-gagging, diddy-bopping "formation."
An enemy vehicle crew at center suffers heavy casualties (white bead), and one rifle team flees from the battlefield (top center, red bead).
On the CLA right, the RPG team fires a rocket...
Which rips the enemy troops standing in the open, putting a rifle team out of the fight, putting heavy casualties on a vehicle crew (white bead at bottom right), and pinning another rifle team (top center, yellow bead).
On the CLA far right, Team 5 (bottom right) opens fire on another vehicle crew (top left)...
Pinning a rifle team (yellow bead at bottom center), and forcing the vehicle crew to fall back (red bead at top center, from the white puff at center).
Team 4, on Hill 32, opens up, but manages to hit nothing. Hell, not even scare anything...
While Tm 3, also on Hill 32, manage to pin an enemy rifle team.
And then Tm 2, the last rifle team on Hill 32, opens up on the enemy mortar, and they suffer casualties (top right, white bead).
On the CLA left, Tm 1 (bottom right) opens up on an enemy rifle team...
And forces them to fall back (top left, red bead, from white puff at bottom right).
The only unaffected enemy rifle team (top left) fires on Tm 2, atop Hill 32, scoring some casualties on them (white bead at bottom right).
And the enemy AT-5 team fires its AKs at Tm 3, to no effect.
Again with a 'rules comment' - the Castro forces get very lucky in that they roll a 'scurry,' which will allow them to try to rally all their folks, and move the rest without drawing reactive fire. As you can see above though, their force is a mess. They roll to start rallying, and it's not good: a rifle team fails and runs off the map (that's the second rifle team to run), and the mortar team dissolves due to casualties, as does a vehicle crew, before a rifle team finally is able to unpin.
A regime rifle team moves up (center) as Team 1 moves up to the lead T-72 (bottom center), covering two vehicle crews falling back to cover (top left). They really need to get them to their vehicles, but need to clear some CLA troops out of the way first (that's how the die roll for the enemy course of action turned out)
In the enemy center, the AT-5 team moves over and rallies a vehicle crew (red bead), while their CO moves over and rallies a rifle team (center). The last rifle team self-rallies (bottom right).
The enemy CO (center top) begins getting his rifle teams formed up to counter the CLA ambush (Hill 32 is just visible at bottom center), and a vehicle crew joins the CO.
Off camera to right, the last remaining vehicle crew rallies itself.
On Hill 32, Captain Muertosa tries to rally Tm 2, but they've taken too many casualties and are out of the fight. Teams 3 and 4 close ranks.
On the CLA right, Tm 5 and the RPG team move forward (bottom center).
On the CLA left, Colonel Habanera joins Team 1.
The enemy CO has driven his rifle teams forwards towards the vehicles on the road in an attempt to get a vehicle crew to one of the BMPs; atop Hill 32 (just visible at bottom center-right), Captain Muertosa calls a 'danger close' fire mission from the 81mm mortar team, and they lay it right on target...
Forcing the center enemy rifle team to fall back (top center, red bead, from white puffs at center, just below the enemy CO, which is the three-man stand).
On the CLA left, Colonel Habanera and Team 1 open fire on a Castro rifle team trying to help two vehicle crews get back to their steeds...
The enemy rifle team is forced to fall back (behind the trees at top center left, with two vehicle crews at far left), and the Colonel and Team 1 (bottom center) give chase! An enemy rifle team in the center (top center) Guard fires, but misses.
Team 1 and Colonel Habanera charge into close combat...
They quickly put one vehicle crew out of the fight before the other vehicle crew and the hunkering rifle team surrender.
And then they move up further (top right); this photo is looking west (left side of board) from the enemy's center position.
On the CLA right, the RPG team fires another rocket...
Which pins a rifle team and the enemy AT team.
The enemy CO desperately falls back and tries to rally a rifle team, but they flee the field.
With no real combat power left, and CLA forces circling in on both flanks, he dejectedly orders his remaining men to surrender. Mission Success to the 8th Popular Force Battalion! They blew the enemy vehicles in place then melted back into the jungle, having stunted the enemy's first attempt to mobilize mechanized forces to deal with the western beach head. This fight went exactly according to plan, but is very unlikely the enemy will be so lackadaisical about their next attempt.
Casualties:
CLA: ~10 KIA/WIA
Regime: ~25 KIA/WIA, 2 T-72s and 3 BMP-2s destroyed, and ~30 POWs
Colonel Habanera was decorated for valor in leading Team 1 into the close combat which knocked out one enemy team, captured two others, and led to the overall capitulation of the enemy force. The Colonel received the Estrella de Bronce.
Not a great tabletop game, but in a campaign, some of the fights will be like that I suppose. It was still fun for me, the tension was still there as all it would have taken was a single crew to get to one of the vehicles and I would have had big problems. I'm still waiting for the opposite of this, the fight where I just get waxed. I've recently had one start that way, but was able to turn it around; that must mean my ass-whoopin' is just around the corner ;)
One more batrep to write up and post.
V/R,
Jack


Always interesting to see encounters where one side has armour and the other does not.
ReplyDeleteMakes you appreciate those little guys toting around ATGM's and RPG's an awful lot more than usual :-)
Yeah, but I'll admit I cheated: the whole fight revolved around whether the enemy could get their crews back to their vehicles. Luckily for me they couldn't ;)
DeleteV/R,
Jack