All,
It's 0730 on 1 Feb 1990, and I Company, 10th Popular Force Battalion is charged with destroying a bridge near the town of Pedroso (#10, north-northwest of the Bay of Pigs, south-south east of Matanzas), with the goal being to screen the Bay of Pigs landing site from the Castro-regime garrison at Matanzas. The bridge is held by the Castro regime's 86th Provincial Militia Company of the 5th Territorial Infantry Battalion.
So far we've had:
1) B Squadron SOF destroyed a radar site in support of amphibious landings at Playa Colorada (5). B Sqdn then egressed and linked up with CLA rotary wing assets for their follow-on mission in Havana (6).
2) C Squadron SOF destroyed a the Cuban military's communications center.
3) 1st Para Battalion dropped in and seized a bridge to screen the landings at Playa Colorada (5).
4) 2nd Para battalion dropped in and eliminated a Castro-regime garrison to screen the landings at the Bay of Pigs (just west of (4).
5) 1st Marine Company, 3rd Infantry Battalion, made an amphibious assault at Playa Colorada.
6) A Squadron SOF attacked a Castro-regime SAM site near Havana, which failed to clear the way for B Squadron's helo assault into Havana.
7) 2nd Marine Company, 6th Infantry Battalion, landed at the Bay of Pigs then turned east and ran into a strong enemy force, which it handily defeated.
8) B Company of the UWG pursued and destroyed an enemy garrison in the Escambray Mountains.
9) B Squadron SOF conducted an aerial insertion into Havana to seize a radio station and broadcast news of the invasion.
10) 10th Popular Force Battalion seizes a bridge near Pedroso, NNW of the Bay of Pigs.
The opposing forces, with regime troops on the left and CLA troops on the right. The regime forces are made up of Pendraken Australians (Vietnam range), heavy weapons from the Pendraken Indo-china and Vietnam ranges, and an armored car from the Falklands range. The CLA forces are Brit and Argentinian special forces from the Falklands range, and the heavy weapons are also Vietcong/NVA/Vietminh from the Indo-china and Vietnam ranges.
The CLA force is commanded by:

Captain Ermera
The CLA force consists of the Command Stand, four rifle teams, an HMG team, two RPG teams, and their battalion commander...

Colonel Willem Elias
The regime force is comprised of a Command Stand, four rifle stands, an HMG stand, an LMG stand, and a Panhard armored car.
Overview, north is up. The bridge (objective) is at top left, with Bunkers 1 and 2 (left to right), and the Cuban barracks at top right. The CLA force entered the fight at bottom left. There is a small village at bottom right. Hill 25 is at center left.
The CLA force in the southwest.
The bridge, with an LMG team in Bunker 1 and a rifle team in Bunker 2.
The Castro-regime forces in the northeast, with the HMG atop Barracks 1, a rifle team atop Barracks 2, and the armored car on the road at right.
There is a single enemy rifle team (top right) near the village in the southeast.
And the fight is on!
On the far left, Teams 1, 2, and RPG 1 move aggressively towards the objective.
Colonel Elias leads Teams 3 and 4 atop Hill 25 in the center.
And then Captain Ermera leads RPG 2 up the road (top left), while the 81mm mortar set up (far right).
In the northeast, the Castro force's commander is slow to realize the immediate threat to the bridge, and so he orders his men to fall back to defensive position around their barracks (bottom right is the enemy rifle team that was near the village).
The LMG team in Bunker 1 opens up on Tm1...
Forcing them to fall back (bottom right, red bead, from white puff at far left), and pinning RPG 2 (top center, yellow bead).
While the enemy HMG atop Bunker 1 fires on Hill 25, but the fire is ineffectual.
This is followed up by the enemy Panhard armored car moving forward aggressively and firing its 90mm main gun on Hill 25...
Getting heavy casualties on Tm4.
Captain Ermera rallies Tm 1, while Colonel Elias rallies Tm 4.
RPG 1 darts right, south of Hill 25, shaking off Guard fire from the enemy armored car...
Then loosing a rocket towards the offending vehicle...
Which sends the Panhard up in flames! The crew bails out, and the rifle team behind is pinned.
Back on the left, Team 2 lays down heavy suppressing fire on Bunker 1 (I got the "Suppressing Fire" random event, 3 shock dice)...
Forcing the enemy LMG team to vacate the bunker, falling back to Bunker 2.
Captain Ermera then rallies RPG 2 and leads them forward (bottom right), braving Guard fire from Bunker 2 (top left).
RPG 2 quickly lines up a shot and fires a rocket...
But overshoots their target. Uh-oh, now the CO and RPG 2 are stuck in the open...
And then the CLA mortar team goes to work...
Targeting Barracks 1, holding the enemy CO, a rifle team, and their HMG.
The HMG team is out of the fight, while the rifle team is pinned.
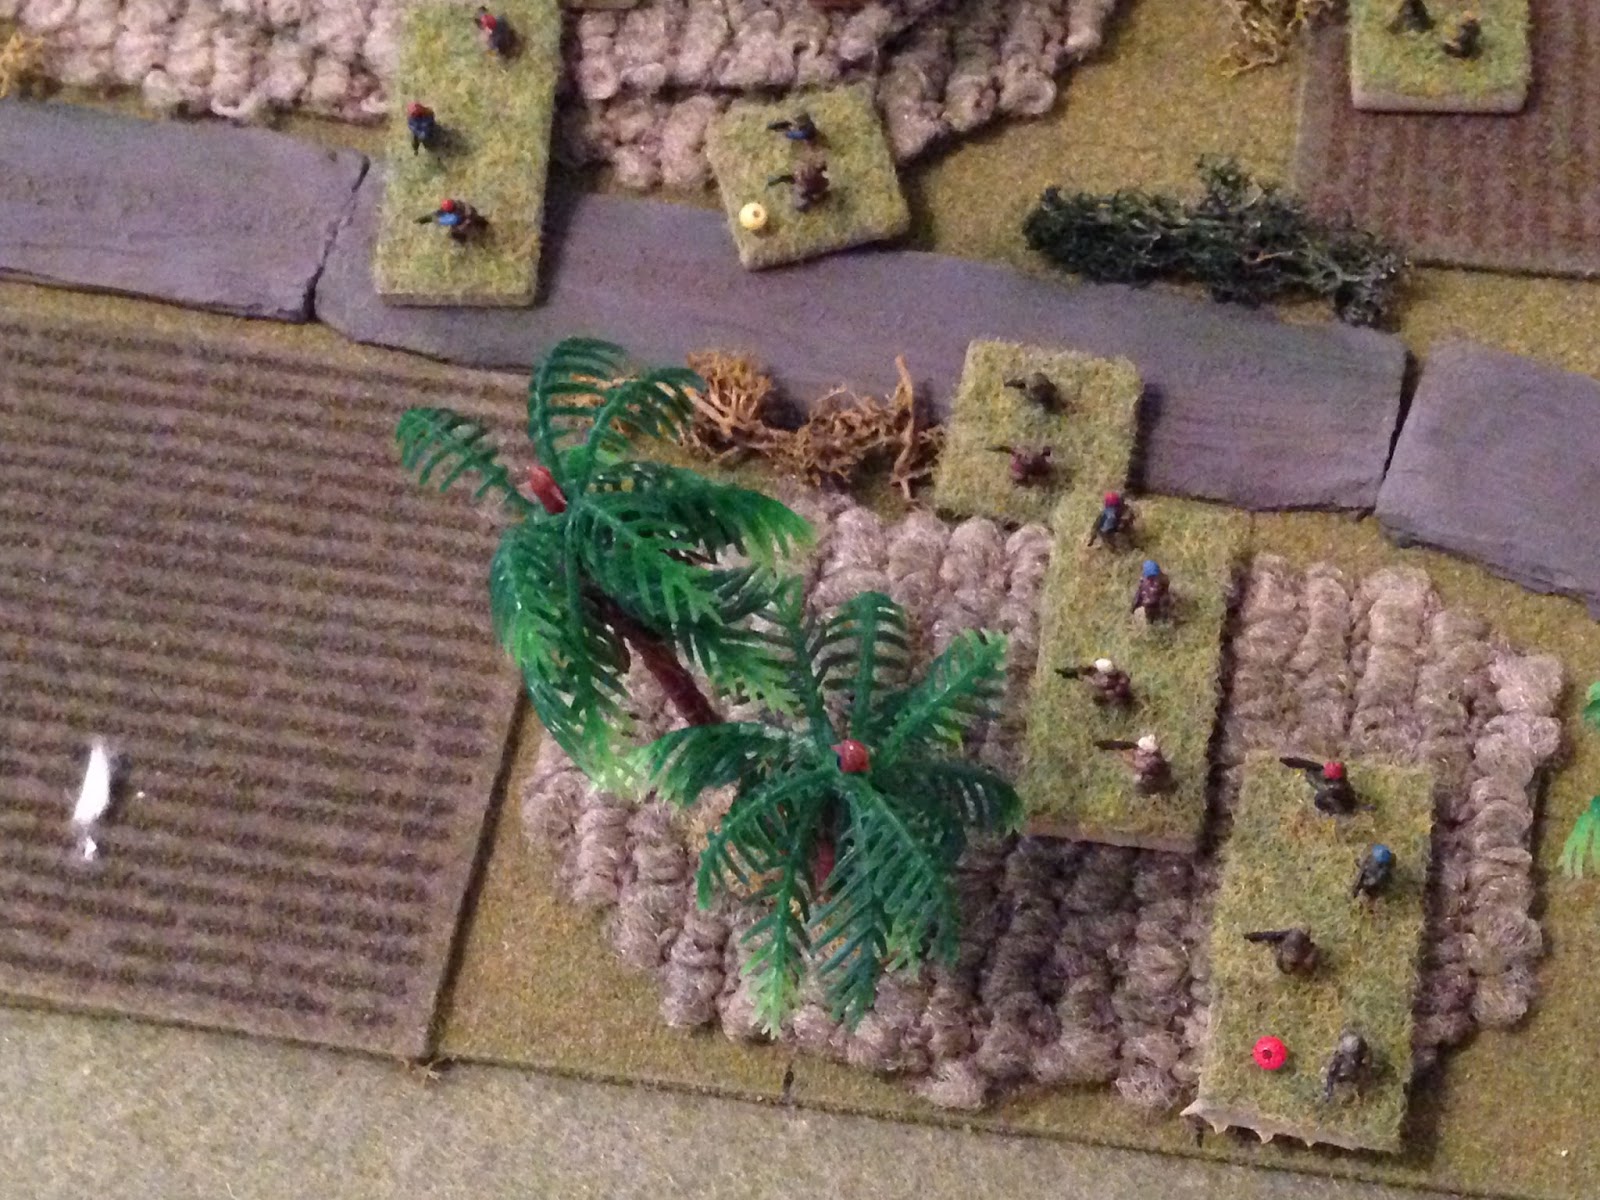
The enemy CO remembers his job is to protect the bridge, not the barracks, and so he rallies the rifle team atop Barracks 1 (far right), then bravely leads the rifle team from Barracks 2 (off camera to right) towards Bunker 2 (the CO and rifle team are at top center, Bunker 2 at top left). The enemy LMG team at top left (red bead) self-rallies.
On the far right, the armored car crew falls back, while the pinned rifle tam self rallies.
In the center, Captain Ermera leads Tm3 and RPG 2 forward (bottom center) towards Bunker 2 (top left).
While on the left, Teams 1 and 2 move up.
On the right, Colonel Elias and Tm4 (center left) run down the hill, while RPG 1 (bottom center left) moves atop Hill 25.
On the left, RPG 2 fires a rocket at Bunker 2...
Pinning the rifle team and LMG team there.
While RPG 1 fires on Barracks 1...
The rocket strikes the building, putting the enemy rifle team there out of the fight. This has the fortuitous effect of stunning the enemy CO and rifle team, forcing them to fall back behind the barracks (they were sprinting to the left reinforce Bunker 2).
On the far right, the Battalion Commander, Colonel Elias, loses focus a bit, or maybe he's too worried about his flanks, so he orders Tm 4 (bottom left) to fire on the enemy rifle team and armored car crew at top right...
The small arms fire pins the enemy team, and so Colonel Elias leads Tm 4 towards them.
Back at the bridge, Captain Ermera leads Tm 3 into close combat with the enemy LMG team...
The CLA force is victorious, and moves to assault the enemy rifle team in Bunker 2...
But the Castro militia are full of fight, and repulse Captain Ermera and Tm 3, who fall back to Bunker 1, pinned!
This is immediately followed up by the enemy CO (top right) leading his rifle team forward; they happened to be equipped with an RPG, and they fire on Captain Ermera and Tm3 in Bunker 1...
The carnage is horrendous! Captain Ermera was killed in action, and Tm 3 was put out of the fight (top left), while Tm2 was pinned (bottom center), and RPG 2 (far right) fell back suppressed!
Bunker 2 fired again on Tm 2 (bottom left), but they received no further ill effect.
Tm1 moved over to RPG 2 (top center right), and rallied them...
Then RPG 2 moved over to Tm2 (bottom left center) and rallied them...
But they failed and fell back (bottom right, from top left).
RPG 1, on Hill 25 (top left), moved up, while Colonel Elias and Tm4 fell back behind the burning armored car (center).
The enemy rifle team at far right (top right) tried to rally, but they also failed, and their fall back carried them off the map!
And so the armored car crew, having witnessed their protecting infantry, promptly surrendered to Colonel Elias and Tm4.
But at the bridge the enemy hastily reoccupied Bunkers 1 and 2. That really sucks...
But then the enemy CO begins counting heads and taking stock of his situation and sees his small force has used up almost all their ammo (they rolled up a random event, "Low Ammo,' and are reduced to firing using only shock dice).
Bunker 1 fires on RPG 2, pinning the rocket team.
While Bunker 2 fires harmlessly on RPG 1, atop Hill 25 at top right.
And then an incredibly ferocious firefight breaks out! RPG 2 slams a rocket into Bunker 1, causing heavy casualties...
And RPG 1 pops a rocket into Bunker 1...
Knocking out the rifle team there. The enemy CO sprints to Bunker 1, but is unable to rally the team there!
Tm1 charges Bunker 1!
But the Castro-militia fight back ferociously, and force Tm1 to fall back (bottom right, from top left! That's the second @#$%ing time that rifle team fought off a CLA team against overwhelming odds! @#$%!!!
The enemy troops in the bunker open up a terrific fusillade...
Forcing the RPG team to fall back (bottom right, just above Tm1)!
RPG 1 dashes to Tm2 and rallies them, then fires another rocket into Bunker 1...
Finally putting the gallant defenders out of action, leaving only their Commanding Officer!
Team 1 moves forward and captures the sullen enemy commander, who looks on despairingly at his dead and dying men who fought so bravely, while Team 2 moves to the bridge and rigs it for demolition.
With a boom and a crash the bridge at Pedroso falls into the river, and the CLA forces fall back to regroup, collecting their casualties as they go, and permitting the few regime prisoners to do what they can for their comrades. Colonel Elias arrived on scene and, in respect for his gallant foe, immediately released all regime prisoners to allow them to care for their wounded.
The Militia of the 5th Territorial Infantry Battalion put up a shockingly ferocious defense of the bridge, and Colonel Elias quietly prayed to himself that the rest of the liberation would not be so bloody. Captain Ermera was a dear friend of his, to say nothing of the other CLA casualties.
Casualties:
CLA: Captain Ermera KIA, 15 KIA/WIA
Regime: 25 KIA/WIA, Armored Car destroyed, 10 POW
What a damn fight! Ivan, this is why 'men down' and 'fall back and hunker' still get a chance, albeit a very small chance, in close combat; the dice somehow worked out for them. Along those lines, once casualties started to mount, I began to roll each turn to see if either side lost stomach and withdrew from the fight, but both kept passing their rolls, and so the battle continued to pretty much the last man. Incredible!
This was the first of four fights I got in this past weekend, I'm getting them typed up as fast as I can.
V/R,
Jack


Great battle report Jack. That one was getting quite tense!
ReplyDeleteLooking forward to the next one.
Cheers, Andy
Thanks Andy! It was a hell of a see-saw battle, and I kept feeling like someone should fall back, and I kept rolling 'force morale' and no one did, so literally a 'fight to the last man/last bullet' kinda fight. Which was a lot of fun ;)
DeleteI should be able to get another one posted this evening.
V/R,
Jack
That one started off as a sure thing for the CLA, but the winds really changed when the Captain died. Good report!
ReplyDeleteHey Chris, thanks for looking and commenting.
DeleteYou're absolutely right; that damned enemy team in Bunker 2 was amazing. I'm not happy in campaign turns, but it sure made for an interesting fight!
V/R,
Jack
The Aussies, I mean the regime, should not have lost! Sure bunker 2 did really well with the dice but that is how it goes. It was when they got Low Ammo it was all over. Low Ammo is a pretty drastic result - shock dice only - come on, there was no way they could come back from that! Robbed! :-)
ReplyDeleteIf I stop using Aussies for the regime will you stop rooting for the damn commies?
ReplyDeleteAnother vicious, back and forth fight. Mentally and emotionally exhausting! I'm becoming too invested in this stuff ;)
V/R,
Jack