All,
It's 1030 on 29 June 1990 and Battlegroup Caballero, having just been rejected from the town of Premja, is again going over into the attack.
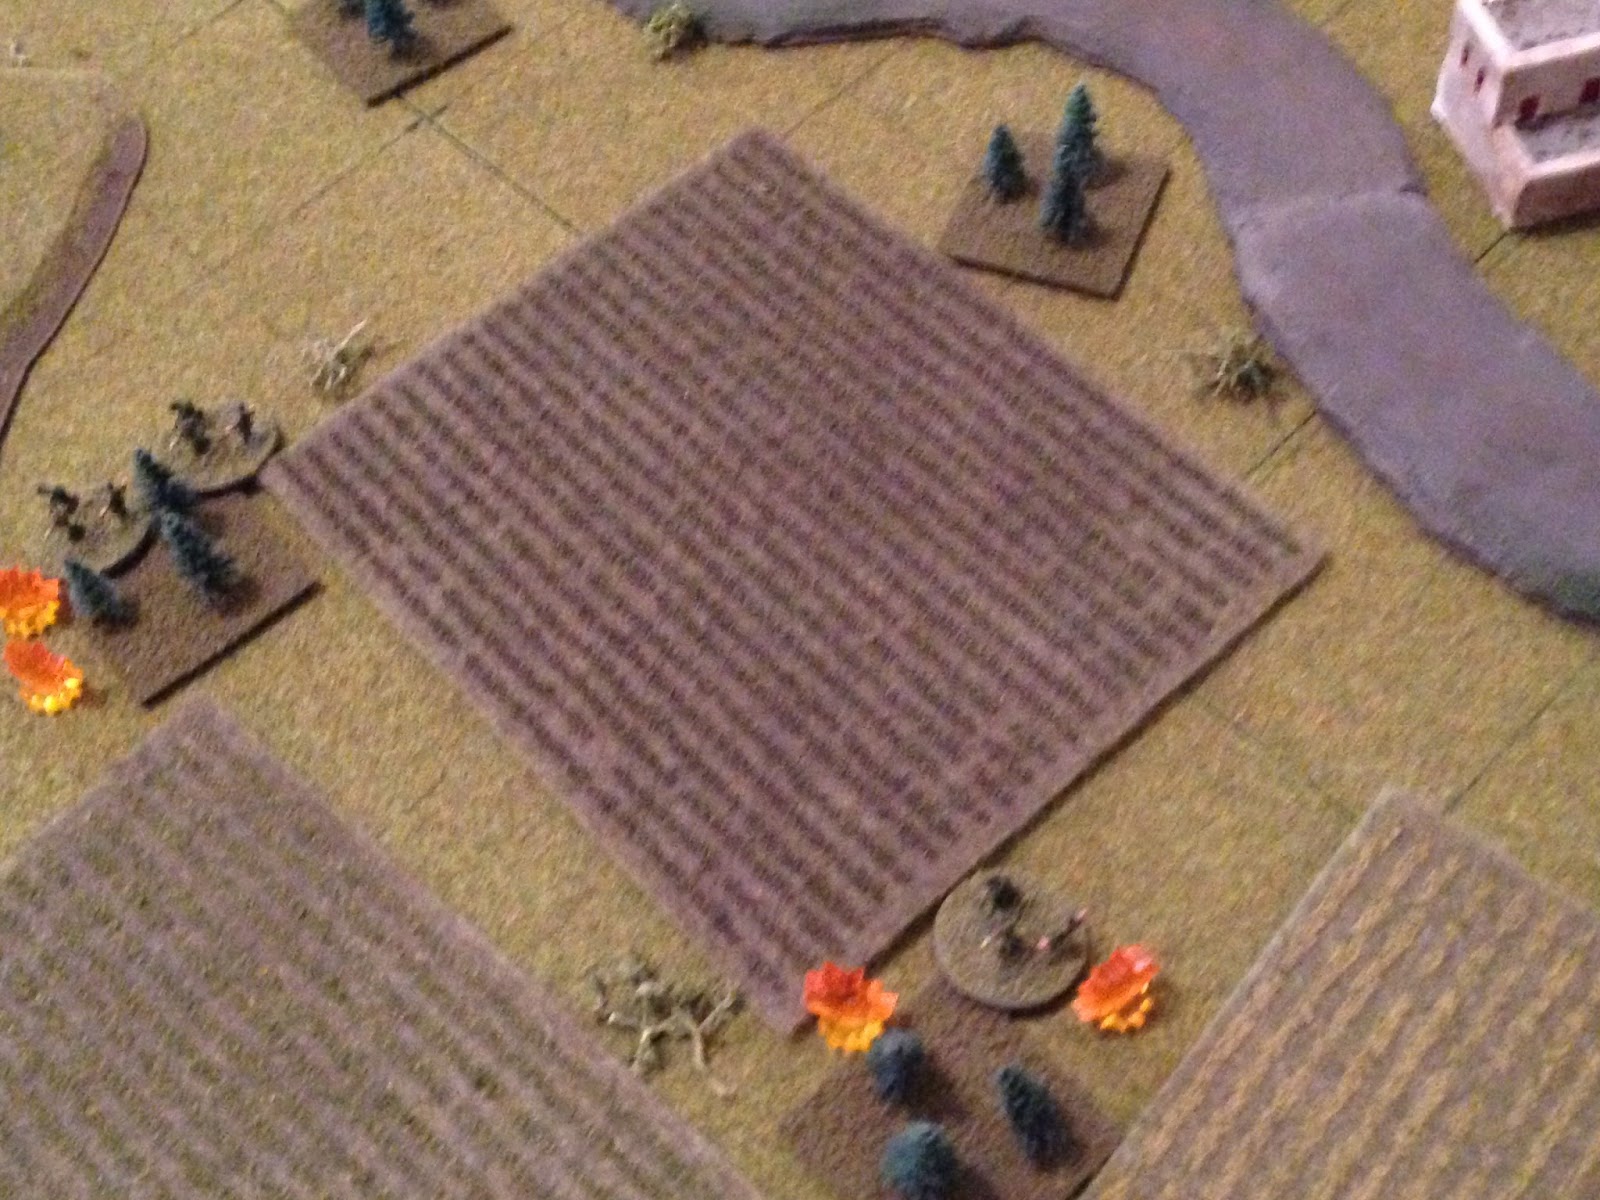
Overview, north is up. The town of Premja is at center right, part of Lake Bulodna at bottom right, and Hill 103 at top left. Battlegroup Caballero will enter from the southwest (bottom left). You can see the burning Scimitar and HMMWV at left.
The opposing forces, Cubans on right, Communists on the left.
The Cuban force consists of their CO (Lt Caballero, who rides in an LAV, but can dismount if necessary), a Stryker wheeled-APC, a HMMWV with TOW ATGM, an AH-1 Cobra attack helicopter, and seven rifle squads (1st Platoon, 3rd Platoon, and one squad scraped together from the remnants of 2nd Platoon).
For anyone worried about Da Choppa, don't. I'm really just treating it like a light-armored vehicle that ignores terrain for movement purposes, and 'morale' is a bit different. 6 Kill is still dead, 1 Kill is damaged and leave the table, 6 Shock is leave the table for three turns, 1 Shock is leave the table for 1 turn.
The Communist force consists of their CO (riding in an MTLB), a ZSU-23/4, and six rifle squads (two full platoons).
Overview of map, with the forces set on the table. The Cubans are at bottom left, the bad guys spread across the rest of the board.
The Cuban plan is much like the last one, despite it failing. At bottom left is the Cobra, with the CO and the Stryker just above it. 1st Platoon is moving left and 3rd Platoon is moving right. The HMMWV and the squad from 2nd Platoon has moved up into the center, next to the burning Scimitar.
The northwest (top left) corner of the table: you can see the enemy has moved off Hill 103, instead occupying positions behind trees along the road. There are three enemy rifle squads: center, right, and bottom right.
Looking at the northeast (top right) corner, we can see the ZSU at top center and the enemy CO at bottom center. The three rifle squads from the last pic are at left center, left, and center bottom. There is a new rifle squad at bottom left.
And in the southeast (bottom right) corner you can see an additional two enemy rifle squads. The squad of super soldiers is in the building at center, the guys they saved at bottom left center. It's really funny that two squads ended up in these positions as I used blinds to place all the bad guys. A bad omen?
Whatever it is, it's time to fight.
On the Cuban right, 3rd Platoon (bottom center) moves forward, drawing react fire, which pins 2nd Squad, 3rd Platoon (2/3).
On the left, 1st Platoon (far left, with HMMWV and 1/2 at bottom center) moves up, drawing react fire.
The enemy fire is ineffective and 1/1 (bottom left) returns fire, but they miss too.
But they do spot some bad guys at the base of Hill 103 (top right).
Seeing 1st Platoon (left) taking fire, the Stryker (bottom center) moves up (HMMWV and 1/2 at bottom right). There are several bad guy squads across the top.
As the Stryker moves up an enemy squad takes a flank shot with an RPG...
The rocket misses and the Stryker returns fire with it's .50 cal, but they miss too!
The Stryker (bottom left) continues forward towards its original target, then fires its HMG, suppressing the bad guys (top center). The enemy troops that just fired the RPG are at bottom right.
The Cobra swoops in over the lake, looking to make a south-to-north rocket run. But an enemy rifle squad takes a shot with an RPG!
Which harmlessly sails by. The Cobra fires its rockets at the bad guys messing with 1st Platoon and the Stryker (off camera to left).
Two rifle squads take heavy casualties (white beads at bottom left and bottom right) and one is pinned (yellow bead at top left).
At that very moment, the enemy CO (bottom right) came on the radio net, exulting his men greater heroism and glory! "Remember how we only hours ago turned away the fascist, capitalist, running pig-dogs, these Yankee villain boot-lickers and sons of motherless goats!"
"Urrah!!!" was the reply over the net; the three enemy rifle squads immediately rallied themselves back into the fight.
I rolled the random event "Lull," which allowed all the bad guys to recover from negative morale effects.
Inconceivable!!! The dice giveth, and the dice taketh away.
The ZSU (bottom right) rolls up to take a shot at the Cobra (top left).
But the HMMWV (bottom right) spots it (top left) and fires a TOW.
For the second time, the ZSU is immobilized and the crew bails out. A nearby rifle squad (yellow bead at top left) is pinned.
Back on the left, a Communist rifle squad (top right) fires on 1st Platoon (left), pinning 1/1.
Back in the south, the enemy super squad (bottom right) fires an RPG at the Cobra.
Which forces the Cobra to dart west (far left, from far right) and leave the area.
He'll be back after a turn. The enemy super squad couldn't kill it, but at least they drove him off for a bit. At this point I realize I forgot to move either of the commanders this turn...
On the left, 3/1 (bottom left) fires at an enemy rifle squad at the base of Hill 103 (top right).
Of course they (bottom left) miss, so the bad guys (top right) return fire...
But they miss too, so 3/1 is able to move over to the Stryker (center), to help protect from marauding enemy infantry.
3/1 (bottom left) takes more fire, but it bounces harmlessly off the Stryker.
1/1, though pinned, opens fire on the bad guys at the base of Hill 103, sending them 'men down.'
With 3/1 and the Stryker at top left, and the HMMWV and 1/2 at left, 2/3 (yellow bead at bottom center) fires on some bad guys up 1st Platoon's way.
As per usual, the Cuban riflemen (bottom right) miss, and the enemy (top left) returns fire. But they miss too. Been a bit of that going around today...
Back in the center, 1/2 (bottom center, next to the HMMWV, and 3/1 and the Stryker at far left) opens fire on an enemy rifle squad (top center).
The target is knocked out (bottom left), and another enemy squad in the line of fire is forced to fall back (red bead at far right, from black bead at top center). 1/2 is off camera to bottom left.
Feeling saucy after actually hitting their target, 2/1 breaks cover (top left), heading for the stand of trees that held their former target (top center). But the enemy super-squad (bottom right) spots them and fires, pinning the squad in the open.
The CO moves right to rally 2/3, but they stay pinned.
On the enemy side, their CO has been hanging out in Premja, but he's looking at two of his squads up near Hill 103 that need some help (top center, top left). As luck would have it, the squad just forced to fall back by 2/1 came right to him (bottom center, red bead). He rallies them...
Then moves up (top right) and rallies another squad.
That squad then sprints over to their buddies at bottom left and rallies them!
They just did it again, got three units back in the fight before I could jump on them.
Then an enemy rifle squad comes from the south (off camera to right) to occupy the spot formerly held by the guys 2/1 gunned down (bottom center).
On the enemy's left flank, two squads move up (bottom left and the super squad at center). The guys we were just looking at in the previous pic are at top left.
Countering this new threat (right), 2/3 (yellow bead at bottom left, near CO) self rallies while 1/3 and 3/3 move up (center). The enemy super squad is at top right, 2/1 is pinned at top left.
3/1 leaves the Stryker (top left) and dashes to 2/1 (bottom center), rallying them. Those are bad guys at right.
1/2 scootches forward, nose to nose with the bad guys at right, while the Stryker moves to 1/1 and rallies them (top left, with bad guys at top center).
1/1 and 2/1 move forward (center).
And the HMMWV moves right to support 3rd Platoon (bottom center, from left).
If you're marveling at all the move-countermove, the enemy had just rolled a scurry, so they all moved, then the Cubans counter-moved. Now the Cubans roll up a firefight, so everyone will get to fire. But with another sick twist of the dice: I roll up another random event, and it's 'Low Ammo.' So now all my shooting will suffer due to low ammo, and I just rolled a firefight on a turn that my Cobra attack helicopter was eligible to move back onto the table, but now he can't move onto the table, so I don't get to use him in the firefight.
Despite the low ammo issue, my HMMWV fires a missile at the bad guy super squad in the building at top right.
But, what with the target being super soldiers and all, the round misses. The bad guys return fire and miss.
Since the HMMWV missed, 2/3 (bottom left) now has to use ammo on those same bad guys (top right).
But 2/3 (bottom left) misses, and when the bad guys (top right) return fire, they don't.
They put heavy casualties on 2/3 (white bead), and force 1/3 to fall back (red bead).
3/3 then opens fire on a very close enemy squad, but only pins them.
The super squad (top center) returns fire, knocking 3/3 (bottom left) out of the fight!
The low ammo BS is having an impact; these misses and pins could have been pins and kills.
But then, some luck: back on the left flank, the Stryker and 2/1 open fire, putting heavy casualties on the two enemy squads at top right.
Then 1/1 (top left) and 1/2 (bottom center, just above 3/1) open fire on the bad guys at center right, putting them out of the fight.
3/1 (top left) then turns to the south and fires, but they miss...
Back in the north, the Communist CO has two squads that need immediate assistance (white beads at center), lest they soon be close assaulted out of existence. He tells his driver to kick it in the ass, and the MTLB speeds towards the distressed squads. But 1/1 (left) spots the enemy command vehicle and fires an RPG...
The near miss (center) forces the enemy CO to fall back (red bead at top right).
Back in the south, the enemy super squad (bottom right) launches a rocket at the HMMWV (top left).
The HMMWV crew is pinned (far left), and the super squad dashes across the street (far right), hoping to get to their pinned buddies (yellow bead at bottom center right). 3/1 (top left) spots them and fires...
But the Cubans miss and the bad guys reach their buddies, rallying them.
And now these @#$%ers are going to do their best super soldier impression...
The recently rallied bad guys (bottom center) move up, drawing react fire from 2/1 (top left, with 3/1 just right of the orange tracer).
What do the Cubans do? They miss, that's what they do. So the bad guys move into close combat with 2/3 (white bead at right).
2/3 is knocked out and the enemy soldiers move up to take out 1/3. The CO, Lt Caballero, dismounts and moves into the melee, trying to save the right flank of his Battlegroup.
And it works! The Cubans and the Communists roll up an exact tie, so the bad guys are thrown back (red bead at right)!
Then the Cobra rolls in and fires on the enemy super squad, causing heavy casualties.
Which allows the CO and 1/3 to move up and capture the two enemy rifle squads in the south.
While in the north, the Stryker and 1st Platoon moves up and captures the enemy CO and two rifle squads.
Man, I don't know how much more of this I can stand, these games are insane! I swear I thought I was going to lose that fight, really hanging on by a thread. And just the weird, flukey bad luck crap. I don't mean that in a bad way regarding the rules, I mean that in a 'war is unpredictable and the enemy gets a say in the outcome' sorta way. The games have been great and I can't wait to play some more, which will start on Friday, which is Veteran's Day!
In any case, Premja, the Task Force's second objective, is now in Cuban hands, and Battlegroup Elias is passing through Battlegroup Caballero on their way to objective three, the town of Abrvo. Here's the toll:
Cubans
15 casualties
Communists
1 ZSU-23/4 destroyed
15 casualties
30 EPW
Lt Caballero was decorated for valor, awarded the Estrella de Bronce, for stepping in and halting the enemy counterattack in close combat on the right flank.
Stay tuned, more games coming this weekend.
V/R,
Jack


No comments:
Post a Comment