Sunday, August 16, 2020

Operation Chunky Bandit #48 (Ground)

All,

2115 on 5 Aug 1990
Mini-Campaign Fight #22
TF Hammer vs FLA 6th Company


Major Chavez
Commander, TF Hammer
Distinguished Service Cross, 2 x Silver Star, Purple Heart, War of Liberation and South Leon campaigns


Lieutenant-Colonel Halabrio
Commander, Task Group Halabrio
Distinguished Service Cross, Silver Star, War of Liberation, Operation Payback, and South Leon campaigns, one Combat Jump


Major Chavez leads his Task Force Hammer into combat against Communist insurgents of the Free Leon Army's (FLA) 6th Company, having seized the bridge over the River Shalabi at Janaf, then fought off a Communist counterattack, and now running into another insurgent force on its way to Pendrakenville, in the dark.  The overall Task Group commander, LtCol Halabrio, has decided to attach himself to the assault element, leaving Major Chavez in overall commander but willing and able to assist as necessary, functioning as a second command stand for the Cubans.

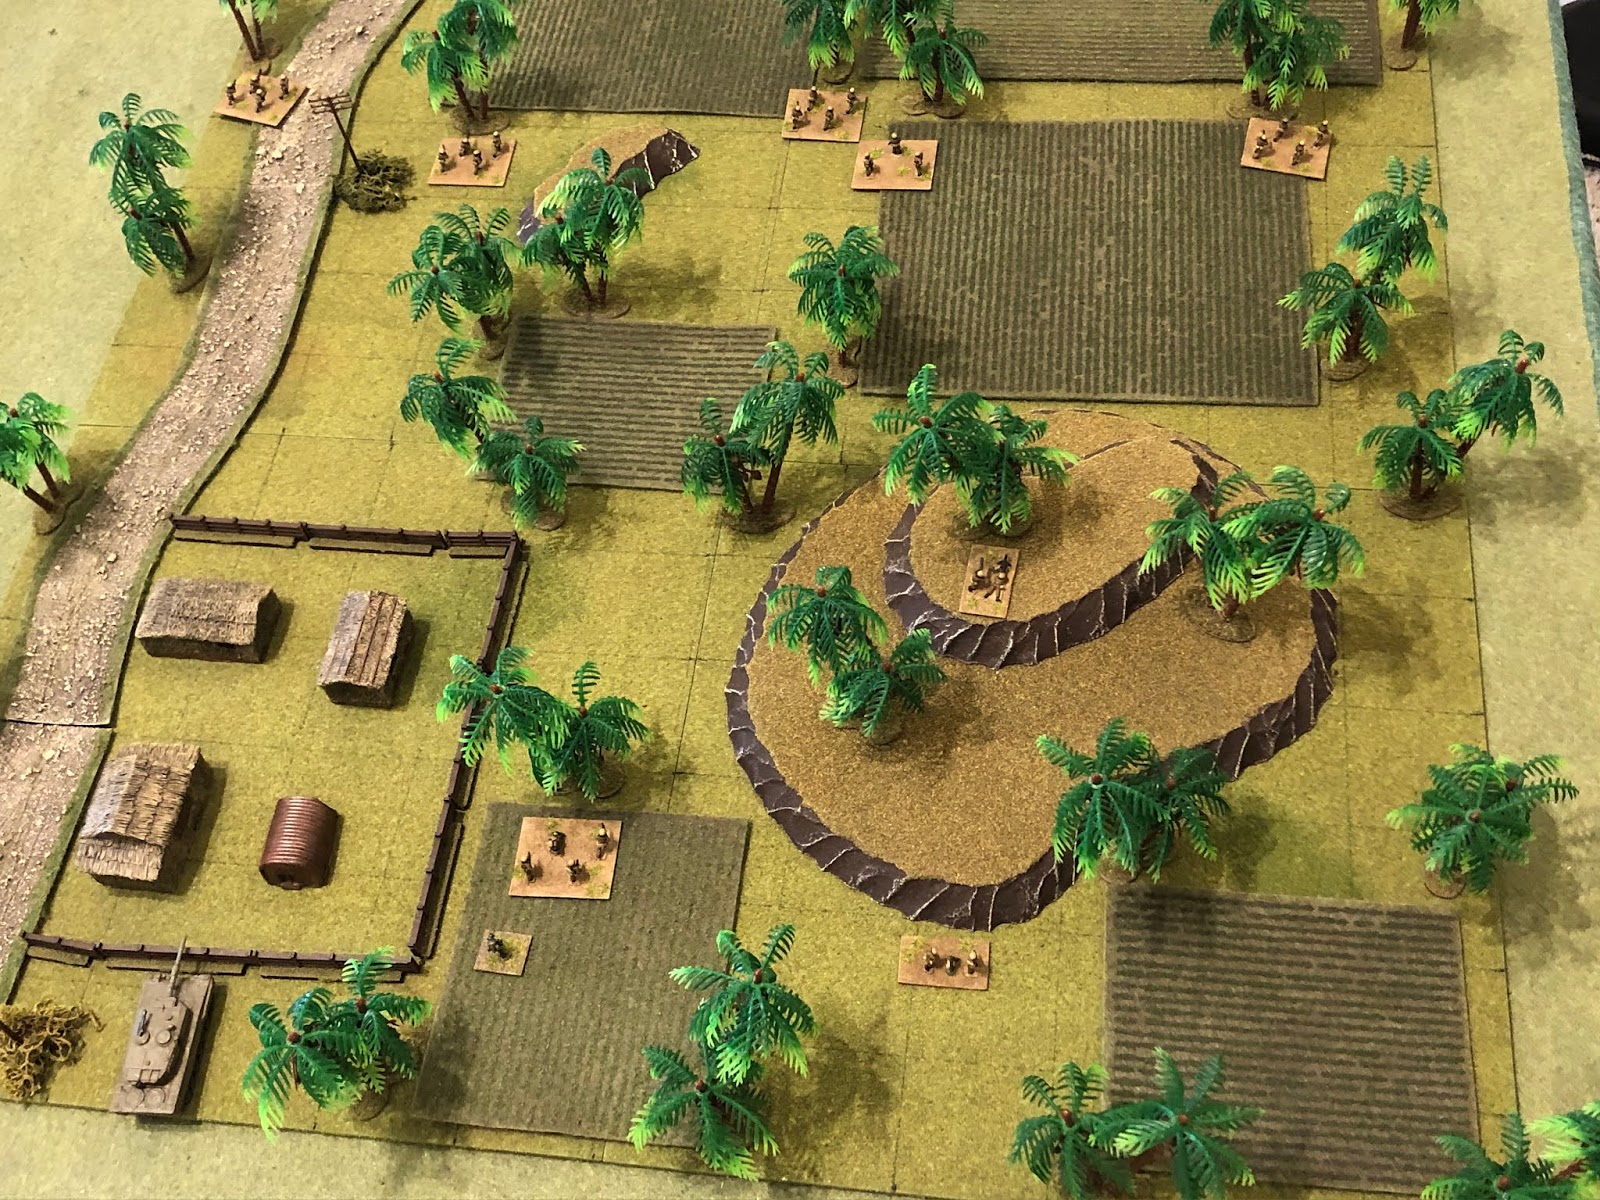
This is a meeting engagement, typically with both sides advancing from their own table edge, but I'm going to mix things up a bit by having both sides placed on the table with random movement to reflect the chaos of meeting each other on the march, in the dark.

Overview, north is up.  There are hardball roads running north/south and east west, intersecting in the northeast (top right), with villages present at top left and bottom right, as well as several knolls/hillocks, to include the prominent Hill 188 at left.  Other than that we've got several cultivated fields and scattered jungle.

The opposing forces, allies on left and Communists on right.

The figures are all 10mm from Pendraken, Minifigs UK, and Butler's Printed Models.  I'm using Ivan's "5Core Company Command," playing on a 3' x 2' surface with simple terrain to speed up the process.  The hootches are from Jimmi at Flashpoint Minis, the roads are from Fat Frank, the hills are from Warzone, the fences are from Sarissa, the fields are from Hotzmats, the trees are cake toppers, and when you see the rivers, they're from Wargamers Terrain.  I'm playing solo and will randomize enemy deployment using a system of blinds borrowed from Joe Legan's "Platoon Forward."

In terms of caliber of forces, the SLA, FSNL, and FLA troops will all be treated equally, except for the fact the FLA troops will be treated as fanatics, in terms of their willingness to advance into close combat.  The Cubans are more tactically and technically proficient, and so they will receive extra firing dice, better rallying capability, bonus in close combat, and sometimes will have a second command stand on the table.

Major Chavez' force consists of: Command stand, five rifle stands, an MG team, an 81mm mortar team, and a Leopard II main battle tank.  These troops are Minifigs' Israelis, except the Leo II,, which is from BPM.  

TF Hammer has a few heroes present:
Major Chavez, TF Hammer CO, has been awarded Distinguished Service Cross and two Silver Stars
LtCol Halabrio, TG Halabrio CO, has been awarded the Distinguished Service Cross and Silver Star

*It seems that Major Chavez and LtCol Halabrio are in quite the duel to one-up each other in the medals for valor department.

Oh, and there's LtCol Halabrio, the Task Group commander.  That is probably the clearest, brightest photo of a 10mm figure I have ever taken!  This is a Minifigs' Australian from their Vietnam range. I love the boonie covers and big packs!

The Communist force consists of: Command stand, four rifle stands, and a T-72 main battle tank.  These troops and vehicles are Minifigs' Modern Insurgents and Modern Soviets.

Overview, this time with troops.  The Cubans are attacking from the west (left table edge), though they've managed to infiltrate troops all the way to the centerline, while the Communists are attacking from the east (right side), where they've managed to stack their troops in.

*Well, that kinda sucks: I used random deployment for both sides, but that's not how it worked out, no interpenetration, not even close.  Unlike the last time I fought night battles, this time I at least remembered to cut down on spotting/firing ranges and effectiveness.

The Cuban starting positions: Major Chavez is at the forefront (top center), which has Hammer 01 to Hammer 04 spread across their front line from left to right.  They're MG team is sighted in atop Hill 188 (center), with the mortar team downslope from them (bottom center), while LtCol Halabrio has Hammer 05 and the Leopard in reserve (bottom left).

The Communists have rifle teams at left bottom, center (with their CO0, atop the knol at top cetner with the T-72 behind them, and in the trees at top right.

Time to roll dice!  The enemy's point element hears movement (bottom right), takes shelter in a nearby treeline, and opens fire on Hammer 03 and Major Chavez' command group (top left).

The enemy (top center) fire is ineffective, as is Hammer 03's (bottom left) return fire.

Which allow the enemy team to dash forward (left, from far right)!

The enemy Commander immediately follows, bringing the T-72 with him!  The Commander detects movement to the south and order the tank to fire; a 125mm HE round immediately goes winging its way towards Hammer 04 (bottom left)

And it's right on the money, taking out Cubans' right-flank rifle team!

Major Chavez and Hammer 03 (left) open fire at point-blank range on the encroaching Communists...

Keeping their (off camera to bottom right) heads down so the Cubans can fall back (far left, with Hammer 02 at top center).

Hammer 02 (top left) then turns and engages...

Before falling back to join Major Chavez and Hammer 03 (far left, from trees at right, with Hammer 01 at top right).

With Hammer 04 down (far right), the MG team leaves Hill 188 (far left) to push right (center bottom), covering that flank.

Taking advantage of the Cuban withdrawals (left top, though Hammer 01 remains in its initial position at top center) and Hammer 04 being knocked out (left bottom center, with the Cuban MG team at bottom left), the Communists push a general advance across the entire front in an arrowhead formation.

The Cubans react by shifting their defense to the right (Major Chavez, Hammer 02, and Hammer 03 moved to left center from top center, while Hammer 01 fell back to top center from off camera to top center).

On the Cuban far right, the MG team (far left) opens fire on the enemy's center, suppressing the lead rifle team (red bead at far right), but the enemy tank immediately responds...

And claims its second victim (casualty figures at bottom center)!!!

Hammer 02 (far left) lays down fire...

As Major Chavez and Hammer 03 close assault the enemy center!

Major Chavez' command group and Hammer 03 knock out the enemy Commander and rifle team (casualty figures at top left), but as they advance the T-72 opens fire with its co-ax...

Major Chavez and his command group are knocked out, as Hammer 03 continues its close assault!

Hammer 03 knocks out the enemy tank (far left) then decides to follow up by advancing on an unsuppressed enemy rifle team, which promptly opens fire on them...

But the tough Cuban troopers ignore the fire and close with the enemy!

Where they (casualty figures at far right) are promptly defeated!!! The victorious Communist rifle team dashes forward to take cover behind the destroyed tank (left).

While on the Communist far right, their rifle team there advances and Hammer 01 opens fire, suppressing them!

And while Hammer 01 is up there handling their business on the left flank (top left), Hammer 02 spots the advancing enemy team that knocked out Hammer 03 and opens fire...

But the fire is ineffective and the bad guys make it into cover (bottom right), where they return fire on Hammer 02 (top left), pinning them.

*And then the Cubans roll a damned 'Firefight!', which is exactly what I DO NOT need right now, seeing as how I only have two teams in position to fire and I have been unable to get my reserves (LtCol Halabrio, Hammer 05, and the damn Cuban tank!) forward...

Hammer 01 continues firing into the enemy rifle team on the far left flank, keeping them suppressed.

*AKA, 'missing'...

While in the center, Hammer 02 (far left) returns fire on their assailants (right), to no effect.

But part of the reserve is actually able to assist: Hammer 05 (bottom left, with LtCol Halabrio behind them and Hammer 02 at top center) spots the fire ahead (telling friend from foe by the color of the tracers), and opens fire, pinning the Communist rifle team at top right!

The Communist rifle team on their right flank (top center right, with Hammer 01 below and to the left of them) self rallies, while their far left-flank team pinches in to assist the center) center bottom, from bottom center right), towards their lead rifle team (in trees at left, with yellow bead and Hammer 02 above them).

The lead enemy rifle team, though pinned, charges Hammer 02, who is also pinned!

The Cuban riflemen take them out (casualty figures at bottom left), then push ahead (center).

Hammer 02 then pushes south, taking cover behind the destroyed enemy tank (center top right), as LtCol Halabrio brings Hammer 05 up (bottom left, with Hammer 01 at top left).

The good guys get a random event that sees an additional rifle team show up (Hammer 06), which comes in on the road next to the shiftless Leopard...

While on the far left flank, Hammer 01 again fires on the enemy team they managed to catch in the open...

And finally puts them out of the fight!

While back in the center, Hammer 02 fires on the last remaining enemy rifle team, who they've managed to catch in the open...

The fire is accurate and devastating, causing the enemy casualties and putting the team 'men down,' so the Cubans immediately pounce, looking to finish them off...

But the bad guys wisely surrender first, ending the fight!
Though they lost their heroic Commanding Officer, TF Hammer wins yet another fight, forcing the defeated FLA 6th Company to fall back to B9 from C9, while LtCol Halabrio immediately assumes personal command of TF Hammer and pushes them forward to exploit their victory, advancing east to C10, from C9.

I keep trying random deployment for both sides in the hopes that I'm going to have some crazy set up where the two sides have penetrated each others' lines, but it just ain't happening.  And I was pretty happy with playing the shorter line of sight/line of fire distances for nighttime, even though sometimes I forget them and sometimes I stretch them a little bit.  

I thought it was a pretty interesting fight, a good back and forth in the center, where the Commies were making good use of pushing infantry forward to identify targets that the tank then smoked, until the Cubans decided to counterattack, which worked, but cost them their Commanding Officer, who was injured badly enough to require evacuation back to Cuba.  Still funny that the Cubans had a tank but couldn't get it into action; it never budged from its starting position!  Now that's what you're talking about when you talk about getting inside the other guy's OODA Loop: he's got assets and knows what he wants to do with them, but he can't because he's busy reacting to what you're doing!

Casualties:
Cuban: ~20 men, including Major Chavez, who was WIA and evacuated to cuba
Communist: ~25 men killed, a T-72 main battle tank destroyed, and ~5 men captured

Decorations:
-Major Chavez, TF Hammer CO, was awarded the Bronze Star w/V for leading the close assault that defeated the enemy Commander and a rifle team.

-Team Leader, Hammer 03, was posthumously awarded the Silver Star for participating in the close assault that defeated the enemy Commander and a rifle team, then leading the close assault that knocked out the enemy tank, before becoming killed in action while leading another close assault.

-Team Leader, Hammer 02, was awarded the Bronze Star w/V for leading the defense that defeated the enemy's close assault in the center, eliminating one Communist rifle team and capturing another during the counterattack.

Next up we have Captain Villagrosa's combined Task Force Hawk/Dusty, which was pushing hard to the east to secure Task Force Hammer's lines of communication, but apparently they were pushing hard enough because they were caught from behind by the FSNL's 8th Company!

V/R,
Jack

No comments:

Post a Comment