SLA B Company vs FSNL 2nd Company
The South Leon Army's B Company is defending against the FSNL's 2nd Company, which is attacking from the northwest in an attempt to crack the SLA line and reinforce/resupply their comrades in and around Pendrakenville. This is a simple attack/defend scenario; the Cuban goal is to hold the ground, while the Communist goal is to crush their enemies on the way to the capital. The SLA defenders are bolstered by a team of commandos from the Cuban Task-Force 23.
Overview, north is up. There is a hardball road running roughly east-to west, with a detour south around Hill 68, with a decent-sized village at the bend (center bottom), as well as several knolls/hillocks. Other than that we've got several cultivated fields and scattered jungle, with a river bend in the southwest (bottom left), though it is shallow and slow moving so relatively easy to ford (slight movement penalty).
The opposing forces, allies on left and Communists on right.
The figures are all 10mm from Pendraken, Minifigs UK, and Butler's Printed Models. I'm using Ivan's "5Core Company Command," playing on a 3' x 2' surface with simple terrain to speed up the process. The hootches are from Jimmi at Flashpoint Minis, the roads are from Fat Frank, the hills are from Warzone, the fences are from Sarissa, the fields are from Hotzmats, the trees are cake toppers, and when you see the rivers, they're from Wargamers Terrain. I'm playing solo and will randomize enemy deployment using a system of blinds borrowed from Joe Legan's "Platoon Forward."
In terms of caliber of forces, the SLA, FSNL, and FLA troops will all be treated equally, except for the fact the FLA troops will be treated as fanatics, in terms of their willingness to advance into close combat. The Cubans are more tactically and technically proficient, and so they will receive extra firing dice, better rallying capability, bonus in close combat, and sometimes will have a second command stand on the table.
The SLA's B Company consists of: a command stand, five rifle teams, an M-113 "ACAV," and a TF23 team in support. These troops are Pendraken US from their Vietnam range, except for the TF23 team, which is Minifigs' Australians from their Vietnam range.
SLA's B Company also has some heroes amongst its ranks:
The M-113's vehicle commander (known as Rhino 13) was awarded the Medal of Honor
Bravo 05 Team Leader was awarded the Distinguished Service Cross
An MG Team Leader was awarded the Bronze Star w/V (though he is not present in this fight)
*A
s the enemy attack is coming from an unexpected direction I did not allow the SLA troops to be dug-in, and I placed them using random deployment, to simulate them reacting rather haphazardly to the unexpected threat
The Cuban initial positions: The TF23 team is at bottom left, with the track, Rhino 13, right behind them, Bravo 01 at center left, Bravo 02 at left top, Bravo 03 at top center, the B Company Commander is at center top, Bravo 04 is at top right, and Bravo 05 at right.
And the Communist starting positions: the enemy has their CO, the BRDM, and four rifle teams at top left, while they have their fifth rifle team at far right, and their ZSU-23-4 at bottom center, between the trees on the 'far' side of the river.
It is time to fight! I had a roll off to see which side would go first, and the SLA won, then they rolled up a 'Firefight!' which is a good way to start off a defense! The track, Rhino 13 (bottom center, with the TF23 to their left) spots the Communist BRDM (top center) and opens fire with its .50-cal HMG and M-60 MGs, putting a Communist rifle team 'men down' and pinning the crew of the BRDM.
On the SLA far right, Bravo 03 (far right, with Bravo 02 at center bottom) opens fire on the enemy (top left).
The target (top left) is 'men down' and the enemy commander is pinned (you can just see the yellow bead at far left, through the trees) as Bravo 02 (far right) opens fire.
Suppressing one rifle team (red bead at right) and pinning another (yellow bead at left, with the pinned enemy CO between them)!
*Couldn't ask for a better start, a 'Firefight!' was just what the doctor ordered, stalling out the enemy attack before they've even jumped off.
The enemy CO self rallies.
But from the enemy far right the ZSU moves up, spots movement up the slope of Hill 68 (Bravo 01, top right), and opens fire, but the hail of 23mm only manages to pin the SLA troops.
*Not my fault, I gave the ZSU a whopping 3K 4s, and that's all they could do with it!
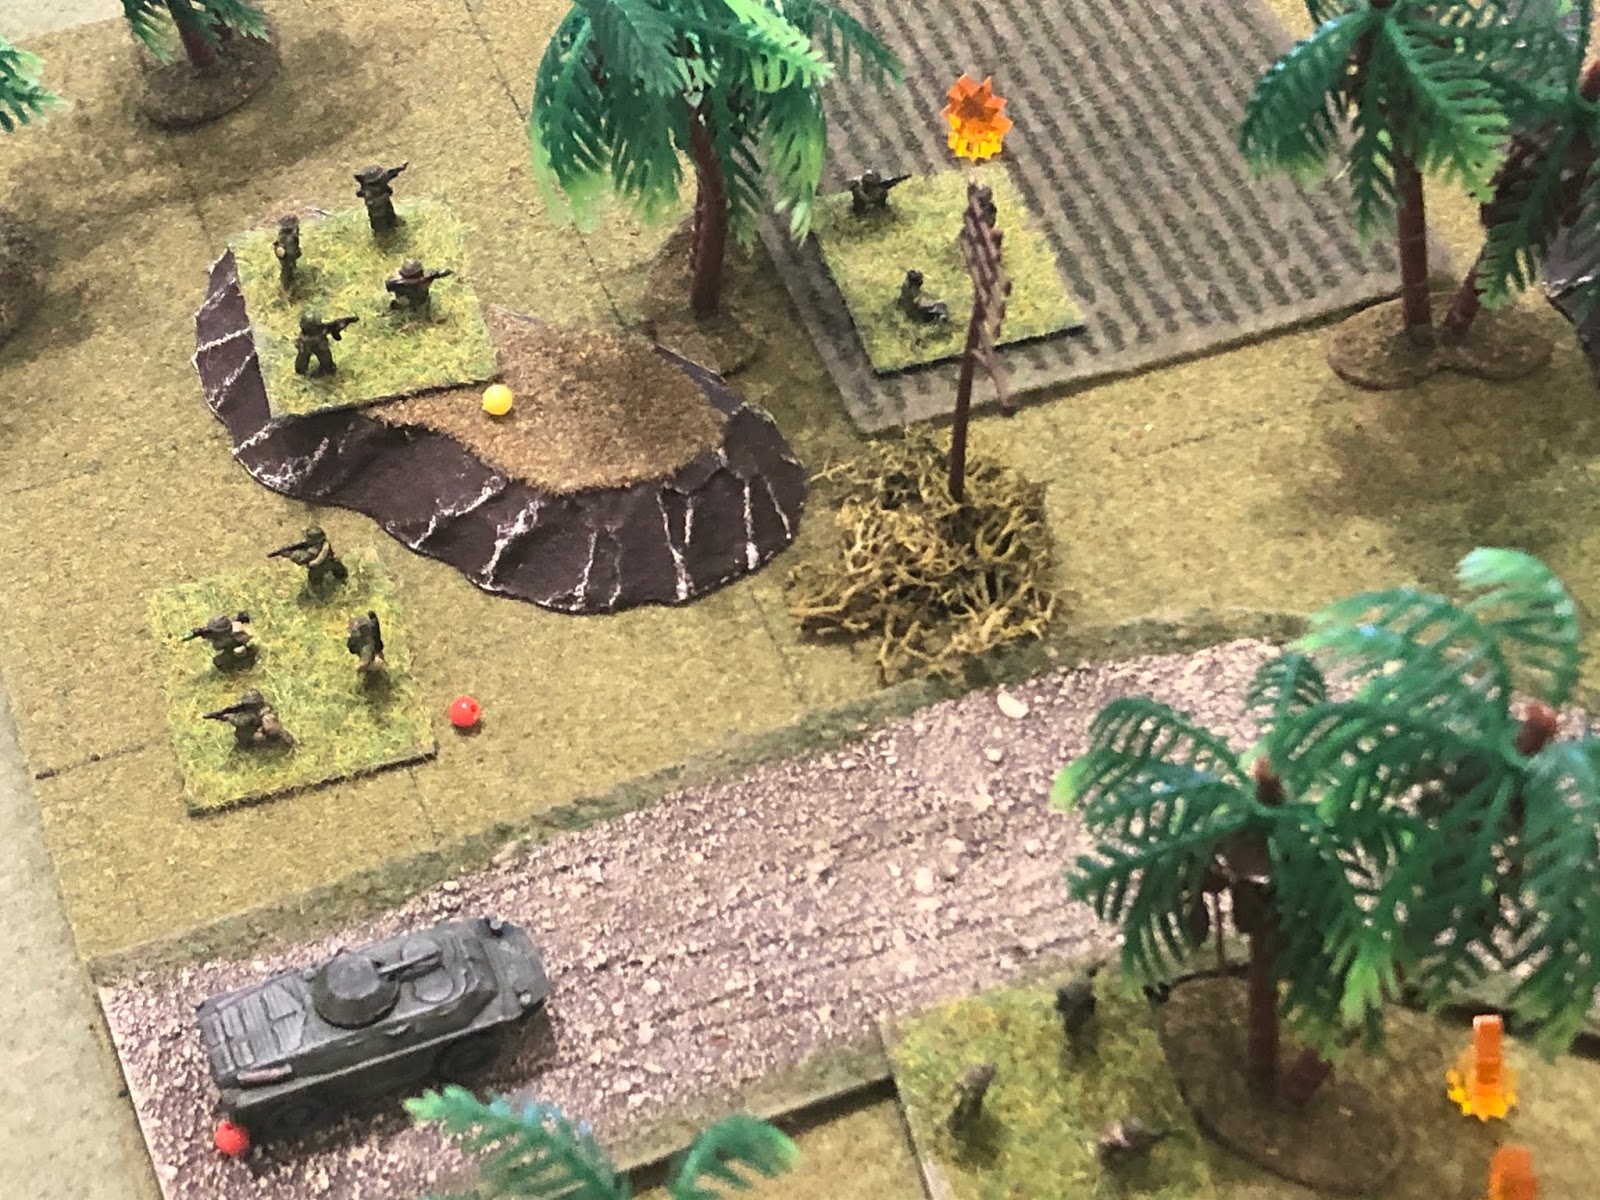
With Bravo 01 pinned (center), the Communist rifle team on the far right moves up on the knoll (bottom left), intent on firing up Bravo 02 (top center left), but Bravo 04 (top right) spots them and opens fire.
But the SLA fire is ineffective and the Communists (bottom left) are able to engage Bravo 02 (top center, with the pinned Bravo 01 at right and the SLA CO at top right), suppressing them!
On the SLA left, the TF23 team pushes up (center, from bottom right), drawing fire from the enemy team (far left) that just suppressed Bravo 02.
But the Cuban commandos shake it off, continuing to advance and then returning fire, pinning the enemy rifle team.
As Rhino 13 pushes ahead, screened on each side by friendly infantry. The track comes to a halt (bottom right, with the TF23 team just below them) and again cuts loose with its .50-cal HMG and two M-60 MGs, suppressing the BRDM crew (top left).
The SLA CO dashes upslope and rallies the suppressed Bravo 02, as Bravo 03 (top center)...
Goes charging downhill (top right), into the heart of the enemy force, firing as they go but hitting nothing!
The enemy returns fire on Bravo 03 (top right)...
And they get smoked...
On the Communist right, the ZSU (bottom left) again fires on Bravo 01 (top right)...
But this time they (top left) completely miss, allowing Bravo 01 (far right) to return fire, suppressing the ZSU's crew!!!
The bad guys atop the knoll on the enemy's far right fire at the TF23 team.
But it's ineffective and the Cuban commandos (bottom right) return fire, but they miss too!
Back on top of Hill 68, Bravo 02 (far right, with the CO behind them) fires downslope.
Forcing the suppressed rifle team to fall back (far left, from far right)!
*It looks like them and the BRDM are dangerously close to being forced to fall back off the map.
Rhino 13 (bottom right) keeps hammering away at the enemy positions (top left), suppressing another rifle team.
Bravo 01 (bottom right) fires on the Communist far-right rifle team (in trees at left, with the ZSU behind them at top left)...
Keeping them pinned so the TF23 team can close assault them!
The Cuban commandos (center) make quick work of the Commies (bottom right) and move up, ignoring the suppressed ZSU (off camera to bottom left)...
Because they (left center) know Rhino is on the way (right)! The ACAV moves up and opens fire on the enemy ZSU with its .50-cal HMG.
Forcing the enemy vehicle to fall back to the west, leaving the battlefield!!!
The Communists roll up a 'scurry;' e
verybody left is either suppressed or 'men down,' so this 'scurry' really could save them by allowing them to get their severely beaten up forces rallied. The enemy commander moves left (top center) and rallies his 'men down' (white bead) rifle team, as the two suppressed rifle teams and the BRDM all self rally. The two rifle teams are good, but the BRDM only manages to get 'up' to pinned, and they still have a 'men down' rifle team at bottom center ('men down' units cannot self rally, they must be rallied by a friendly unit in base contact).
The Allies react by pushing forward Bravo 01 (far right, despite being pinned), Rhino 13 (center bottom), and the TF23 team (far left).
Additionally, the SLA CO and Bravo 02 come dashing down the hill (center right, from top right).
Rhino 13 (far right) opens fire with its Ma Deuce, looking to take out the BRDM (far left).
And that's exactly what it does!
Bravo 01 (bottom right) fires into the enemy position (top left), suppressing one of the Communist rifle teams.
Bravo 02 (far right, with the CO next to them) attempts to do the same thing...
But they (top right) miss, and the enemy's return fire puts them 'men down' and suppresses the Company Commander!!!
*Uh-oh, stuff just got real up in here, we've got big problems.
The bad guys roll up another 'scurry,' so their suppressed rifle team (red bead at bottom left) tries to self rally...
But he fails, so they panic and run off the table!
An enemy rifle team moves over (center, from bottom left) to help out a team of 'men down' comrades, but they're weaklings and stay down, as the TF23 team (bottom right) and Rhino 13 (top right) look on.
But it's crunch time now, it all comes down to this...
The enemy commander grabs his closest rifle team and they charge up Hill 68, close assaulting the SLA B Company Commander and Bravo 02...
The SLA commander and his troops are massacred (left) and the enemy CO and rifle team keep rolling, running down the pinned Bravo 01...
Bravo 01 goes down (top center) and the bad guys close on Rhino 13 from the rear!
The armored personnel carrier and its crew, including the Medal of Honor awarded commander, are knocked out, as the enemy commander and rifle team close on the Cuban commandos!!!
The men of TF23 promptly put an end to this nonsense, knocking out the enemy commander and rifle team! They spy two more enemy rifle teams nearby (top center) and move on them...
But these Commies have had enough of the incredible death and destruction wrought by both sides! The enemy is literally out of troops, so the Cubans and surviving SLA troops sort of win by default, accomplishing their objective of repelling the enemy assault, but at terrible cost.

The SLA B Company's defensive line held (B4), forcing the FSNL 2nd Company to fall back (A4). FSNL2 will most likely continue to withdraw, likely will hold, and less likely will counterattack next turn.
Oh my goodness, that's the kind of fight I live for! The SLA/Cubans have it all going their way, move up to finish the bad guys off, the Commies catch a lucky break (the 'scurry' that allowed them to rally everyone), then flip the tables, taking down four Allied teams in consecutive close combats before some heroes step up to save the day, holding the line by the skin of their teeth! Tremendous fun! It does rather suck that the SLA Medal of Honor winner was killed; I must be honest, in the heat of battle I forgot he was a Medal of Honor winner and thus did not accord him and his crew any positive dice roll modifier for the close combat they were involved in, even though he won the Medal of Honor for fighting off FSNL infantry in close combat (back in Operation Chunky Bandit #11)… Also, I don't know what's up with those Commie vehicles lately, they just can't seem to get anything accomplished. The ZSU got off two shots with 3K 4s and only managed to score one 'pinned' result. You can't blame that on me, that's pure dice...
Cuban: ~30 men, including the Company Commander and the Medal of Honor-winning Rhino 13 vehicle commander, one M-113 destroyed
Communist: ~25 men, ~10 more captured, and one BRDM destroyed
Decorations:
"Porter" and "Robo" of the TF23 team were both awarded the Distinguished Service Cross for close assaults that eliminated the enemy commander, two rifle teams, and captured two more, saving the SLA's B Company from being overrun by Communist forces.
Next up we have the South Leon Army's A Company defending against the FSNL's 8th Company.


No comments:
Post a Comment