Monday, June 22, 2020

Operation Chunky Bandit #38 (Ground)

All,

2130 on 4 Aug 1990
Mini-Campaign Fight #12
TF Bowie vs FSNL 4th Company


Captain Madre-Animral
Navy Cross, Bronze Star w/V, War of Liberation and South Leon campaigns
Commander, TF Bowie


2nd Lt Peria
Tm3 (Medal of Honor, Silver Star, battlefield commission to 2nd Lieutenant)


Captain Madre-Animral leads his TF Bowie against the FSNL's 4th Company, with whom they are very familiar.  That familiarity is born of an absolutely ferocious battle the two held several hours earlier, literally fighting themselves to exhaustion.  Unable to press forward yet unwilling to cede ground, both sides called for reinforcements and dug in.  This is a simple attack/defend scenario; the Cuban goal is to crush their enemies on the way to the capital, the Communist goal is to hold the ground.

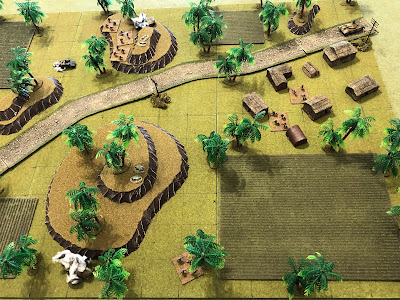
Overview, north is up.  There is a hardball road running southwest to northeast, with a decent-sized village present (right top), as well as several knolls/hillocks.  Other than that we've got several cultivated fields and scattered jungle.

The opposing forces, allies on left and Communists on right.

The figures are all 10mm from Pendraken, Minifigs UK, and Butler's Printed Models.  I'm using Ivan's "5Core Company Command," playing on a 3' x 2' surface with simple terrain to speed up the process.  The hootches are from Jimmi at Flashpoint Minis, the roads are from Fat Frank, the hills are from Warzone, the fences are from Sarissa, the fields are from Hotzmats, the trees are cake toppers, and when you see the rivers, they're from Wargamers Terrain.  I'm playing solo and will randomize enemy deployment using a system of blinds borrowed from Joe Legan's "Platoon Forward."

In terms of caliber of forces, the SLA, FSNL, and FLA troops will all be treated equally, except for the fact the FLA troops will be treated as fanatics, in terms of their willingness to advance into close combat.  The Cubans are more tactically and technically proficient, and so they will receive extra firing dice, better rallying capability, bonus in close combat, and sometimes will have a second command stand on the table.

Captain Madre-Animral's force consists of: a command stand, five rifle teams, a HMMWV-mounted Mk-19 Automatic Grenade Launcher (AGL), and a dismounted .50-caliber Heavy  Machine Gun.   These troops are Minifigs' Modern US with a BPM HMMWV, though the dismounted .50-cal is Pendraken US from their Vietnam range.

TF Bowie also has some heroes amongst its ranks:
Bowie 03 Team Leader was awarded the Medal of Honor and the Silver Star, and was provided a battlefield commission to 2nd Lieutenant

The Communist force consists of: a command stand, five rifle teams, an AGS-17 automatic grenade launcher (AGL), and a T-72 main battle tank.  The figures and tank are from Minifigs' Modern Soviets, except the AGS-17, which is actually a cut down Argentinian .50-cal HMG from their Falklands range.

Overview, this time with troops.  You can see the Cubans have occupied the ground up to the center line, while the Communists have consolidated in and around the village at top right.

The Cuban starting positions: Bowie 01 and 02 are at top left, the .50-cal HMG is on the knoll at far left, then Bowie 03, 04, and 05 are at center to far right, with the HMMWV at bottom right and their commander, the freshly promoted Captain Madre-Animral, at center right, behind Bowie 03, which has the Medal of Honor winner, 2nd Lt Peria.

The Communists have rifle teams at bottom left, right bottom, top right, and two at far right, with their commander at center, the T-72 just left of him, and their AGS-17 team just behind the tank.

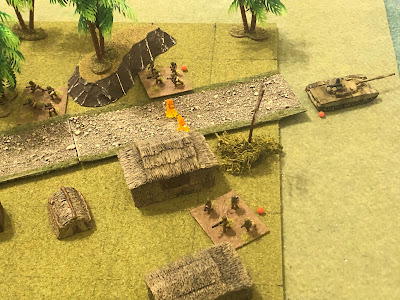
It's dark, but the HMMWV crew (bottom left) are using their thermal sights and they quickly locate the enemy T-72 (top right).  The Mk-19 gunner opens fire, draping the tank in 40mm HEDP rounds that suppress the crew!

Bowie 03 (bottom right) opens fire on an enemy rifle team (in trees at top center, with Bowie 01 and 02 visible at top left).

The target is pinned down (yellow bead at right), but another enemy rifle team (bottom center) spots the Cuban Marines (top center) and returns fire, to no effect.

And with the enemy soldiers opposite them pinned down, Bowie 01 goes over the top, close assaulting the Communist defensive position.

But the Commies (bottom right) put up a helluva fight and send the Cuban Marines packing!  Bowie 01 falls back to cover (top left), suppressed.

The bad guys give chase, cresting the hill and skylining themselves.

Bowie 02 (bottom center) spots them and opens fire...

But it's not enough to keep the determined FSNL troopers from closing with Bowie 01!

Bowie 01 is knocked out and the Communist soldiers charge Bowie 02, who again opens fire...

But again the Cuban fire is ineffective and now the Communists close with Bowie 02.  The night air is pierced by furious burst of gunfire, the sharp crack of hand grenades, and the screams of men...

Bowie 02 knocks them out (casualty figures at left), then climbs the hill (top center) and takes up defensive positions.

On the enemy left, their AGL (bottom center) opens fire on the Cuban HMMWV (top left) as their commander moves over to rally his tank crew (right).  Bowie 04 is suppressed, but...

The tank crew panics and falls back (top right, from bottom left)!!!

The Cuban .50-cal HMG crew (bottom left) is astonished to see the enemy tank turn tail and run, and so they do everything they can to hurry it along on its way: the .50-cal begins pounding out tracers, chasing the T-72 (top right).

Not only does the .50-cal fire convince the tankers to quit the battlefield, it also suppressed two Communist rifle teams nearby!!!

*Yeah, the tank panicked and fell back, then I had the .50-cal light them up and score another 'fall back,' so the tank left town!

On the Cuban left, Bowie 02 (bottom left) fires on enemy defensive positions (top left), to no effect.

While on the Cuban right, the HMMWV (bottom right) and Bowie 04 (left bottom) return fire on the enemy AGL (top center).

Knocking it out!!!

Bowie 03 (bottom left, with Bowie 05 at far right) opens fire on an enemy rifle team (top right).

But they miss and the bad guys (bottom center) return fire, missing too.

On the enemy right, an enemy rifle team (bottom left) fires on Bowie 02 (top right), missing.

The Communists' far left team (bottom center) continues firing on the Cubans opposite him, suppressing Bowie 03, atop the hill (top center).

The enemy rifle team moves up (far right), but Bowie 04 (far left, with Captain Madre-Animral next to them) spots them and opens fire.

But the Cubans miss and the bad guys make it to cover, perilously close to the suppressed Bowie 05 (far left)!

On the Communist right, a rifle team (center right top) opens fire on Bowie 02 (top left) as the enemy commander moves right (far right) and rallies a suppressed rifle team.

*Very admirable that they're not just giving up after their tank ran and their AGL was knocked out.

The fire suppresses Bowie 02 (top left) and the enemy team moves up (center, from far right), looking to take advantage of this opening.  But, the dogged Cuban Marines spot the advancing enemy and quickly rally themselves back into fighting shape.

While on the Cuban right, Captain Madre-Animral rallies Bowie 03 (red bead)...

And then Captain Madre-Animral and his command team charges down the hill to rally Bowie 05 (bottom right, from top center), solidifying the line.

As Bowie 03 (bottom center) lays down covering fire, engaging the enemy troops in the village (top center).

Catching them in the open and knocking out a rifle team as the enemy CO looks on helplessly (there's a suppressed rifle team at top right).!

Bowie 03 then begins moving down the hill (top left), but the Communist team on their far left (bottom right) spots them and fires.

It's ineffective and Lt Peria is able to get his men into cover!

And while they (top left) are doing that, Bowie 04 (bottom left) returns fire on the nearby enemy troops (far right).

The Communists are suppressed and Bowie 04 moves up...

And the Communist left flank collapses as the last enemy team there surrenders!

The enemy commander and his last two teams retreat, ending the fight!

TF Bowie defeated FSNL4 and will hold in place (E4) as the Communists are forced to fall back (E5).  FSNL4 will most likely continue to withdraw, likely will hold, and less likely will counterattack next turn.  Hmmm, kinda interesting there, I probably screwed up again.  By my count, FSNL4 has now been involved in two battles, and both times they took pretty heavy casualties, so probably I should have eliminated them as an effective fighting force from the campaign, rather than allow them to survive by falling back.

Well, not without a few tense moments, but nowhere near as intense as the previous fight, but that's okay, my heart can only take so much.  Not too much to talk about, a pretty conventional, straight forward fight, the only real issue being how the Communists can't seem to get their damned T-72 in the fight.  Now, it's true that these battles are infantry-centric, and while any tank or AFV on the table is going to be pretty powerful, the fact that there won't be many of them (a max of three at one time) means that they're certainly going to draw a lot of attention, and I think you've seen that by both the Cubans and the Communists, when they're able to isolate a tank/AFV they just keep feeding forces into the fight against it in order to destroy it, no qualms about using all their activations/troops to do that.  

Casualties:
Cuban: ~10 men
Communist: ~20 men with ~5 men captured

Decorations:
Bowie 02 Team Leader was awarded the Bronze Star w/V for fighting off an enemy assault that had just eliminated Bowie 01, then counterattacking and eliminating the threat and stabilizing the Cuban left flank.

Next up we have the SLA's A Company defending against an assault by the FSNL's 6th Company.

V/R,
Jack

Thursday, June 18, 2020

Operation Chunky Bandit Mini-Campaign Turn 3

All,

Here are the map moves for Turn 3 of my campaign in South Leon.

Here's what happened:

FSNL1: ELIMINATED
FSNL2: Push west to outflank the Cuban incursion, A3 from A5
FSNL3: ELIMINATED
FSNL4: Hold, E4, locked in combat with TF Bowie and will fight again ASAP
FSNL5: ELIMINATED
FSNL6: Attack SLA A Co, B5 from B4
FSNL7: Fall back to east, D6 from D4
FSNL8: Push west, C6 from C8
FSNL9: Hold, D12
FLA1: Advance to screen SLA D Co, B2 from A1 
FLA2: ELIMINATED
FLA3: Hold and regroup after defeat by TF Razor, F6
FLA4: Advance west, B9 from A10
FLA5: Advance west, C9 from D10
FLA6: Advance west, E10 from E12

SLA A Co/TF23: Hold, defend against FSNL6, B6
SLA B Co/TF23: Fall back to straighten line, B4 from C5
SLA C Co/TF Black: Hold, B5
SLA D Co/TF23: Fall back to screen FLA1, C2 from C4
TF Hammer: Advance east, C5 from C3
TF Hawk/Dusty: Advance east, D5 from D3
TF Bowie: Hold, E4, locked in combat with FSNL4 and will fight again ASAP
TF Redleg: Fall back to rest, regroup, and replenish, E2 from F3
TF Razor: Fall back to rest, regroup, and replenish, F2 from F4

So, it's night time, but we've only got two fights, and one's a re-fight!  TF Bowie and FSNL4 shall resume knocking the hell out of each other, and the SLA's A Company must defend its positions against FSNL6.

V/R,
Jack

Operation Chunky Bandit #37 (Ground)

All,

1400 on 4 Aug 1990
Mini-Campaign Fight #11
TF Bowie vs FSNL 4th Company


1st Lt Madre-Animral
Bronze Star w/V, War of Liberation and South Leon campaigns
Commander, TF Bowie


1st Lt Madre-Animral leads his TF Bowie straight east, in pursuit of the FSNL's 4th Company, whom they defeated and forced to withdraw earlier this morning.  This is a simple attack/defend scenario; the Cuban goal is to crush their enemies on the way to the capital, the Communist goal is to hold the ground.

Overview, north is up.  There is a hardball road running southwest to northeast, with a decent-sized village present (right top), as well as several knolls/hillocks.  Other than that we've got several cultivated fields and scattered jungle.

The opposing forces, allies on left and Communists on right.

The figures are all 10mm from Pendraken, Minifigs UK, and Butler's Printed Models.  I'm using Ivan's "5Core Company Command," playing on a 3' x 2' surface with simple terrain to speed up the process.  The hootches are from Jimmi at Flashpoint Minis, the roads are from Fat Frank, the hills are from Warzone, the fences are from Sarissa, the fields are from Hotzmats, the trees are cake toppers, and when you see the rivers, they're from Wargamers Terrain.  I'm playing solo and will randomize enemy deployment using a system of blinds borrowed from Joe Legan's "Platoon Forward."

In terms of caliber of forces, the SLA, FSNL, and FLA troops will all be treated equally, except for the fact the FLA troops will be treated as fanatics, in terms of their willingness to advance into close combat.  The Cubans are more tactically and technically proficient, and so they will receive extra firing dice, better rallying capability, bonus in close combat, and sometimes will have a second command stand on the table.

1st Lt Madre-Animral's force consists of: a command stand, five rifle teams, a HMMWV-mounted TOW Anti-Tank Guided Missile (ATGM), and a HMMWV-mounted .50-caliber Heavy  Machine Gun.   These troops are Minifigs' Modern US with BPM HMMWVs, thought the mounted weapons are cut-down Minifigs' Modern US.

TF Bowie also has some heroes amongst its ranks:
Bowie 03 Team Leader was awarded the Silver Star

The Communist force consists of: a command stand, five rifle teams, a T-72 main battle tank, a BMP-2 armored fighting vehicle, and a BTR-70 armored personnel carrier.  The figures are all Minifigs' Modern Soviets.

*Uhhh, damn, it sure looks like the Commies managed to regroup.  They really came loaded for bear, fully ready for their last stand.

Overview, this time with troops.  You can see the Cubans at far left, the Communists from center line to right.

The Cuban initial dispositions, from left: Redleg 01, 02, 03 with Lt Madre-Animral right behind him, Redleg 04, the TOW-HMMWV, the .50-cal HMMWV, and Redleg 05.

The Communists have rifle teams at top left, far left, atop hill at top center left, at right, and at center, with their commander just behind him, their BMP atop hill at top right, their BTR in the village at right, and their T-72 at bottom right.

Time to die!  The fight begins with the Communist BMP (bottom right) sighting in on the TOW-HMMWV (top center left) and opening fire with its 30mm autocannon...

Wrecking the HMMWV and killing the crew!

*And wrecking the Cubans' only long-reach anti-tank capability.  I am reviewing my notes and cannot, for the life of me, figure out why I let the bad guys have the first activation here, it's a Cuban attack and I normally allow the attacker the first activation unless the tactical situation dictates otherwise.  An ambush, for example, but this is no ambush, the Cubans are chasing an enemy they previously defeated.

But hell with it, there's the new campaign narrative: Earlier this morning TF Redleg defeated a probe conducted by FNSL4, which promptly fell back to their main defensive line.  In its zeal to pursue, TF Redleg walked right into strong enemy defensive positions.

Having drawn blood, the BMP then falls back (top right, from far left), daring the Cubans to follow!
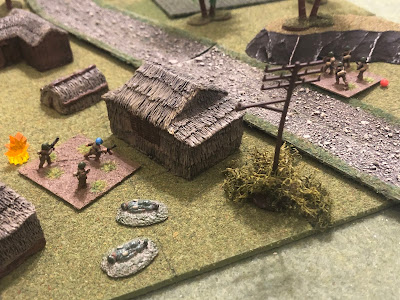
Then the BTR opens up from the village (top right) with its 14.5mm HMG, targeting the other Cuban HMMWV (far left)...

The fire is ineffective and the HMMWV crew returns fire (bottom center left) with its .50-cal HMG...

But they miss, too, so the BTR displaces forward (bottom center, from center top), out of line of sight behind the hill at bottom left.

Bowie 05 dashes up to cover (center left, from off camera to bottom left), but an enemy rifle atop the nearby hill (top right) takes them under fire, pinning them down.

So Bowie 04 moves up in support (far left, with Bowie 05 at bottom center) and engages the enemy rifle team (top right).

But they only end up exchanging ineffectual fire with the Communists (bottom right).

With Bowie 04 (center, at bottom end of the knoll) laying down covering fire, Lt Madre-Animral and the remaining HMMWV push forward (just above Bowie 04, from bottom left).

The enemy rifle team atop the hill (bottom right) continues pouring lead into Bowie 04 (top left)...

Knocking them out of the fight!

*The bad guys rolled up a 'normal' activation plus the random event "accurate fire," which provided one team an extra Kill dice.  Thanks...

On the Communist left, a rifle team dashes ahead (bottom center, from bottom right, with the bad guys that just whacked Bowie 04 at top right) and fires on Bowie 05 (far left).

Rounds zip past their heads, but the Cuban Marines keep calm and return fire, putting the enemy team "men down"!

Bowie 05 then turns its fire back on the hilltop, but again the two simply exchange ineffectual fire.

*The bad guys get a break: the Cubans roll up a "Firefight!" but only one team (Bowie 05) is in position to fire on an enemy unit...

The enemy BTR rolls up on the far left flank, rallying the 'men down' rifle team (bottom center) and opening fire on Bowie 05 with their 14.5mm HMG!  Bowie 05 is suppressed...

And the Communists quickly follow up with a close assault!

Bowie 05 is knocked out (casualty figures at far right) and the enemy rifle team pushes across the road, where Bowie 03 (top left, with the CO and HMMWV at top center) spots them and opens fire, suppressing the encroaching enemy infantry!

Lt Madre-Animral (center top left) sends the HMMWV forward (center top right), but it's engaged by the enemy rifle team dominating the battlefield from atop the hill (bottom right), pinning the crew!

*The Cubans have taken such heavy casualties that they are now reduced from taking three actions per 'normal' activation to taking only two, same as the Communist forces.

Lt Madre-Animral immediately pushes up and rallies the crew (top left) as Bowie 03 (bottom left) continues firing on the suppressed enemy rifle team that overran Bowie 05 (far right)...

And then the Cuban Marines charge, looking to stabilize the line!

Point-blank gunfire and hand grenades see the enemy team knocked out (far left) so Bowie 03 dashes ahead (far right bottom), looking to pressure the enemy BTR (top right) into falling back.

On the enemy's far right flank, they push a rifle team up (far left, from center) to pressure the Cuban HMMWV and CO (off camera to left).

Bowie 02 (bottom left), still on its start line, spots the bad guys (top right) and opens fire.

Suppressing the enemy rifle team, though they are immediately joined by the FSNL BMP as the enemy keeps up the pressure!

The HMMWV vehicle commander orders his gunner to engage the Communist armored fighting vehicle with their .50-cal HMG.

But the fire is inaccurate and the BMP crew answers with its 30mm autocannon.

The HMMWV is immobilized, and though the crew stays with the vehicle, they're suppressed.  Lt Madre-Animral rallies the HMMWV crew...

Then charges the Communist hilltop position!!!

*The Cubans rolled up a 'scurry,' which allowed the CO to rally the HMMWV and then charge without drawing react fire.  But it's ugly, one command stand vs an armored fighting vehicle and a suppressed rifle team.

But Lt Madre-Animral is hardcore, motivated, gungy, all that crap, and he pulls it off, knocking out the BMP and the enemy rifle team in close combat!!!

While on the far right flank, Bowie 03 charges the Communist BTR!

*Again, the 'scurry' a allowed them to charge without drawing react fire.  The BTR is suppressed, but it's an armored vehicle with limited capability vs close-in infantry assault and with little situational awareness, while the Cubans have the initiative and a quality bonus, so it's Cuban +2 and Commie -1 on the opposed D6 die roll.

Bowie 03 knocks out the BTR (bottom left) and climbs the hill, close assaulting the enemy rifle team that has had such an out-sized impact on this battle.

Bowie 03 puts the hilltop bad guys out of the fight (center left top) and charges downslope, heading for another Communist rifle team (far right)!

Having watched these Cuban savages tear apart their BTR and comrades on the hill, they promptly throw down their weapons and surrender!

Lt Madre-Animral (right) orders Bowie 01 and 02 to get off their asses and move up (top left).

They take up position on the northern hill (to left), with the immobilized HMMWV behind them and Bowie 03 holding down the right flank (bottom center), as the Communists move their last remaining rifle team into the village, joining their commander and the T-72 (right/top right).  And from there they sit and stare at each other, each firmly planted in the ground it holds, but too weak to dislodge the enemy from theirs!

Both commanders put out a call for reinforcements and order their men to dig in.


TF Bowie and FSNL4 beat the absolute hell out of each other, fighting to a draw.  Both battlegroups will remain in place (E4) and fight again as soon as possible next turn, after having received reinforcements.

Holy crap, that was insane!  Things went wrong right from the get-go, but then the heroic (and lucky) actions of Lt Madre-Animral and Bowie 03 not only saved the Cubans from catastrophic defeat, they actually completely turned the tables on the enemy, knocking out two of their three vehicles and four of their rifle teams in close combat!  Quite the turnabout, and it's funny sometimes, sometimes in the game you just get to the point where you're like "I'm getting the @#$% kicked out of me, I might as well charge and see what happens," and the next thing you know you've racked up quite a string of victories and totally changed the complexion of the game.

A funny side note: Bowie 03 is listed on the roster as a hero (should get another +1 in close combat and 2D6 when rallying), but I screwed up and didn't use it!  I thought it was Bowie 04 that was supposed to be the hero, and they got mowed down by the Communist rifle team on the hill, right at the start, so Bowie 03 went on that rampage without having the benefit of their "hero" status!

Casualties:
Cuban: ~20 men, two HMMWVs destroyed (the immobilized HMMWV had its .50-cal HMG dismounted and the crew destroyed the vehicle)  
Communist: ~25 men, one BMP-2 and one BTR-70 destroyed, and ~5 men captured

Decorations:
Bowie 03 Team Leader was awarded the Medal of Honor for halting the enemy advance threatening the Cuban right flank, then, finding his team completely isolated and alone, leading a counterattack that destroyed a Communist armored personnel carrier, eliminated two enemy rifle teams, and captured another in close assault.  Bowie 03's team leader was given a battlefield commission, promoted to the rank of 2nd Lieutenant.

1st Lt Madre-Animral, TF Bowie commander, was awarded the Navy Cross for dashing into heavy enemy fire to rally the crew of an immobilized HMMWV and then leading his command team uphill to close assault a Communist armored fighting vehicle and rifle team, knocking both out in close combat that saved the crumbling Cuban left flank.  Lt Madre-Animral was meritoriously promoted to Captain.

Next up we have the Turn 3 map moves, which will be followed by Captain Madre-Animral's Task Force Bowie and the FSNL's 4th Company having at each other again! 

V/R,
Jack