All,
It is 0330 local time on 27 July 1990, and a team of Free Cuban commandos is on the move, conducting a clandestine rescue mission in Oman.
Following the War of Liberation, in which exiled Cubans successfully staged a coup against the Castro regime and created a democratic government, Castro hardliners, backed by Venezuela, were causing trouble in the homeland with various acts of terrorism. The Cuban government actually sought to buy-off the hardliners in Operation Payoff, which was a trap from the beginning. Cuban Special Operations were dispatched to bring the provocateurs to justice; implicated were Castro die-hards, member of the Venezuelan government, as well as members of the Iranian Revolutionary Guards Corps (IRGC). All known accomplices were dispatched in Operation Payback. But the world continues to be a very dangerous place, with threats to Cuban citizens and interests not only in Cuba but also without, and so the Cuban Defense Minister created Section 20 to deal with threats outside the homeland.
Section 20 is a self contained Special Missions Unit, comprised of its own Command, Communications, Logistics, Transportation, Intelligence Collection (HUMINT, SIGINT, and IMINT), and Direct Action elements, whose mission is to detect, identify, and neutralize threats to Cuban citizens and interests worldwide in a clandestine manner, answering directly to the National Command Authority.
Two days ago a wealthy Cuban businessman was abducted off the coast of Oman while on a chartered fishing expedition. Section 20 immediately went to work and less than 48 hours later they had confirmed the abductee's location in a small fishing village near Sur, Oman, right down to the house he was being held in. The planners of the Command Element immediately went to work, working up a plan, setting in motion the logistics and transportation elements. By 0230 on 27 July 1990, the shooters of Section 20 had donned their gear and were entering the water, beginning their swim into the target area.

Overview of the target area, north is down. At left is the Cuban SOF's entry, coming out of the water after having SCUBA'ed in. At right is the fishing village where the Cuban businessman is being held; he's actually in the walled compound at top right, the second building down, which is the objective. The building above the objective is the house where the terrorist commander is sleeping. All other buildings are civilian-owned, with civilians not happy and fearful due to the arrival of the terrorists, so they're all staying inside.
The objective building (far right), with the terrorist leader's hovel at top right.
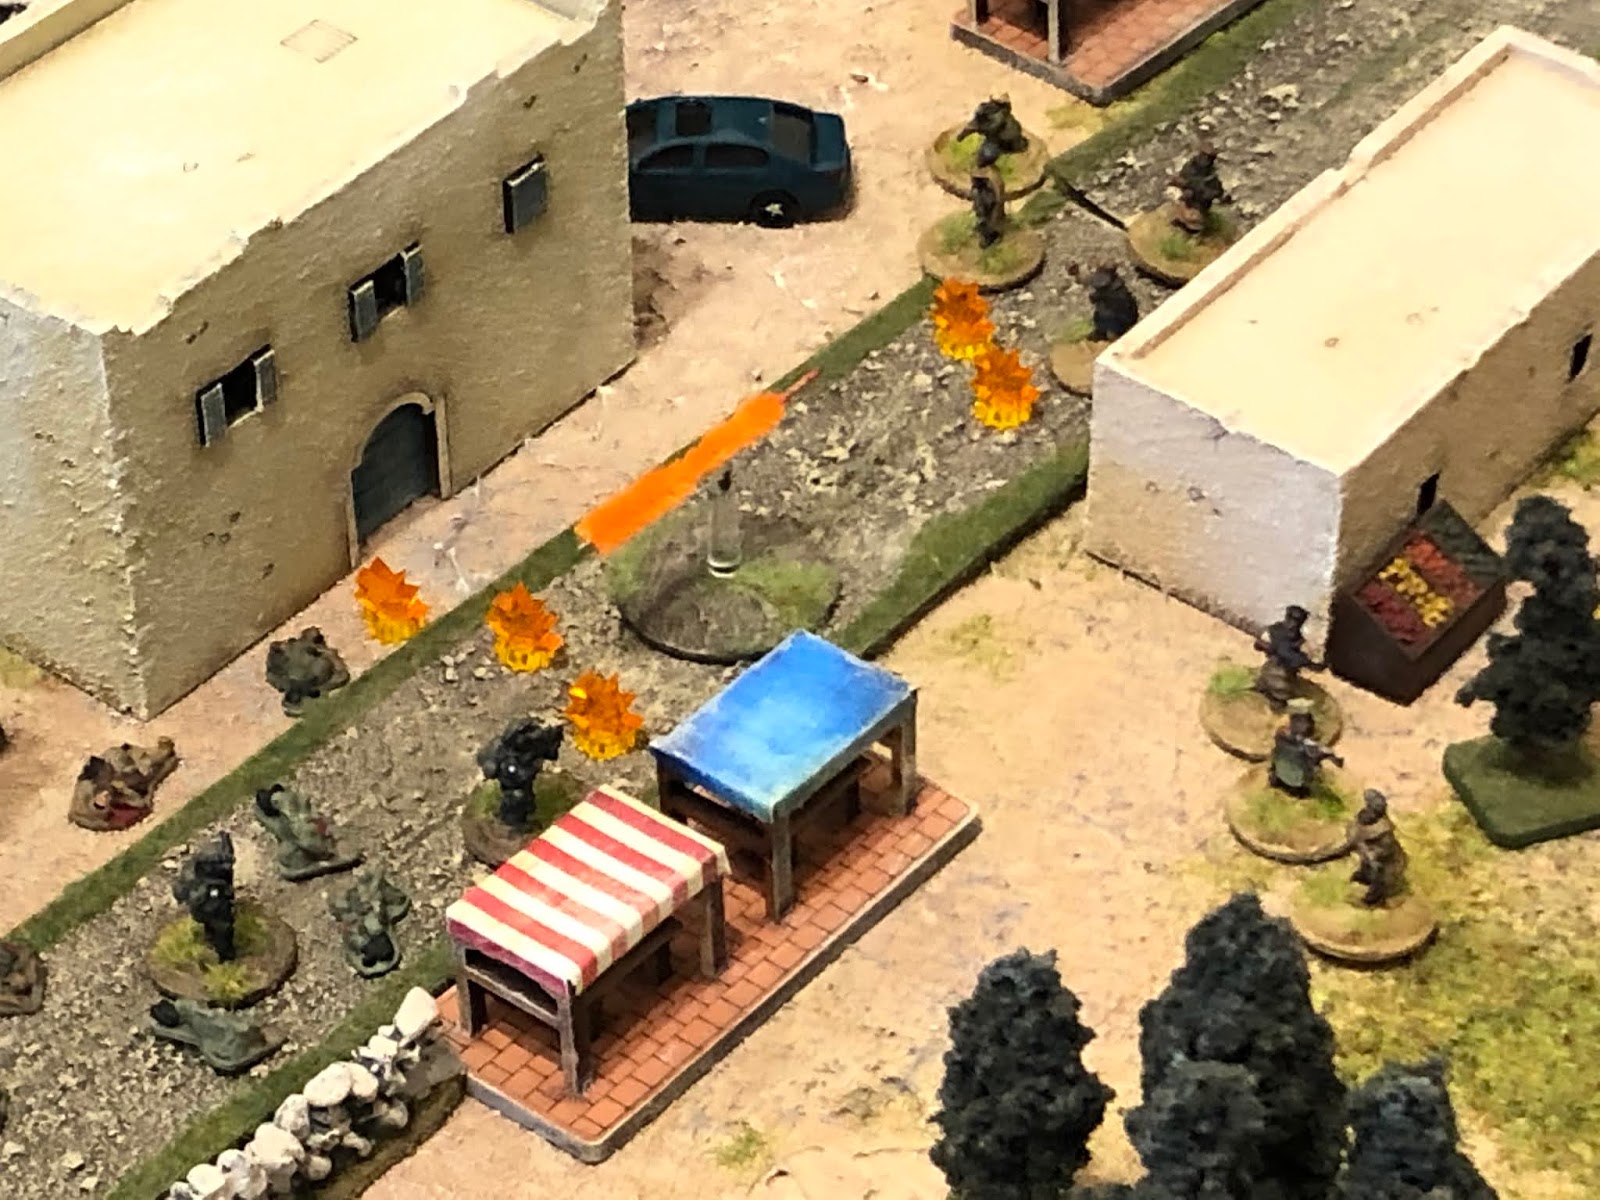
A look at the top center of the map.
Top left.
Bottom left. This is where the Cubans would actually come ashore, and I freaked out a bit at the lack of cover, so I ultimately ended up adding some fishing boats at bottom left for the Cubans to stage behind.
Bottom center.
And bottom right.
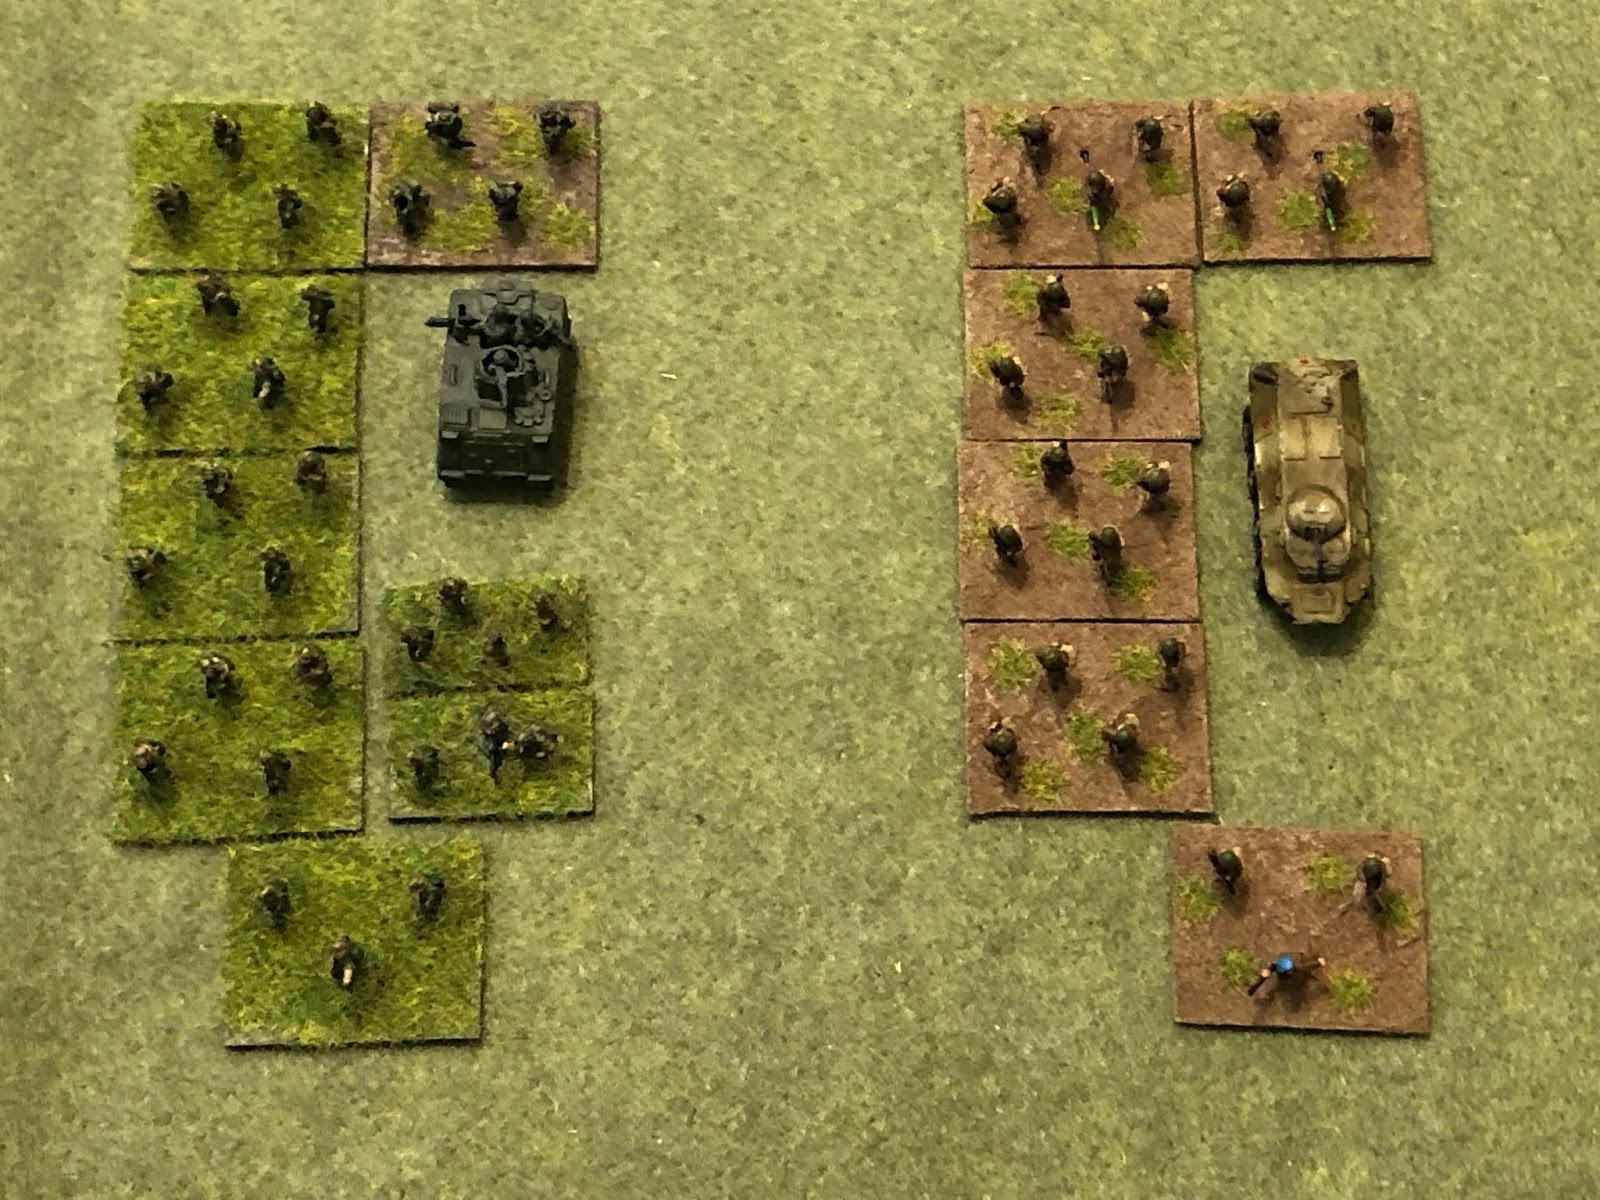
The opposing forces, with Cuban SOF at left, the Cuban hostage at center, and bad guys at right. This is not an exact description of the enemy forces that will be faced during the game as not all bad guys pictured here will begin on the board, and some that are killed will be regenerated.
We're playing this game in 15mm using Osprey's "Black Ops" ruleset. The good guys are from Khurasan, the hostage is from Rebel Minis, and the bad guys are from Flytrap Factory. The mat is from War Sigil Mats, the buildings and fruit stands are Crescent Root Studios, the roads are Fat Frank, the walls and fountain are JR Miniatures (now Novus Studios?), the trees are La Petite Armee, and the rock escarpments are from someone on Ebay (sorry, I don't recall who).
I'm playing this out with my two boys; they control the Cuban SOF, while I'm sort of umpiring and controlling the bad guys, which are really programmed opponents until things 'go loud.' The way the rules work is that the SOF dudes are sneaking around and you roll to see what the bad guy sentries are doing, until the SOF dudes get discovered (make too much noise, get seen, then the alarm gets raised), at which point it turns into a 'regular' shooty-type wargame.
The Section 20 Direct Action Team, divided into the Assault Element and the Security Element.
Assault Element (top row, left to right):
Bravo 01, Team Leader with HK-416
Bravo 08, Designated Marksman with suppressed rifle
Bravo 04, Linguist with HK-416
Bravo 03, Operator with HK-416
Security Element (bottom row, left to right):
Bravo 02, Team Chief with HK-416
Bravo 07, Machine Gunner with Mk-48
Bravo 05, Operator with HK-416 and M-320 Grenade Launcher
Bravo 06, Team Medic with
HK-416 and M-320 Grenade Launcher
The bad guys, with a bunch of different rifles, RPGs, a PK machine gun, a Dragunov sniper rifle, and even a dude strapped with a Suicide Vest (bottom right).
The objective: rescue the abducted Cuban businessman and return him safely to Havana.
The 'new' entry point for the Cubans, with some fishing vessels offering some cover.
Overview, now with troops. You can see the Cuban SOF at bottom left, the objective at top right, and bad guy sentries posted all over the map, from the north-south running road at left to far right.
The Cuban deployment area; the Assault Element is at top, Security Element at bottom.
Looking north to south, you can see bad guy sentries at bottom left, bottom center, and bottom right.
Moving south, we've got more sentries: bottom center left, right bottom, left, top left, center top right, and at top right, atop the Objective Building. So lotsa bad guys roaming around, not exactly expecting trouble, but on the lookout nonetheless.
The Direct Action Team swimming in.
And entering the target area.
Immediately the SOF spot a nearby sentry armed with an AK. Bravo 01 orders Bravo 08 to take him out, so Bravo 08 creeps forward, stalking the terrorist sentry in the dark, night vision goggles in place.
Shtack, shtack goes the double-tap on the suppressed rifle...
And down goes the first bad guy.
The Cubans push forward, looking to get off the beach as quickly as possible.
The nearest sentry (bottom right) yawns and stretches, completely unaware of the nearby threat.
The guard at the other end of the beach (top left, on road) moves north but can't see the SOF dudes (bottom right) in the darkness.
The Cubans continue moving off the beach, with Bravo 02 pulling up the rear.
Bravo 05 and 06 (bottom left) spot the sentry on the escarpment (top right) as Bravo 08 pushes up to the trees (left), though he doesn't have a shot on the sentry.
But the sentry heard something and comes down from his perch (bottom left, from top right, with Bravo 05 visible at top center).
The sentry at the other end of the beach (bottom left) is causing some anxiety for the Cubans (top right) as he continues strolling north up the street.
But they've got bigger issues: the sentry from the northern escarpment calls out to his friend and receives no response, so he turns towards the beach (bottom center, from bottom center right)...
Where he spots Bravo 05!!! "Commandos, commandos are here," he exclaims as he begins firing his AK!!!
The Cubans immediately respond, with Bravo 01 opening fire with his unsuppressed weapon.
The sentry is down, but quite a bit of noise has been made. We'll see if that draws further attention...
The sentry at the other end of the beach (bottom left) has his interest piqued, but rather than advance towards the Cubans for a better look (top right), he decides to go up, so he starts up a nearby stairwell.
The enemy sentry in the northwest heard the firing, but doesn't go straight towards it, apparently thrown off in the dark. Instead, he advances straight up the road, stepping off next to a black sedan (center bottom), where he spots a friend coming from further south (center, the sentry that was next to the fountain at top center). "Ahmed, was that you? What was that?"
"I don't know, Habbibi. You should check it out."
"No,
you check it out, Ahmed, I have more terrorist seniority!"
"Yes, Habbibi…"
The fountain sentry continues north (bottom right), where he is in position to spot Bravo 05 (left, between the rocks and the trees), but he doesn't see anything.
The assault element breaks off, heading south down the street, with Bravo 03 leading (top center), as Bravo 05 moves up the escarpment (bottom center, with the fountain sentry at top right).
Bravo 05 continues pushing (bottom center, from left) looping all the way around, getting behind the northwest sentry (right bottom).
Further south, Bravo 05 (bottom left) covers as Bravo 04 hops the wall and sneaks up to the trees (center, from bottom left), stalking the fountain sentry.
Bravo 04 moves in and silently dispatches him with his Ka-Bar.
While back in the north, Bravo 05 (bottom left) covers as Bravo 06 moves out to do the same to the northwest sentry (bottom center).
And quickly does.
Two more enemy sentries are down (at trees at far right and near sedan at top right) as the opposite end of the beach sentry gets onto the roof (bottom left) and two more sentries (left and top left) begin snooping around.
The Assault Element pushes south down the street (bottom left), except Bravo 04, who's kinda caught out in the center (dead center), as the Security Element moves right (top center right, from the building at top center to the orchard at top right).
The Security Element continues moving up (bottom right, with objective building at top right and the Assault Element behind the buildings at far left, minus Bravo 04, who is at center left).
Bravo 08 walks point, with Bravo 03 slack.
Bravo 08 levels his suppressed rifle on the sentry on the roof.
And drops him.
Then dashes across the street (left, from bottom right)>
Ugh, I missed some photos, but we've had a very interesting development. My older boy had pushed the Security Element up behind the building at top center left; I asked him what he planned on doing, and he said he didn't really know. I reminded him that the Security Element's job was to keep bad guys off the Assault Element so they could get onto the objective and rescue the hostage, then keep the way clear for the Assault Element to exfil off the objective. So he moved his Security Element back into the center; you can see Bravo 02 and Bravo 05 hiding behind the fruit stand at bottom right, waiting for the sentry at far left to come strolling up the street, where they plan to quietly take him in hand to hand, but just then an enemy patrol of four men arrives nearby (top center), right where the Security Element had been!

Fortunately for the Security Element (bottom right), the enemy patrol pushes south (top left, from top right), towards the Objective Building. Which is unfortunate for the Assault Element (off camera to bottom left), which has to get into the Objective Building and rescue the hostage. The Security Element is in a real pickle now, if they are looking to do their job...
The lone sentry continues lollygagging up the street.
While back on the left, the Assault Element continues pushing south. Bravo 08, still walking point with his suppressed weapon (bottom left), fires on another sentry.
And drops him (bottom left), but there's a sentry at the wall (top center left)...
He saw his buddy go down an begins screaming bloody murder, trying to alert everyone!
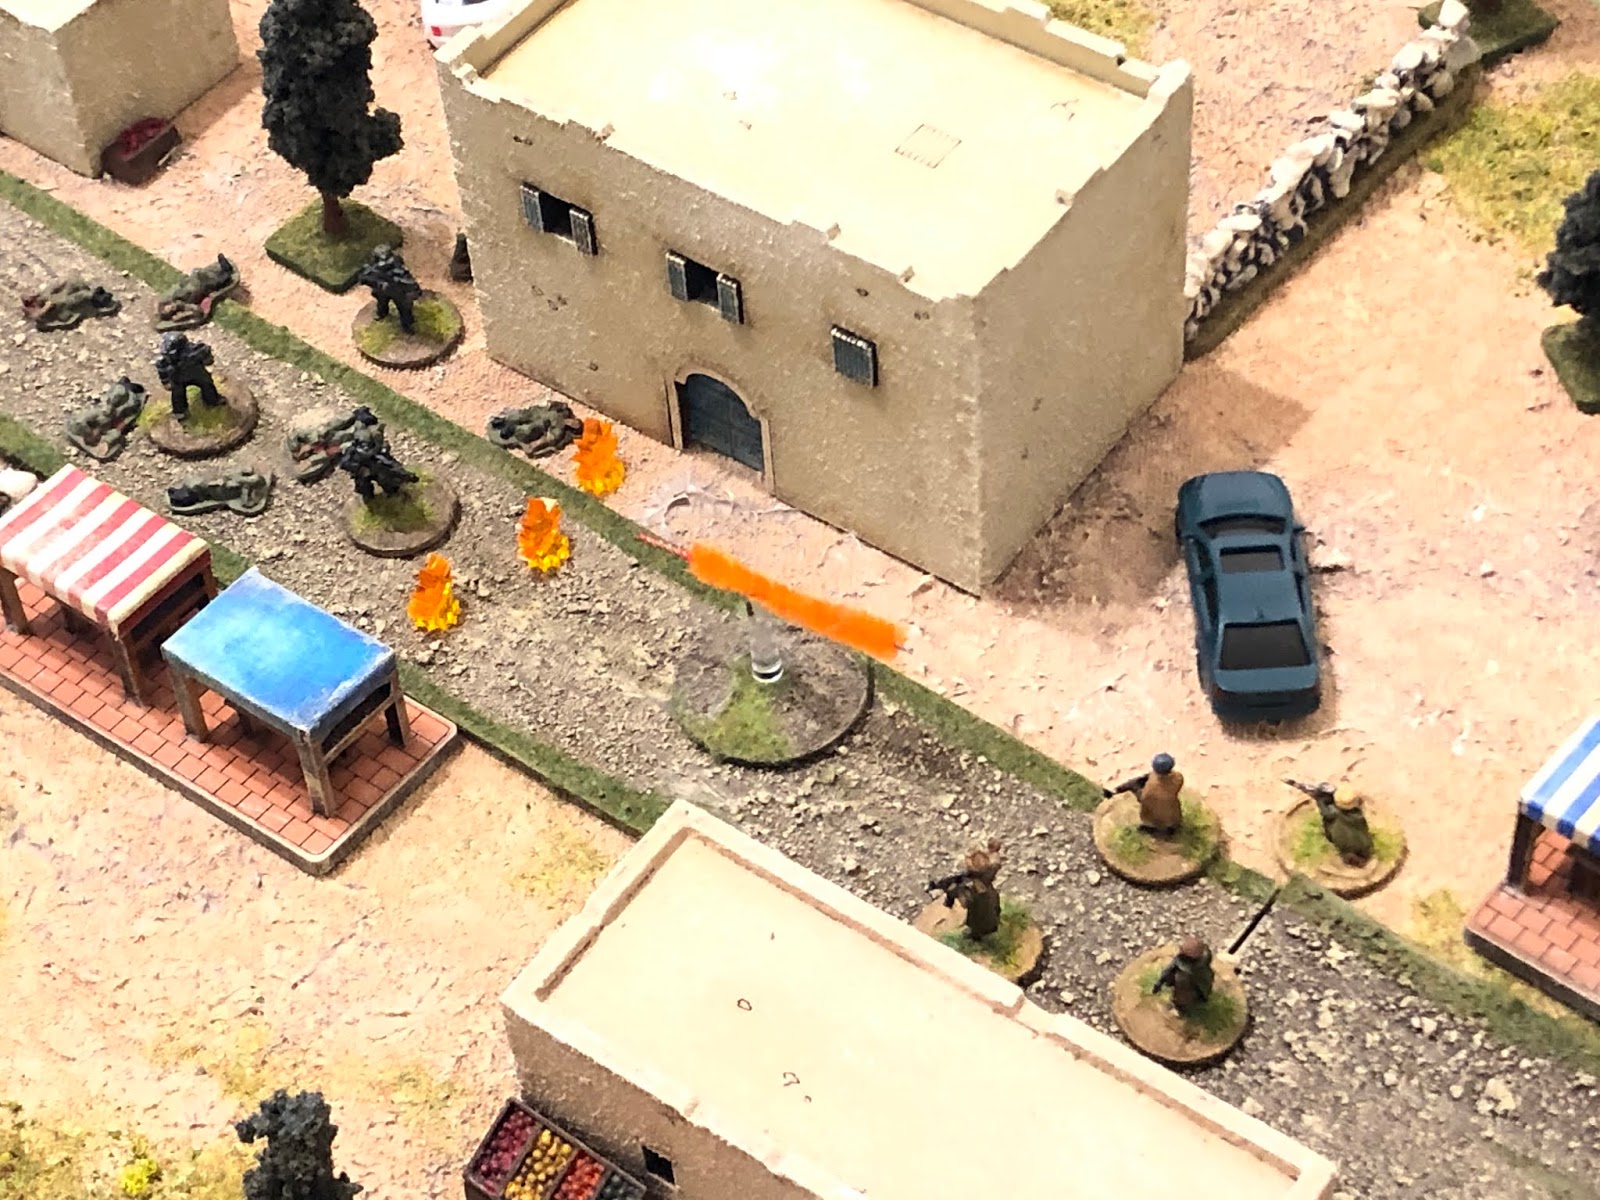
The guy moving up the street hears the screaming and actually turns around and moves south (center, from right, away from Bravo 02 and Bravo 05 at bottom right), towards the Objective Building (top left)!
But the enemy patrol (top right)...
Decides to push back north (top center, from far left), putting even more pressure on the Security Element (bottom right)!
The bad guy at the wall (left) still can't see any Cubans, but he keeps screaming "they shot Talib, they shot Talib!!!" The dude with the RPG on the Objective Building (top right) squints into the darkness, but can't see anything.
And then the sentry on the road reverses course again, moving back up the street towards the Security Element (center, from bottom left, with the enemy patrol at top center).
Bravo 02 and Bravo 05, still trying to be quiet, jump him, knives drawn!
But in their desire to remain silent they don't go strong enough and they don't manage to subdue him (bottom right), with the ensuing scuffle making enough noise that it draws the enemy patrol over to see what the hell is going on!!!
More hand to hand combat breaks out...
And one of the terrorists goes down from slashes from Bravo 02's knife!
Bravo 06 rushes to the wall, sees his comrades mixed up and outnumbered, and opens fire with his unsuppressed rifle, but it's such a mess that he doesn't manage to hit anything!!!
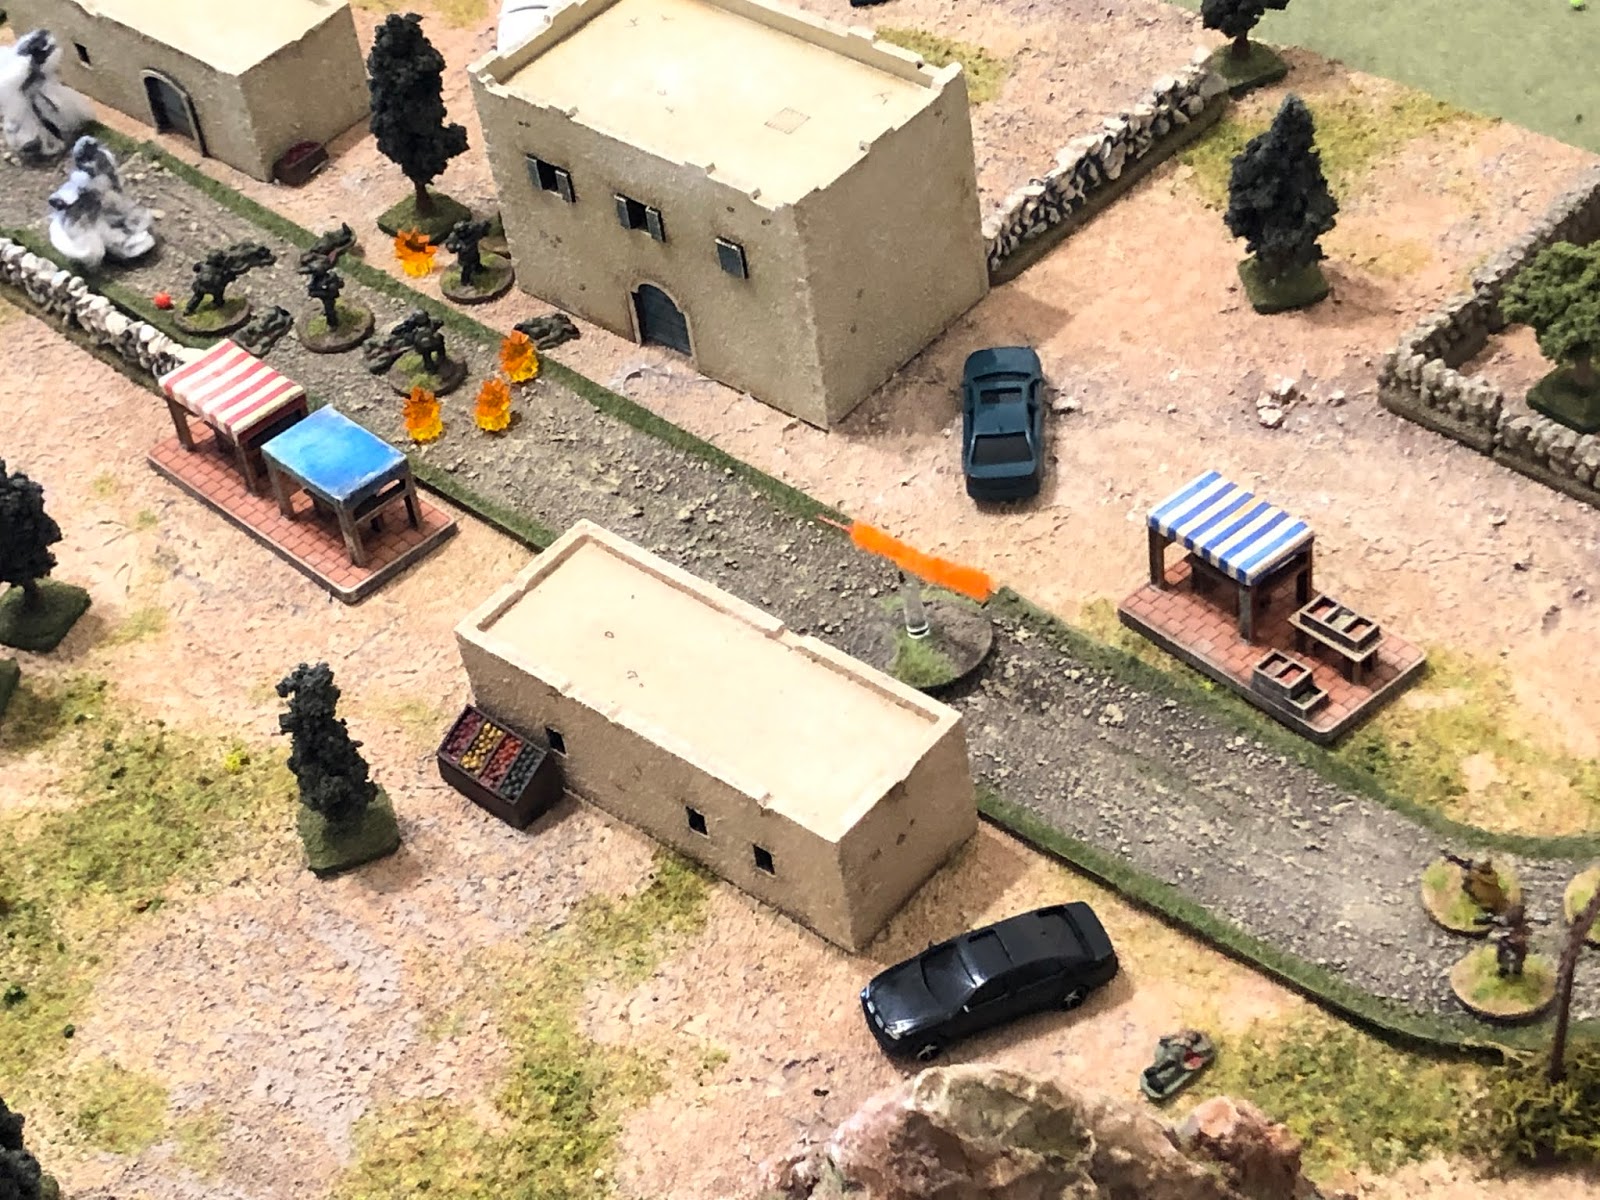
Figuring Bravo 02 gave the okay to 'go loud,' Bravo 04 moves up (bottom left) and fires on the enemy rocketman, atop the Objective Building (top right).
And puts him down!
But with all that shooting, the terrorist leader has finally awakened! He stumbles out the door, groggily adjusts his turban, and tersely asks the nearby sentry, "what the hell is going on out here?"
But before the sentry can answer, the Bravo 07 moves into the street (bottom right) and lets rip with an 8-round burst from his Mk-48 light machine gun!
Two bad guys go down in the hail of fire!
Back on the left, Bravo 01 and 03 are just kinda hanging out (bottom center) as Bravo 08 pushes ahead (bottom left) and takes a shot at the sentry at the wall (top left), the one the enemy commander was talking to, but the rounds slam harmlessly into the stone wall.
The terrorist leader raises the alarm!!!
Back in the street with the Security Element, Bravo 02 (bottom right) is still tangled up with the sentry...
He successfully disengages, steps back (bottom center, with Bravo 07 above him and Bravo 05 to his left), grabs his rifle, and opens fire, but he trips and misses both targets...
Bravo 08 (top left) continues scanning for targets as Bravo 01 mutters a curse under his breath; "we're too loud too soon, gotta do something or they're gonna whack the hostage. Let's go!" And with that, Bravo 01 leads Bravo 03 back up the center street (right, from behind building at left, towards the Objective Building, which is off camera to top right).
Back with the Security Element, the melee is still rumbling. The Doc, Bravo 06, hops the wall and mixes it up with Bravo 05 and the two bad guys in the street.
With Bravo 01 and Bravo 03 (top left) finally moving on the Objective Building (off camera to top right) and the Security Element squabbing it out in the street (bottom right), Bravo 04 moves up (center top, on the road, from bottom left).
Bravo 07 charges into the melee!
As Bravo 08 pushes up (bottom right), continuing to target the sentry at the wall (top left) with his suppressed rifle.
Bravo 08 (top right) misses and the bad guy (bottom left) finally spots him and returns fire.
The Cuban SOF dudes of the Security Element are really slacking in their close combat skills...
Bravo 07 finally drops one (right)...
Then he, Bravo 05, and Bravo 06 converge on the last bad guy in the street.
And put him out, but as they're doing that another bad guy has come up (top center).
With Bravo 08 (far left) engaging the sentry at the wall (top right, with their commander behind him), Bravo 01 pushes up (center bottom, from bottom left) towards the Objective Building.
Bravo 08 continues his one-man fire and maneuver drill (bottom left).
While back in the street, Bravo 05 goes crashing into the last bad guy there (top left), and the two fall to the ground and begin rolling around as the other three members of the team look on, slack-jawed.
The enemy commander has successfully contacted his reinforcements via hand-held radio.
*The Cubans were hoping to be out of here by now, but so far haven't even reached the Objective Building, much less rescued the hostage...
And so a huge group of terrorists arrive from the north (top right), coming in behind the Security Element (top center)!
The good news: they are well away from the Assault Element moving on the Objective Building (top left).
The bad news: there are a bunch of them, and they have caught the Security Element out in the middle of the street...
A good look at what the cat dragged in.
They immediately fire two RPGs at the Security Element!
The rockets go long and only manage to suppress Bravo 06.
As the enemy PK machine gunner moves up (bottom right) and begins laying down fire.
Suppressing Bravo 02 (red bead) as Bravo 05 (center)...
Finally finishes off the last bad guy from the street brawl.
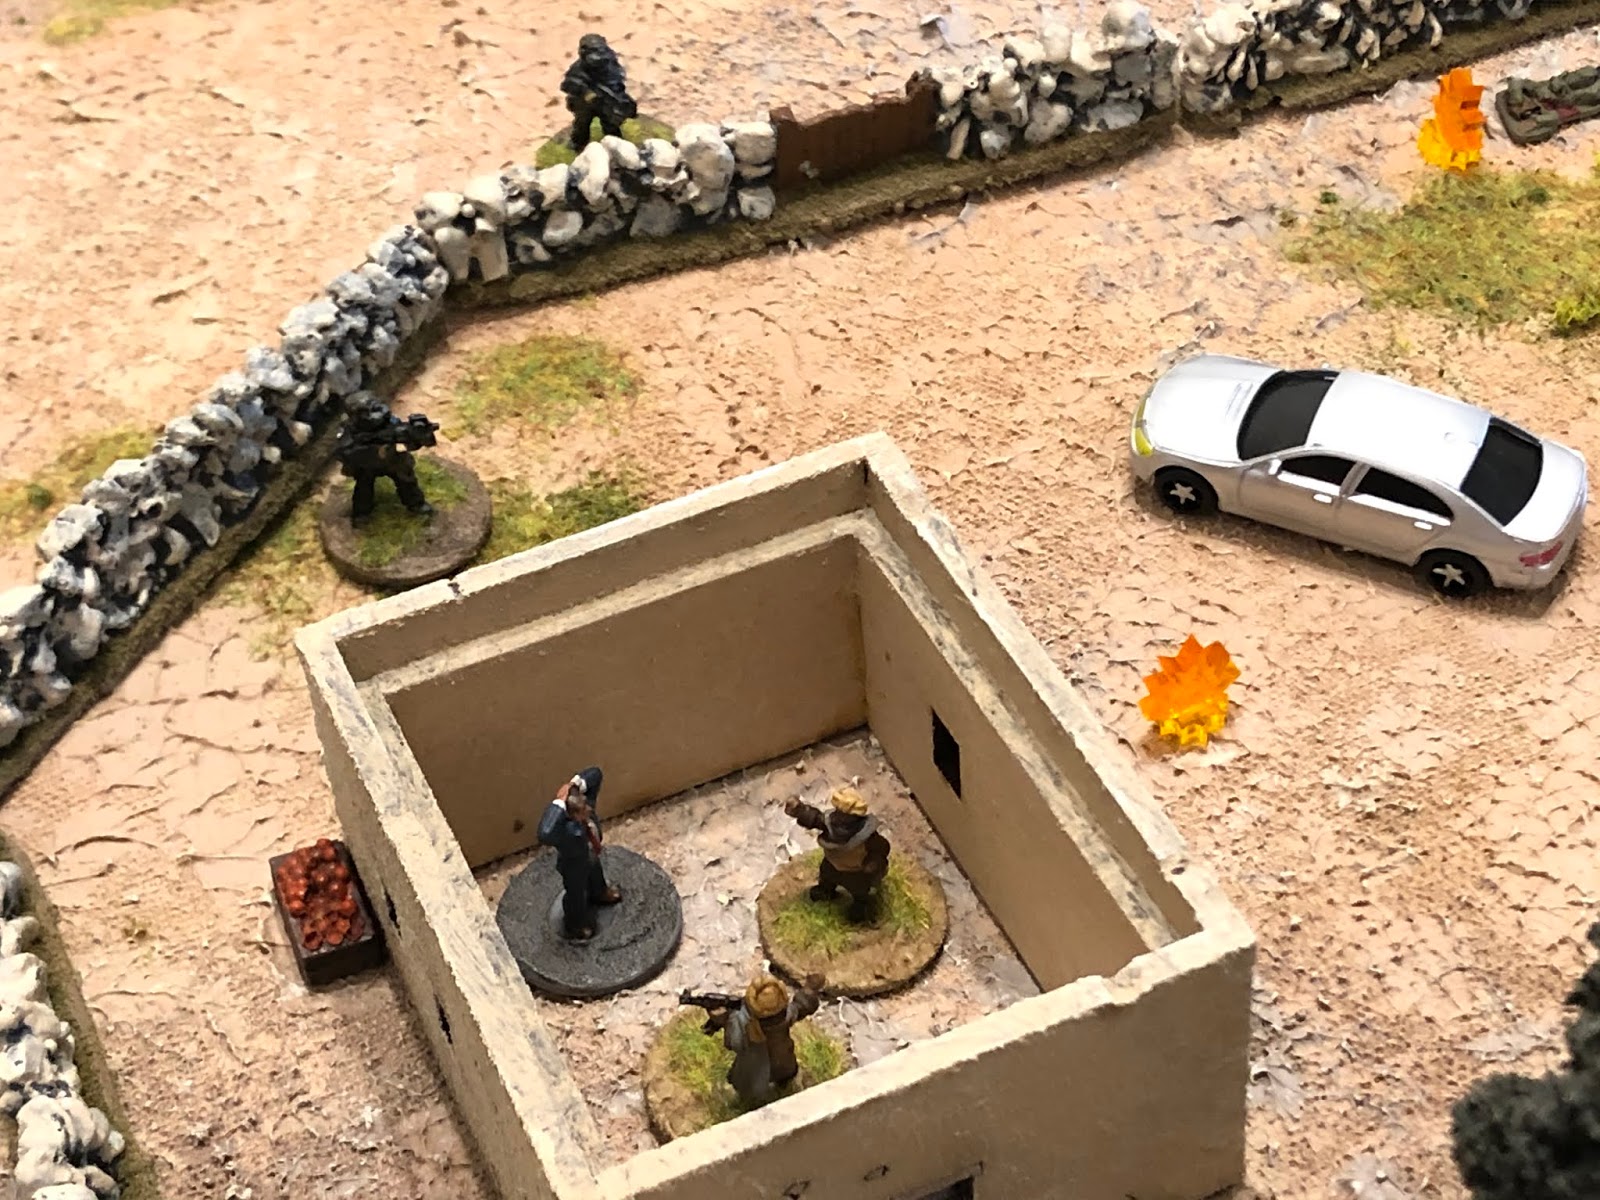
Back at the objective, Bravo 03 dashes up the hill and reaches the wall, where he (bottom left) flanks the sentry at the wall (top center)...
And puts him down.
Back in the north, the terrorists have their heavy weapons (two RPGs and the PK, bottom center) laying down a base of fire as their riflemen split and work to carry out a double envelopment (four guys went left (far left) and four went right (far right)!
Up on the objective, the enemy leader sees his sentry go down (top right) and can tell the Cuban SOF are close, so he dashes from his hovel (right) to the house holding the hostage (left).
Bravo 01 joins Bravo 03 at the wall outside the Objective Building.
Where he promptly spots and fires on the enemy leader!
But he missed! Bravo 03 jumps the wall.
But because Bravo 01 (top center, with Bravo 03 below him) missed, the bad guy leader makes it into the Objective Building...
Where he promptly pulls his pistol, levels it at the hostage, and fires! Luckily for the Cubans, it would turn out to be just a flesh wound, a through and through!
*If you're thinking I cheated for the Cubans, I sort of did, in that we rolled to see the extent of the hostage's wound, rather than just immediately counting him as dead. Having said that, I cheated for the bad guys, who, according to the rules, are not allowed to target the hostage until the good guys have taken possession of him. I just did this to add a sense of urgency for the boys.
The Security Element (bottom left) begins returning fire on the enemy heavy weapons (top right, with enveloping riflemen at far right and left top).
And Bravo 04 reverses course, coming back to the fountain (bottom right) and opening fire on one of the terrorist flanking groups (top left), trying to keep them off the Security Element (left).
While back int he north, the enemy suicide bomber arms his vest...
Then charges out into the street (left, from behind the building at center), looking to get into the Security Element and detonate his vest!
But Bravo 02 jumps out and grabs him...
And quickly finishes him off!!!
*Wow, that was tense! The suicide bomber ran out into the street and failed his roll (only needed a 3+, rolled a '2').
As Bravo 02 was handling the suicide bomber (on street at left), Bravo 04 pushes forward (center, from right of the fountain), firing as he goes.
Dropping a bad guy (far right), as Bravo 07 (left) gets his machine gun back into action, laying into the terrorist's heavy weapons team (top right).
Putting two of them down!
The Cubans are taking lots of 7.62mm rounds to their SAPI plates, but so far very lucky, lots of hits but lots of saves, but this can't last...
Back on the objective, Bravo 01 (top right) and Bravo 03 (top center) look on as Bravo 08 hops the wall and moves up to the Objective Building (left)...
"Flash out!"
The flashbang goes off, stunning all three occupants of the Objective Building.
As Bravo 07 (bottom left) is firing on the enemy heavy weapons team (top right), the enemy flanking unit at top center...
The firefight in the street gets ugly as the enemy's right-hand flanking team jumps in...
And their left-hand flanking team moves up (bottom center). The still night is ripped by the sound of gunfire, the street looks like a thunderstorm from the intermittent muzzle flashes, and the air is alive with the rush of hundreds of rounds zipping and snapping past each other...
And the inevitable happens: Bravo 05 goes down in a hail of gunfire...
As Bravo 04 (top right) is engaged...
And goes down (far left)!
The poor boys are in such a bind: when the hostage was shot (in the Objective Building, just off camera to bottom right), the Security Element sent the Doc, Bravo 06, that way. But then Bravo 05 and Bravo 04 went down in a matter of seconds, so now they make the decision to bring the Doc back; Bravo 06 sprints back towards the street fight (far left, between tree and white sedan, with Bravo 02 and Bravo 07 above him, from the fruit stand at bottom right).
Having flashed the room, Bravo 01 and bravo 03 breach and enter the Objective Building...
The enemy commander goes down, then Bravo 01 and Bravo 03 both concentrate their efforts on the sentry...
Moments later they emerge from the Objective Building with the hostage. Bravo 08 looks over, sees blood on the hostage's shirt; "he okay?" "Yeah, he took a through-and through in the tricep."
"Havoc Base, Havoc Base, this is Bravo 01. Bravo 01 is 'Broncos,' say again, Bravo 01 is 'Broncos.' Bravo 02, we're coming down."
Havoc Base: "Roger, Bravo 01."
Sparrow: "Roger, Bravo 01, enroute, ETA five mikes."
Bravo 02: "Roger Bravo 01, on the way, but we've got some problems. We got two 'Peanuts, say again, two 'Peanuts,' over."
Bravo 01: "Dammit. Roger, hurry up."
*The "Broncos" call is from an Execution Checklist, a list of pro-words used to minimize radio communications, which mean specific, pre-arranged items that need to be communicated. For example, when the Direct Action Team came ashore they would have given a pro-word to let HQ know they'd reached their infil point with all team members. We'll call that "Chargers." As soon as they were troops in contact they would have had another one, call that "Packers." They called out "Broncos" for securing the hostage, would have had another call if they didn't, like "Cowboys" (since they're losers), or "Jaguars" if the hostage was killed. 'Peanuts' is wounded men.
Back with the Security Element, the fight continues to rage in the street, with only Bravo 02 and Bravo 07 still in the fight (bottom left).
Bravo 06 moves up and checks Bravo 05; he's stabilized, but out of the fight.
Bravo 08 jumps up on the roof of the Objective Building to cover the exfil and see if he can help out the Security Element.
He (bottom right) spots the terrorists' left-hand flanking element (top left) and opens fire.
Bravo 08 drops two of them (far right) and Bravo 02 (bottom left, Bravo 07 to his right) finishes the last one off.
But more bad news: another huge group of bad guys arrive, this time in the southeast (bottom left, with the Objective Building at top center)!
They begin moving (bottom left) on the Objective Building (top right).
Bravo 01 and Bravo 03 rush downhill with the hostage (bottom left) as Bravo 08 covers them (atop Objective Building).
Bravo 02 lays down the last bad guy.
Then moves up to check the area (bottom right) as Bravo 07 grabs the wounded Bravo 05 and starts making his way towards the extraction point (far left, with Bravo 06 at center).
The bad guys in the south (bottom left) begin firing on Bravo 08 (top center).
As Bravo 06 hops the wall and checks Bravo 04; just like Bravo 05, he's stabilized but out of the fight and needs medical attention.
Things are getting hot for Bravo 08 (top center), and as Bravo 01 and Bravo 03 escort the hostage downhill, suddenly a city bus comes roaring up and then screeches to a halt!
And who pops out but our favorite female international operative, Victoria Scallopeni! "Let's go boys, you got a train to catch!"
The Cubans dash for the bus!
Once everyone is loaded, Victoria slams the door shut, throws the bus into gear, and begins hauling ass down the street (far left bottom, from far right bottom) as the bad guy reinforcements (top left) close in!
Victoria pulls the bus into a hard left turn, nearly tipping the damn thing over (bottom center), onto the road paralleling the beach.
As the bus pulls away (far right), a lone bad guy pops out and fires an RPG at them!
The rocket slams harmlessly into the sand as Victoria pulls the bus off the road, towards the surf.
The bus screeches to a halt and everyone dismounts as quickly as humanly possible. "Havoc Base, Havoc Base, this is Bravo 01, we are Seahawks, say again, we are Seahawks."
And with that, Bravo 01 bid Victoria adieu as the commandos took to the sea to make good their getaway with a 500m swim to a waiting speedboat.
Victoria blew the commandos a kiss, then took a last puff on her cigarette before scurrying off...
To hotwire a nearby sedan...
And make good on her own escape!
Well, how 'bout that? That was a lot of fun! And the boys had a great time, too! All in all a very successful mission, with the commandos securing the Cuban businessman, a little worse for wear, and returning him to Havana. They took two casualties, but no KIA, just two wounded, and they'll be back after surgery, recovery, and rehabilitation. The older boy was a little upset about both casualties coming on his watch, but I reminded him that you can't control everything, and that his guys did their job, which was to keep the bad guys off the Assault Element so they could go in an rescue the hostage, which they did. I did talk to him about not adding to a bad situation; once things went pear-shaped in the street, he shouldn't have kept adding more men to the melee, he should have either assaulted through it or fell back and handled it with fire. I'd have preferred the latter; I let him know it wasn't his fault, the bad guy patrol and then the reinforcements couldn't have come in at a worse time and location for his guys, but sometimes it's just like that, Murphy reaches up and just gives you a good boot to the groin. The key is not making it worse; falling back to cover as soon as the enemy patrol got into it (before the reinforcements arrived) would likely have seen the enemy patrol and reinforcements defeated without any friendly casualties.
I was proud of the boys, it was a lot of fun, and there was some great talks and good decision making. The only problem was all, combined with playing a new set of rules and having to look stuff up, came with a steep cost in time: we were up there for almost four hours, and if there were any problems, it was sometimes trying to keep the boys attention focused. There's a lot of cool stuff to see and play with in Daddy's room ;)
What did I think of the rules... Overall, I really liked them. I thought they gave a really fun, intense game, and I really like the stealthy bit of it, rather than just running in and shooting everything up. The down side of it is that all that sneaking around takes a lot of time I think, even if you're on top of the rules. There are plenty of times where you have to wait or go slow in order to make sure you don't get spotted/don't get the alarm sounded on you. Having said that, gunshots don't seem draw as much attention as I think maybe they should, and you can actually do quite a bit of shooting without necessarily waking up the enemy boss/getting the alarm raised. And I gave the bad guys more forces than the rules called for, because I didn't want the boys thinking they could just sit there and shoot their way out of it; they weren't going to kill all the bad guys and then just calmly stroll to the extraction point. Having said that, I did cheat, twice: regarding extraction, they should have had to walk all the way back to the extraction point, but we'd been up there so long that we really needed to end the game, so I quickly dreamt up the Victoria bus ride to get them out of there. The other cheat: right at the beginning of the game, when the SOF were still on the beach, the bad guy RPG gunner on top of the Objective Building had LOS to one of the commandos and had a one in a million chance of seeing him, so I asked the older boy to roll for me and... he rolled a '1,' which, no matter the odds, is always a failure, so the Cuban should have been exposed. But I just cursed under my breath, rationalized that there was no way the RPG gunner could see a dude dressed in black, in the dark, about 300 yards away, and told the boy to roll again. He passed ;)
So that was a lot of fun, and we'll be playing again next weekend.
V/R,
Jack