South Leon Army D Company vs FSNL 3rd Company
The SLA's D Company was dug-in deep into defensive positions oriented north, prepared to fight off the Commie hordes coming down Route 1, but aware of the Cubans' Task Group Halabrio attacking east to west behind them. What they were not expecting was for a Communist company-sized battlegroup to be defeated by TF Hammer and pushed into their rear, but that's exactly what happened! Having said that, the industrious SLA troopers were able to rush some troops to their left flank and prepare a defense, even digging in a couple of their units, as the Communists approached.
Okay, I screwed this up twelve different ways:
1) This fight is a result of a fight in Turn #1, so was supposed to happen in Turn #2, but I put it in Turn #1.
2) This fight shouldn't happen at all; rather than allow the Communists to fall back into an Allied unit, they should have been squeezed between TF Hammer and D Company and forced to surrender.
3) When I set up the table I should have had D Company on the right and the Communists on the left, but I didn't orient it properly so it's flipped, so I'll have to call north 'down' as you're looking at it.
4) D Company's defenses were oriented to the north, not the west, so I shouldn't have allowed them to have any units dug in.
Another little tidbit is that time is moving now. All four of the previous fights occurred at 1000 local time, as that was the kick-off time for Phase 2 of Chunky Bandit. But now time is moving forward, if that matters to ya ;)
Alright, let's get on with this. The funny thing is that I still screwed it up again after this fight!
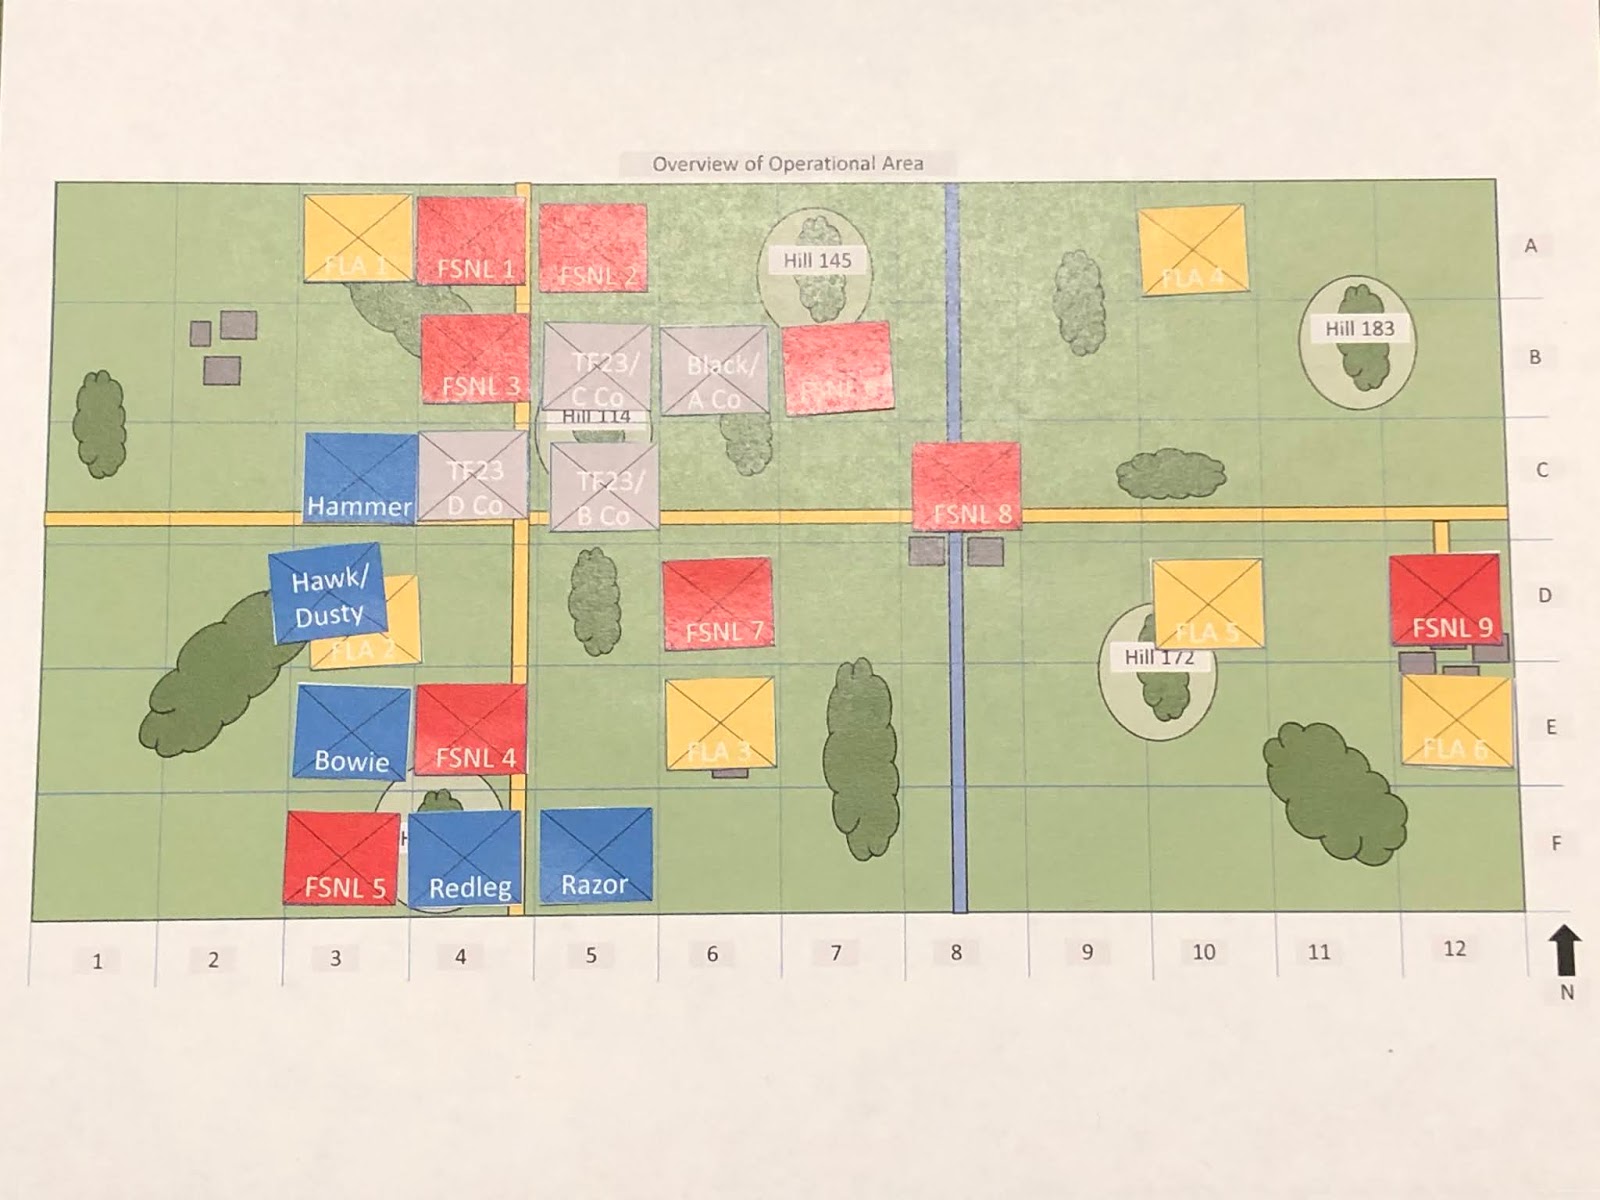
Overview, north is DOWN. There is a hardball road running straight east/west, with hamlets at each end, as well as several knolls/hillocks. Other than that we've got several cultivated fields and scattered jungle.
This would have made a lot more sense if it was an attack from north to south by the Communists, coming straight down Route 1, which is what I thought when I looked at the campaign map, not looking up or remembering how FSNL3 got here...
The opposing forces, allies on left and Communists on right.
The figures are all 10mm from Pendraken, Minifigs UK, and Butler's Printed Models. I'm using Ivan's "5Core Company Command," playing on a 3' x 2' surface with simple terrain to speed up the process. The hootches are from Jimmi at Flashpoint Minis, the roads are from Fat Frank, the hills are from Warzone, the fences are from Sarissa, the fields are from Hotzmats, the trees are cake toppers, and when you see the rivers, they're from Wargamers Terrain. I'm playing solo and will randomize enemy deployment using a system of blinds borrowed from Joe Legan's "Platoon Forward."
In terms of caliber of forces, the SLA, FSNL, and FLA troops will all be treated equally, except for the fact the FLA troops will be treated as fanatics, in terms of their willingness to advance into close combat. The Cubans are more tactically and technically proficient, and so they will receive extra firing dice, better rallying capability, bonus in close combat, and sometimes will have a second command stand on the table.
Another thing: the SLA defenders also have some heroes amongst their ranks:
The commander of D Company was awarded the Silver Star following fight #12
The team leader for Delta 04 was awarded the Bronze Star w/V following fight #12
The table, with troops. You can see the SLA/Cuban defenses at left, while the Communist attackers are spread across the right half of the board.
The SLA/Cuban defensive positions, from left: Delta 01, Delta 02, the MG team and CO in the sandbagged position, with the mortar team behind them, Delta 04, and Delta 03 and the TF23 team in the sandbagged position at far right.
The Communist attackers have two rifle teams on the left flank (far left, bottom left), and they managed to infiltrate their AGL team into firing position on a nearby hill (center top left), while they've got more rifle teams on the right (center top and right), a one more in the center (left bottom), as well a their commander (right bottom) and their mortar team (right below the commander).
The fight begins with the Communists continuing to affect an infiltration, with all units save the AGL (on hill at left bottom) and mortar team (top right) pushing forward.
*Pretty fortuitous time to roll a "scurry."
But the SLA defenders are well prepared and ready, so their only response is to send Delta 04 forward, into firing position (center, from left).
But the SLA Commander (bottom left) has seen enough. He initiates the defensive fires by ordering the machine gun team to open fire on a nearby enemy rifle team (top right)...
The Communist rifle team (top right) takes casualties and goes 'men down,' but their AGL team (bottom right) returns fire on the SLA MG position (top left)...
But the SLA gunners are not affected and Delta 03 (bottom right) opens up on the Communist grenade launcher (top center)...
The AGL team (far right) is suppressed, but a nearby rifle team (bottom center) returns fire (top left)...
Delta 03 is pinned (yellow bead), but the TF23 team immediately rallies them back into the fight.
The SLA mortar team (far left) gets in on the action, pounding the Communist center (top right).
Though it's a little off target and only manages to pin one rifle team.
The Communists keep pushing for the SLA lines, with three rifle teams moving up on their left (left, center bottom, and far right), and they attempt to rally the AGL team (bottom right), but they only rally 'up' to pinned.
While on the Communist right, the CO moves up gets the 'men down' team back in the fight (left), but they stay down, while the rifle team pinned by the mortar fire hauls ass to get out of the kill zone (top center, from right).
But then the SLA/Cuban defenders go cyclic*: it starts on the right flank with Delta 03, who cuts loose with their rifles and squad automatic weapon on the nearest enemy rifle team (top right).
They put one unit out of the fight and suppress another!
Delta 04 (bottom left) opens fire on another rifle team (top right), pinning it.
While the MG team (bottom left) engages the enemy commander attempting to rally the 'men down' rifle team (top right).
The gun suppresses the enemy commander and forces him to fall back (bottom right, from left)!
*Kinda weird, not sure why I did that, not really allowed to shoot at command stands.
On the SLA left, Delta 01 and 02 (bottom left) both fire, but neither scores!
While the SLA mortar team (bottom left) fires on the enemy AGL position (top right).
But it's a little long and only pins the crew.
*It was a devastating time for the SLA/Cubans to roll up a 'Firefight!', not fair, really ;)
The only enemy unit able to respond is the rifle team on their far right (bottom right), the one Delta 01 and 02 completely missed (top right), so they return fire, pinning Delta 02.
The Communists roll a third straight 'scurry,' and everyone attempts to self rally, except the 'men down' team, which can't, they have to have a friendly team rally them. The enemy CO is good (right top), as is the rifle team in the center, but the AGL team stays pinned and the far left rifle team panics and falls back (bottom center, from bottom left). The Communist rifle team on the right flank (top center) just holds in place.
The SLA mortar team (bottom left) keeps working out...
Thought their rounds are actually getting further from the target (the AGL team, yellow bead at left)!
That's hard to do rolling 2K 3S...
So the MG team (bottom left) swings over and opens fire on the Communist AGL team (tp center right).
And the AGL team is suppressed (red bead at bottom right), while a nearby rifle team returns fire, to no effect.
While on the SLA far left, Delta 01 and 02 (far/bottom left) open fire on the enemy's far-right rifle team...
Knocking them out!
The enemy CO moves up to rally his 'men down' rifle team in the center (center bottom, from far right).
*The Communists roll a 4th straight 'scurry'!!! Normally I would say that would mean they're winning, but they haven't gotten to really even shoot yet (only returning fire, and their mortar team has yet to shoot) and the problem is that the SLA forces were all the way on the far side of the table, which is not usually the case. Usually both sides have teams all over the place, which means the Communists would surely have physically run into someone by now, after four scurries! The issue is that this is down to setting this fight up as if it were a hasty attack against a prepared defense, when it was supposed to be a hasty attack against a hasty defense...
They're good to go, and immediately advance on the SLA defensive line (center, from bottom right).
The other rifle team in the center joins them (left, from center, just above the AGL team). The AGL team and left-flank rifle team (bottom right) both self rally.
And just like the bad guys keep rolling scurries, the good guys keep rolling firefights. The SLA mortar (bottom left) and MG teams (center left) absolutely pound the Communist center...
One rifle team is knocked out (bottom right), one is 'men down' (far left), and their commander is suppressed (top right)!
Delta 04 (bottom left), TF23 (bottom center right), and Delta 03 (bottom right) open fire on the enemy AGL team (top center right).
The grenade launcher is knocked out (top left) and a nearby rifle team is pinned (bottom right).
The Commies pack it in, with their CO, rifle team, and mortar team heading for the hills!
But in order to escape they had to abandon the 'men down' rifle team on the road, which Delta 04 promptly moved up on and captured.
The SLA D Company's defense was a resounding success. D Company will hold their ground (C4), while FSNL3 is forced to fall back to the north (B4). Next turn they will most likely continue to fall back, will likely hold, and will less likely counterattack.
Well, that was about as much an ass-whoopin' as you can expect to deliver in a wargame, and I apologize, that crap was BORING! All my screw-ups led to that debacle of a game, which was good for my overall campaign, but really sucked as a means of entertainment. I've already spilled enough ink (electrons?) on all my mistakes, but let me point out one more that I made: following this fight, once again FSNL3 should have been eliminated rather than allowed to fall back. I wrote above how they were decisively defeated by TF Hammer and were squeezed between them and D Company so should have been forced to surrender, but I let them carry on and they just received their second absolute hammering of a defeat, which should have seen them eliminated, but allowed them to stay again somehow! Still, the war continues...
Casualties:
Cuban: ~5 men
Communist: ~20 men, with 5 more captured
Decorations:
None (there were no opportunities for heroics, the bad guys were mowed down!)
Next up we have the rematch between Lt Espinale's Task Force Hawk and the Free Leon Army's 2nd Company, which fought the Cubans to a standstill, knocking out a tank, an APC, two rifle teams, and wounding their commander! The Cuban paratroopers are seeking retribution.


Excellent. Love the surrendering soldiers base. Nice touch!
ReplyDeleteThanks, Jim, and yes, they add a bit o'character ;)
DeleteV/R,
Jack