It's 1330 on 3 Feb 1990, and the CLA's B Company, 6th Infantry Battalion, with support from 3rd Troop, 5th Tank Battalion, begins the process of reducing the regime's Cienfuegos garrison, consisting of the remnants of the enemy's 6th Armored Battalion. The enemy launches a spoiling attack, rolling out to meet the CLA's thrust, just west of Cienfuegos. Two lines of armor clash!

D-Day
...
15) 4th Infantry Battalion's 1st Air Assault Company conducts an air assault southeast of Sandino to counter enemy mechanized forces of 3rd Infantry Battalion (forcing 1st Airborne Battalion's right flank).
16) 9th Popular Force Battalion conducts a spoiling attack on the regime's 7th Infantry Battalion in the Matanzas garrison.
17) 2nd Air Assault Company, 7th Infantry Battalion, inserts east of El Rincon to block the escape of the regime's 6th Armored Battalion.
18) C Company of the UWG fought a running battle in the Escambray Mountains to delay/halt the regime's 12th Mechanized Battalion moving west.
D+1
19) A Squadron SOF holds off the regime's 2nd Airborne Company, 1st Airborne Battalion at the Radio Station in downtown Havana, while B Squadron SOF and 8th Popular Force Battalion move to reinforce.
20) 2nd Airborne Battalion, attacks north of Sandino to eliminate the regime's 4th Infantry Battalion.
21) 7th Infantry Battalion, attacks north of Sandino to eliminate the regime's 5th Territorial Infantry Battalion.
22) Colonel Huistrella's Unconventional Warfare Group fight another desperate holding action in the Escambray Mountains, this time against the regime's 10th Territorial Infantry Battalion.
D+2
23) The 5th Tank Battalion squares off against the regime's 2nd Armored Battalion just west of Artemisa.
24) 9th Popular Force Battalion holds the line at Matanzas as the enemy's 7th Infantry Battalion attempts to break out to reinforce Havana.
25) 6th Infantry Battalion, with support from 5th Tank Battalion, engages the enemy 6th Armored Battalion's spoiling attack.
 The opposing forces, with CLA on the right and regime on the left. The CLA is made up of Pendraken Americans from their Vietnam range, with plastic Takara M-48s and Shermans, then Pendraken M-113s and a Panhard. The M-113s have gunners from Minifigs (one .50 cal and one TOW).

Commander, B Co, 6th Inf Bn: Captain Rolando

Commander, 3 Troop, 5th Tank Bn: Captain Basilone. He won't be treated as a leader, just as another tanker.
 The CLA force has a Command Stand, three rifle stands, two dismounted TOW teams, two M-113s (one HMG and one TOW), a captured Panhard armored car, two "Super" Shermans, three M-48s, and a single leader figure representing the 6th Infantry Battalion Commander.

6th Infantry Battalion, Commanding Officer: Colonel Ricardo Colvasquez, already heavily decorated with the Estrella de Bronce (F7) and Cruz Servicio Distinguido (F12).
 The regime force has a Command Stand, two rifle stands, two dismounted MILAN ATGM teams, 6 T-34s, and three T-55s.
 Overview, north is up, with CLA forces spread across the left (west), and regime forces attacking out of their garrison at Cienfuegos (off map) at right (east). This is nothing but a bare-knuckle brawl; no room for maneuver, just pure guts and marksmanship (or lucky command and firing rolls).
 Looking west at the CLA formation, with M-48s in the southwest, Super Shermans in the center, tracks and armored car on the road in the north and a few infantry teams spread across the front.
 Looking east, the regime line, with T-34s in the north and south, T-55s in the center, and infantry spread across the middle.
A quick dice-off to see who goes first, and it's the CLA force. And it's on!
 It's starts in the north: Team 3 moves up, drawing react fire from a nearby T-34, but they shake it off...
 Then cut loose with a LAW rocket...
 Scratch one tank!
 In the south, Tank 1 (T1, bottom left) rolls up, halts, and looses a 90mm round at a T-55, but the round is short.
 The T-55 returns fire, and the round strikes home...
 T1 is knocked out, and a rifle team falls back behind T2.
 Captain Basilone, in T2, moves up, but an enemy ATGM fires, pinning his crew.
 At top left, the TOW track moves up to clear its line of fire, drawing the attention of a T-34 in the bottom right corner, who react fires but misses.
 The TOW launches at the lead T-34 in the south, but also misses.
 And then the TOW's target returns fire, and the shell strikes the track, causing a violent explosion!
 The T-34 (bottom right) that just destroyed the TOW track moves up, while a Super Sherman (T5, top left) react fires and misses...
 The T-34 fires at Captain Basilone's vehicle, striking it...
 And forcing it to fall back (bottom left).
 In the center, a T-55 rolls forward, and one of the CLA dismounted TOWs (TOW2) react fires...
 Knocking out the enemy tank!
 Another T-55 halts and fires at T4, a Super Sherman...
 Immobilizing it and causing the crew to bail.
 At top left, TOW1 returns fire on the T-55. It's a near miss, pinning the crew.
 At top right, an enemy MILAN moves up. Team 1 (far left) react fires and misses.
 The MILAN team launches a missile at the Panhard...
 Putting it out of the fight.
 At bottom left, Colonel Colvasquez rallies Captain Basilone's tank, getting them back in the fight, but only getting the hunkering rifle team up to pin. Basilone's tank fires on the closest enemy tank...
 Forcing it to fall back (far right, red bead, from far left explosion).
 But then some luck as Team 2 uses small arms fire to eliminate an enemy MILAN team!
 At bottom left, T3 fires at a T-55 and misses.
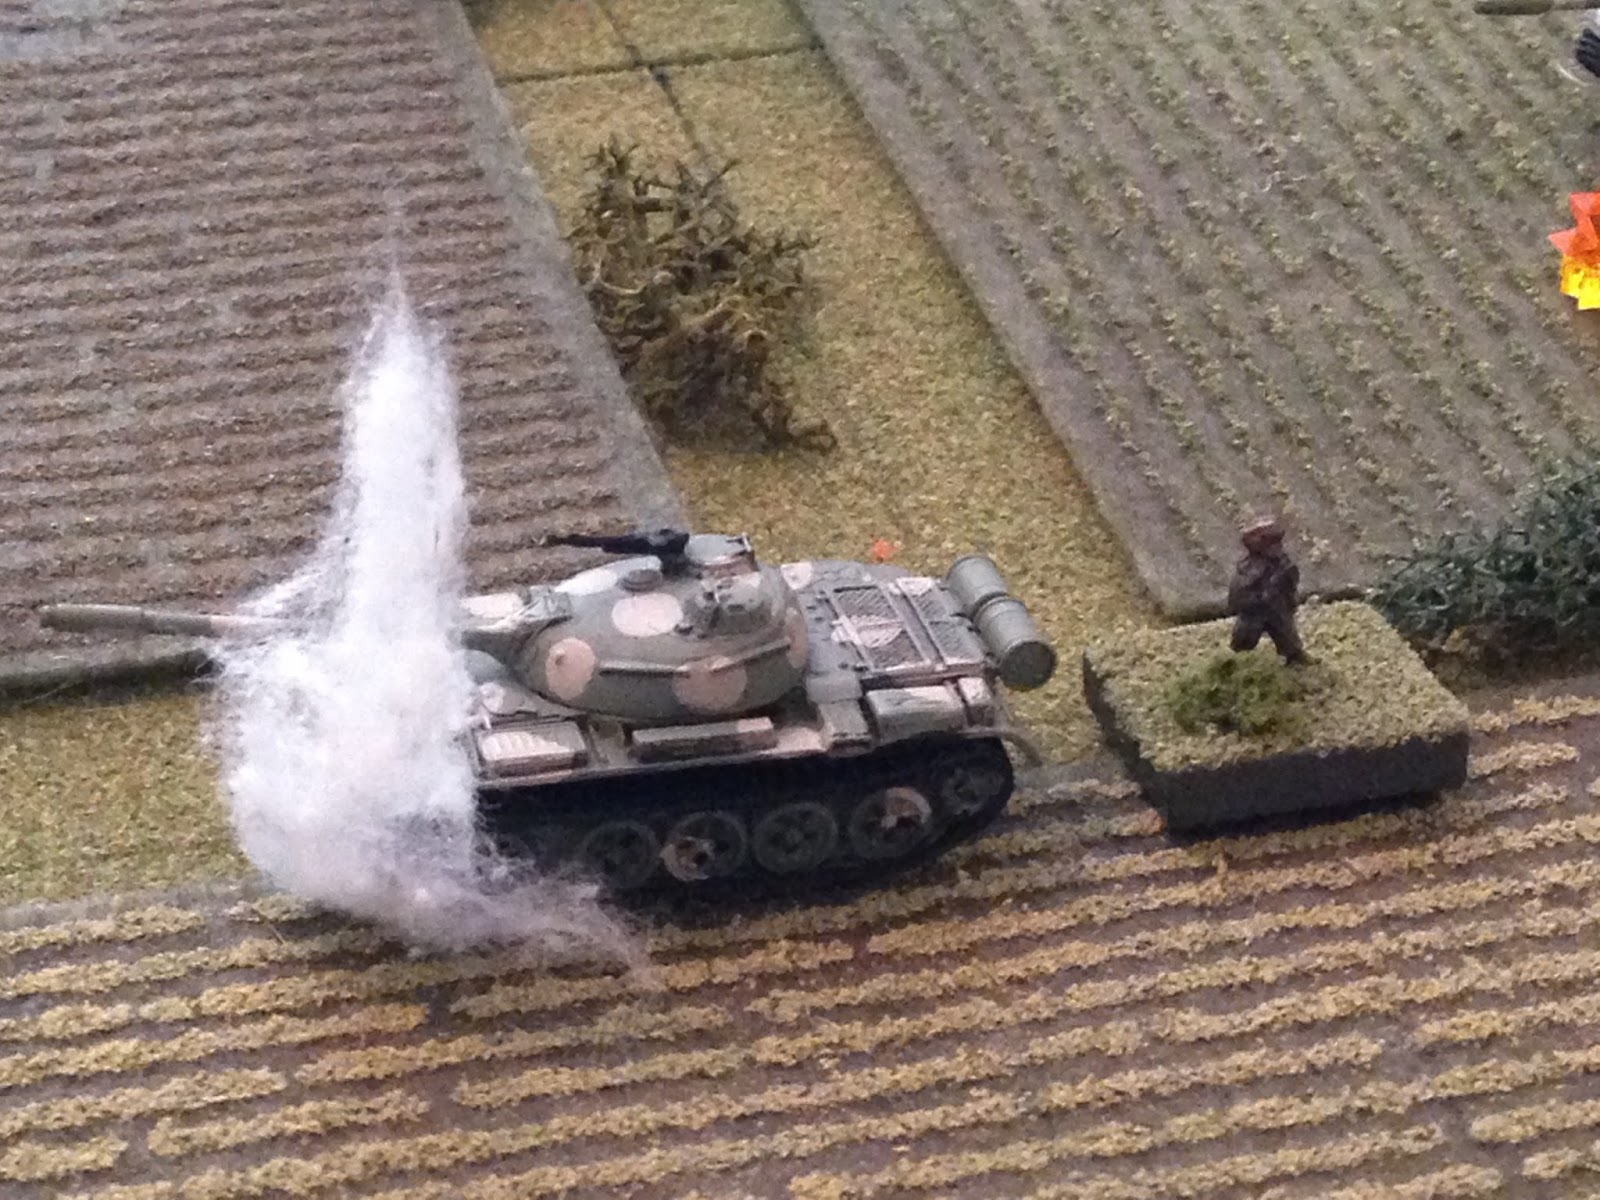
 TOW2 launches another missile at a T-34...
 And knocks it out! Must have struck the vehicles ammo as the secondary explosions were horrendous, knocking out a rifle team (casualty figure) and forcing the hunkering (red bead) T-34 to fall back off the map!
 Super Sherman T5 (top left) fires on a southern T-34, but misses.
 While Team 1 fires their squad weapons at the enemy's remaining MILAN team, to no effect.
 TOW1 fires on a pinned T-55 (yellow bead)...
 The tank is immobilized and the crew bails, and the MILAN team falls back (top left).
 The HMG track (top left) opens up with its .50 caliber machine gun, creating enough of a racket to pin the crew of the remaining T-55 (far right).
 On the far left flank (northern), Team 3 opens up, catching an enemy rifle team (far right) in the open and eliminating them.
 A southern T-34 fires at T5 and misses.
 The enemy CO rallies his remaining T-55 and MILAN (far right), while a northern T-34 fires on Team 1, causing heavy casualties (bottom left, I forgot to put the white bead on before I took the photo).
 The other T-34 in the north knows Team 3 is nearby, but can't get a good look, but they open up anyway and hit nothing.
 In the south, the last T-34 moves up, drawing ineffective react fire from T5 again.
 And the T-34 (far right) fires on Captain Basilone's tank, but he also misses...
 But Basilone's return fire knocks him out!
 In the north, a T-34 moves up, drawing react fire from Team 3. They launch a LAW, and it hits but skips off the sloped armor. The T-34 fires its main gun at TOW1 (far left)...
 Causing heavy casualties, and forcing the HMG track to fall back (top left, red bead).
 The other T-34 in the north (top right) and T3 (bottom left) exchange fire to no effect.
 And then Team 3 fires another LAW at the nearby T-34...
 The steel beast brews up, and while the crew bails out Team 3 sprints ahead to take cover behind the other tank they knocked out, with an eye on third northern T-34 (top right).
 At top left, Captain Rolando falls back and rallies TOW1, while T5 Super Sherman opens fire with its main gun...
 Knocking out the last T-55! With that, the enemy CO looked around, realized he was down to a single T-34, a single rifle team, and a MILAN ATGM team, decided to call the attack off. He sent the flare up, and the enemy fell back, ceding the battlefield to the Cuban Liberation Army. His shame is great; he knows that his failure means the death of 6th Armored Battalion and the fall of Cienfuegos, where the battered remnants of the once proud garrison are already steeling themselves for the CLA's final assault.
Not bad, and real quick. I'm not usually much for no maneuver, die rolls are all that matter slugfests, but they happen every now and again in a campaign, and I'd be lying if I said it wasn't at least a little fun lining up all those vehicles and banging them up. The big surprise to me was that five of the CLA's seven tank kills were from infantry rockets (Team 3 with 2) and TOWs (TOW2 with 2, TOW1 with 1). Captain Basilone's T2 and T5 (Super Sherman) each had one.
Casualties:
CLA: ~20 KIA/WIA, one M-48 destroyed, one M-113 destroyed, one Super Sherman damaged, and one (captured) Panhard A/C damaged.
Regime: ~50 KIA/WIA, 3 T-55s knocked out, and 4 T-34s knocked out.
Sgt Madre-Animral of Team 3, B Co, 6th Inf Bn's Team 3, was decorated with the Estrella de Bronce for leading his team to knock out two enemy tanks.
One more fight for D+2, then on to D+3.
V/R,
Jack

Commander, B Co, 6th Inf Bn: Captain Rolando
Commander, 3 Troop, 5th Tank Bn: Captain Basilone. He won't be treated as a leader, just as another tanker.

6th Infantry Battalion, Commanding Officer: Colonel Ricardo Colvasquez, already heavily decorated with the Estrella de Bronce (F7) and Cruz Servicio Distinguido (F12).


A quick dice-off to see who goes first, and it's the CLA force. And it's on!


Not bad, and real quick. I'm not usually much for no maneuver, die rolls are all that matter slugfests, but they happen every now and again in a campaign, and I'd be lying if I said it wasn't at least a little fun lining up all those vehicles and banging them up. The big surprise to me was that five of the CLA's seven tank kills were from infantry rockets (Team 3 with 2) and TOWs (TOW2 with 2, TOW1 with 1). Captain Basilone's T2 and T5 (Super Sherman) each had one.
Casualties:
CLA: ~20 KIA/WIA, one M-48 destroyed, one M-113 destroyed, one Super Sherman damaged, and one (captured) Panhard A/C damaged.
Regime: ~50 KIA/WIA, 3 T-55s knocked out, and 4 T-34s knocked out.
Sgt Madre-Animral of Team 3, B Co, 6th Inf Bn's Team 3, was decorated with the Estrella de Bronce for leading his team to knock out two enemy tanks.
One more fight for D+2, then on to D+3.
V/R,
Jack
Excellent report. It's really interesting to see how armour v.armour plays out with the rules. Great looking game too...love the hit markers and the missiles (again)!
ReplyDeleteJim,
DeleteThank you Sir! I feel like I need to apologize though; my opinion is that the rules handle armor pretty well, just I'm not doing them any favors by putting way too many tanks on a 2' x 2' table.
I just bought those little explosion markers from Litko, I think they look pretty good. And everyone loves the missile ;)
V/R,
Jack
I thought this was more fair than the other recent AAR with the T-72s. I know the rules do not differentiate tanks to much but M48s Vs more T-72s and the T-72s are all gone. Not fair! Mainly as after the Chieftain, the T-72 is my favourite tank. So I am only whinging...
ReplyDeleteListen to you! You should be ashamed of yourself! Not fair...
DeleteYou're lucky I let any of them survive, these CLA fellas are rough (as the Aussies once were) ;)
V/R,
Jack