It's 1700 on 1 Feb 1990, and the CLA's 2nd Air Assault Company, 7th Infantry Battalion, having only recently come ashore at the Bay of Pigs landing site, has taken up defensive positions. The CLA's 2nd Airborne Battalion twice dealt the enemy heavy blows at El Rincon; the second severe enough to send the enemy's 6th Armored Battalion wheeling and in retreat towards its base at Cienfuegos. Looking to seize the opportunity to put a major enemy armored formation permanently out of the fight, Generalissimo Waraldonez ordered the 2nd Air Assault Company lifted into blocking positions east of El Rincon to cut off the enemy's retreat, placing the enemy troops between 1st Airborne Battalion in the west and 2nd Air Assault Company in the east.
A bold move to be sure, but the CLA has now placed the enemy in "death ground," that patch of real estate in which the enemy cannot sit still and they cannot run, they must attack for the sake of their very own survival. 2nd Air Assault Company was about to reap what the Generalissimo had sown with his overly ambitious battle plan...
1) B Squadron SOF destroyed a radar site in support of amphibious landings at Playa Colorada (5). B Sqdn then egressed and linked up with CLA rotary wing assets for their follow-on mission in Havana (6).
2) C Squadron SOF destroyed a the Cuban military's communications center.
3) 1st Para Battalion dropped in and seized a bridge to screen the landings at Playa Colorada (5).
4) 2nd Para battalion dropped in and eliminated a Castro-regime garrison to screen the landings at the Bay of Pigs (just west of (4).
5) 1st Marine Company, 3rd Infantry Battalion, made an amphibious assault at Playa Colorada.
6) A Squadron SOF attacked a Castro-regime SAM site near Havana, which failed to clear the way for B Squadron's helo assault into Havana.
7) 2nd Marine Company, 6th Infantry Battalion, landed at the Bay of Pigs then turned east and ran into a strong enemy force, which it handily defeated.
8) B Company of the UWG pursued and destroyed an enemy garrison in the Escambray Mountains.
9) B Squadron SOF conducted an aerial insertion into Havana to seize a radio station and broadcast news of the invasion.
10) 10th Popular Force Battalion seized and destroyed the Pedroso bridge to protect the Bay of Pigs landing site from the Matanzas garrison.
11) 1st Airborne Infantry Battalion successfully fought off a regime counterattack near the bridge at Sandino, protecting the western (Playa Colorada) landing site from the Pinar del Rio garrison.
12) 6th Infantry Battalion fought through an enemy ambush while pushing inland from the Bay of Pigs landing site.
13) 8th Popular Force Battalion ambushed a mechanized column of the enemy 2nd Armored Battalion, just west of Havana.
14) 2nd Airborne Battalion engaged enemy armored forces of the 6th Armored Battalion in the village of El Rincon, en route to the Bay of Pigs landing site.
15) 4th Infantry Battalion's 1st Air Assault Company conducts an air assault southeast of Sandino to counter enemy mechanized forces of 3rd Infantry Battalion (forcing 1st Airborne Battalion's right flank).
16) 9th Popular Force Battalion conducts a spoiling attack on the regime's 7th Infantry Battalion in the Matanzas garrison.
17) 2nd Air Assault Company, 7th Infantry Battalion, inserts east of El Rincon to block the escape of the regime's 6th Armored Battalion.
The opposing forces, with regime troops on the left and CLA troops on the right. The CLA force consists of US troops from Pendraken's Vietnam range, while the regime guys are Argentinians from Pendraken's Falklands Range with Takara plastic T-34s in support.

Captain Wallestre,
Commander, 2nd Air Assault Co, 7th Infantry Battalion.The CLA force has a Command Stand representing their Company Commander, seven rifle teams, an HMG team, a TOW ATGM team, a Charles Gustav team, and a single leader figure representing their Battalion Commander.
 7th Infantry Battalion, Commanding Officer: Colonel Tomas Barnejesus
The enemy force has a Command Stand, seven rifle teams, and four T-34 tanks.
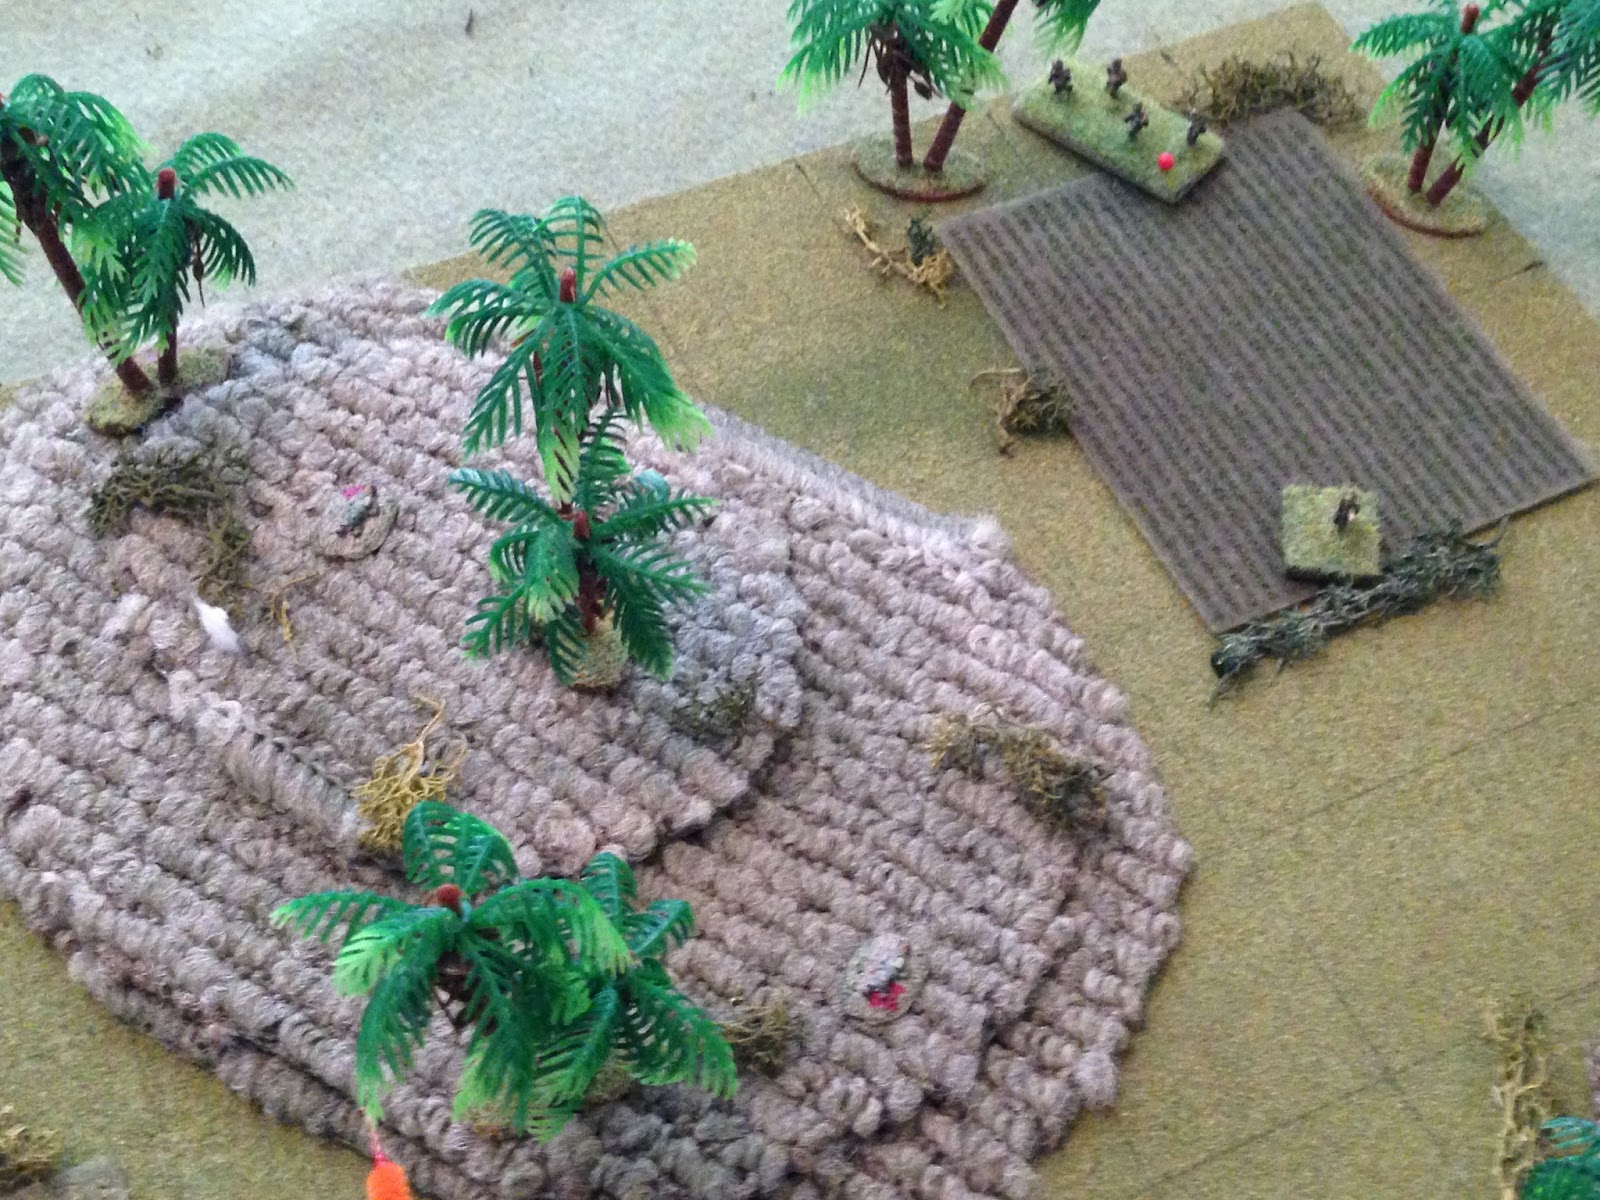
Overview of the map, north is up. The enemy is in the bottom left corner, fleeing from the west, trying to escape to the east. The CLA force is divided into two elements, with the rail line, which sits atop an embankment, splitting their defense down the middle. The Colonel is in the north, atop Hill 33, and the Captain is in the south, atop Hill 35.
The regime's start positions. There is no cover, so they must push quickly to get into and through the CLA's line. Their plan is to ignore, for the most part, the CLA force in the north, and just push through the CLA force in the south.
In the northeast, atop Hill 32, Colonel Barnejesus has four rifle teams, the HMG, and the Gustav.
In the southeast, atop Hill 35, Captain Wallestre has three rifle teams and the TOW.
Let's get it on!
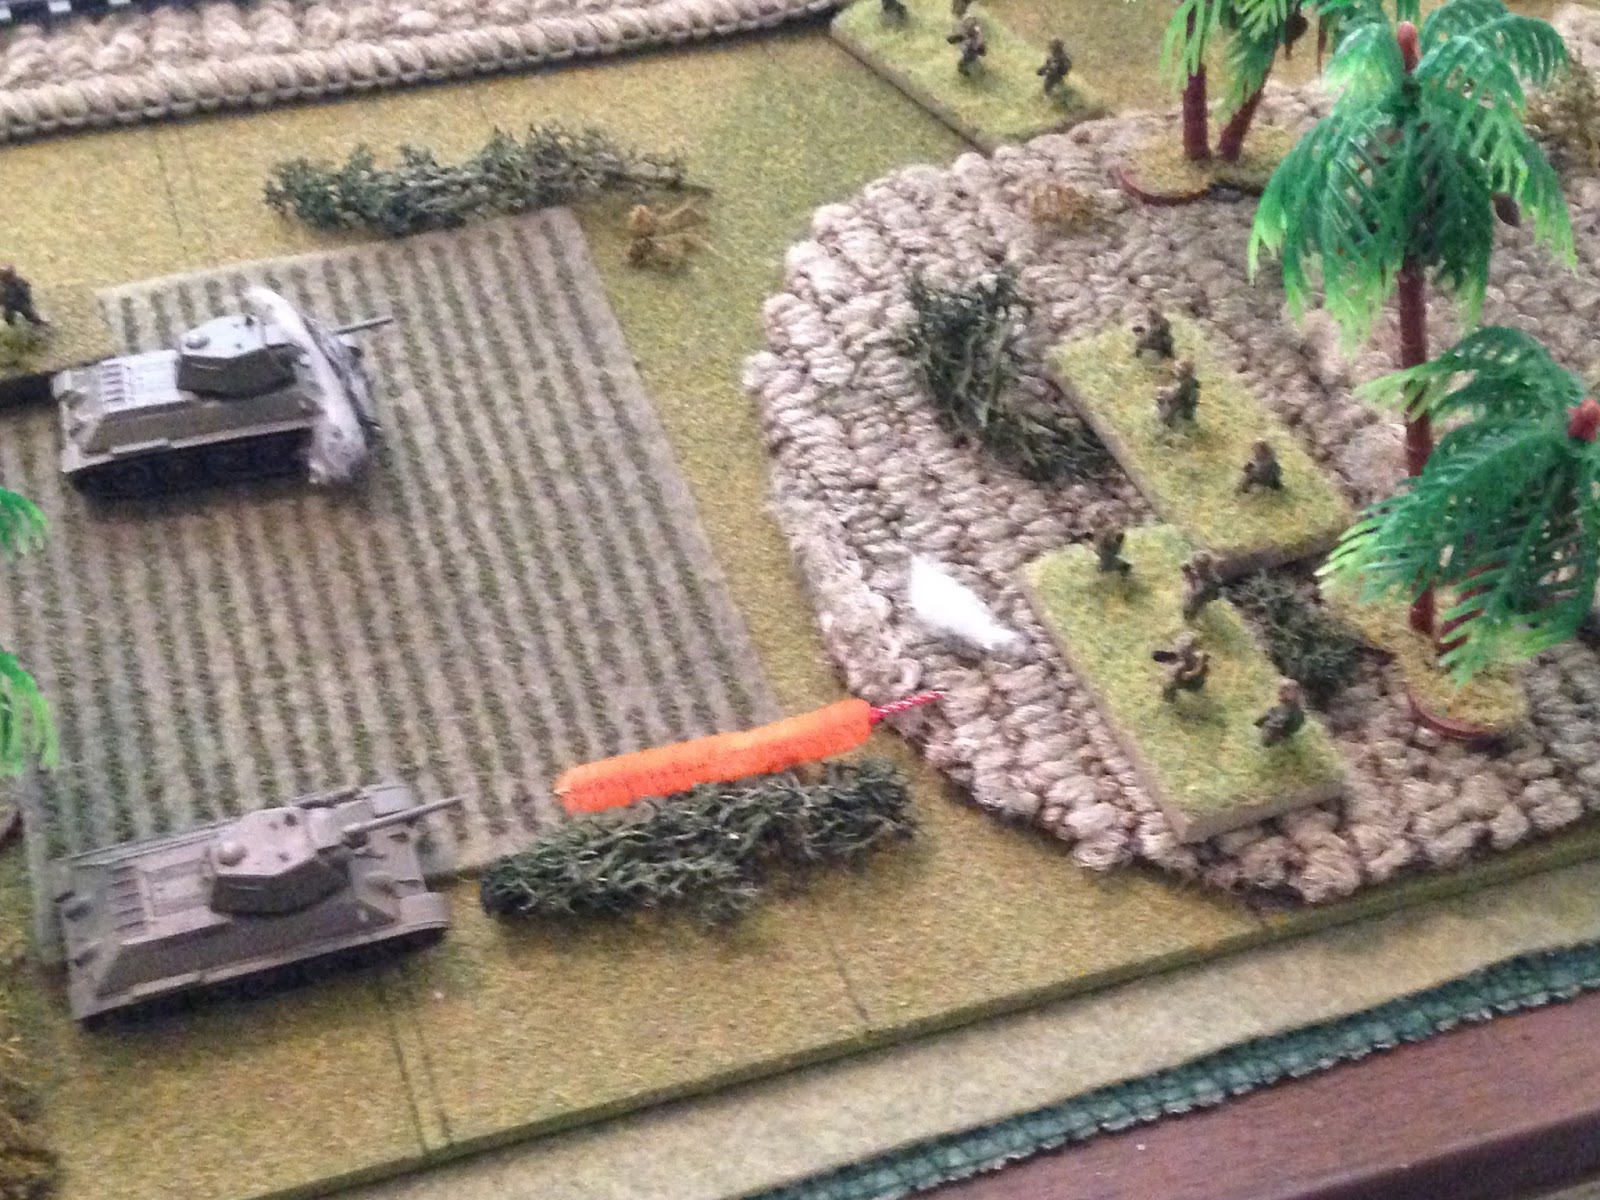
The enemy wins the initiative and pushes a T-34 forward. Having a feeling he's not going to be around long (mistakenly), the TOW team leader orders "Fire!" Which apparently was jarring to the gunner, because he MISSED!
The T-34 had a hard time spotting the TOW team due to the thick jungle (maybe the TOW missed because the wire got hung up on a branch?), so he sprayed the area with his machine guns, to no effect.
A second enemy tank pushes forward, spots the CLA troops on Hill 35, and opens up with high explosives from his main gun...
Team 1 (bottom left, white bead) suffers heavy casualties, and another team is forced to fall back and hunker (top right). TOW is at right.
But overall the enemy tanks have a hard time locking in on their targets.
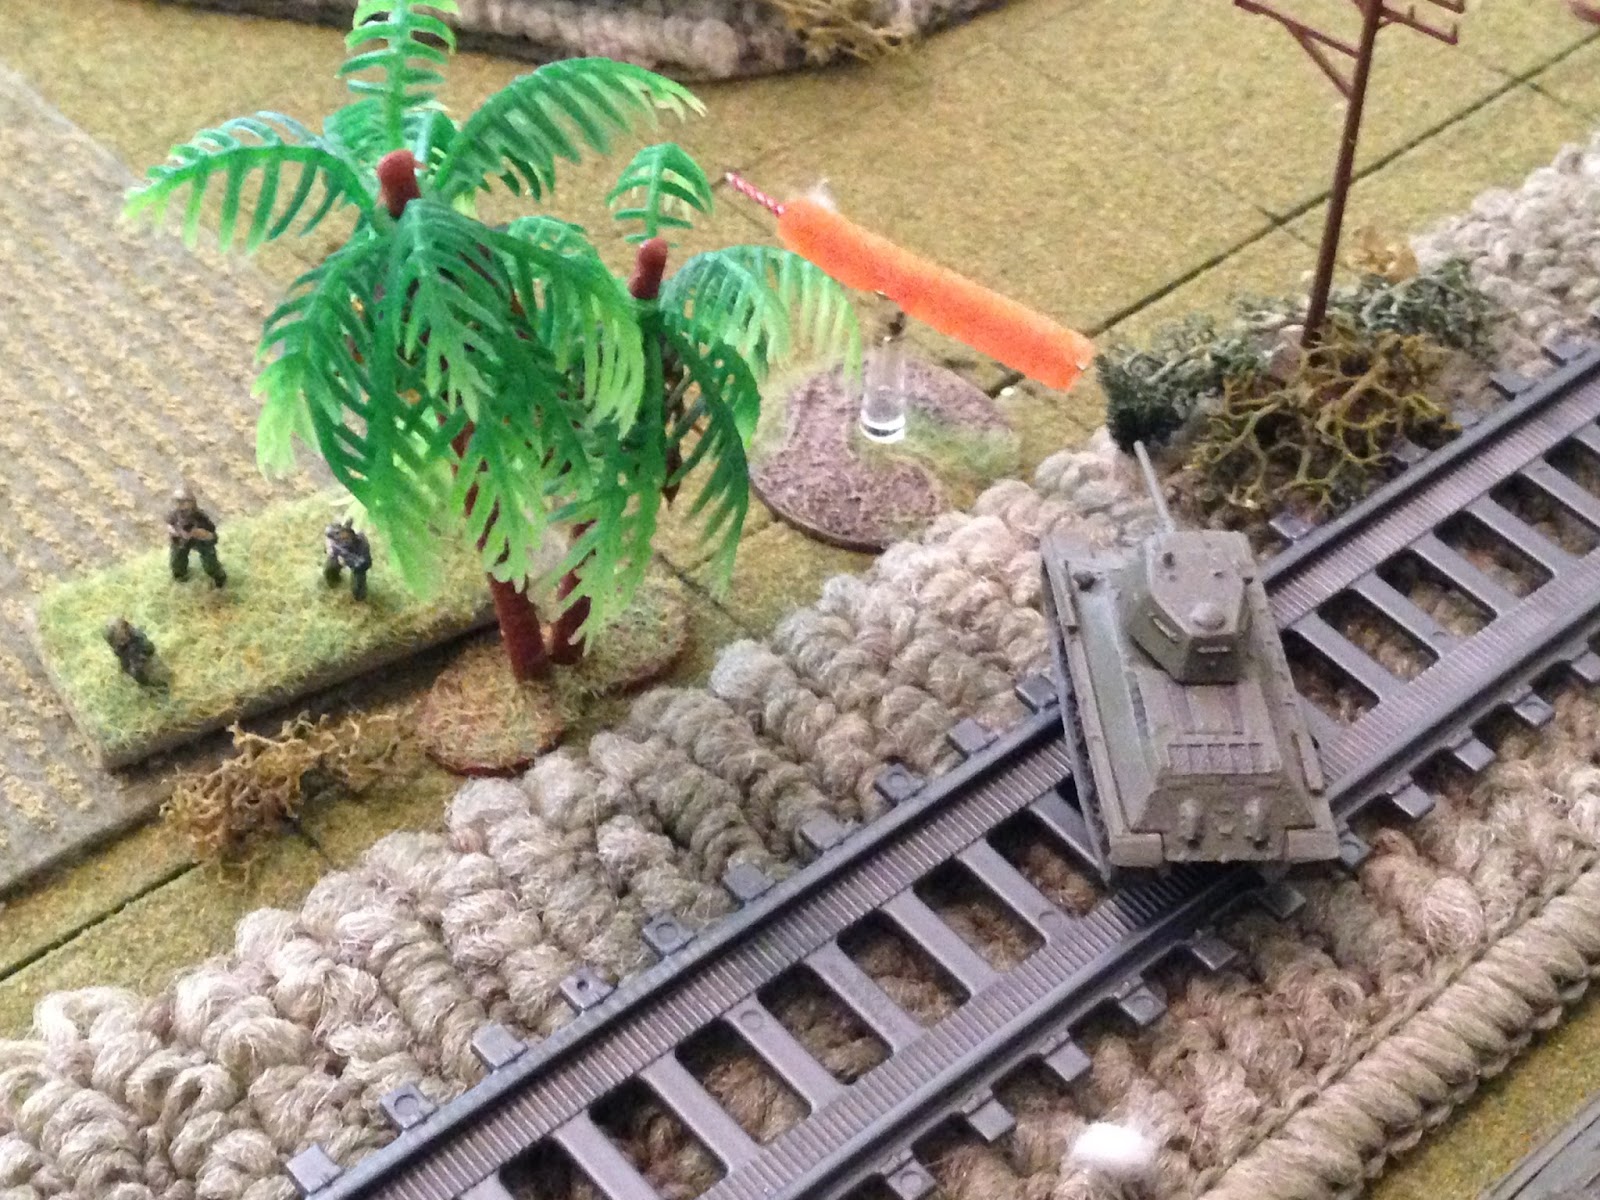
A third T-34 moves up and fires his main gun, hitting nothing...
While the final T-34 moves atop the railroad embankment and fires, also missing. Moving atop the embankment is certainly a calculated risk: it places his flank at peril from the CLA on Hill 32, but at the same time, the regime commander realized the attack wasn't going as quickly and smoothly as hoped, so he started to worry a bit about his flank, and he also needed to create some space, as his armored attack was starting to look like a traffic jam, with vehicles and men blocking each other's lines of fire.
The enemy CO then lead a rifle team forward (bottom left, with the stricken Team 1 at bottom right). Team 3 (top right), trying to protect their comrades in Team 1, opened fire but missed...
But the enemy commander wasn't interested in the easy target, Team 1, he wanted the TOW team (top right), so he took a bad shot (into the thick jungle) and missed.
Then, out of the blue, Team 5's Team Sergeant freaks out and they fall back, hunkering (top right, red bead, from bottom left)...
It was a random event; along those lines, I should explain that they happen pretty frequently for me, probably three or four times per game, but you don't see them because many times the random event is irrelevant to the situation. I've been thinking of coming up with my own table, so that every time a random event occurs, something a bit more dramatic occurs.
Colonel Barnejesus falls back (top right) to rally Team 5, but only gets them up to pinned, while the HMG (top center) opens fire...
On an enemy rifle team, causing heavy casualties (white bead).
The Charlie G team scootches over and takes a shot at the T-34 on the tracks, but the rocket is short.
Team 4 uses the diversion to sprint towards the enemy tank.
Back in the south, on Hill 35, Captain Wallestre moves up to Team 1 and rallies them, and they open fire on the enemy rifle team and CO,..
Forcing them to fall back (far left, from far right).
Back on the north side of the tracks, Team 6 sprints up (center, right below the enemy T-34, with Team 4 above them and the enemy team that got beaten up by the Ma Deuce at bottom right with white bead).
The CLA forces in the south are getting beat up, but are hanging in, and two rifle teams from the north, and the Gustav team, have now gotten within striking distance.
A T-34 rolls forward, drawing the attention of the TOW gunner on Hill 35...
The missile strikes a mobility crew, the crew pops out (far right), and another T-34 falls back (top left).
But another T-34 steadfastly presses forward and fires its main gun at the CLA troops on Hill 35...
Forcing Team 1 (bottom right, red bead) and Team 3 (top right, red bead) to fall back.
The enemy CO falls back and rallies the rear-most T-34...
Who rushes forward (far left, next to the immobilized T-34) and fires at Team 2...
Putting them out of the fight (casualty figure at center, next to Captain Wallestre).
The T-34 on the tracks pulls up to deal with Team 6, who's gotten too close for comfort, but the Gustav team fires... and misses again.
The T-34 then figures, "to hell with Team 6, I'd better deal with that damn Gustav." The main gun roars...
Of all the lucky damn shots: the Gustav team is knocked out, and Team 6 is forced to fall back (top right).
A second enemy rifle team climbs up the railroad embankment and rallies their stricken teammates; Team 4 snap fires, and puts heavy casualties on them!
On Hill 32 in the north, Team 7 moves up (center), while Colonel Barnejesus rallies Team 5 (top right).
The Colonel then moves to Team 6 and rallies them (far right, from top center).
The .50 cal puts some fire over Team 4's heads, into the enemy troops on the railroad embankment...
Forcing a rifle team to fall back (red bead at bottom left, from top left).
At top right, the Colonel leads Team 6 forward, but they draw fire from a T-34 (center), pinning Team 6...
Team 4's Sergeant decides the situation is getting dire and something needs to be done, so he leads his men up the embankment and into close combat...
They easily dispatch the beat-up enemy team, then move forward to get at another beat-up enemy team, but the enemy rifle team at bottom center snap fires...
And Team 4 is gunned down in its tracks.
The situation is getting desperate, and we're making big mistakes, feeding troops into the fight piecemeal. Team 7 moves down from Hill 43; the T-34 on the embankment snap fires but misses.
Team 7 gets safely into position in cover.
At far right, atop Hill 35 in the south, Captain Wallestre rallies Team 1.
But I didn't use an activation to move them forward. If you can't tell, they and the TOW team are right on the table edge, nowhere really to fall back to. This is turning into the Alamo...
On another crazy note, the regime rolled up a random event, and it was "Abandon Mission." I could have played it right, but then several of my Castro-loving fans would cry all over their laptops and short them out. So I ignored it and had the regime force press home their attack, much to my detriment.
But I re-roll the random event...
Turns out Team 7 was able to use hand grenades to immobilize the T-34 atop the railway embankment.
Another T-34 moves up, and the TOW gunner once again misses the damn target...
Having survived the TOW attack, the T-34 fires on Team 6...
Knocking them out and forcing Team 3 to flee the battlefield. Colonel Barnejesus is lightly wounded and falls back (top center right)
In the south, a T-34 surges to the base of Hill 35 and fires on the TOW team, causing heavy casualties and pinning Team 1, and lightly wounding Captain Wallestre.
The enemy CO falls back and tries to rally a rifle team, but they run off the map.
With the CLA forces in the south largely kaput, another T-34 climbs the embankment and fires on Hill 32, targeting the .50 cal...
The HMG is knocked out (far left), and Team 5 falls back (top right, with Colonel Barnejesus at far right)...
The enemy CO leads a team up the embankment, and Team 7 snap fires but misses...
The enemy's return fire knocks out Team 7.
Not much left for the CLA at this point...
Captain Wallestre orders his headquarters section to lay smoke, while the TOW team and Team 1 fall back off of Hill 35. The CLA's 2nd Air Assault Company falls back in disarray. The enemy assault has succeeded, opening a hole in the CLA's encirclement. The regime's 6th Armored Battalion's survivors pours through the gap, hauling ass towards their base at Cienfuegos.
Casualties:
CLA: ~35 KIA/WIA
Regime: ~15 KIA/WIA, one T-34 knocked out
Well, after a pretty incredible string of luck, that's two fights in a row that haven't gone my way. But never fear, the CLA will soon be back on top. One more fight to post, and it's the last fight of D-Day! Yes, 18 fights in the campaign already, and that was only Day 1 of the War of Liberation.
V/R,
Jack


It seems like the TOW wasn't all that effective. However, is there some sort of morale roll to make for tanks if they see an ATGM firing at them? Even if it had missed, I would think that tanks crews would be a little hesitant to press forward knowing that there is an ATGM near by.
ReplyDeleteChris,
ReplyDeleteYeah, the TOW was having a rough time, just bad dice-rolling, really. There is a morale component; when the TOW knocked out a T-34, the tank next to it fell back, but was later rallied by the regime's CO and got back in the fight. If you're familiar with the 5Core mechanics, I'm rolling 2K 3S for the TOW; if you're not, those dice mean the target tank stands a real good chance of getting knocked out, while other tanks around stand a real good chance of halting or falling back. Of course, if the target tank is not knocked out/disabled, it stands a pretty good chance of halting or falling back. But in this game the dice just weren't working ;)
"...I would think that tanks crews would be a little hesitant to press forward knowing that there is an ATGM near by."
Well, first you need to understand that tank crews in my games have nerves of steel, at least usually ;) But in the overall context of this scenario, it made sense to me for the tanks to push very hard as they mission was to break out of the CLA's encirclement. So, if something is going to convince you deal with that TOW, it's the knowledge that death or capture await you if you don't.
All in all a pretty enjoyable fight. I expected the regime to win, but for a minute there I actually got my hopes up that the CLA might pull out a win. Then the TOW and the Gustav missed...
Thanks for taking a look and commenting.
V/R,
Jack
Two losses in a row! I am surprised (as you may have been as well) that only one tank was knocked out. Really you only had 1/2 the CLA forces in the game as the others on the wrong side of the tracks came in two late. I think the regime was using better tactics than the CLA in this game (even if what they are doing is coming out the same brain!).
ReplyDeleteYeah, a bit of a rough spell. Having half the force on the other side of the tracks was a necessity, couldn't afford to defend only half the map and risk getting flanked, whereas the attacker could afford to screen half off and concentrate his forces for the assault. It worked this time...
ReplyDeleteV/R,
Jack