All,
It's 1830 on 2 Feb 1990, and the CLA's Unconventional Warfare Group (UWG) sits astride the east-west running routes in the Escambray Mountains. The UWG has fought like lions, but has suffered terribly from regime attempts to reinforce its units in the west. The UWG has so far stood its ground, and scouts report to Colonel Huistrella that another enemy formation is approaching, this time in A Company's sector. The enemy troops are members of the 90th Provincial Militia Company, 10th Territorial Infantry Battalion.
So far we've had:
D-Day1) B Squadron SOF destroyed a radar site in support of amphibious landings at Playa Colorada (5). B Sqdn then egressed and linked up with CLA rotary wing assets for their follow-on mission in Havana (6).
2) C Squadron SOF destroyed a the Cuban military's communications center.
3) 1st Para Battalion dropped in and seized a bridge to screen the landings at Playa Colorada (5).
4) 2nd Para battalion dropped in and eliminated a Castro-regime garrison to screen the landings at the Bay of Pigs (just west of (4).
5) 1st Marine Company, 3rd Infantry Battalion, made an amphibious assault at Playa Colorada.
6) A Squadron SOF attacked a Castro-regime SAM site near Havana, which failed to clear the way for B Squadron's helo assault into Havana.
7) 2nd Marine Company, 6th Infantry Battalion, landed at the Bay of Pigs then turned east and ran into a strong enemy force, which it handily defeated.
8) B Company of the UWG pursued and destroyed an enemy garrison in the Escambray Mountains.
9) B Squadron SOF conducted an aerial insertion into Havana to seize a radio station and broadcast news of the invasion.
10) 10th Popular Force Battalion seized and destroyed the Pedroso bridge to protect the Bay of Pigs landing site from the Matanzas garrison.
11) 1st Airborne Infantry Battalion successfully fought off a regime counterattack near the bridge at Sandino, protecting the western (Playa Colorada) landing site from the Pinar del Rio garrison.
12) 6th Infantry Battalion fought through an enemy ambush while pushing inland from the Bay of Pigs landing site.
13) 8th Popular Force Battalion ambushed a mechanized column of the enemy 2nd Armored Battalion, just west of Havana.
14) 2nd Airborne Battalion engaged enemy armored forces of the 6th Armored Battalion in the village of El Rincon, en route to the Bay of Pigs landing site.
15) 4th Infantry Battalion's 1st Air Assault Company conducts an air assault southeast of Sandino to counter enemy mechanized forces of 3rd Infantry Battalion (forcing 1st Airborne Battalion's right flank).
16) 9th Popular Force Battalion conducts a spoiling attack on the regime's 7th Infantry Battalion in the Matanzas garrison.
17) 2nd Air Assault Company, 7th Infantry Battalion, inserts east of El Rincon to block the escape of the regime's 6th Armored Battalion.
18) C Company of the UWG fought a running battle in the Escambray Mountains to delay/halt the regime's 12th Mechanized Battalion moving west.
D+119) A Squadron SOF holds off the regime's 2nd Airborne Company, 1st Airborne Battalion at the Radio Station in downtown Havana, while B Squadron SOF and 8th Popular Force Battalion move to reinforce.
20) 2nd Airborne Battalion, attacks north of Sandino to eliminate the regime's 4th Infantry Battalion.
21) 7th Infantry Battalion, attacks north of Sandino to eliminate the regime's 5th Territorial Infantry Battalion.
22) Colonel Huistrella's Unconventional Warfare Group fight another desperate holding action in the Escambray Mountains, this time against the regime's 10th Territorial Infantry Battalion.
The opposing forces, with regime troops on the left and CLA on the right. The CLA is comprised of Minifigs modern Australians ('modern' being relative, they look to be Vietnam era), while the regime force is made up of Australians from Pendraken's Vietnam Range, heavy weapons are NVA/VC/Vietminh from Pendraken's Vietnam/Indochina Ranges, and an M8 armored car from Pendraken's WWII Americans Range.
 Commander, A Co: Captain Kalabera
The CLA force has a Command Stand representing Captain Kalabera, six rifle teams, and a single leader figure representing the UWG commander.
 CLA Unconventional Warfare Group, Commanding Officer: Colonel Hector Huistrella, already decorated with the Cruz Distinguido.
The regime force has a Command Stand, six rifle teams, an LMG team, an 82mm mortar team, and an antiquated, yet still functional, M8 Armored Car.
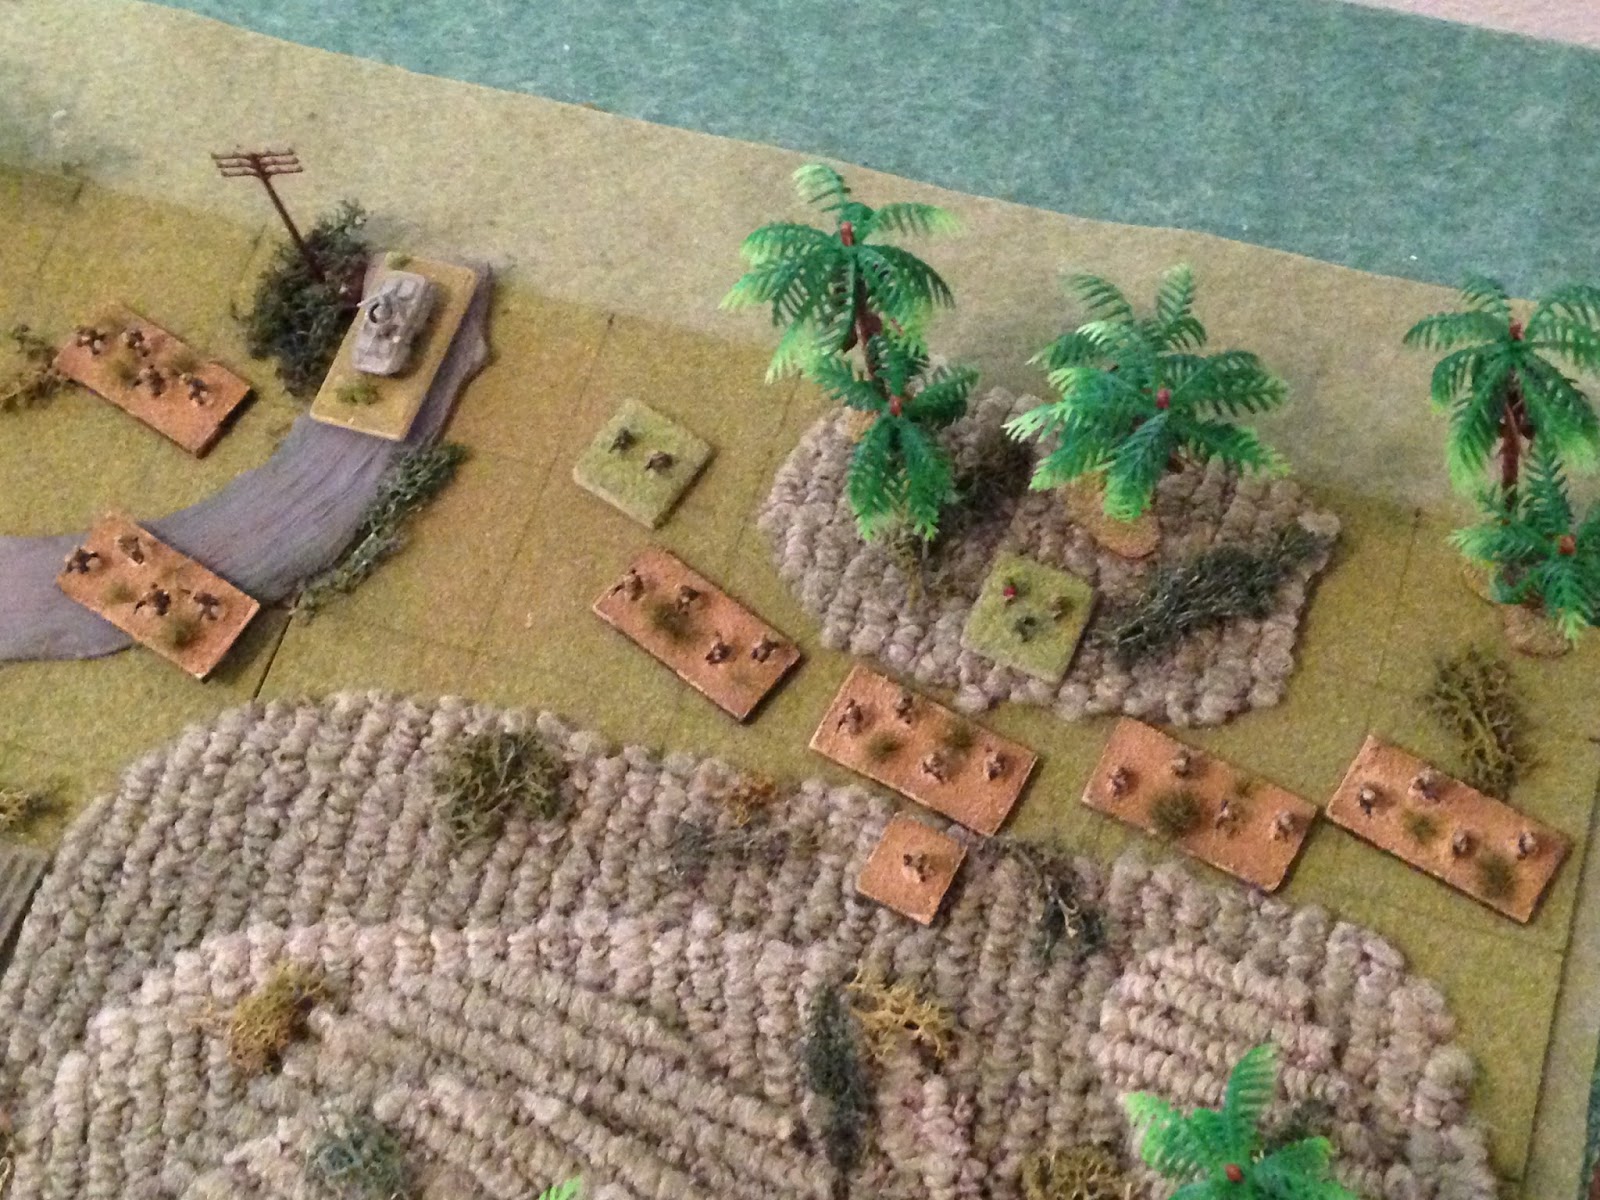
Overview, north is up. The Castro-force is expecting trouble, so is dismounted and fanned out along the right (east) side of the board. The CLA force is hiding on the back side of Hill 67, on the left (west) side of the board. The purpose of this is to avoid observation by enemy elements that could call in air/arty, sort of a micro-reverse slope defense. But they're ready to spring their ambush, so, at the micro-level they shan't be sitting tight, waiting for the enemy to crest.
Sitting tight would make sense if their goal was a short burst of fire to sow confusion, cause a few casualties, and slow the enemy mechanized force by making them dismount and deploy, then fall back. But then enemy is already deployed, and the goal is turn back the enemy, not hit and run; operationally, the UWG doesn't have room to fall back, they'd end up in the Cienfuegos garrison. So, with these short ranges they're better off seizing the initiative and lashing out at the enemy, rather than holding fast and potentially being overrun due to being caught outnumbered at such short range, or (more likely), being fixed in place by ferocious enemy fire at short range, then having enemy armor loop around the flank to eliminate them.
The southwest, showing the CLA start positions.
The enemy force, spread out along the right (east) side of the board.
CLA wins the die roll (had a positive modifier due to being much better troops, i.e., Special Forces vs. Militia), so let's do this.
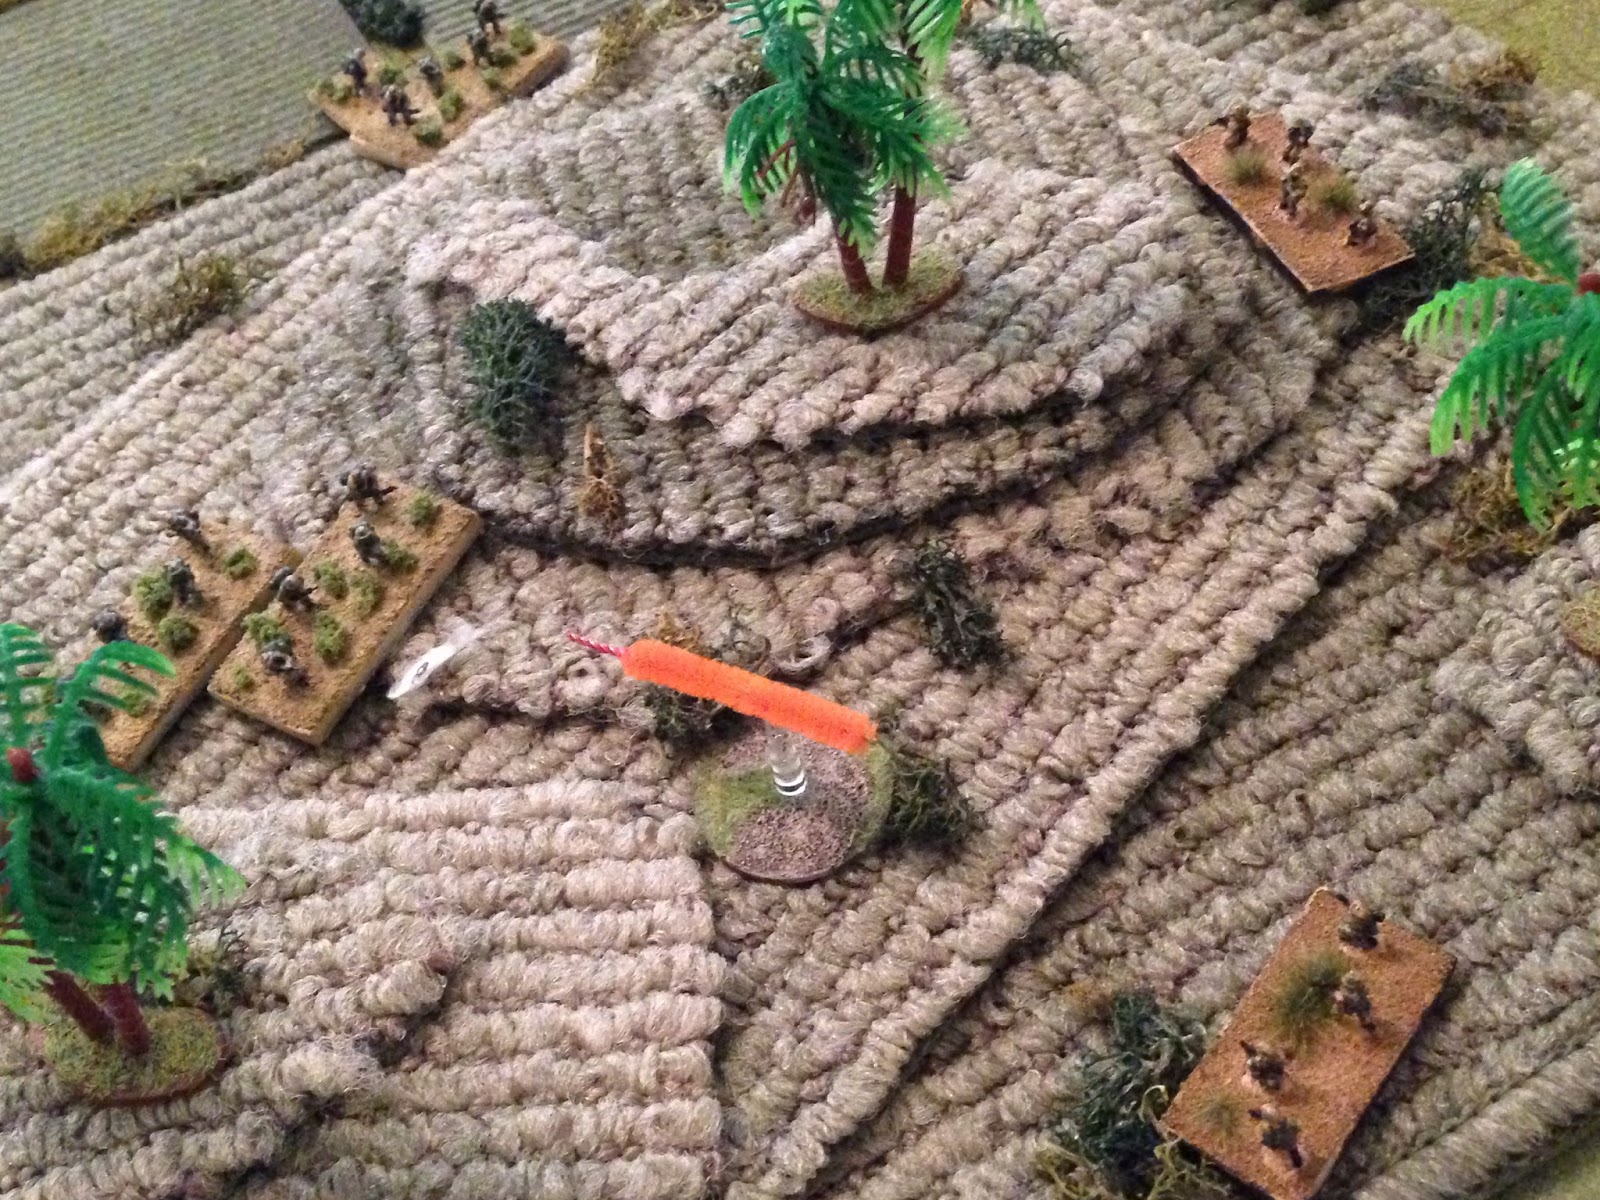
The CLA force scurries on up Hill 67.
And the enemy moves in force up the hill as well, with a small, but powerful force (with the armored car) looping around to the north on the highway.
The enemy mortar immediately goes into action, firing on Team 3...
And causing heavy casualties (with Captain Kalabera right behind them).
Then a rifle team fires on Team 1, causing them heavy casualties.
Two different enemy teams fire on Team 2, but they suffer no ill effects.
Then the enemy armored car fires its main gun at Team 4, but misses.
Next is fire on Team 6 (bottom center), which at first does not harm them, but a second team fires and pins them.
Then the enemy LMG fires on Team 4...
Forcing them and Team 7 to fall back (far left, red beads).
Team 2 returns fire, pinning an enemy rifle team.
While Team 6 fires at the enemy LMG team, but doesn't find its mark.
Colonel Huistrella falls back to rally Teams 4 (good, bottom center) and Team 5 (fail again, bottom left, red bead), and Team 6 (stays pinned, yellow bead)...
Captain Kalabera tries to rally Team 3, but their casualties are too many and they stay 'men down.' He moves forward and successfully rallies Team 1.
Team 2 (top left, with Team 1 and the Captain at bottom left) moves up, drawing enemy fire, which misses.
Team 2 opens up at very close range...
Putting heavy casualties on one rifle team (top left, white bead), pinning one (bottom left, yellow bead), and forcing another to fall back (far right, red bead). Enemy mortar is at bottom center.
Team 6 (bottom left, still pinned with yellow bead) opens fire...
They force a rifle team to fall back (far right, red bead, from center). An enemy team (top right) returns fire, but misses.
On the CLA's far right, Captain Kalabera senses opportunity, and leads Team 1 forward in a rush into close combat. The enemy CO moves over to assist his pinned rifle team against them...
Fighting tenaciously, the Captain and Team 1 eliminate the rifle team and enemy CO, then lurch forward towards the enemy mortar team, which opens fire with their personal weapons...
But the CO and Team 1 push through and eliminate them, then charge headlong into a hunkering enemy rifle team...
The put that team out of the fight (casualty figure at far right). With stricken enemy teams to each side of them, they charge up the middle at the enemy LMG team, which opens fire...
**If you're thinking charging the LMG team, rather than the hunkering or 'men down' rifle teams, is dumb, it's not as dumb as it sounds. In game terms, the LMG, due to its proximity, is going to be able to snap fire the CO/Tm1 regardless of whom they charge, so this was the best option. That is, if the CO/Tm1 went after the rifle team with the red bead, the LMG team would get to snap fire. If the CO/Tm1 beat them, they'd then have to move on the LMG team, which would get to snap fire again.
But Captain Kalabera and Team 1 brave the enemy's machine gun fire and close with the enemy team...
But their attack is repelled (it was a draw, so the attacker falls back). The CO and Tm1 were forced to fall back (bottom right, red bead). Nooooooooooooooo!!!
Team 5 moves up, but draws heavy enemy fire, which pins them...
The enemy LMG team moved over and helped the 'hunkering' rifle team (top right, red bead) rally, then opened up on Team 1, but they've already gone to ground and the enemy fire is ineffective.
The just rallied team moves up and helps the 'men down' rifle team rally, then fires on Team 2, but they miss too!
This game is certainly proving that close combat is necessary to eliminate infantry!
Then Captain Kalabera tries to rally Team 1 (bottom right), but they've had enough and run off the map! The CO falls back (bottom center), while Team 2 (top left) lays down cover fire. Cover fire which doesn't hit anyone, despite being at very close range...
On the left, Colonel Huistrella rallies Team 6 (top left), then falls back to rally Team 4 (bottom center), but they run off the map too! Off camera to right, Team 3 successfully self rallies.
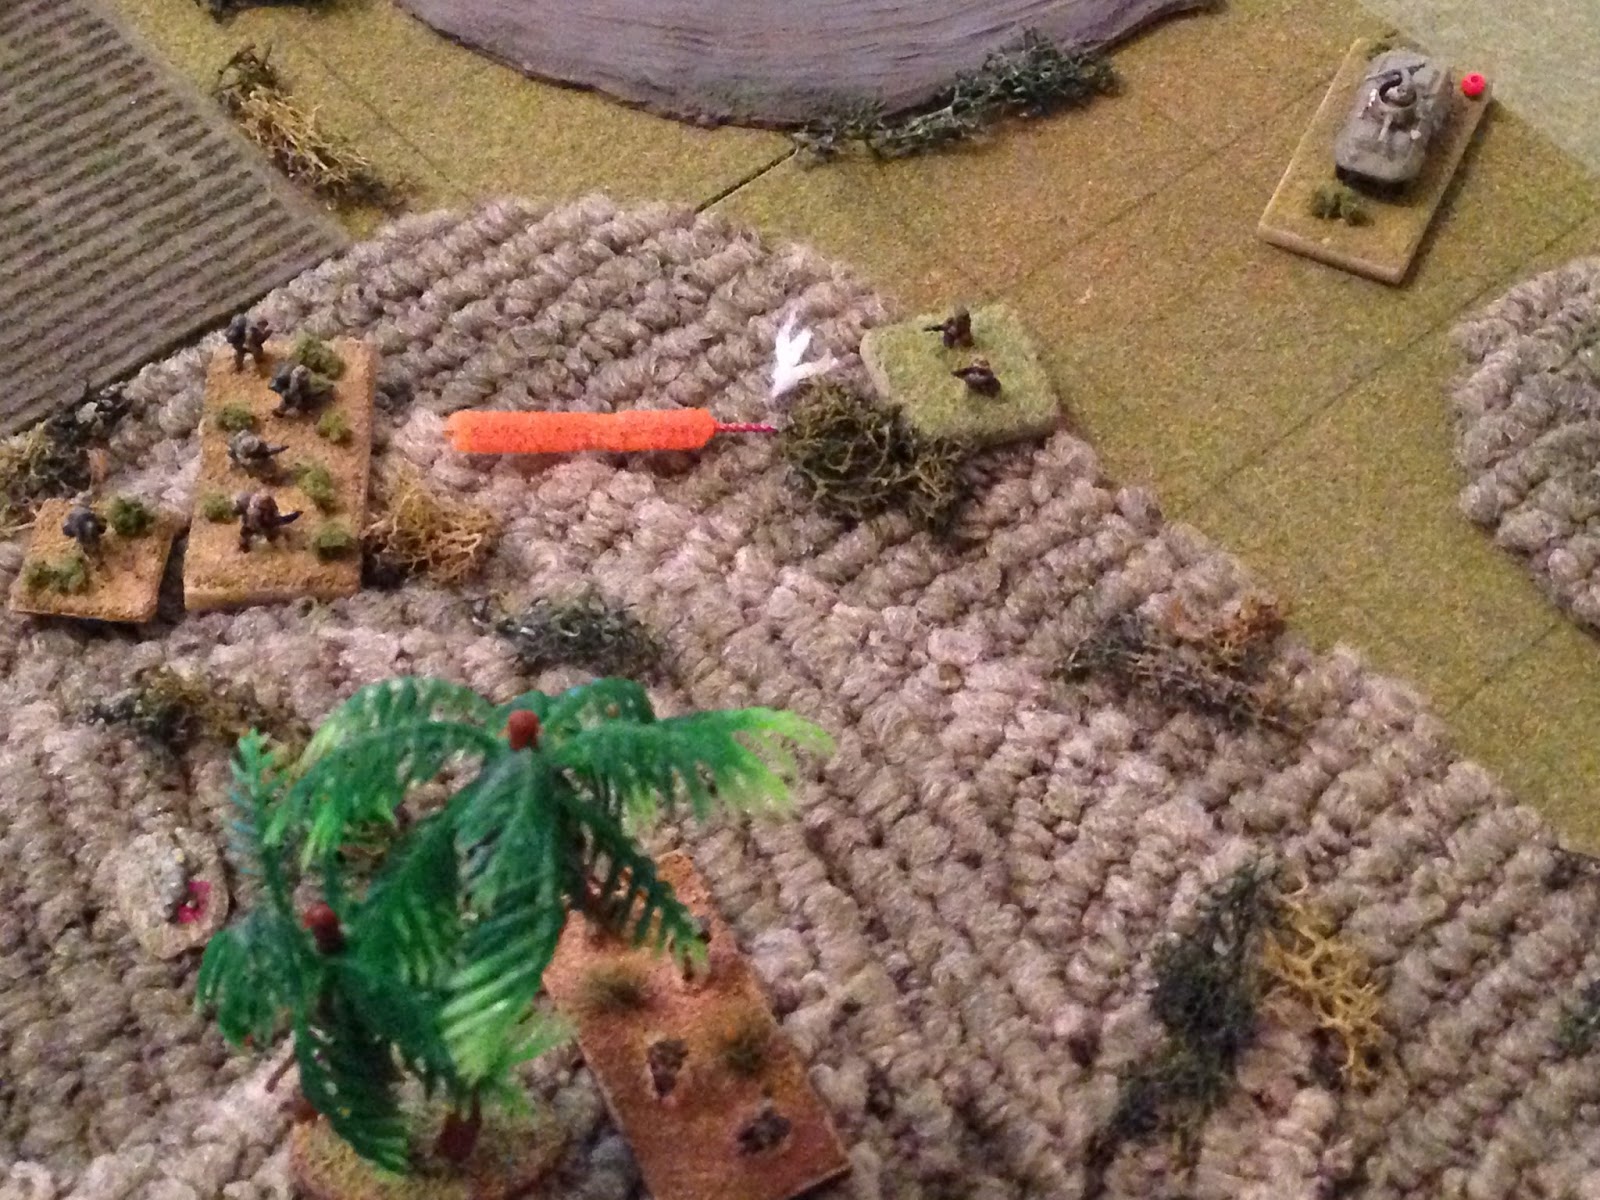
Not forgetting about having to deal with the enemy armored car before it eats them up (meaning you have to get very close to use a LAW, which means you have to get rid of the enemy rifle teams that are placed to protect it with reactive fire), Team 5 fires, and pins an enemy team in the north.
And then Team 6 fires on the other enemy team in the north and causes heavy casualties. The way is now clear of infantry to move up, though you still have to worry about reactive fire from the armored car. Which is better than having to worry about reactive fire from the infantry AND the armored car...
So Team 6 moves up (top left), but draws fire from the armored car...
Forcing them to fall back (red bead, far left)!
But both enemy rifle teams in the north (top center) successfully rally, while the armored car falls back to put more distance between it and CLA LAWs. Like a game of chess, the LMG team then decides to leave the CLA troops in the south to friendly infantry, and falls back (far right) to be in position to interdict CLA movement in the north towards the armored car.
In the south, an enemy rifle team moves over (bottom right), forcing Captain Kalabera's HQ section to fall back (bottom left).
Colonel Huistrella (bottom left) braves enemy fire to sprint over to Team 6 (from top right), and rallies them.
Yuk! Sorry, another terrible photo... Colonel Huistrella leads Team 6 forward, while Team 5 (bottom right) self rallies.
On the right, Team 3 (top center) an the CO and Team 2 (bottom center) move up Team 5 is at far left, with the Colonel and Team 6 off camera at far left).
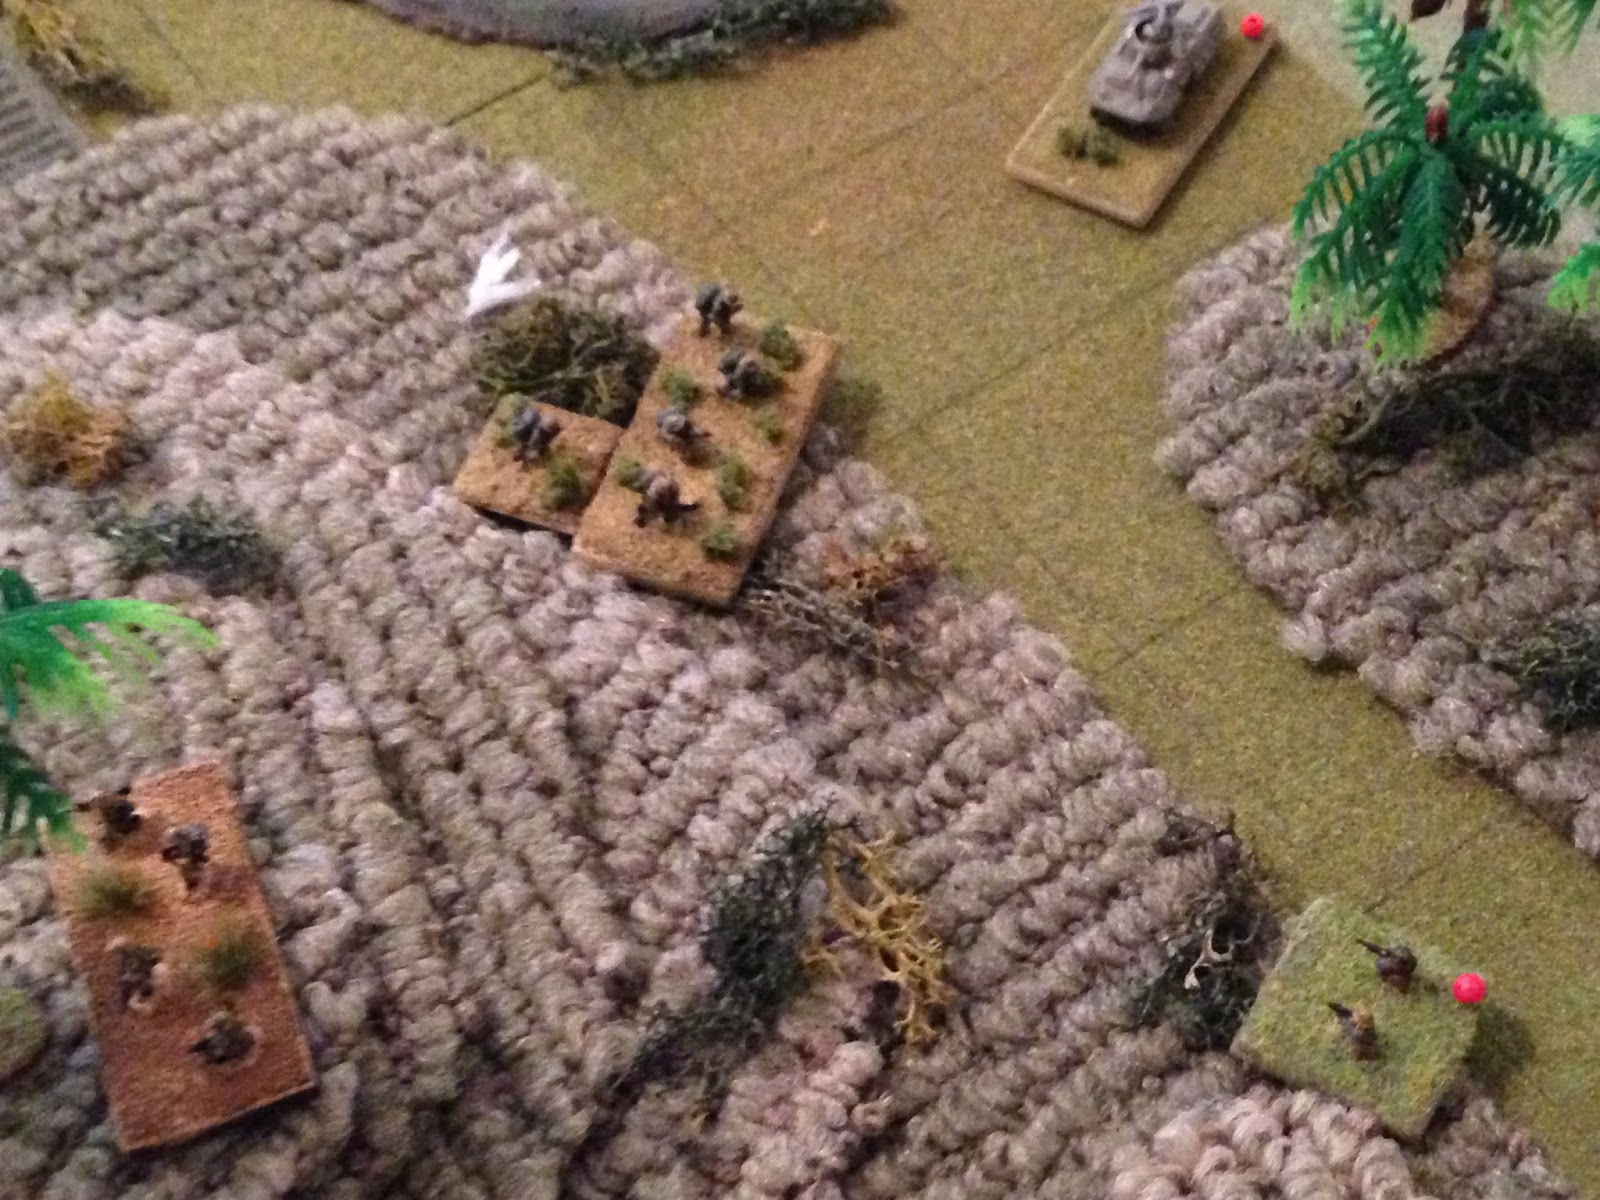
The CLA is working very hard to encircle the enemy's armored car: Colonel Huistrella leads Team 6 forward (far left), while Team 5 moves up (bottom center), and Team 3, seeing the Colonel's focus, decides to leave the fight in the south (right) and move up on the armored car (far right). There was an enemy rifle team on the road; they fall back to put more room between them and the bloodthirsty CLA troops.
Captain Kalabera and Team 2 move north (top left) to maintain contact with the rest of the force, not leave a big hole in their center, but his opens up their right flank, which an enemy team (bottom left) promptly exploits by dashing forward. The enemy LMG team (far right, just visible under tree) holds fast, lining up a perfect shot on Team 3 (top center).
The enemy armored car senses the trap, and doesn't want any of it, so it falls back. It's a bit closer to Team 3 (center) now, but their LMG is covering them, and they put a lot of distance between the armored car and Teams 5 (bottom left) and 6 (off camera to left).
The LMG team opens fire on Team 3, pinning them (Team 2 is barely visible under tree at bottom left).
Team 2 returns fire on the LMG team...
Forcing them to fall back (far right).
Then the armored car's main gun roars (yes, only 37mm, but firing cannister at this range), pointed at Captain Kalabera and Team 2...
Team 2 is knocked out of the fight! Somehow Captain Kalabera is okay, but Team 3 is forced to fall back (top left, red bead)...
Captain Kalabera shakes off the stars and cobwebs, then sprints to the rear and rallies Team 3 (bottom left).
On the far left, Colonel Huistrella and Team 6 open fire, pinning an enemy rifle team in the north.
While Team 5 (far left) and the other enemy rifle team in the north exchange fire, fruitlessly.
The enemy armored car darts south, helping the LMG team to rally so it can get back in the fight.
The LMG team promptly reoccupies its old position (bottom right), then fires on the Colonel and Team 6...
Somehow the Colonel survives, but Team 6 is out of the fight!
I've been quite surprised lately with the lack of leader casualties, but the dice rolls have been with them. I really thought Captain Kalabera had bought it when the armored car popped Team 2, and now this...
Colonel Huistrella takes off at a sprint to join Team 5. I was preparing to have the CLA fall back off the map, conceding the battle to the regime force, when Team 5 opened up a torrent of fire on the enemy infantry in the north...
Knocking them both out!!! (casualty figure is easy to see at top right, but there's another on the knoll at top center right)
Then, in the south, Captain Kalabera led Team 3 forward. The enemy opens up, but they are unshaken.
The Captain and Team 3 open up, and put the enemy team out of the fight.
Now the shoe is on the other foot: in the blink of an eye, the regime force has lost three rifle teams.
This is looking from behind the regime force at the CLA force, i.e., right to left in the table's normal orientation. The enemy, rather impressively, particularly for third-rate militia, not only hangs around, but decides to advance!
The CLA force is down to Colonel Huistrella, Captain Kalabera, Team 5, and Team 3. The enemy is down to their armored car, the LMG team, and one rifle team.
Recognizing the gauntlet has been cast, the CLA reciprocates, with Captain Kalabera and Team 3 move up in the south (bottom left), while Colonel Huistrella and Team 5 move up in the north (top center).
Alright folks, this is it, the OK Corral. It all comes down to the dice...
Captain Kalabera screams "NOW!" and Team 3 launches a LAW rocket at the armored car...
The rocket skips off the front glacis of the M8, but the crew is shaken and falls back (top right, from bottom center).
Then the Colonel and Team 5 open fire on the LMG team...
They fall back (bottom right, red bead, from center), and the Colonel leads the men forward (center).
The enemy rifle team in the center now has CLA forces to its front left and right rear; it goes for front left, firing on the CO and Team 3, pinning them.
The enemy rifle team, having just fired and pinned Team 2, now elects to fall back to try to rally the LMG team. The Colonel orders Team 5 to open fire on them...
But the militia infantrymen are hell bent on getting there, and they do. They help the LMG team rally, which then fires on the Colonel and Team 5, but their blood is up and they shrug off the machine gun fire!
Team 5 returns fire...
If you're wondering why the armored car is just sitting there, not doing anything, it's because it's still 'hunkered.' Without their CO (knocked out early on in close combat), who gets a 'free' action each turn to move and rally, the regime has been forced to either 1) move a team over into base contact, or 2) spend an activation to attempt to rally. At this point, moving over to the armored car, drawing react fire from Teams 3 and 5, is not a good idea, and they can't afford to spend an activation on rallying.
Pinning the rifle team and forcing the LMG team to fall back.
And then Team 3 opened fire on the already pinned enemy rifle team, forcing them to fall back off the map. When this occurred, the enemy threw in the towel, with the hunkered LMG team and the hunkered armored car following suit and falling back off the map.
Casualties:
CLA: ~20 KIA/WIA
Regime: ~35 KIA/WIA
Colonel Huistrella was awarded the Estrella de Bronce for this fight, while Captain Kalabera was awarded the Estrella de Plata. Team 1's Sergeant would have been getting an award for all that close combat, but then they ran off the map! Both the Colonel and Captain were also lightly wounded.
Somehow, once again, the Unconventional Warfare Group, fought down to a nub, holds its ground and drives off a numerically superior, mechanized enemy force. I don't know what it is with these guys, but they're last two fights have been absolutely fantastic! If you recall, their first fight was a real stinker: they cornered a regime patrol up against the table edge and slaughtered them, over in about five minutes. But these last two, wow. If it wasn't for that first fight, in which B Company suffered very few casualties, the UWG would be eliminated. A, and now C Companies have been virtually wiped out.
Along those lines, some of you are probably looking at the above casualties (~20 KIA/WIA) and wondering, "what the hell are you talking about, fought down to a nub? A company usually has between 100 and 200 men." Well, yes, but to keep this campaign in a scale that was gameable (for me), I not only had to reduce the overall size of the two armies (the CLA, which is imaginary, has 10 battalions plus the SOF and UWG; the Cuban Army, which is pretty damn large in real life, has only 15 battalions in my little world), but I am sort of 'bath-tubbing' the results. That is, in a tabletop battle, a company is represented by a commander (and another leader for the CLA; yes, I'm cheating, but I really really really want to win. I can't have a bunch of campaigns after this if the CLA doesn't liberate Cuba!), between 5 and 7 rifle teams, and between 1 and 3 support teams (can be heavy weapons and/or vehicles). So, if they take extremely heavy casualties, they are no longer combat effective. If they take heavy casualties, I usually give them another fight, but if they get roughed up there they are done, and so on.
On another note, thus ends the fights I had scheduled for D+1, and we now move on to D+2, the third day of battle. With the way things are going, I can't see the War of Liberation going past D+4 or 5. But you never know... I do still have to deal with the issue of El Presidente (what will become of him?), and the Iranians (seen in the first fight for the Radio Station in downtown Havana), aside from the 'regular' fighting with the regime forces still available.
Next up will be the SITREP for D+1, then I'll look to knock out some more fights in D+2.
V/R,
Jack


Yeah, bath tubbing it works great for examples like this.
ReplyDeleteI usually just figure that the results from the table are representative how actions fared elsewhere in the overall battle.
So if my boys took 20% losses (that's a good day with my dice rolls), that's the average losses along the front.
Nice focus on the rallying with the armoured car too. Risking a 1 in 3 chance at the activation being wasted burns :-)
I remember someone telling me that moving troops in contact to rally in company commander was a bad idea... ;-)
Commissar,
DeleteYou're spot on with the bath-tubbing, there's no other way I could have fought the whole 'war' with company-level rules. Regarding the rallying, I thought it was a good move, so put it in with a couple other courses of action, rolled for it, and that's what popped out. Could've worked ;)
Someone did tell you that, but then someone tried it out, and a picture formed in someone's head: a rifle squad/team is pinned down, another squad/team sees this, rushes over, puts itself in the line of fire to shield their brothers, then cuts loose a withering bout of covering fire while the pinned squad/team's NCO rallies his boys.
The rest, as they say, is history. Thanks for stopping by man.
V/R,
Jack
Excellent AAR - the campaign is getting quite interesting.
ReplyDeleteLooking forward to the D+1 summary and the next days reports.
Cheers, Andy
Thanks Andy. The campaign has been great, but I probably put a few too many fights in D-Day ;) The following days are going to be much shorter in terms of fights (D+1 and D+2 are both four fights), and I can't see the war going much past D+4, if that. It's been fun, but I'm too much a butterfly and have other things I want to get to.
DeleteI did a summary (SITREP) for D-Day, but I on'y posted it here on the blog, I didn't make a posting on the various websites, and I didn't receive any commentary on it. So my frustration was wondering if anyone saw it, or if people saw it but didn't see any utility in it.
For the D+1 SITREP I'm going to make a post on the websites, then see if anyone looks. If it's not of interest, no sweat, I'll just stop doing it. But if there even a couple people that like it, I'll keep going. I aim to please ;)
Thanks for reading and commenting.
V/R,
Jack