It's 1530 on 1 Feb 1990, and the CLA's Golf Company, 9th Popular Force Battalion, finds itself in very interesting position, insofar as they about to attack a larger force. Captain Elias, G Company's commander, turned to his superior, Colonel Bustamante: "Are you sure about this, Sir?" "Yes, Captain, we will strike at the enemy while he is still preparing to strike at us."
Generalissimo Waraldonez' orders to Colonel Bustamante, commander of the 9th PF Bn, were to delay the enemy garrison at Matanzas from striking south (towards the Bay of Pigs landing site) or west (towards the Playa Colorada landing site). Colonel Bustamante conducted a map reconnaissance and realized there were three highways leading out of the Matanzas area that could be used by the enemy. Col Bustamante was adamantly opposed to assigning one of his companies to each of the highways, as it would leave him without a reserve, nor could he afford to play a 'guessing game' with the enemy, trying to ascertain which route(s) they might use.
So Col Bustamante decided the best course of action was to seize the initiative and conduct a spoiling attack against the enemy's 43rd Infantry Company, 7th Infantry Battalion, as it was preparing to depart the Matanzas military base and strike for the CLA landing areas.
1) B Squadron SOF destroyed a radar site in support of amphibious landings at Playa Colorada (5). B Sqdn then egressed and linked up with CLA rotary wing assets for their follow-on mission in Havana (6).
2) C Squadron SOF destroyed a the Cuban military's communications center.
3) 1st Para Battalion dropped in and seized a bridge to screen the landings at Playa Colorada (5).
4) 2nd Para battalion dropped in and eliminated a Castro-regime garrison to screen the landings at the Bay of Pigs (just west of (4).
5) 1st Marine Company, 3rd Infantry Battalion, made an amphibious assault at Playa Colorada.
6) A Squadron SOF attacked a Castro-regime SAM site near Havana, which failed to clear the way for B Squadron's helo assault into Havana.
7) 2nd Marine Company, 6th Infantry Battalion, landed at the Bay of Pigs then turned east and ran into a strong enemy force, which it handily defeated.
8) B Company of the UWG pursued and destroyed an enemy garrison in the Escambray Mountains.
9) B Squadron SOF conducted an aerial insertion into Havana to seize a radio station and broadcast news of the invasion.
10) 10th Popular Force Battalion seized and destroyed the Pedroso bridge to protect the Bay of Pigs landing site from the Matanzas garrison.
11) 1st Airborne Infantry Battalion successfully fought off a regime counterattack near the bridge at Sandino, protecting the western (Playa Colorada) landing site from the Pinar del Rio garrison.
12) 6th Infantry Battalion fought through an enemy ambush while pushing inland from the Bay of Pigs landing site.
13) 8th Popular Force Battalion ambushed a mechanized column of the enemy 2nd Armored Battalion, just west of Havana.
14) 2nd Airborne Battalion engaged enemy armored forces of the 6th Armored Battalion in the village of El Rincon, en route to the Bay of Pigs landing site.
15) 4th Infantry Battalion's 1st Air Assault Company conducts an air assault southeast of Sandino to counter enemy mechanized forces of 3rd Infantry Battalion (forcing 1st Airborne Battalion's right flank).
16) 9th Popular Force Battalion conducts a spoiling attack on the regime's 7th Infantry Battalion in the Matanzas garrison.
The forces, with regime troops on the left and CLA on the right. The CLA are made up of Brit and Argentinian SF from Pendraken's Falklands range, with VC/NVA/Vietminh for heavy weapons, while the regime force is made up of Argentinians from Pendraken's Falklands range.
 Captain Elias, Commander, G Co, 9th PF Bn (brother of Col Elias, CO of 10th PF Battalion)
The CLA force has a Command Stand representing the Company Commander, five rifle teams, a single RPG team, and a single leader figure representing their battalion commander.
 9th Popular Force Battalion, Commanding Officer: Binyamin Bustamante
The Castro-regime troops have a Command Stand, seven rifle teams, and a .50 caliber HMG.
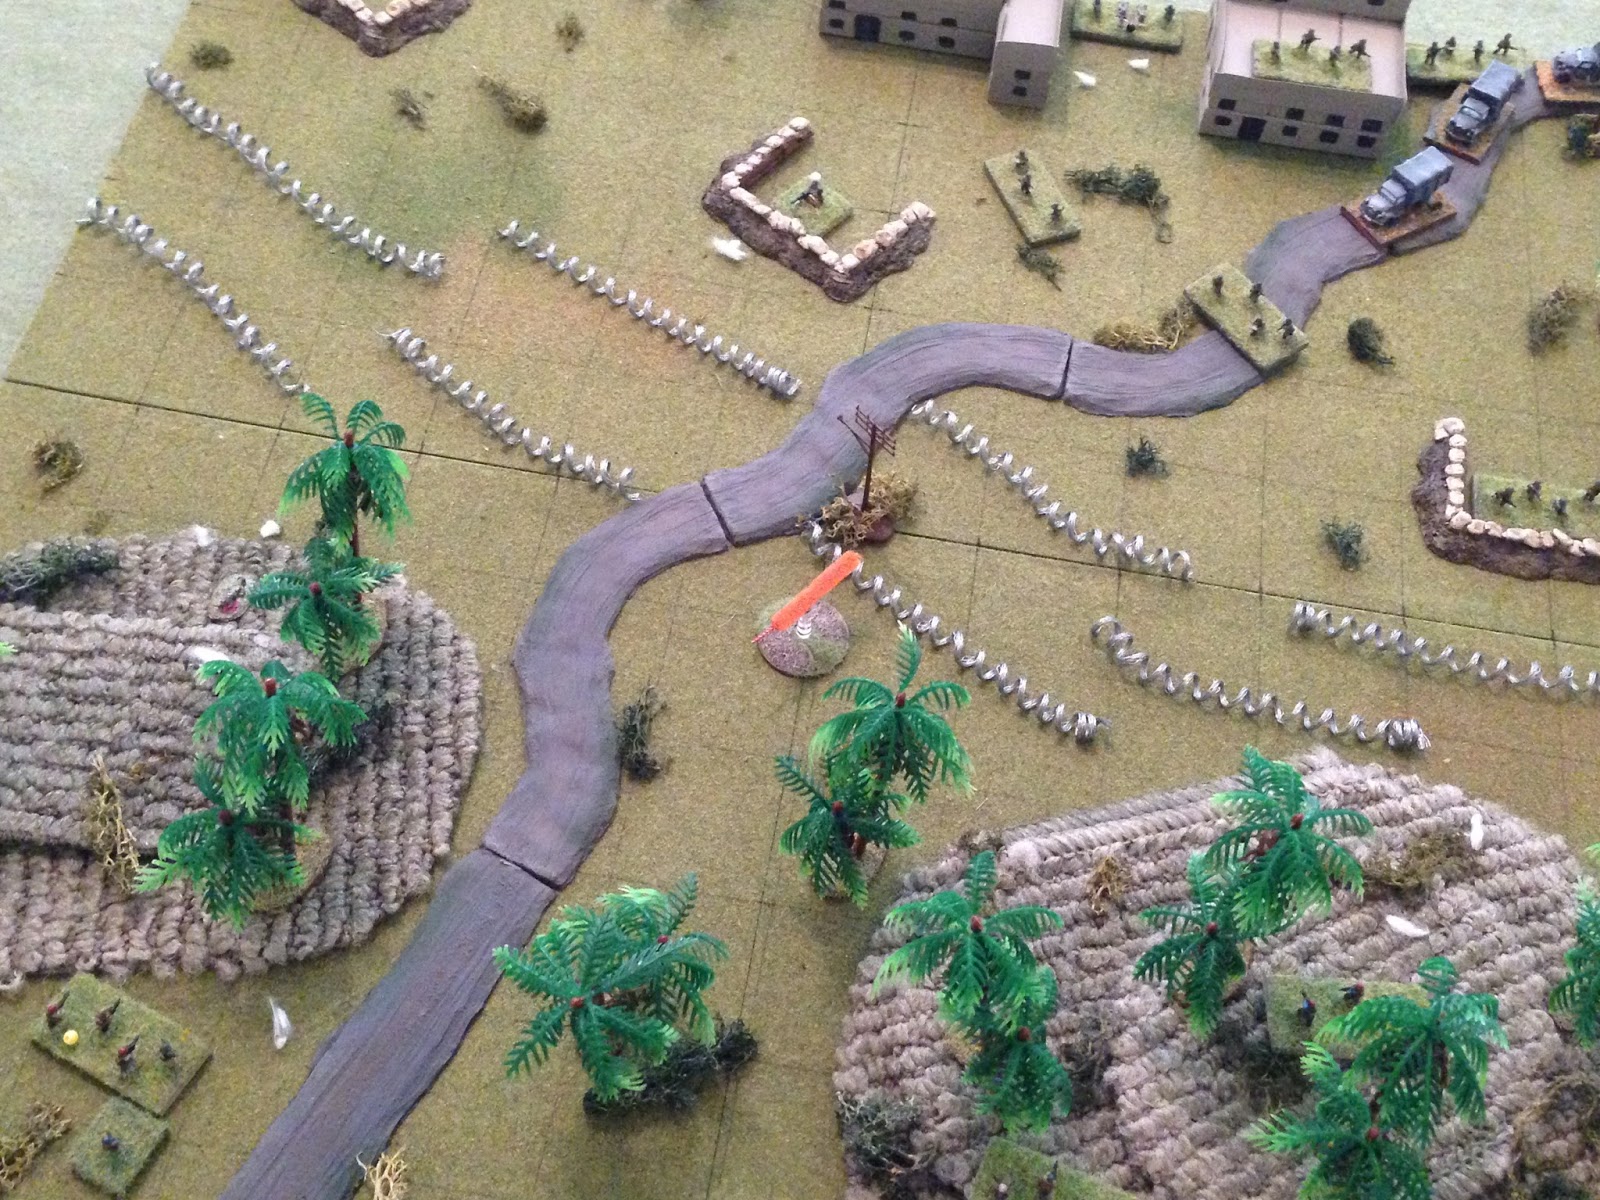
Overview of the map, north is up, with the regime's Matanzas military base on the northern half of the board. There are three rifle teams on the ground, falling back to the trucks (at top right), where the Commander and the other four rifle teams are already mounted up. A single rifle team has just left Bunker 1 (if you count the three bunkers from left to right), and two rifle teams are next to Barracks 1 (if you count the two buildings from left to right). The HMG is in Bunker 2. The CLA force is along the bottom (south) edge, with Colonel Bustamante, the RPG team, and a rifle team in the bottom left corner, looking to provide a base of fire from Hill 15 (bottom left), while Captain Elias leads the assault of four rifle teams coming through the thick jungle atop Hill 25 (bottom right).
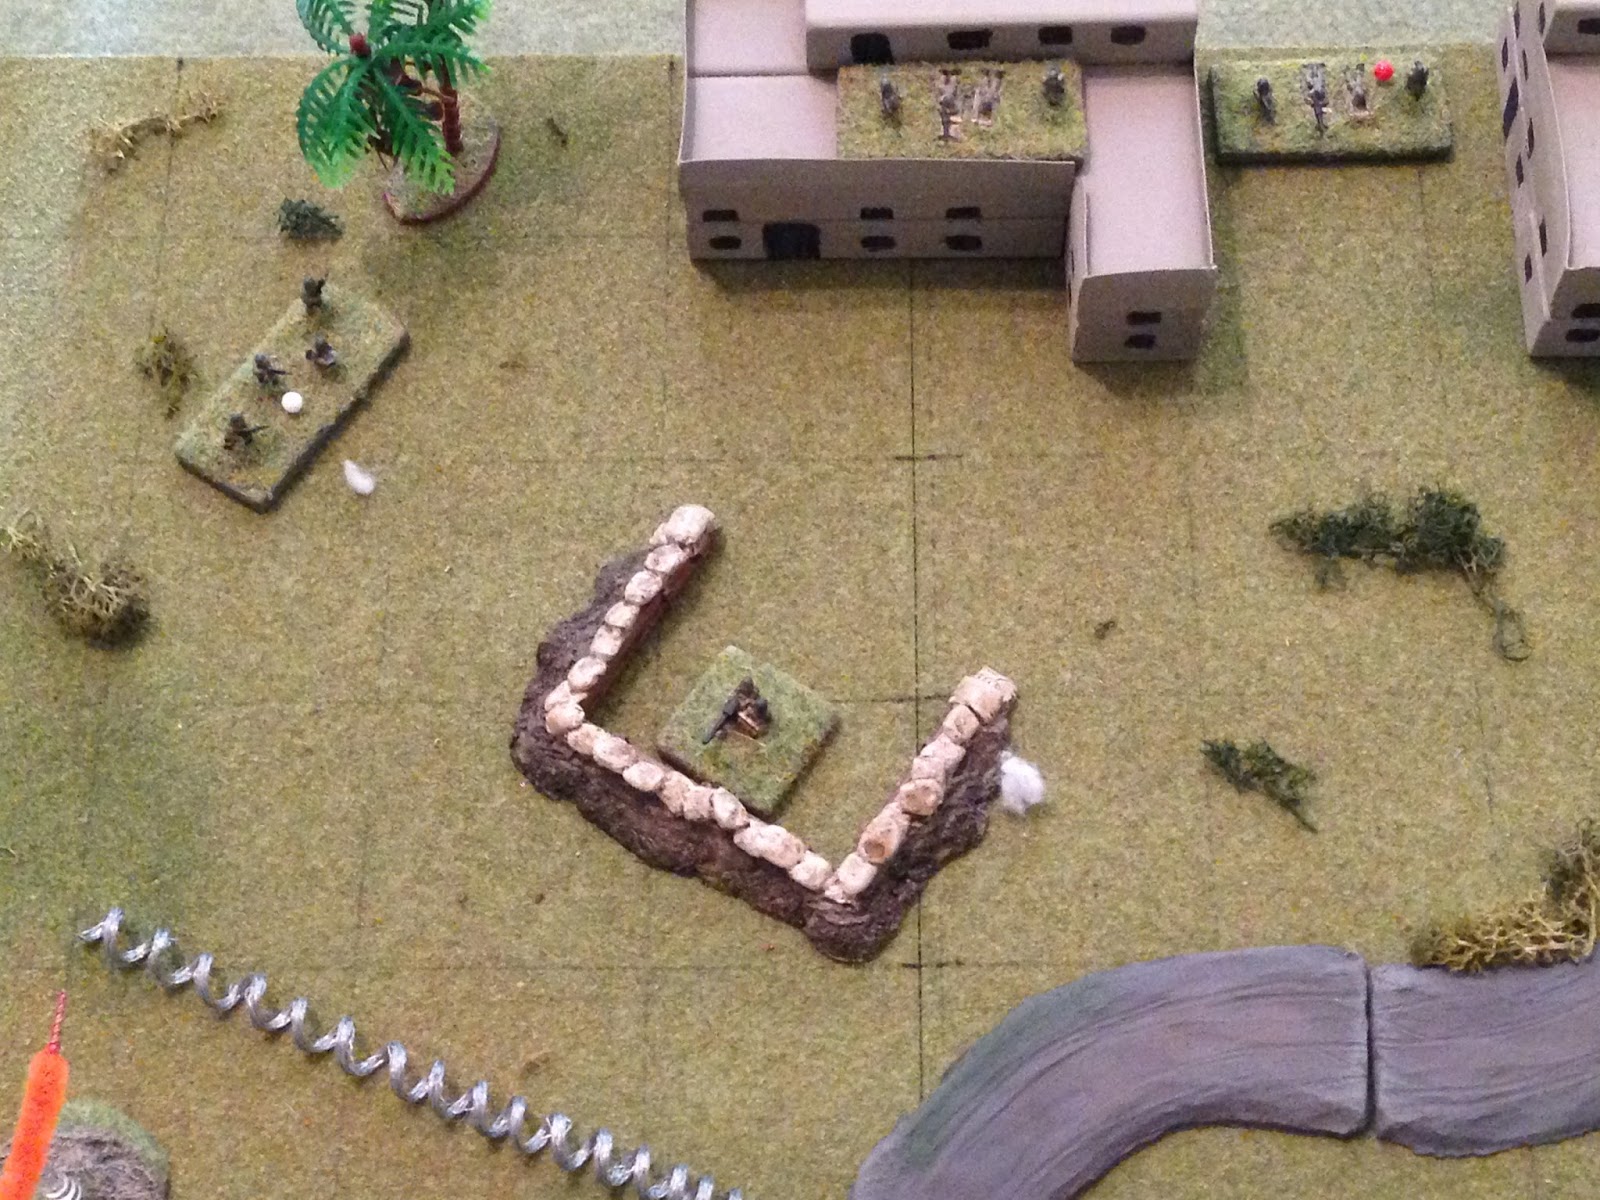
Southwest corner, showing Colonel Bustamante and the support element nearing Hill 15.
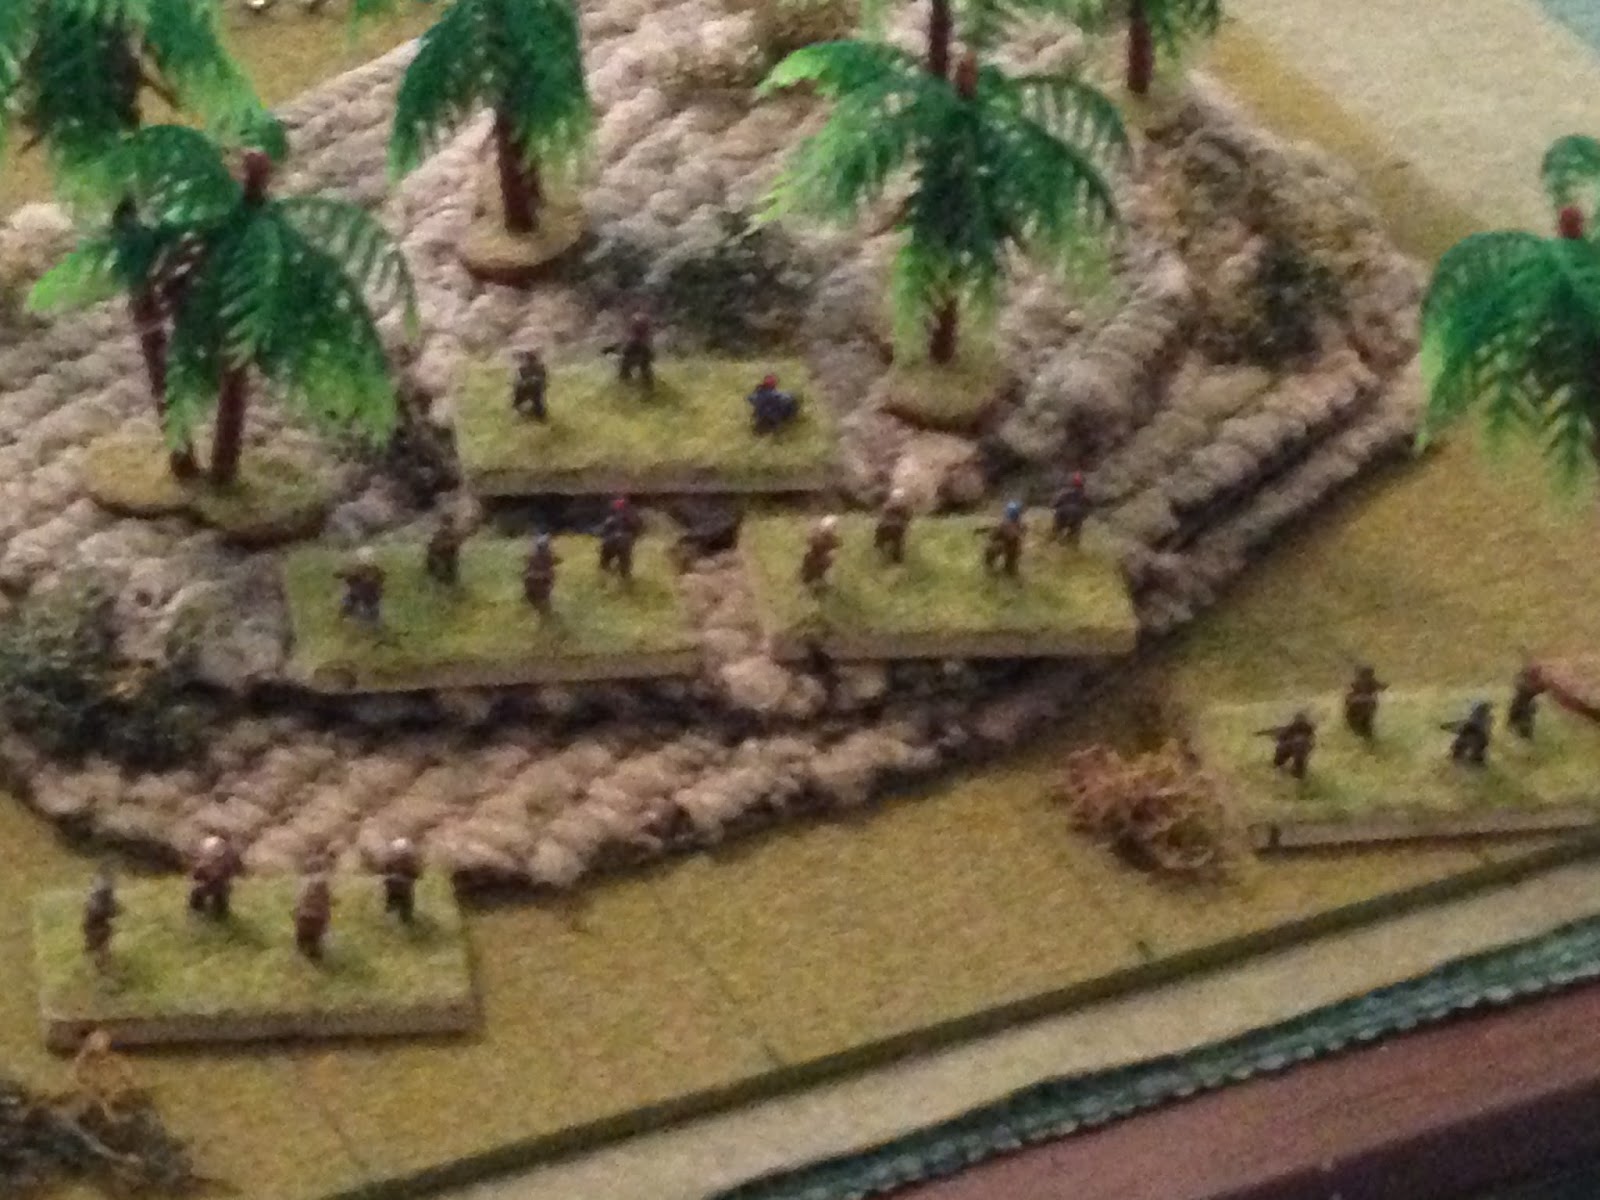
The CLA's right side, showing Captain Elias leading Teams 1 through 4 up Hill 25.
The enemy forces in the north, with their CO and four rifle teams in the trucks at right, and the rest of their force packing up to hop on the trucks and head towards the sound of gunfire.
Ladies and gentlemen, the game is afoot.
The support team gets on top of Hill 15, and the RPG team immediately fires a rocket towards the HMG in Bunker 2...
But the rocket hits wide of the mark.
But then Team 5 (on Hill 15 with the Colonel and RPG) opens up a ferocious fusillade...
Getting heavy casualties on one enemy rifle team (white bead, top left), and forcing another to fall back (red bead at top right, between the two Barracks).
On the right, Captain Elias leads Team 2 up Hill 25, where they open fire, but they're breathing heavy after moving uphill through thick vegetation and the rounds miss...
At to left, the Castro team with heavy casualties tries to recover, but they've taken too many casualties and melt away, while the hunkering team (top right) rallies. Then the enemy's HMG opens up on Hill 15 (bottom left)...
Forcing Team 5 to fall back.
The enemy team in Barracks 1 (top left) fires on Hill 25, pinning Team 2.
The enemy was quite stunned, being attacked on their own base, and so their reaction was slow enough that the troops in the trucks were unable to dismount in a timely fashion.
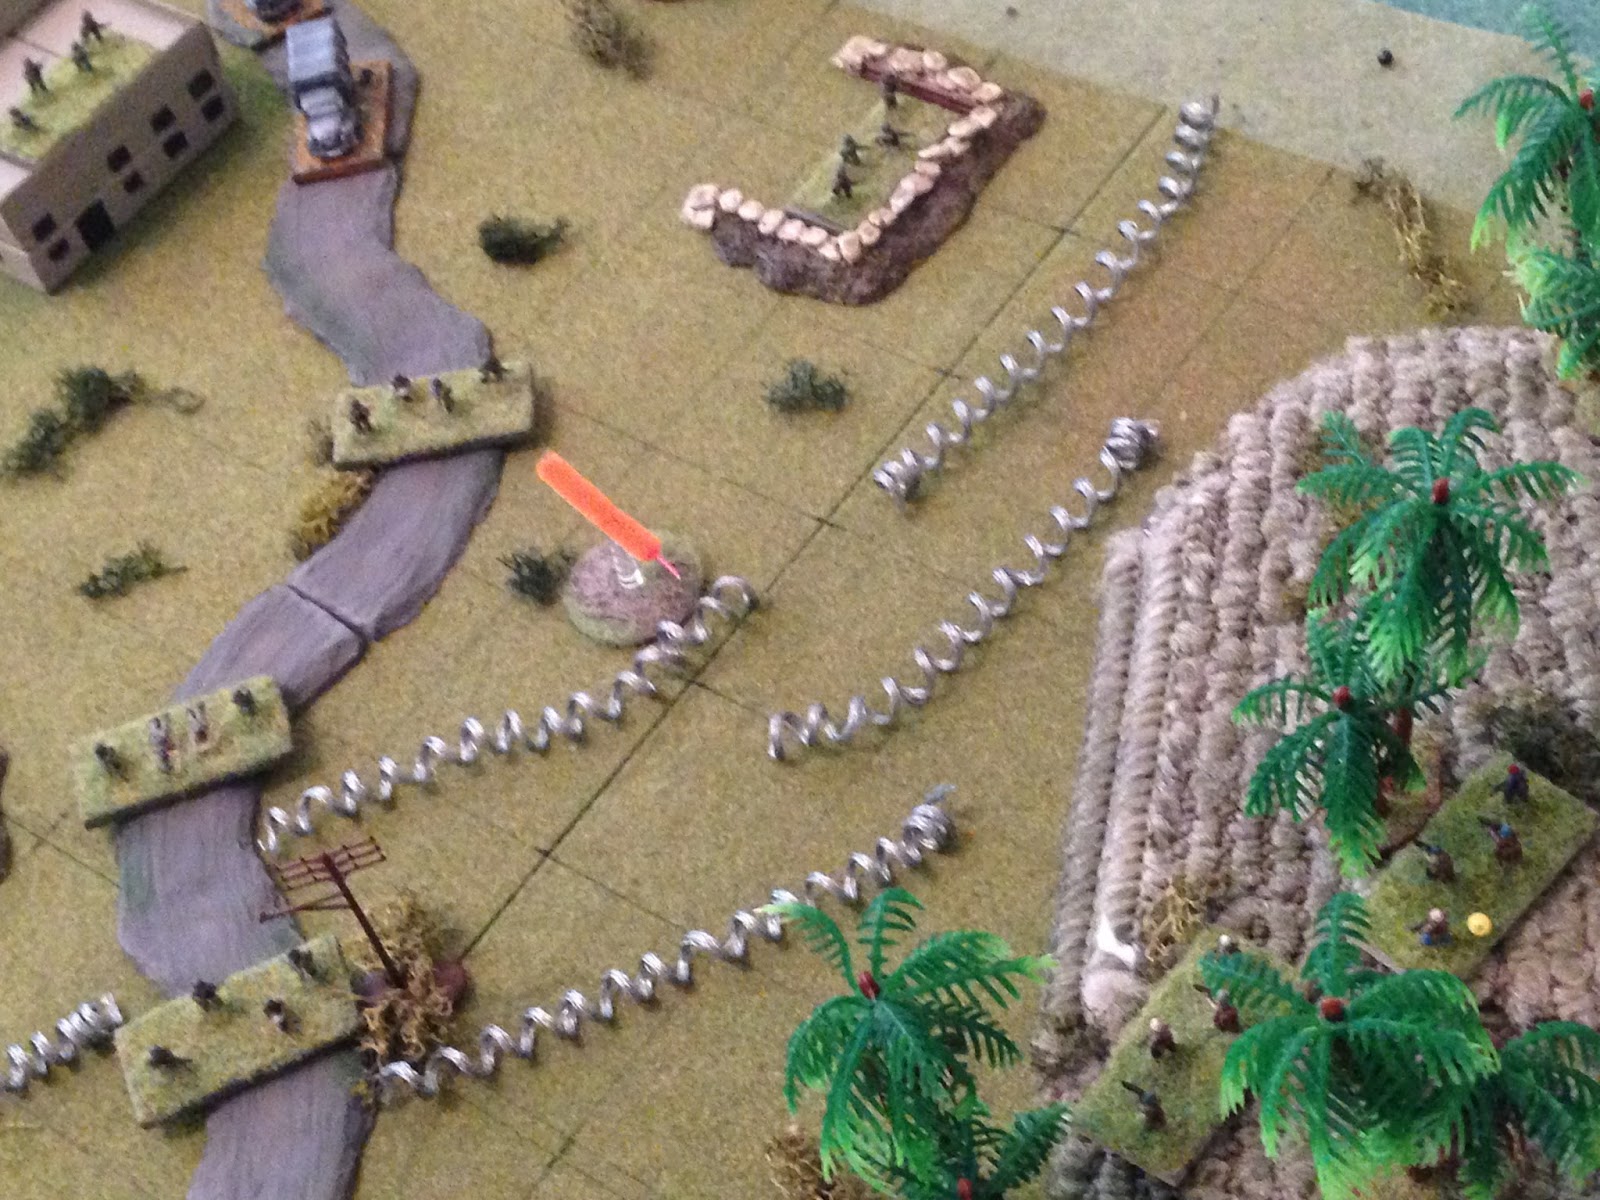
Back on Hill 15, the RPG team moves up, drawing fire from the enemy's HMG, but they dodge the incoming rounds in Matrix fashion...
Then put another rocket into Bunker 2, putting heavy casualties on the enemy HMG.
On Hill 25, Team 2, still pinned, fires on the enemy team between the two barracks, but misses again. Captain Elias tries to rally them...
But fails and they fall back (top right, red bead, with CO at top left).
Then Team 1 moves up Hill 25 next to their CO, drawing heavy fire but none worse for the wear...
And they cut loose another round of fire (the third by CLA elements) on the enemy team IN THE OPEN BETWEEN THE BARRACKS, and again the enemy shakes it off!
At top right, the regime forces dismount their trucks, and their CO (center) sprints directly towards Bunker 2, looking to rally the HMG and get it back into action.
One of the recently dismounted rifle teams makes it into Bunker 3 (that sucks) and opens up on Team 1 atop Hill 25...
Forcing them to fall back under heavy fire (they are at far right, with red bead, with Team 2 at top right and the Captain at center, still on the hill).
Another enemy team moves up, then fires on the RPG team...
Putting them out of the fight. This is going to make it very hard for the CLA to knock out bunkers and troops in the stone barracks...
At top right, an enemy team gets into Barracks 2, then opens up on Team 5 (bottom left), who's already pinned, and semi-exposed to this new threat, but the fire is inaccurate and ineffective.
Colonel Bustamante tries to unpin Team 5, but they won't budge...
On the right, Teams 4 and 5 go up Hill 25, while Captain Elias comes down, looking to rally Teams 1 and 2. Team 1 is good, but Team 2 only gets 'up' to pin...
Hmmm, apparently I failed to take a photo here... Off camera, this is followed by the enemy HMG trying to rally, and failing, then their CO tries to rally them, and he fails too! Three enemy rifle teams sprint towards the main gate, looking to take the fight to the flailing rebels...
Off camera, the enemy HMG rallies, while Bunker 3's rifle team opens up on Team 3, atop Hill 25, pinning them (yellow bead at center right).
The enemy rifle team in Barracks 2 (top left) fires on Team 4 (bottom right, next to the pinned Team 3) and puts heavy casualties on them. Here you can finally see the three regime rifle teams moving up to the main gate, with a team actually at the gate (bottom left).
The enemy CO joins the rifle team at the gate, then leads them forward, where they fire on Team 5, who Colonel Bustamante has been unable to rally behind Hill 15. Team 5 takes heavy casualties, and finds itself suddenly very vulnerable to enemy close assault.
Another enemy rifle team follows their CO and fires ineffectually on Team 3 atop Hill 25. Please note that Team 4, right next to Team 3, has suffered heavy casualties and is very vulnerable to close assault...
But Captain Elias' decisive action saves the day, at least momentarily: he rallies Team 2 (far right), then moves up Hill 25 and rallies Team 3 (center), and they help Team 4 rally, so the troops on/around Hill 25 are in fighting shape. Off camera to bottom left, Colonel Bustamante is finally able to rally Team 5.
Team 1 moves up Hill 25 and draws fire from Bunker 3, but they shake it off...
Then open up on an enemy team moving towards the gate. Catching them in the open, the enemy team suffers heavy casualties.
Then, from Hill 15, Team 5 opens up on the enemy team that led the way through the gate, and they suffer heavy casualties.
Colonel Bustamante quickly takes stock of the situation: he knows his attack is floundering, but he sees the momentum ma be swinging back in the CLA's favor...
So he leads Team 5 forward, hoping to get into close combat with the recently stricken enemy team, who has the enemy CO with them. The enemy HMG opens up on Colonel Bustamante and Team 5 from Bunker 2...
But the Colonel bravely leads his men through the hail of gunfire and into close combat, while the enemy CO falls back.
Colonel Bustamante and Team 5 put the enemy team out of action, then move towards their next victims, who open fire...
But again the Colonel leads his men through the fire and into close combat, and again the regime CO falls back (to Bunker 2, top left)...
The Colonel and Team 5 put another enemy rifle team out of the fight, and once again press forward. The enemy CO is hysterical: "Open fire, open fire I say! Do it! Did I make it clear your job is on the line!?" The enemy HMG opens fire on the closing rebels...
That's not good...
Colonel Bustamante and Team 5 are mowed down in the street, just yards short of glory.
Atop Hill 25, the Team Sergeant for Team 2 muttered to Captain Elias, "wow, that was incredible. The Colonel... I've never seen such gallantry."
Captain Elias, atop Hill 25 (bottom center, with the bodies of the Colonel and Team 5 lying at top center left, just short of Bunker 2): "Yeah, it almost makes up for the stupidity of ordering this attack in the first place, don't it? Alright everyone, fall back. And hustle up, they're gonna be hot on our asses!"
Well, mission not successful. I knew it was looking at rather long odds to begin with, and the whole key was speed. If the CLA could knock out Bunker 2 (the enemy HMG) and get into the enemy perimeter as the enemy was just getting out of their trucks, things could have gone well. But the RPG missed, then several teams missed other shots, then they got bad morale results out of the enemy's return fire that stymied the assault. When the enemy got out of the trucks, things started to look dim, then when the RPG got knocked out, things started to look dark, and when the enemy decided to rush three teams up and out the main gate, I was suddenly very fearful they were about to string together a series of close combats against ME!
Luckily I was able to avert that with some lucky rally dice-rolling, and then the whole 'charge' by Colonel Bustamante thing happened. I didn't really intend for it to go that far, and I really had a bad feeling they were going to get gunned down, but they couldn't not charge the HMG; there was nowhere else to go. So they tried, and it didn't work out. C'est la vie, ces't la guerre. It was still a whole lot of fun!
Casualties:
CLA: ~15 KIA/WIA, ~5 POW
Regime: ~10 KIA/WIA
Colonel Bustamante was awarded the
Cruz Servicio Distinguido for valor, and he was wounded and captured by the enemy.The Team Sergeant for Team 5 was posthumously awarded the
Estrella de Plata and Corazon Purpura.Stay tuned, more batreps coming right up!
V/R,
Jack


Blimey..that was a tough one!
ReplyDeleteYeah man, and I just posted the next one, it's even worse!
DeleteV/R,
Jack
Wow. i thought you may break out your Magic Dice and just not tell us, but then what I sort of thought should happen did happen and you actually lost a game. It was always going to be tough, and it was :-(
ReplyDeleteBatrep #16!!?? You need to hurry up, Mr Travers, the war has passed you by ;)
DeleteTonight I intend on posting the final batrep for Cuba Libre, and tomorrow I intend on starting my next war, so do keep up Sir.
And yeah, this fight didn't stack up well for the CLA when I rolled up the forces; I was surprised it was as close as it was! Don't want to spoil it for you, but you'll be happy to know I get my butt kicked several more times in the coming batreps...
V/R,
Jack
This is where I left the battreps when going to New Zealand. I have been slack in playing a few cold War games and painting some figs rather than read your AARs (when I have gaming time). But I will be trying hard over the next week to catch up. Glad - I mean so sad - to see you, the invader lose a few more battles. You can label yourself liberator all you want but Blue and I see through that :-)
DeleteYeah, no sweat man, I'm just messing with ya.
DeleteAnd I'm sure that you and all your Socialist friends (not just Blue, but Panda, Ivan, and Rod, as well) were happy when your dictator prevailed on the battlefield, but I've got bad news: the war's over, the CLA successfully liberated the island!!! Muhahahahahahahah!!!
You're commies are probably going to win my next campaign though...
V/R,
Jack