All,
AKA The reduction of Dubrovna, Fight #2
It's 0845 on 1 July 1990 and Battlegroup Elias continues to push up Hill 489. Earlier, units from 2nd Platoon made contact with an enemy patrol and defeated it. Following that firefight, 2nd Platoon continued up Hill 489 and conducted a reconnaissance. Their Platoon Sergeant quickly sketched out a Communist bunker complex atop the hill, noting a ravine which afforded a covered and concealed avenue of approach to within 150 meters of the enemy defensive positions. The Plt Sgt had carefully reconnoitered the ravine; he found an engineer stake, signalling the enemy had likely registered the ravine for indirect fire, but it didn't appear the enemy had eyes on the ravine, nor where there any indications of mines or booby traps. He'd found what looked to be a two-man observation post (OP), but it looked to be abandoned. Encircled and cut-off, the enemy's morale was beginning to crack, and the platoon's earlier defeat of the enemy patrol likely was enough to convince the OP to fall back into the bunkers.
But that meant Battlegroup Elias had a way to get within 150m of the enemy defensive line without being seen. If they could slip across the small stream unnoticed, they could get within range to put a rocket into the nearest Communist bunker. And if they could do that, they could rush more troops across the stream, face left, and roll up the enemy line. Because of the dense forest and undergrowth, and because the enemy had chosen to site their defensive positions too close to the crest, the bunkers weren't in very good position to support each other. Without the OP in the ravine, the enemy defense was compromised.
The Battlegroup commander, Captain Elias, was briefed on the situation, and he quickly issued his orders. 2nd Platoon would go firm on either side of the ravine, and act aggressively against enemy troops attempting to patrol in/around the ravine, or trying to re-establish their OP in the ravine. Meanwhile, 3rd Platoon, following in trace of 2nd, would pass through 2nd Platoon, move up the ravine, then attack the enemy defensive line.

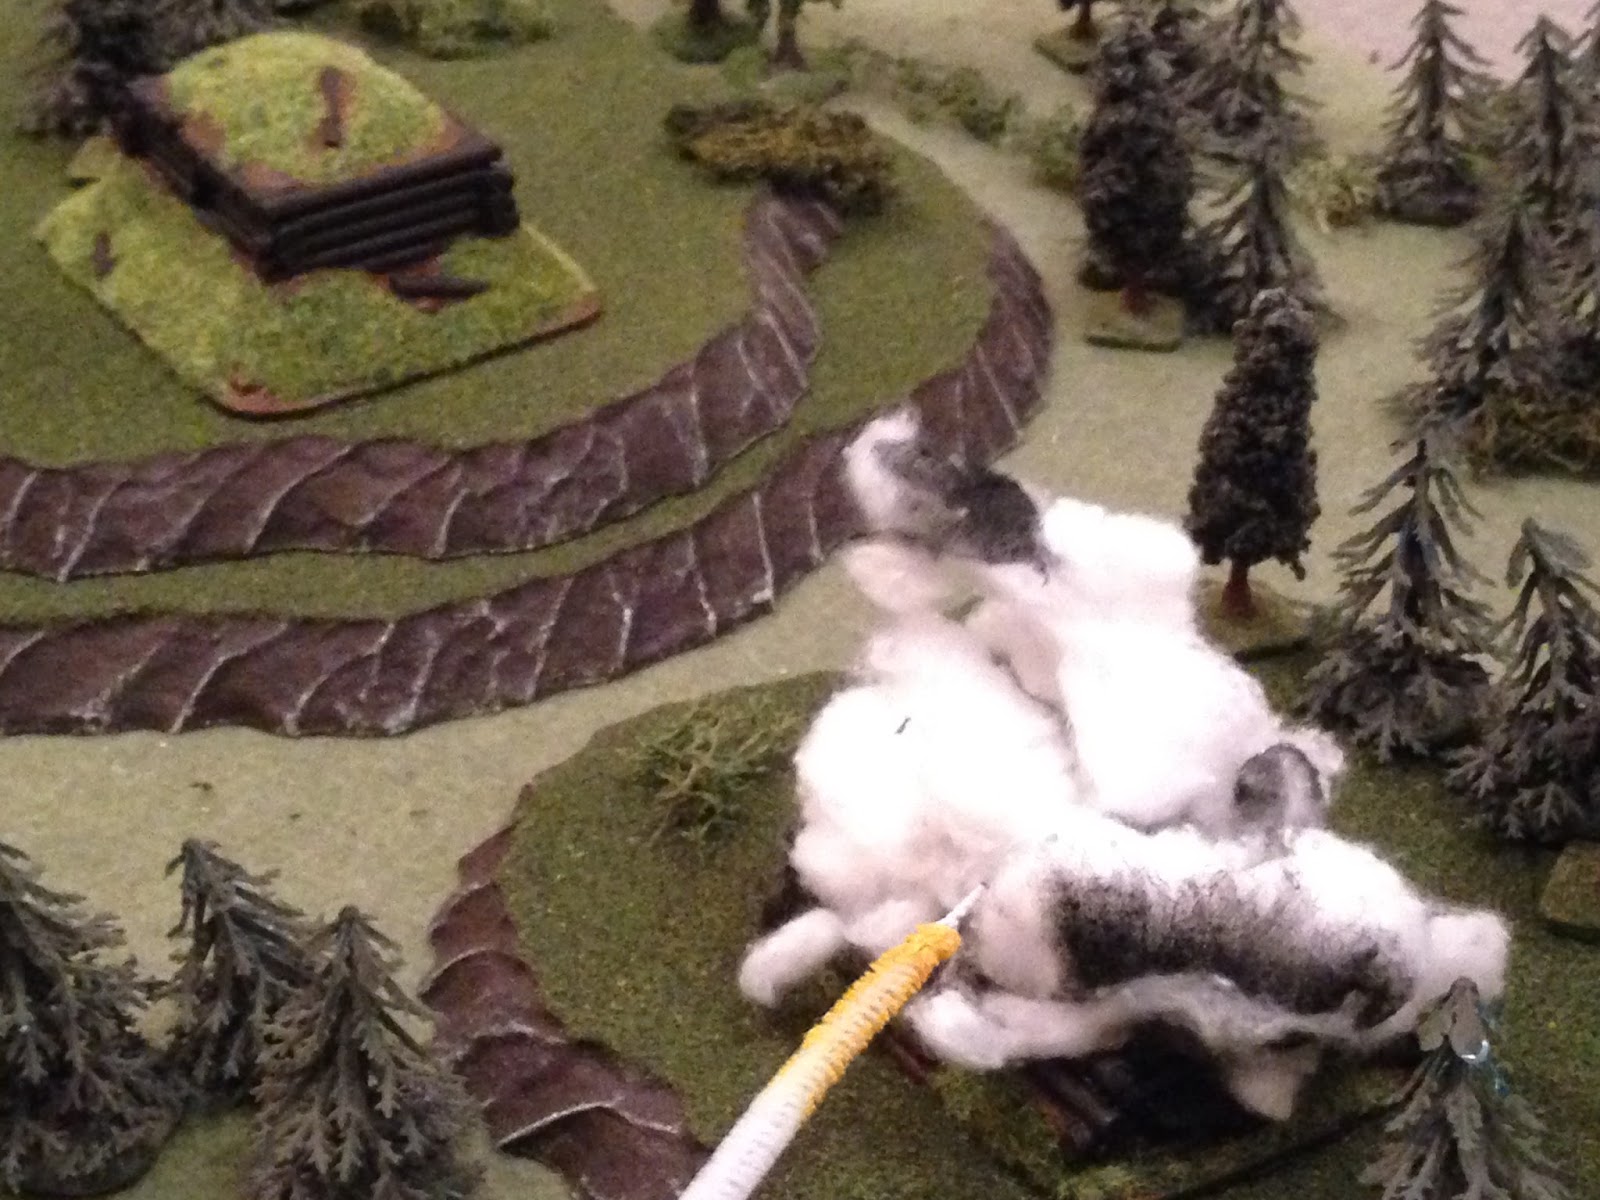
Overview of map, north is right. You see two bunkers here, there's another one off camera to top (west). The ravine is off camera to left (south), but you can see the shallow stream 3rd Platoon needs to cross to get into action against the enemy bunkers. The concept is to sneak across the stream, take up a position at bottom left, put an AT-4 rocket (or two) into the bunker at center bottom, the turn left (west) and roll up the next to bunkers. It may seem a little strange that there's a stream up here; Hill 489 flattens out at the top, which is where the enemy put its defensive line, and then peaks (up another 30 meters) off camera to top right.
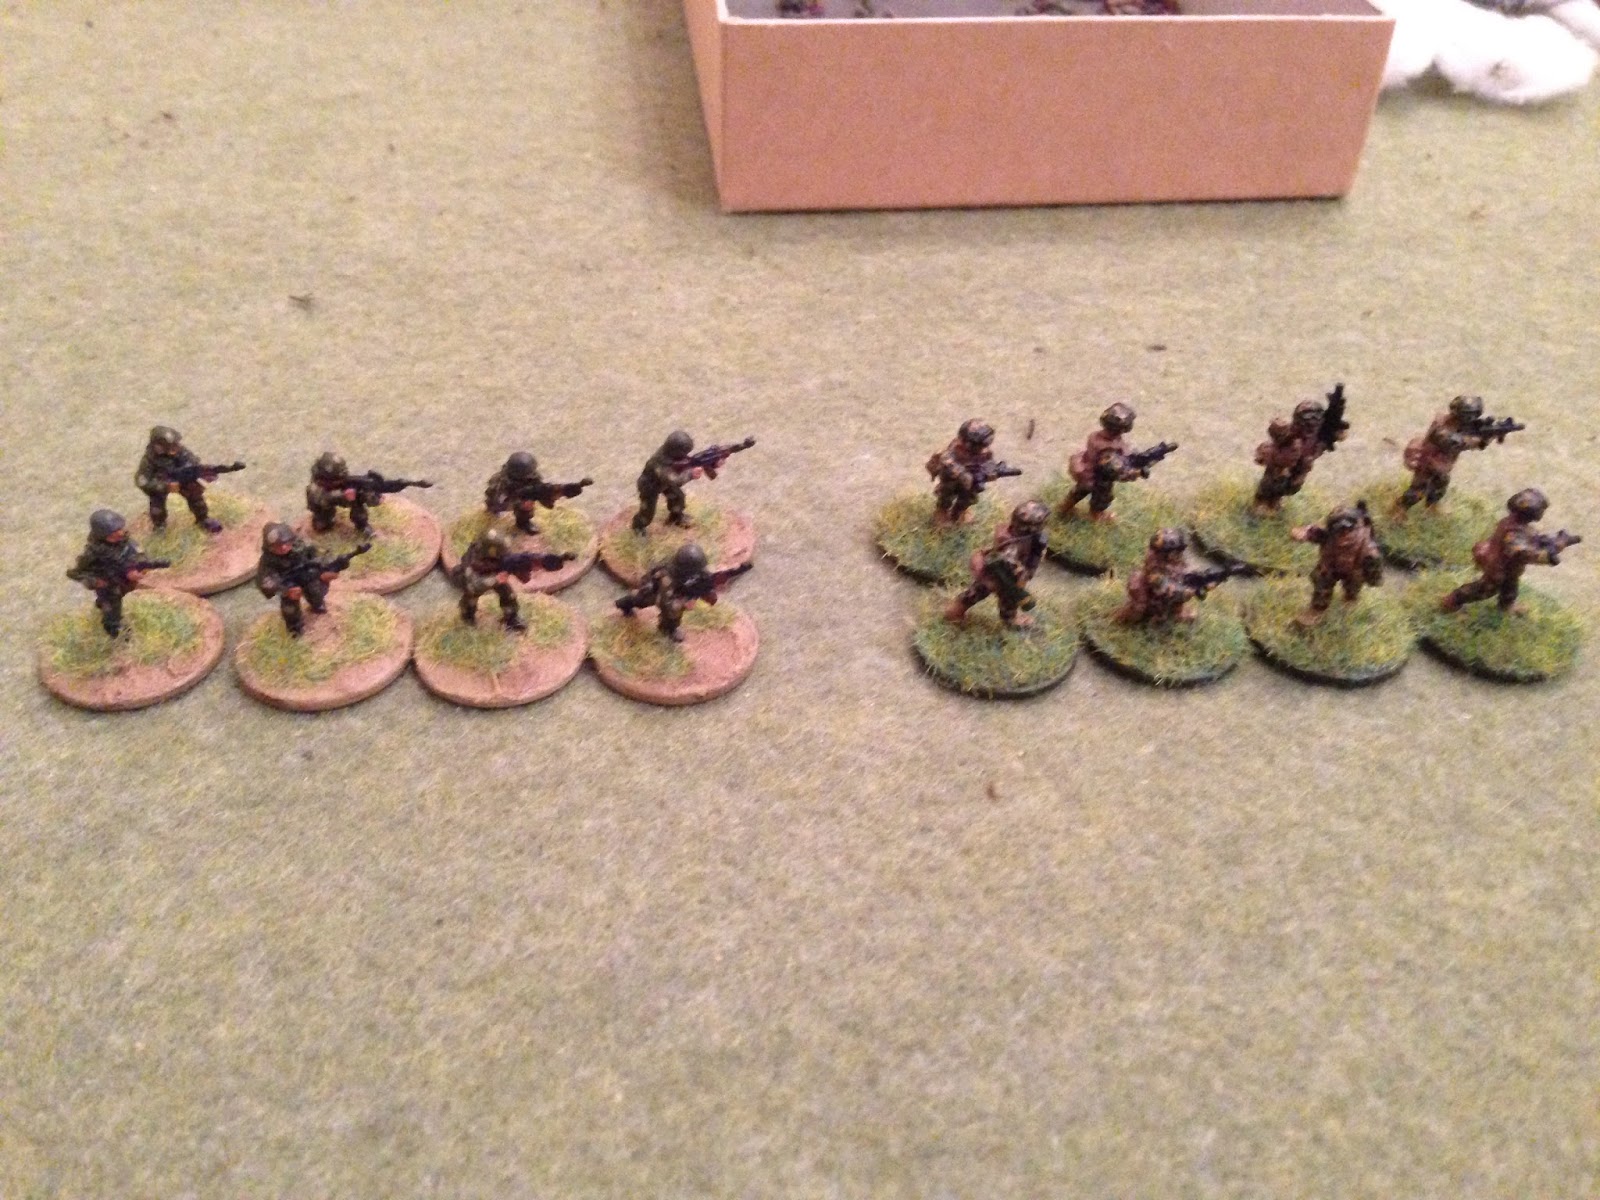
The opposing forces, with bad guys on the left and good guys on the right. The Cubans will always have eight men (so that my son and I can always control four guys, each), while the bad guys will roll to see if they get 6, 7, or 8 guys. Here they got eight...
The Cuban squad, eight men in two fireteams, 15mm Modern Marines from Peter Pig, painted up in temperate MARCAM. These are anonymous squads within Battlegroup Elias, not named characters, so I'm going to use a generic set of names through each of this series (of six) battle reports. We are not following a single squad, or even a single platoon; I just don't feel like trying to come up 48 different names for this set of fights. So, please bear with me ;)
Team 1:
Team Leader: Corporal Lira
SAW Gunner: LCpl Galban
Assistant Gunner: PFC Aguilar
Scout: Private Salazar
Team 2:
Team Leader: Corporal Lupe
SAW Gunner: LCpl Garcia
Assistant Gunner: PFC Abrera
Scout: Private Solis
The bad guys, 15mm Modern Russians from Eureka Miniatures, painted up in 'Sun Bunny' camo. Each game we roll to see how many bad guys there will be on table, with the options being 6, 7, or 8 men. With eight men they get two whole teams, each of a grenadier, a machine gunner with PKM, and two riflemen with AKs.
Members of 2nd Squad, 3rd Platoon exit the ravine and creep to the stream bank.
As the squad takes up positions to support as necessary, the squad leader and one rifleman creep across the stream as stealthily as possible.
So far, so good. The pair of Cuban soldiers take up position. The squad leader peers through the brush at the bunker, orders the rifleman to arm an AT-4 rocket.
"Fire!!!"
BAM!!! The rocket crushes the wood and earthen bunker.
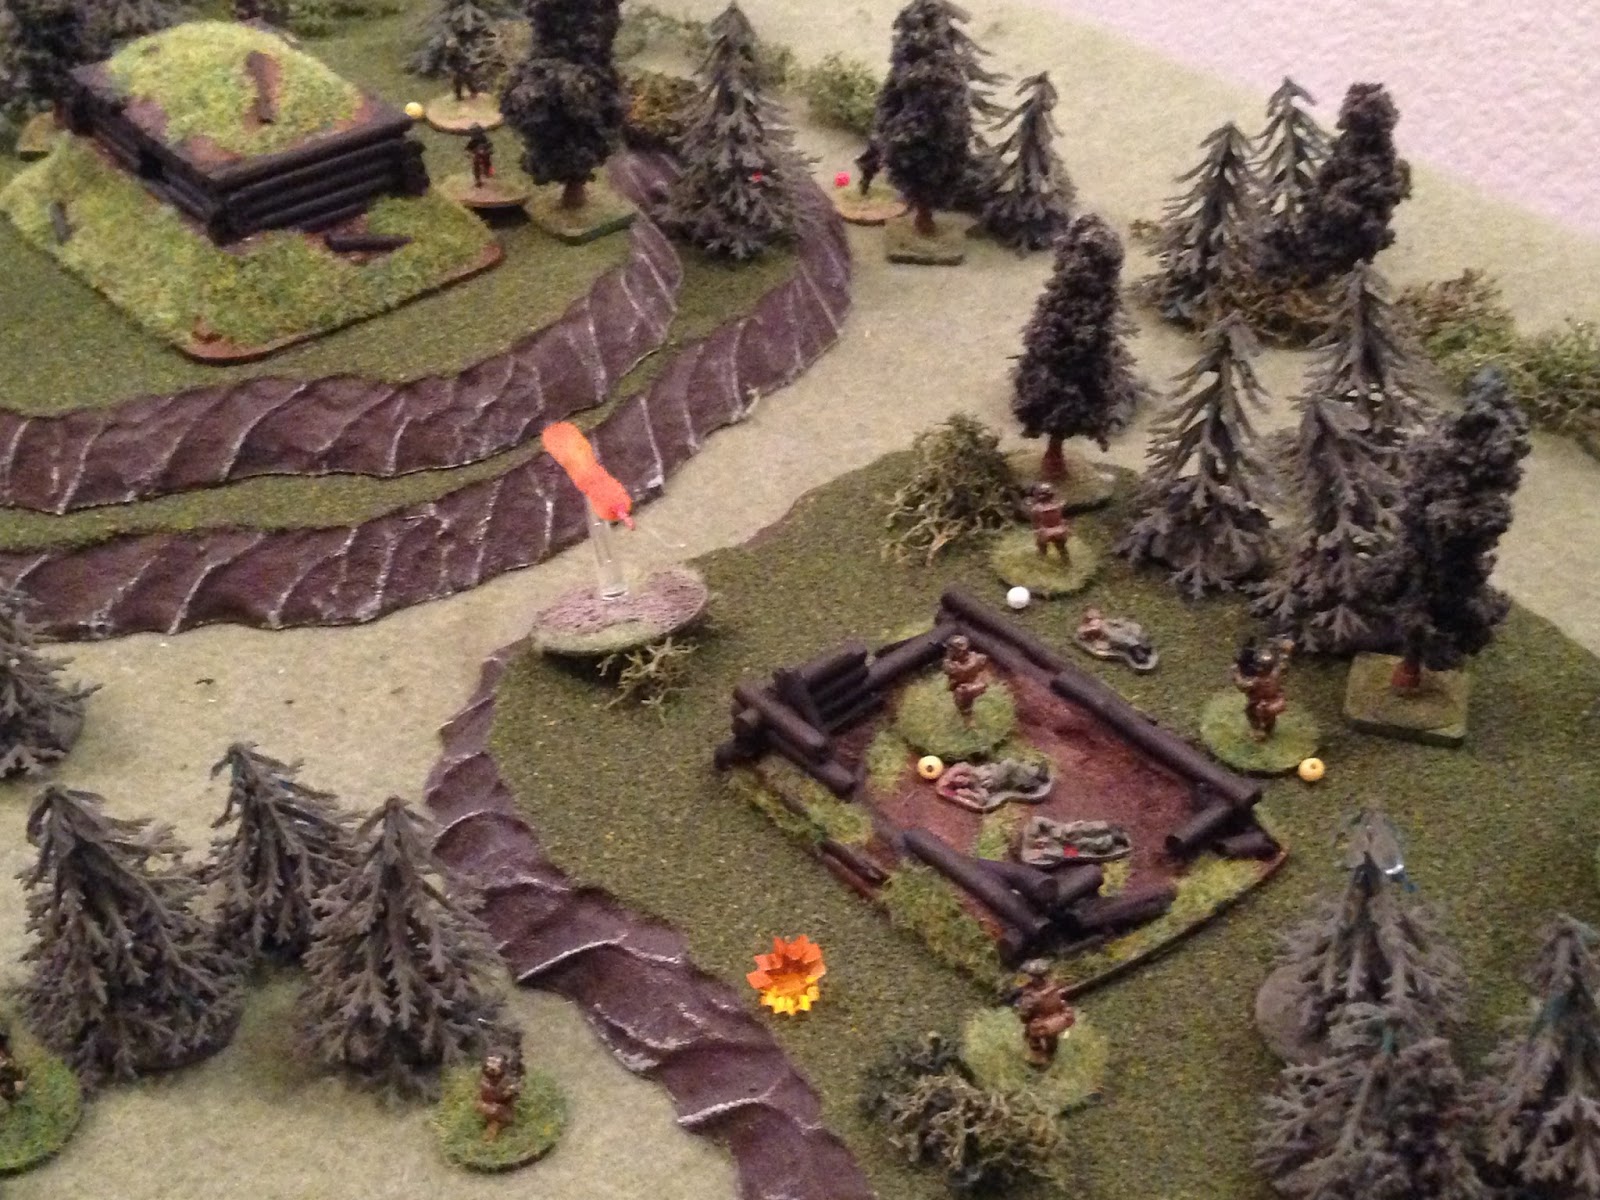
Oh, by the way, these are my new bunkers from Miniature Building Authority. They're a little tall, but I wanted bunkers with removable roofs so I could actually put guys inside.
Bunker #1 is kaput, three bad guys down.
The rest of 2nd Squad hauls ass across the stream, hoping to get there before the enemy recovers from the shock of the initial contact.
The squad links up, turns left (top, west), and begins moving to take out bunkers 2 (top) and 3 (off camera).
"Comrades, out of the bunkers!!! The running dog capitalist pigs are across the river, we are flanked!!!"
A look at the overall tactical situation. Okay, all the stuff previously was pure cinema, here is where the actual game begins. The Cubans are at right, with Team 1 at bottom center and Team 2 at center right, and the bad guys at top left, out of their useless bunkers (which have fields of fire to the south, bottom left). Time to go; once again the damn Commies win the initiative roll...
Having just exited his bunker, an enemy machine gunner (top left) spots Team 2'sCpl Lupe and Pvt Solis (center), and opens fire.
Solis is knocked down by the incoming fire (white bead), while Cpl Lupe and LCpl Garcia (yellow beads) are pinned.
The bad guys from Bunker 2 fan out, taking up firing positions.
Around Bunker 3, two bad guys move up (top left and bottom left).
But Team 2's PFC Abrera (bottom right) spots one (top left) and fires, pinning him.
The enemy machine gunner from Bunker 3 moves up; he wants to help his pinned buddy (yellow bead), but he's a little wary of sticking his head up in the line of fire, so he pulls up a bit short (top).
Nevertheless, Team 1's Scout, Pvt Salazar (bottom left) spots the movement and cuts loose.
Dropping the Communist machine gunner!
The last bad guy (right) from Bunker 3 moves up, on the right side of Bunker 2 (bottom right).
But Team 2's leader, Cpl Lupe (bottom right), opens fire on the right side of Bunker 2.
Suppressing one bad guy (red bead) and pinning another (yellow bead).
Following Cpl Lupe's (bottom right) shot, the SAW gunner, LCpl Garcia (bottom center) rattles off a long burst at the enemy's far right man, suppressing him.
PFC Abrera (bottom center) keeps up fire on the bad guy to the left of Bunker 2, keeping him pinned. Team 1 is at bottom left.
Pvt Salazar (bottom left) fires to the enemy's far right.
He (top left) misses, so the bad guy (bottom center) returns fire, pinning Salazar.
With Salazar pinned at bottom right, Cpl Lira dashes past him (center) and tosses a grenade up the knoll (blue bead), trying to take care of that seemingly bullet-proof, pinned, bad guy once and for all.
Team 1's SAW gunner, LCpl Galban, moves right (bottom center) and opens fire on the enemy right.
Putting a bad guy out of the fight (center left).
With Galban firing at bottom right, PFC Aguilar moves up to Salazar to rally him (left), but he's still a bit shook up (stay pinned). Cpl Lira is at top left, hunkered down, waiting for his grenade to go off.
BAM!!! The pinned bad guy is knocked down (white bead).
In the center, the remaining enemy machine gun fires on PFC Abrera and LCpl Galban (bottom center).
And Abrera goes down (bottom center).
From behind Bunker 2, a Communist crawls out to check on the man knocked down by Cpl Lira's grenade.
But the enemy trooper has succumbed to his wounds (bottom left). Meanwhile, there's another bad guy on their far left (sorry, I should have explained: whenever I say 'enemy's left/enemy's right' I'm saying that from the perspective of the player, not the enemy), at top center left.
He creeps forward up the flank (bottom center), very near the stream bank (just off camera to bottom, south, with Bunker 3 at top left and Bunker 2 at right).
But Cpl Lira (bottom center) spots him (top left) and fires, pinning the enemy soldier.
On the enemy right, two suppressed men (red beads) self rally and get themselves back in the fight. The yellow bead is the enemy machine gunner, who is pinned but still able to shoot.
But the Cuban squad steps up its volume of fire: LCpl Galban (bottom center) opens up on bad guys near Bunker 2 with his SaW, suppressing one of the guys that just rallied.
While LCpl Garcia (bottom right, with Pvt Solis, white bead, knocked down next to him) fires his SAW at the enemy far right, dropping the other bad guy that just rallied!
Back on the left, and having pinned the bad guy at top left, Cpl Lira (bottom center) shifts his fire right and cuts loose.
He drops his target (top left), then sprints up to Bunker 2 (right).
Back on the left, Pvt Salazar (bottom left, with PFC Aguilar right behind him Cpl Lira visible at center right, in front of Bunker 2) sights in on the bad guy Cpl Lira had pinned (top left), and fires, knocking him down.
PFC Aguilar (center left) sprints past Pvt Salazar (bottom right), up near the guy Salazar just knocked down with rifle fire (top left). Cpl Lira is at top right.
Back on the right, LCpl Garcia (bottom left) lays down fire with his SAW as Cpl Lupe moves up to check on Solis, but he remains unconscious. Cpl Lupe begins the lifesaving steps: start the breathing, stop the bleeding, protect the wound, treat for shock.
But as Cpl Lupe is treating Solis (right), LCpl Garcia's SAW runs dry and needs to be reloaded. The enemy machine gunner rises up and cuts loose on Team 2.
LCpl Garcia is suppressed (red bead at bottom center) as Cpl Lupe falls next to Pvt Solis (far right). LCpl Galban (bottom left) can't return fire with his SAW due to the risk of hitting Cpl Lira (top center).
With the bad guy machine gunner pinned at top center and Cpl Lira at bottom center, the suppressed enemy rifleman (red bead) tries to rally but fails, falling back to top left from the tree at right.
With Solis still lying there bleeding and Cpl Lupe dead (just left of white bead), LCpl Garcia rallies off his suppression to get back into the fight.
Having seen the nearest bad guy run away in panic, Cpl Lira dashes round the corner of Bunker 2, right into the enemy machine gunner! The two blaze at each other at point blank range...
Until Cpl Lira drops the Communist soldier.
Then moves to his suppressed friend.
And quickly dispatches him. The area around Bunker 2 is littered with enemy dead.
With Cpl Lira at top right, PFC Aguilar moves up to the last enemy trooper, knocked down by Pvt Salazar's rifle fire (bottom left).
The last enemy soldier is out of the fight. Cpl Lira consolidates the squad on Bunker 3, taking up defensive positions to the west and beginning the CASEVAC process, with one KIA and one WIA, to the enemy's eight KIA. The remainder of 3rd Platoon is atop Hill 489, working east to clear the rest of the enemy bunkers. 2nd Platoon begins moving up the center, between 3rd Platoon's 3rd Squad on the left (south) and 1st and 2nd Squads on the right (north). As 2nd Platoon reaches the crest they can see the enemy is broken, and a good thing too! The enemy massively outnumbers the two Cuban platoons atop Hill 489, but they're outflanked and in full route down the west slope of Hill 489.
2nd Platoon's commander calls the development in to Captain Elias, who immediately orders 1st Platoon, still unengaged in a blocking position astride the highway at the base of Hill 489. Capt Elias orders 1st Platoon to proceed southwest at all speed, then turn right and push up the backside of Hill 489 to cut off the enemy's retreat, to prevent them from falling back into the town of Dubrovna and setting up defensive positions there. Battlegroup Elias' AMX-10RCs and LAVs will remain on the highway and cover 1st Platoon's left flank (facing Dubrovna).
1st Platoon mounted its LAVs, dashed west to the backside of Hill 489 (screened by Battlegroup Elias' armor), then dismounted and began pushing to cut off the enemy troops. However, the dismounts quickly ran into an enemy strongpoint, a weak enemy force seeking to 'hold the door open' for their comrades, i.e., not allow the Cubans to close their path of escape. As 1st Platoon's 3rd Squad moved on the strongpoint, a few routing enemy stragglers moved over to join the fight.
Next fight, coming right up!
V/R,
Jack


See what happens when you limit the enemy forces - you don't lose most of your own men! Who would have thought it.
ReplyDeleteLike the new bunkers too!
p.s. it is just me, or are you more recently taking a lot more closeups than before? It is a good thing if it is (I do know a few of us used to be on your back about taking more closeups) and slack of me not to notice if you have been doing lots of them for months.
Hey, the point was for the bad guys to almost overrun the good guys in that last operation. The bad guys just did a little better than expected, unfortunately. But yes, here the bad guys are being handled a bit more... reasonably ;)
ReplyDeleteNot sure if I'm taking more close-ups than before, wasn't really thinking in those terms. I think I'm just playing smaller, more individualistic skirmish games, so the pics are more up close and personal. I guess?
V/R,
Jack