All,
It's the eve of invasion, the Cuban counterstroke in South Leon. You've already seen a company of paratroopers and a Special Forces detachment jump into South Leon and battle it out in the opening hours of the invasion (Operations Geronimo and Currahee, respectively), but it's a little know fact of military history that Captain Stelosavo's B Squadron, Operational Detachment Phoenix (Cuban Expeditionary Force's equivalent of SAS/Delta Force), was scheduled to jump into South Leon as part of the invasion. What follows is the story of why they did not, a tale now known as "Operation Tears of the Cuban News Network." Sorry, not very creative ;)
Civil war has broken out in nearby Nigeria, where the armed forces have staged a coup against President Azuka, killing him and his family, then dispatching armed elements across the country to hunt down supporters. It's been identified that two members of the Cuban News Network, Ms. Lena, AKA "The Reporter," and Mr. Kendricks, AKA "The Cameraman," are in a small fishing village with coup-members closing in, killing everything in their path. Seeing the risk to these two Cuban citizens, operations orders are immediately altered, sending Captain Stelosavo and his men into Nigeria to rescue the Reporter and her cameraman. They will receive little to no support; first, with the invasion kicking off simultaneously, there's not much in theater to go around, and second, this is a black op, Cuba is trying to pull off this rescue on the down-low. So Capt Stelosavo and his team will HALO into the water, swim in, grab the two Cuban citizens, and haul ass to a nearby LZ where they will be extracted. But things never go as planned...

Here's the whole mess of troops I'll be using, 15mm figures singly based on pennies. At far right are the Cubans, which are actually Vietnam-era Special Forces and SEALs from Flashpoint Minis. At center are the bad guys, Nigerian military coup supporters, government forces from Rebel Minis. Above them are the Reporter and Camerman, also from Rebel Minis, and a few armed rebels at top left, from Rebel Minis. At bottom left are a bunch of civilians from Peter Pig.
The ten Cuban "operators" of B Squadron, OD Phoenix.
Commanded by Captain Stelosavo, a former US Army Special Operations member and War of Liberation veteran.
The team can be broken down, or "task organized," however the mission dictates. For this mission they are broken down thusly: Team 1 is (left to right) Tracker, Aarby, and Skye.
Reverse.
Team 2 is Zuma, Everest, and Marshall.
Reverse.
And Team 3 is Rubble, Chase, and Rocky.
Reverse.
And of course their leader, Captain Stelosavo, who uses the handle "Ryder." This is one of my favorite miniatures, and it still reminds me of Steven Segal in "Above the Law."
Reverse. I'm using Buck Surdu's rules, Combat Patrol. Each of the three-man teams will get a dice, as will Ryder, as their leader.
A look at the civilians.
And the object of the exercise, the Reporter and the Cameraman. I'm basing this whole thing loosely on the movie "Tears of the Sun," in which the damsel in distress was a doctor, but I don't have a doctor figure, so it's a reporter.
The bad guys, with five five-man teams and a leader each getting an activation dice.
Overview, north is up. The table is about four feet long by a little more than two feet wide, with the villagers needing rescuing hiding at far right, government forces spread across the table, and the Cubans entering at far left.
It's 0630 on 26 July 1990, the day before the invasion of South Leon. The team makes a water jump...
And swims in.
Then approaches the shore, with (top to bottom) Team 1, Team 2, Ryder, and Team 3 moving east in line abreast.
Looking east from behind B Squadron, which is referred to as Task Force 23 while taking part in the South Leon operation. Bad guys are all over the damn place (any figures not in the river at bottom are bad guys)!
Team 1 (bottom left) has already spotted a government patrol moving east on the road.
Team 1 (top left) and Team 2 (bottom center) keep an eye on a nearby fishing boat. The body at right center makes it clear government troops have already been by...
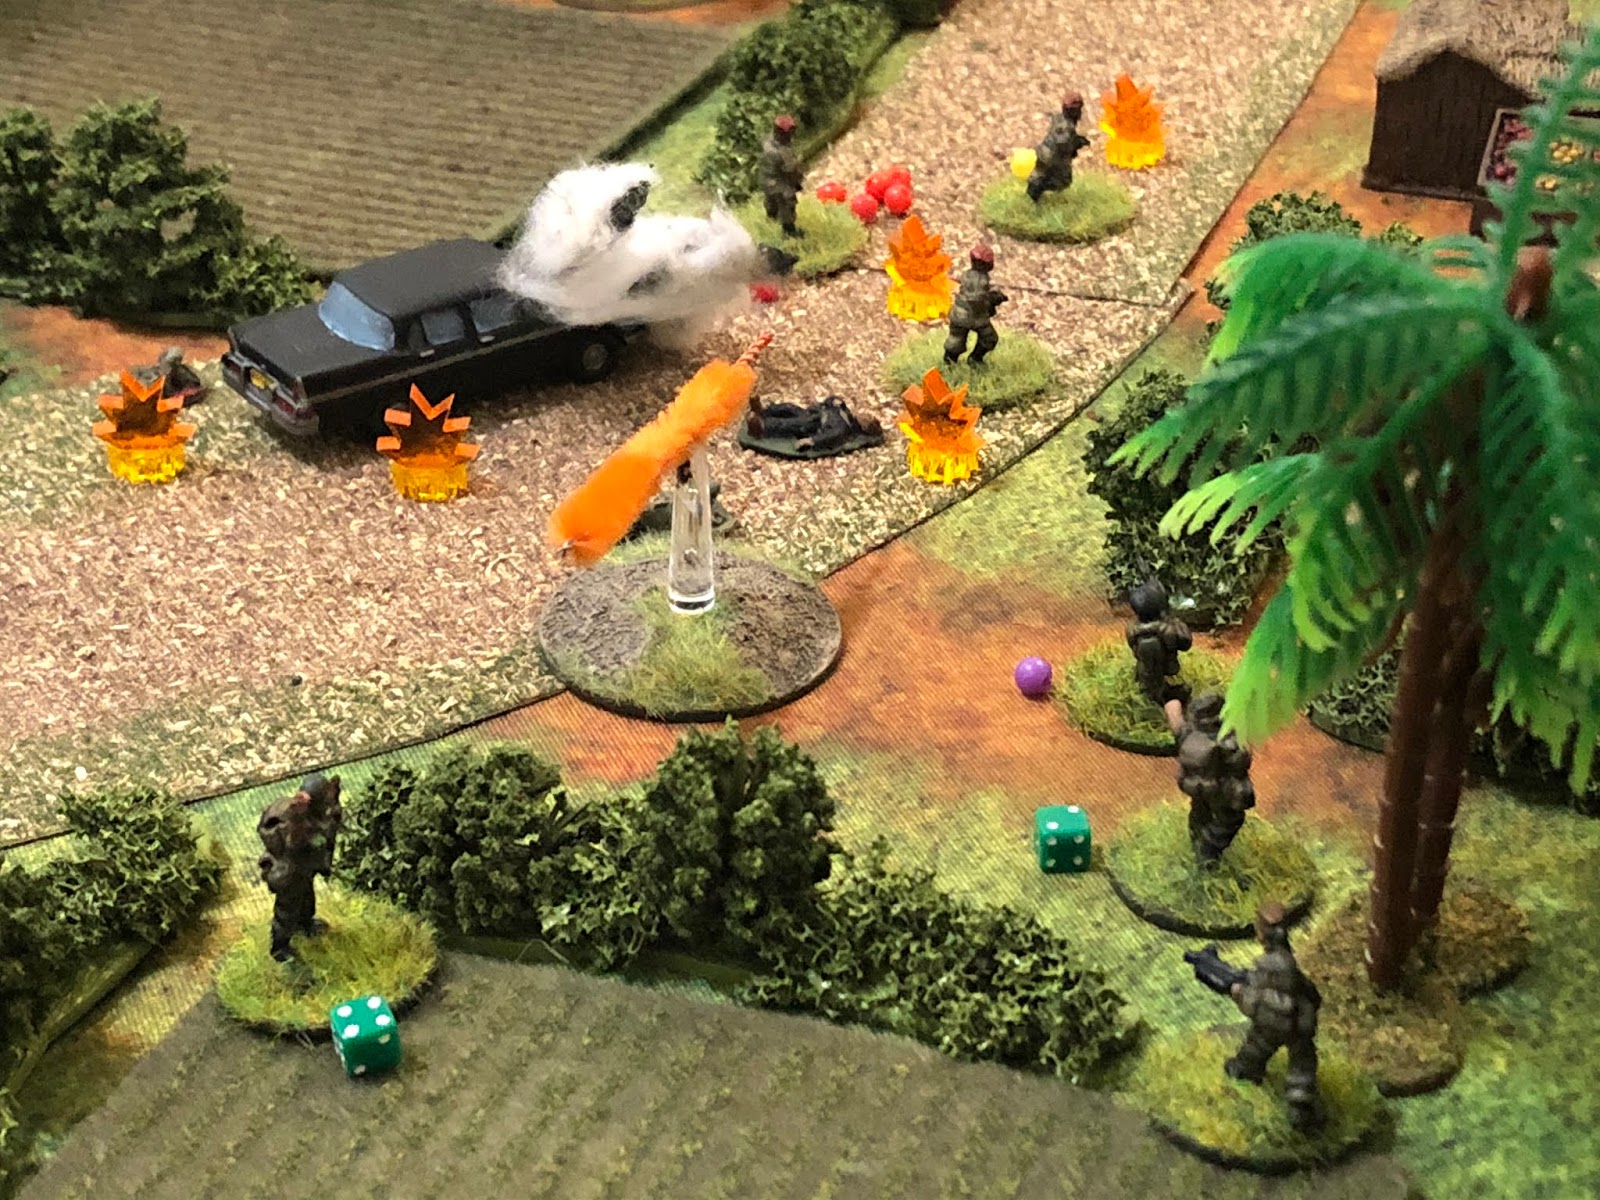
Further up the road is a burning sedan...
Above the burning sedan (off camera to bottom center left), two government patrols push east, searching for more villagers.
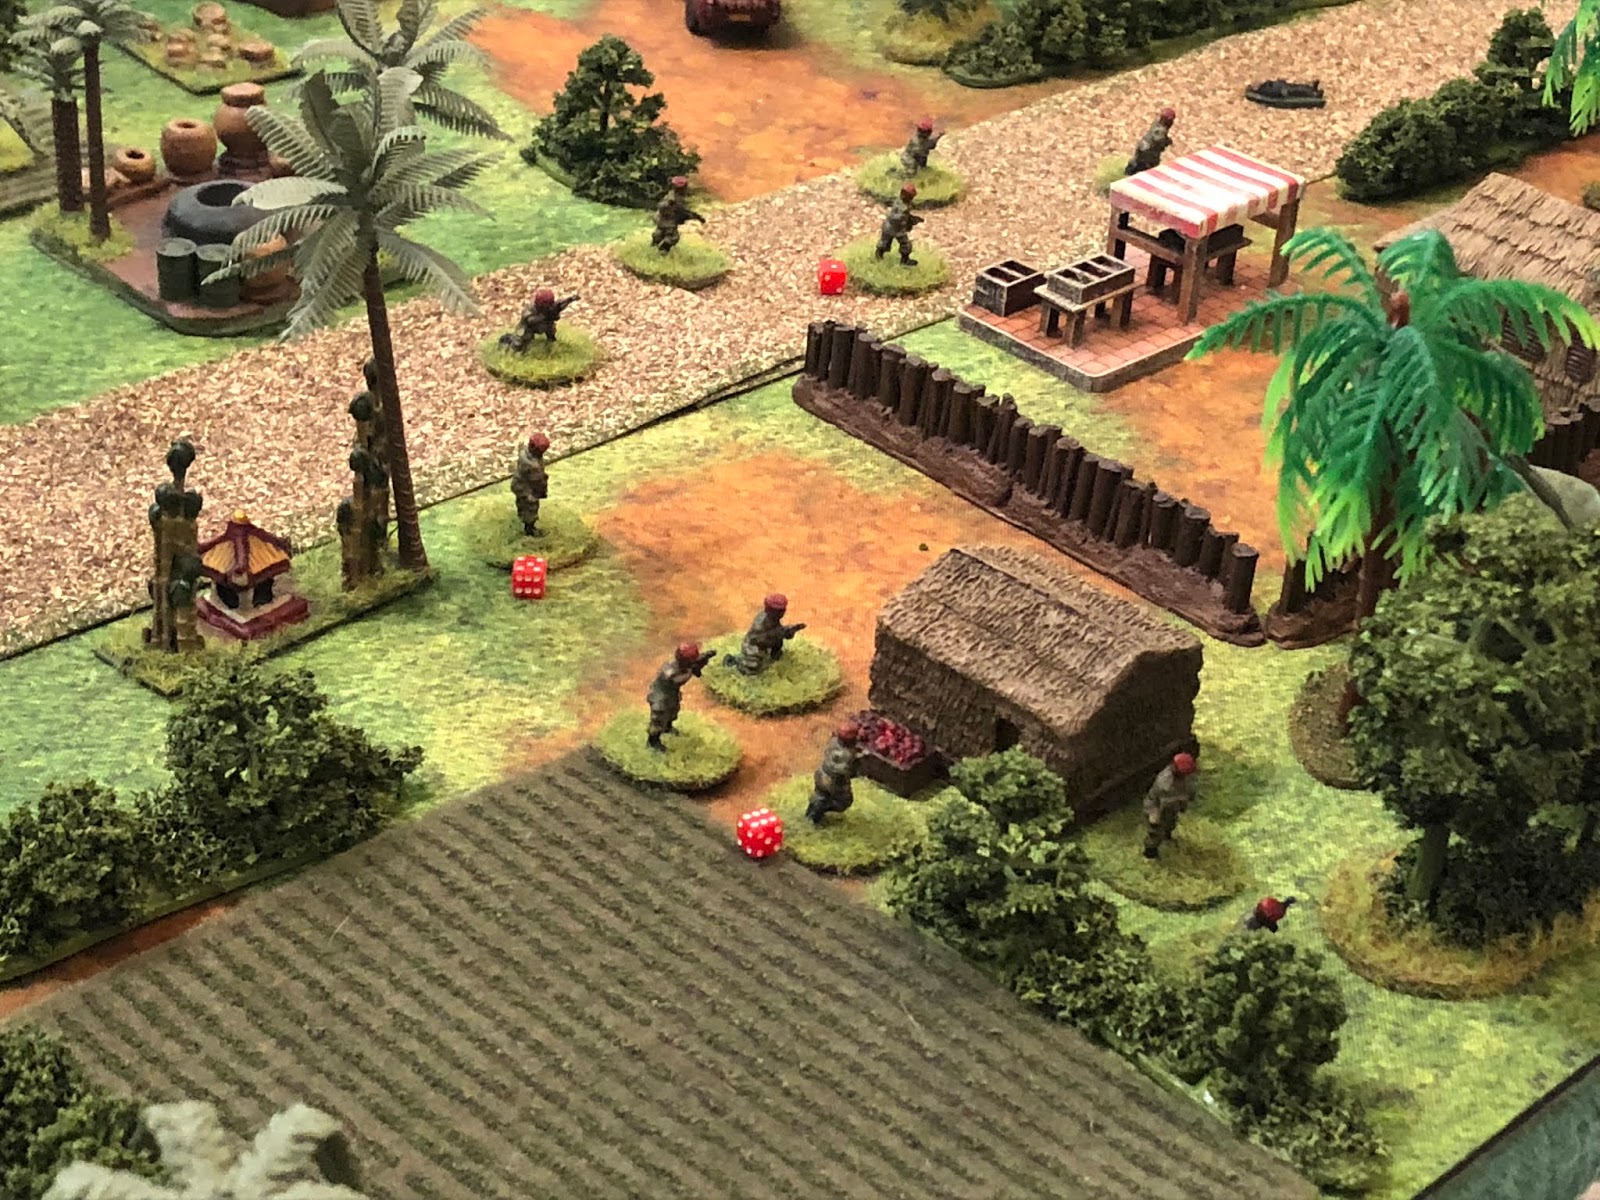
You can just see the bottom patrol from the previous picture at top left; two more patrols are shown here, with the enemy commander at center right, just right of the shrine/left of the retaining wall.
Government soldiers are intent on cleansing this village because of its tribal ties to the former president.
Looking west to east at the far eastern end of the table, with a couple more dead villagers visible.
Looking east to west at the table, B Sqdn//TF 23 at top.
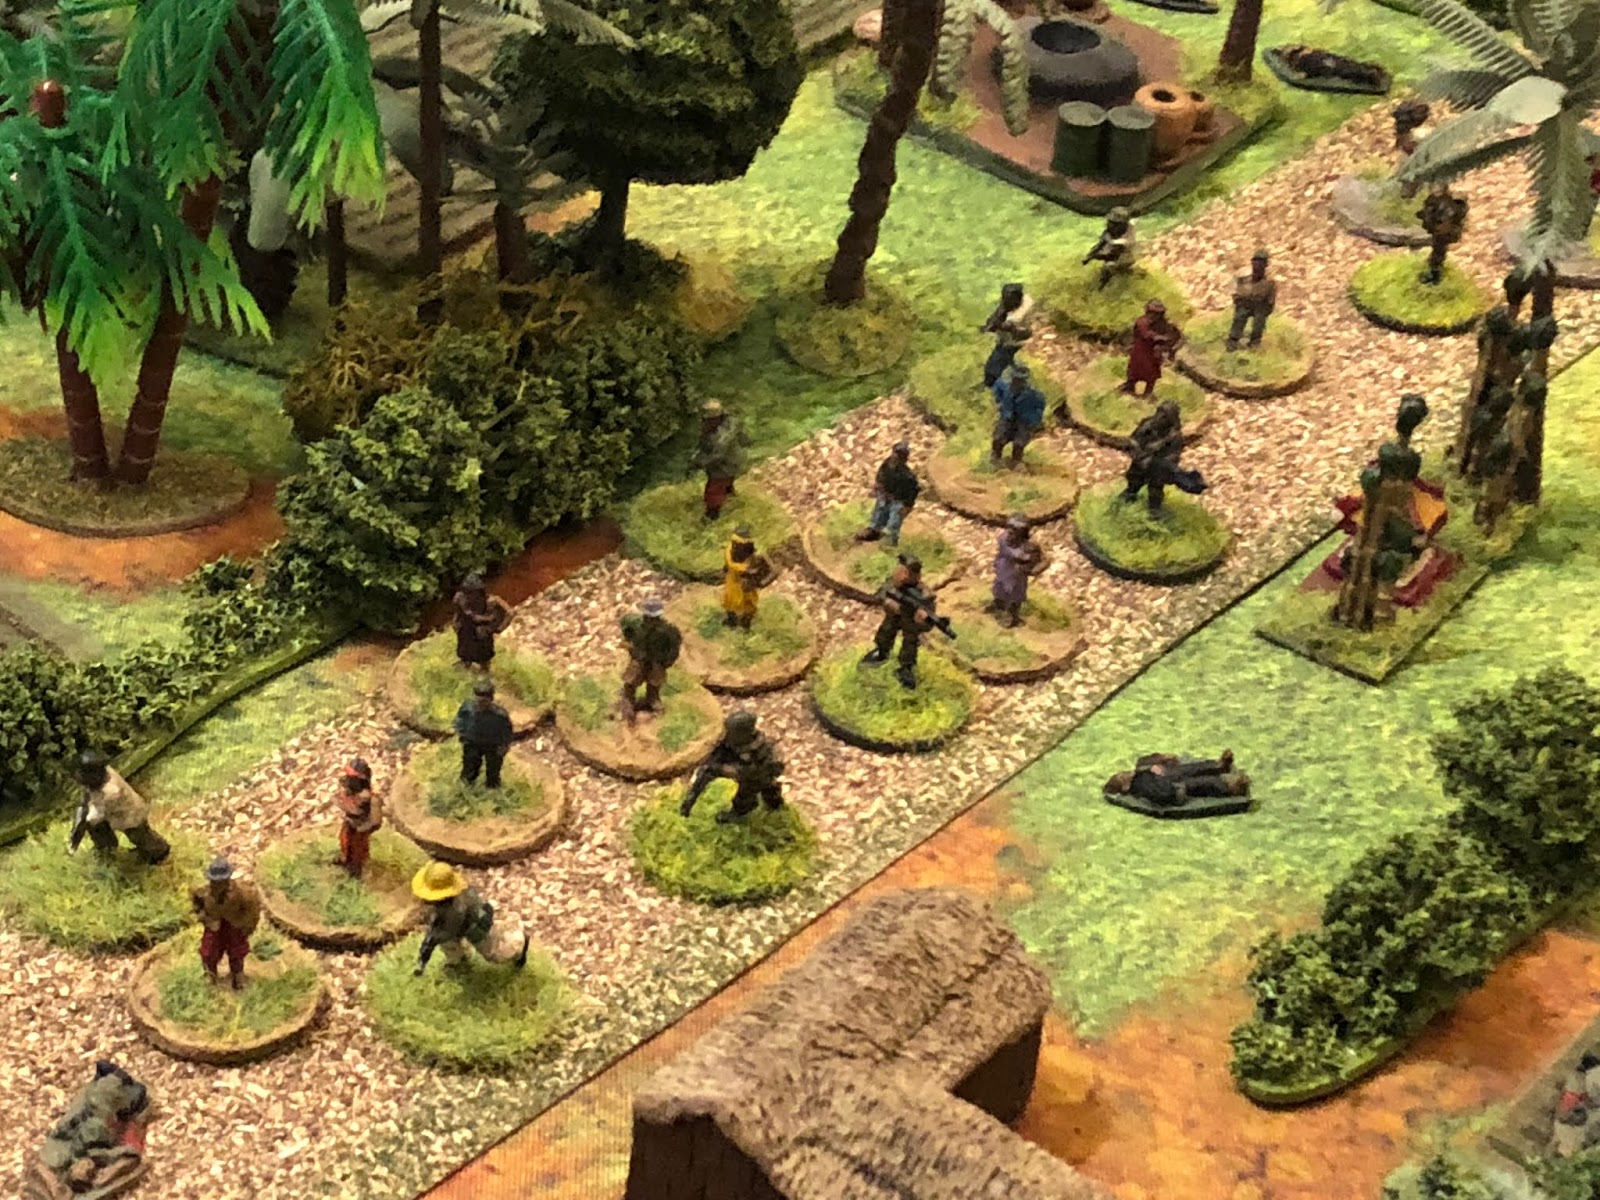
Another look at the center of the table, showing the enemy troop dispositions. Five 5-man teams and a leader.
Looking west down the road at Ryder and his men coming out of the river (top).
The enemy commander smoking a cigar as his men clean out the village. Didn't know there was bamboo in Africa, did ya? ;) Okay, time to get this op on the road!
For game purposes, I'm treating all the Cubans as Elites with semi-auto rifles, letting them fire on the move with two shifts right and only one shot vice two. Each team has at least one guy with a silenced weapon, but it's treated as an Assault Rifle (shorter range), rather than a semi-auto rifle, with the same treatment for moving and shooting. The Cubans are also wearing body armor, have an endurance of three, and melee +2. The bad guys are Green, treated as bolt action rifles (one shot), and endurance two, and melee at Even (I suppose I should say 2 for the Cubans and 0 for the government), to further reflect the difference in troop quality.
On the Cuban left, Team 1 creeps forward, out of the water, with Tracker pushing a little further into the jungle, weapon shouldered and levelled at the nearby government patrol diddy-bopping up the road.
While on the right, Rocky leads Team 3 up, onto the shoreline, with Ryder (far left) keeping an eye on them AND the government patrol (top left) AND the other government patrol (moving up the road, off camera to top right).
Team 2 then moves up in the center.
*Funny how the activation cards work out. I didn't really want the Cubans to all go first, but that's sure as hell what happened. I'm trying to keep it quiet as long as I can, get the drop on the bad guys, then unleash hell. The last thing we want is to get caught, pinned on the shoreline.
Ryder (bottom left) keys the mike of his intra-squad radio: "Rocky, move'em up." And with that, Team 3 left it's position on the river bank (right) and slowly began picking its way east (top right)…
Skye keyed back: "We're in position, good coverage of the road, got tangos coming at us (the patrol near Team 1, top left), another set about 25m east of them (top right)." Ryder: "Roger. Skye, push."
Team 1's leader, Skye (bottom far left, with Tracker above him and Aarby to his right) replies: "Negative, they're on top of us, gonna let'em pass." Ryder: "Roger."
Team 1 (off camera to bottom far right) lets the Nigerian soldiers move further up the road (left, from bottom center), straight into Rocky's Team 3 (just visible at top right, left of the trees).
Further east, another government patrol moves up, looking for villagers (and Cuban journalists) to kill.
And the same in the south. The bad guy boss (left) exhorts his men to search each hut thoroughly, leave no living thing alive.
As the furthest east enemy patrol nears the end of the village (top right).
Marshall and Team 2 (bottom left) hold overwatch, keeping an eye on the nearby enemy patrol (on road at top left), as Ryder moves up, into the trees (center, from bottom center). Rocky's Team 3 is at far right.
The enemy commander crosses the street (center, from bottom left, near shrine).
The government patrol in the west nears the burning sedan, moving very slowly (Tm 3 at top right, more bad guys at top left).
They take a look around, but don't spot Tm 3 (top left), Ryder (top center), or Tm 2 (top right).
*I pulled cards as for shooting, to determine if the bad guys spotted any of the Cubans. A 'hit' would have been a yes, but my luck is holding.
Enemy troops in the north move up to an animal pen housing a goat (thanks Kyote!)…
And push forward in the south, having searched the hut at bottom left.
As the furthest east government patrol reaches the edge of the village (top right). The commander (center) mutters to himself: "come out, come out, you heathens, I know you're hear somewhere. We shall find you, and that will be the end..."
Ryder (far right) covers the enemy patrol as Marshall and Tm 2 push up (left, from bottom left). The Cuban commander is getting anxious...
Zuma (bottom center, with Marshall and Everest to his left) mutters "Boss, what the hell are you doing?" as Ryder crouches and creeps forward (top right, from far right), getting dangerously close to the enemy patrol (top left).
Rocky (bottom left, with Chase to his right) comes on: "I concur. Boss, what the hell are you doing? You're masking our lane of fire, we gotta move to support."
The enemy commander steps back into the street (bottom center) and peers west; "where are these vermin?" he asks, watching his western-most patrol near the burning sedan (top center, with Ryder visible above and left of them).
*And that was the end of Turn 1.
Marshall and Tm 2 (far right) hold tight, covering the enemy patrol (top center), as Skye and Tm 1 dash forward (top left, from bottom left).
Only Tracker (bottom center, with Aarby and Skye to his right) gets around the corner. He motions them to halt, drawing down on the backs of the government troops, but holding his fire.
Ryder (bottom right) keeps his head down as the government patrol passes the burning sedan.
Marshall pushes Tm 2 forward (left, from bottom left), taking up firing positions covering the road. Ryder: "Damn, that's a ballsy move." Marshall looks over at him and grins: "You're talking to me about ballsy moves?"
Ryder: "You're right, time go loud. Team 2, light'em up when you're set, Teams 1 and 3 keep your eyes on the flanks, we got this." All three teams came back: "Roger."
Ryder (bottom right) looks on as his Team 2 (bottom left) quickly repositions, checks weapons one last time, then opens fire: Everest fires, hitting two different enemy soldiers in the left leg, while Marshall hits a guy in the right arm, but Zuma's M-60 jams!
On the left, Skye sees that the opening salvo isn't as devastating as hoped, so rather than watch the flank (which would b to the left of this picture), he pushes his team onto the road, where they open fire. Tracker hits a man in the chest, dropping him, as does Skye, but Aarby is spraying and praying and don't hit shit!
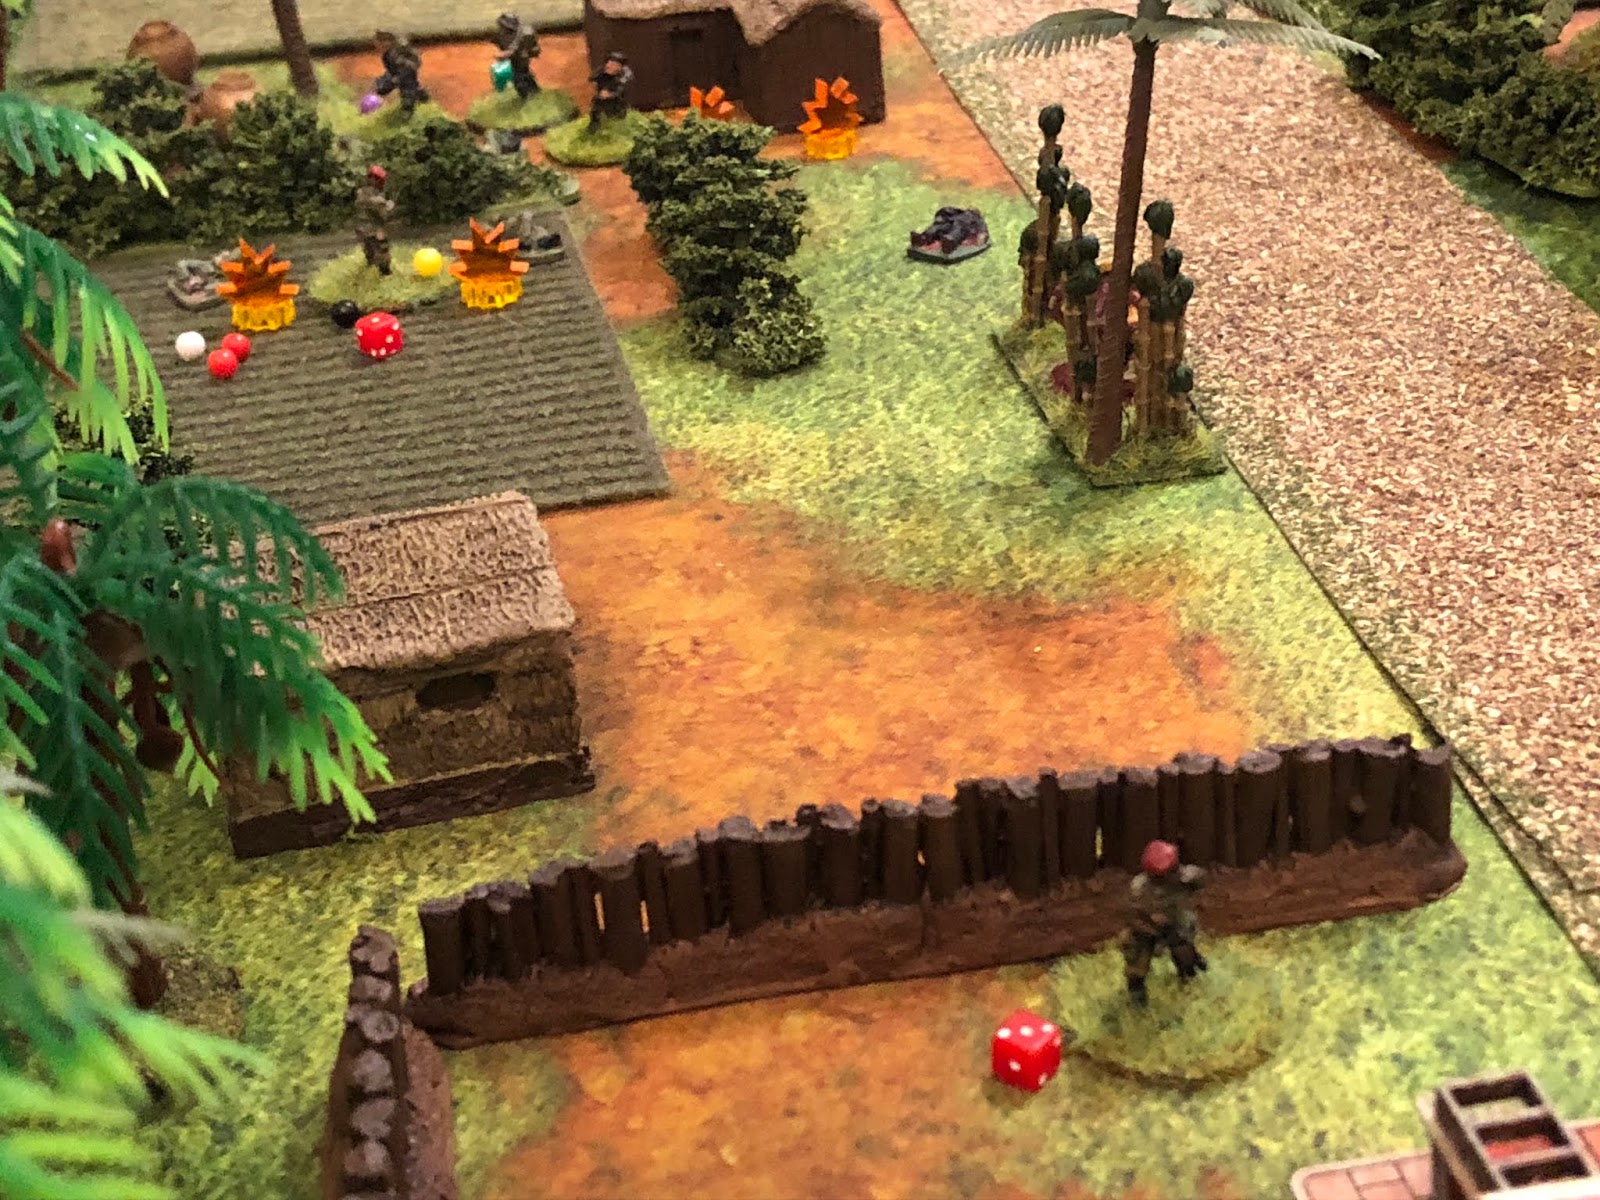
The government patrol at the burning sedan is in a bad way with two dead and two wounded, and that stack of red beads means a whole bunch of morale tests.
And all that death and destruction occurred largely in part due to the above card coming out, which allowed the Cubans to move two teams up, then allowed them to go again!
Not to be outdone, Rocky, with Tm 3 on the far right, also says to hell with his flank, and he leads his men right up to the decimated enemy patrol (center top, from far right, with Ryder at center). Ryder: "What the hell are you doing? How 'bout a little damn discipline, gentlemen?"
Chase (bottom left), at point blank range, opens fire, or tries to: his weapon jammed!
Looking west to east, the bad guys have all heard the sudden outbreak of fire and have turned to meet the threat. The patrol that had reached the end of the village turns and hauls ass back up the road (center, from bottom center), coming up on their commander standing in the middle of the road, who is busy watching his westernmost patrol get ripped to shreds at the burning sedan (top center).
With Chase jammed (purple bead at far right) and masking Rocky and Rubble, Ryder moves up (bottom left), firing as he goes, dropping another bad guy.
In the north, an enemy patrol was searching the hut at bottom center left, but upon hearing the gunfire, they reversed course and began working back to the west (just visible at center bottom, with another patrol at far left and the burning sedan at top center). Unknowingly, they're actually working behind the Cubans since Skye and Tm 1 (top right) have turned in, onto the road. The enemy patrol at far left begins moving right...
Joining their compatriots (center/center right, from bottom center), now potentially putting ten enemy soldiers behind the Cubans (Tm 1 at top left).
In the southeast, the enemy patrol that was searching their turns back to the west.
And are joined by their commander (right).
Who then (bottom right) begins screaming at their Sergeant to get his ass in gear and get in the fight! The enemy soldiers double time west (left, from bottom center), nearing the raging firefight (burning sedan at top right, Tm 2 above it, Ryder at top center right, Tm 3 at top center).
*Back to back cards for the bad guys, not good...
And then the bad guys in the north push west again, managing to get their point man through a hedge...
And as he does (center right), he spots Tm 1 (top center) and lets out a shout: "Commandos!!!"
Meanwhile, back on the road, Ryder moves up to the burning sedan, squeezing off rounds and putting another government soldier out of the fight.
Which is enough to convince the enemy commander he'd better get his ass into cover (bottom center, from bottom right, with Ryder going berserk at top right and Tm 3 at top left)! The enemy patrol at the burning sedan is down to a single man, its leader...
Who promptly lets out a scream and charges through the smoke, running smack dab into Ryder!!!
*This was a morale result, 'charge the nearest enemy,' but further helping things was the fact that before he drew that one he drew a card that left him stunned.
Ryder calmly and coolly stuffs his muzzle into the bad guys face and puts him down.
Then dashes forward (top right, from bottom left) into cover, realizing he may have gone a bit too far a bit too fast...
Ryder (center bottom, at the top right corner of the bottom field) finds himself surrounded on three sides, with enemy patrols at far left, far right, and coming down the road from top right. Ryder: "Gentlemen, I don't mean to sound like an Englishman, but I could use a spot of help."
Marshall: "Roger, Boss, we're on the way," as he leads Tm 2 up to the burning sedan (from bottom center left, with Ryder at top center). As Everest pushes into the brush (center, with Zuma nd Marshall to his right), he spots movement to his left (top left)…
Everest raises his M-14 (bottom left) and fires, but somehow misses!!! Ryder: "nice shot, jackass!!!!"
With Tm 2 (bottom right) engaging enemy troops on the left flank (top right), Tm 1 is now alerted to the threat and Skye moves them over (top left) to deal with it.
*Pretty lucky in terms of activation, insofar as I was able to get two teams up before the bad guys were able to jump up my butt.
Tm 1 spots the enemy coming through the hedge and opens fire at point blank range...
Tracker drops the point man (top left), Skye misses, and Aarby pops another rifleman (right).
*End of Turn 2.
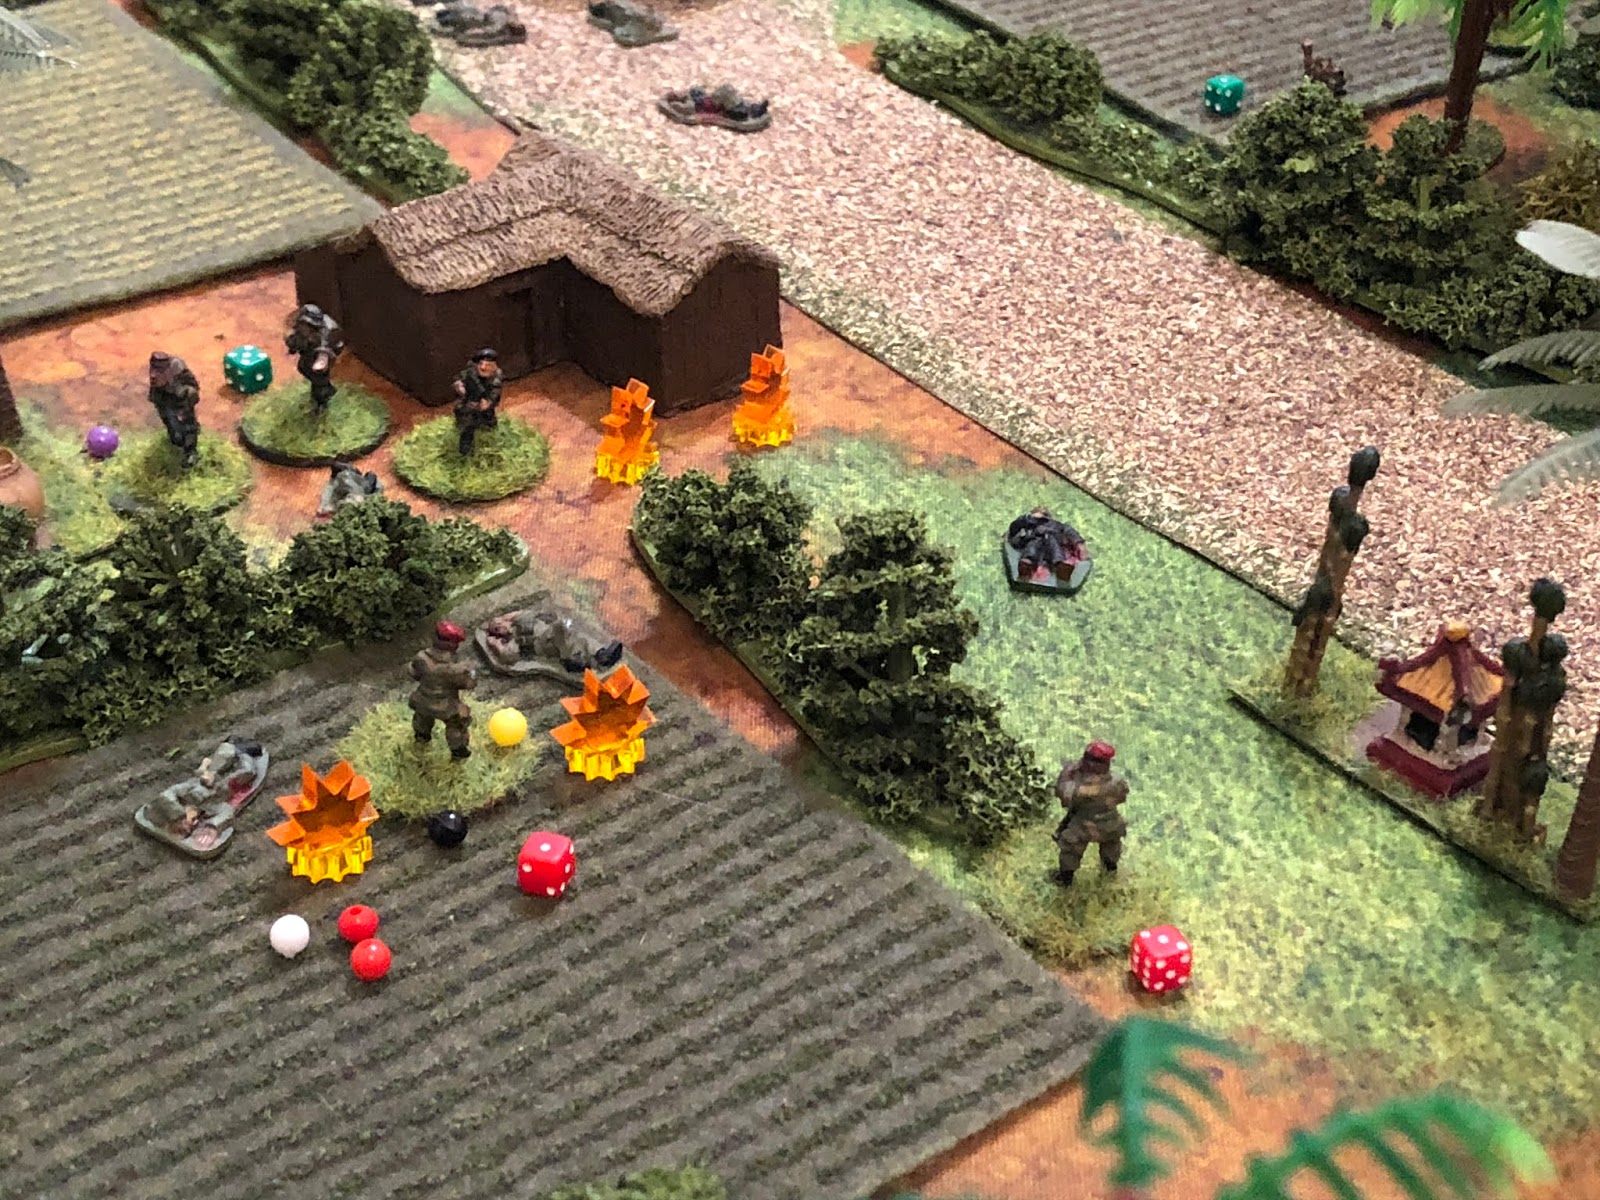
While on the right, Tm 3 (bottom right, with Tm 2 at bottom left and Ryder at far left) has spotted government troops closing in (top right, with their commander at top center). Chase clears his malfunction as Rocky opens fire and Rubble gets his M-60 going. The machine gun drops one man with wounds in both legs, then hits his partner in the leg, wounding him, as Rocky sights in and pops the patrol leader in the head!
Team 3's ferocious burst of fire (to left, shooting at enemy patrol at far left, with Tm 3 at top center and the enemy patrol Tm 1 is lighting up at top right) is enough to convince the bad guys double-timing up the road (bottom right) to take cover. They hop off the road and take cover near the village well (right). Team 3 decides to keep up the pressure...
Chase, Rocky, and Rubble assault through (center, from bottom left)…
Chase misses, Rocky hits a guy in the left arm, and Rubble's M-60 runs dry!!! The enemy commander is at top right, chewing his cigar in half.
The government patrol at the well (bottom left) looks to help their buddies out (top left), so they open fire on Team 3, but they score no hits, and one bad guy manages to empty his whole magazine and needs to reload.
Back in the center, Ryder (top right) scopes out the situation: "Team 3 and I have the right nailed down, Marshall, go help Skye with the left." Marshall then leads Tm 2 up (left, from bottom right).
Everest (left) misses again (guess that's not the accurized M-14 I was hoping he'd been issued, Zuma's M-60 jams (center), and Marshall (bottom right) pops a guy in the left leg. But the men quickly settle in find their groove: Zuma clears his gun...
Everest knocks the enemy patrol leader out of the fight, while Marshall hits a guy in the chest, wounding him, then hits the same guy again, dropping him, leaving only two men, one of whom is wounded in the leg.
*That was awesome, they didn't do so hot firing, but then their card came out again. Meanwhile, a red 4 comes out. The enemy has two teams on 4, but they both lost their leader so they've both pinned and activate only on black 4s.
While Tm 2 (top center) is beating up on one government patrol (top left), the other government patrol in the north (center left), facing off against Tm 1 (bottom right), activates and is forced to check morale. They're mostly okay...
But one guy does decide he's had enough and takes off (top right, from bottom left, running through the friendlies getting their ass kicked by Tm 2)…
Flopping down next to the old goat, stunned.
But two enemy soldiers have held their position, and they return fire with their AKs...
Tracker is hit and wounded! Luckily he got hit in the chest, right in the plate, but it looks like it cracked a rib!
*The card showed an incapacitating chest wound, but since they're wearing body armor and he was hit in the chest, I dropped it to a chest wound.
Skye and Aarby hold position (bottom right), while Tracker falls back (top left). "I think I need to have me a quick sit down, collect my thoughts." Skye: "Take your time sweetheart."
*This was a morale result; it told me to have the lowest Guts fall back. They all have the same Guts, but Tracker had just been hit so I figured it made the most sense for him to fall back.
Skye and Aarby seize the initiative and assault through on the Cuban left.
The close range fire manages to wound both remaining government troops (bottom left), and sudden violence to their right from Tm 1 (off camera to bottom left), combined with the fire from Tm 2 (off camera to right) is enough to pin the two remaining bad guys from the other patrol in the north (top right)!
*This was a result of checking morale when the enemy team at top right activated.
But then one of the government troops lets out a scream, stands back up, and sprays the bush near Team 2 (top left), pinning Everest (top center)!
*This was another morale result, and may seem kinda funny, but in Combat Patrol they accrue morale markers and draw a card for each one, so the first card stunned both remaining bad guys, but the next card made one of them fire at the nearest enemy.
But then, having done his duty, the guy that pinned Everest (bottom left) takes off running for the rear (top right, from left), passing the shirker from the other patrol that's hanging out with the goat (top center)! The enemy patrol at the village well is at far right.
Back on the far right, the government patrol being assaulted by Tm 3 is under pressure. One of its members is pinned...
But the other two charge, bursting through the hedge and going nose to nose with Rubble, Rocky, and Chase!
Rubble, who's M-60 is still in need of ammunition (purple bead), pulls his sidearm and takes care of one bad guy, while Rocky and Chase team up to bust up the other.
*The enemy team was forced to check morale because of all the wounds/kills, which stunned one guy and forced the other two to charge. I wonder if I messed up, if all three should have charged? Anyway, that's the end of Turn 3.
Meanwhile, on the Cuban far left, a similar situation is playing out. Tm 1 (top left) has badly roughed up a government patrol, and they must check morale. But these two fellars aren't as hearty as their compadres on the other flank...
And they take off like a pair of jackrabbits, joining their third, still handing out with the goat (bottom center, from top center, where you can still see Tm 1, with another enemy patrol at center, the one being shot up by Tm 2)!
Tracker, though still nursing his busted rib (top left), is ready to get back in the fight. But Skye and Aarby (bottom right)…
Ain't waiting around. They move up and assault the patrol Tm 2 (off camera to right) was engaging...
And Aarby makes sure that particular fight is over.
Over on the Cuban right, Team 3 (left) is still tussling with the last bad guy in the patrol they engaged. Ryder (top right) looks on as the enemy commander (bottom center right) assesses the situation...
And decides discretion is the better part of valor. He dashes to the rear (bottom right, from center), and vaults over the nearby retaining wall like an Olympian!
Chase (center top left) and Rocky (right) give chase (bad guy commander is behind wall at top center), dashing past the last, wounded soldier from the patrol they were duking it out with...
Leaving Rubble to move up (center bottom)…
And finish him off (bottom left). About that time is when Rocky (right) spots the enemy patrol across the street at the village well. He and Chase (center top left) both open fire.
Chase hits the enemy patrol leader in the arm (yellow bead), while Rocky drops one.
Rubble moves up and reloads (bottom left), while Chase and Rocky keep firing.
*Their card came out again.
Chase drops one and wounds another, but Rocky misses twice!
In the center, things are quieting down, and Ryder (bottom right) and Team 2 pause for a moment, looking and listening. Ryder: "Skye, how's it looking on the left." "Left if good, Boss. Maybe a few stragglers up ahead, we saw'em run, but they're whipped." Ryder: "Yeah, sounds like it. We need to end this quick. Marshall, Team 3 is shooting it out with some guys to our front, why don't you loop around and handle it." "Roger."
Marshall: "Zuma, with me, Everest, overwatch, let's go." Marshall and Zuma (top center) creep ahead as Everest (bottom left) covers.
And it's perfect: Marshall and Zuma (bottom center) have popped out on the other side of the government patrol at the village well (top center, with Team 3 off camera to right). Zuma gets the gun going, shocking the hell out of the enemy, while Marshall fires and hits an enemy soldier in the head, putting him out of the fight.
Skye: "Moving up on the left!" While Zuma and Marshall (center top right) are engaging the enemy at the village well (top right), Team 1 gets moving again on the far left (Skye and Aarby at center left top, Tracker, with the busted rib, moving to catch up at bottom center left).
The Cubans (top left) sense danger and slow up, moving very carefully. The three government soldiers they drove off are cowering nearby...
But this fight is all over but the crying. One patrol still has three men, but two are wounded (top right, the ones Team 1 just crept up on). Another patrol has one man left, and he's cowering behind the fish farm (bottom center), and the last patrol is now down to two men (far left) at the village well, both wounded, and caught in a crossfire (from Team 3, off camera to left, and Team 2, off camera to top center).
It doesn't take long: the government troop at the fish farm breaks and runs.
Then the two wounded guys at the village well join him (bottom right, from center top), leaving their commander (far left) howling after them!
Ryder moves up to the village well (center, from bottom left), with Team 3 covering him (bottom right).
He scopes the area out; all is quiet.
Ryder hears something (bottom left), but doesn't get a clear shot at the bad guy commander scurries away (top right, from center bottom).
Lastly, the three government men in the north decide it's time to make their break.
*This and the commander were not morale results, it just seemed like it was time to wrap it up.
The Cubans fan out, searching for signs of the Cuban Reporter and Camera Man, moving east (right).
They close in on a rusted, corrugated tin shack...
"Don't shoot, don't shoot!" Villagers begin popping out of the shack, tears of joy streaming down their faces. Zuma: "Holy crap, you almost got freakin' nunchucked, you don't even know!"
The men keep an eye out for enemy soldiers, and check each of the villagers as they emerge. Marshall: "Holy crap, how many people can you fit in that tiny thing!? Anybody seen a couple of Cubans?"
When suddenly, voila, the Reporter and the Camerman appear!
"No, I won't go, you must rescue these poor villagers too!" Ryder: "I said, grab your Camerman and let's go!" "No, I won't go without these poor villagers!" Ryder: "Ma'am, you're about to make this trip unconscious."
Ryder: "Damn it, I'm warning you. I'll... I'll... Good grief, okay, fine, we'll save the poor villagers, too. Let's go."
They quickly gathered up all the villagers that could walk, formed up on the road, and got moving west, to the HLZ.
Team 1 led, all the way to the LZ.
There they halted, established a perimeter, and got comms with the inbound bird.
Ryder: "So, are you ready to go?" "Yes, thank you. You are so kind, and compassionate. You are truly my hero."
Ryder: "Hmmm, about that... I suppose now is as good a time as any to tell you I lied, there's not room on the helo for all your punkass friends."
"You son of a..."
Ryder: "And then some. In any case, here comes our ride. Madame, after you."
Ryder: "Eh???"
Ryder: "Dammit... Well, don't I feel like a heel?"
Ryder: "Alright everybody, grab your stuff, looks like we're walking."
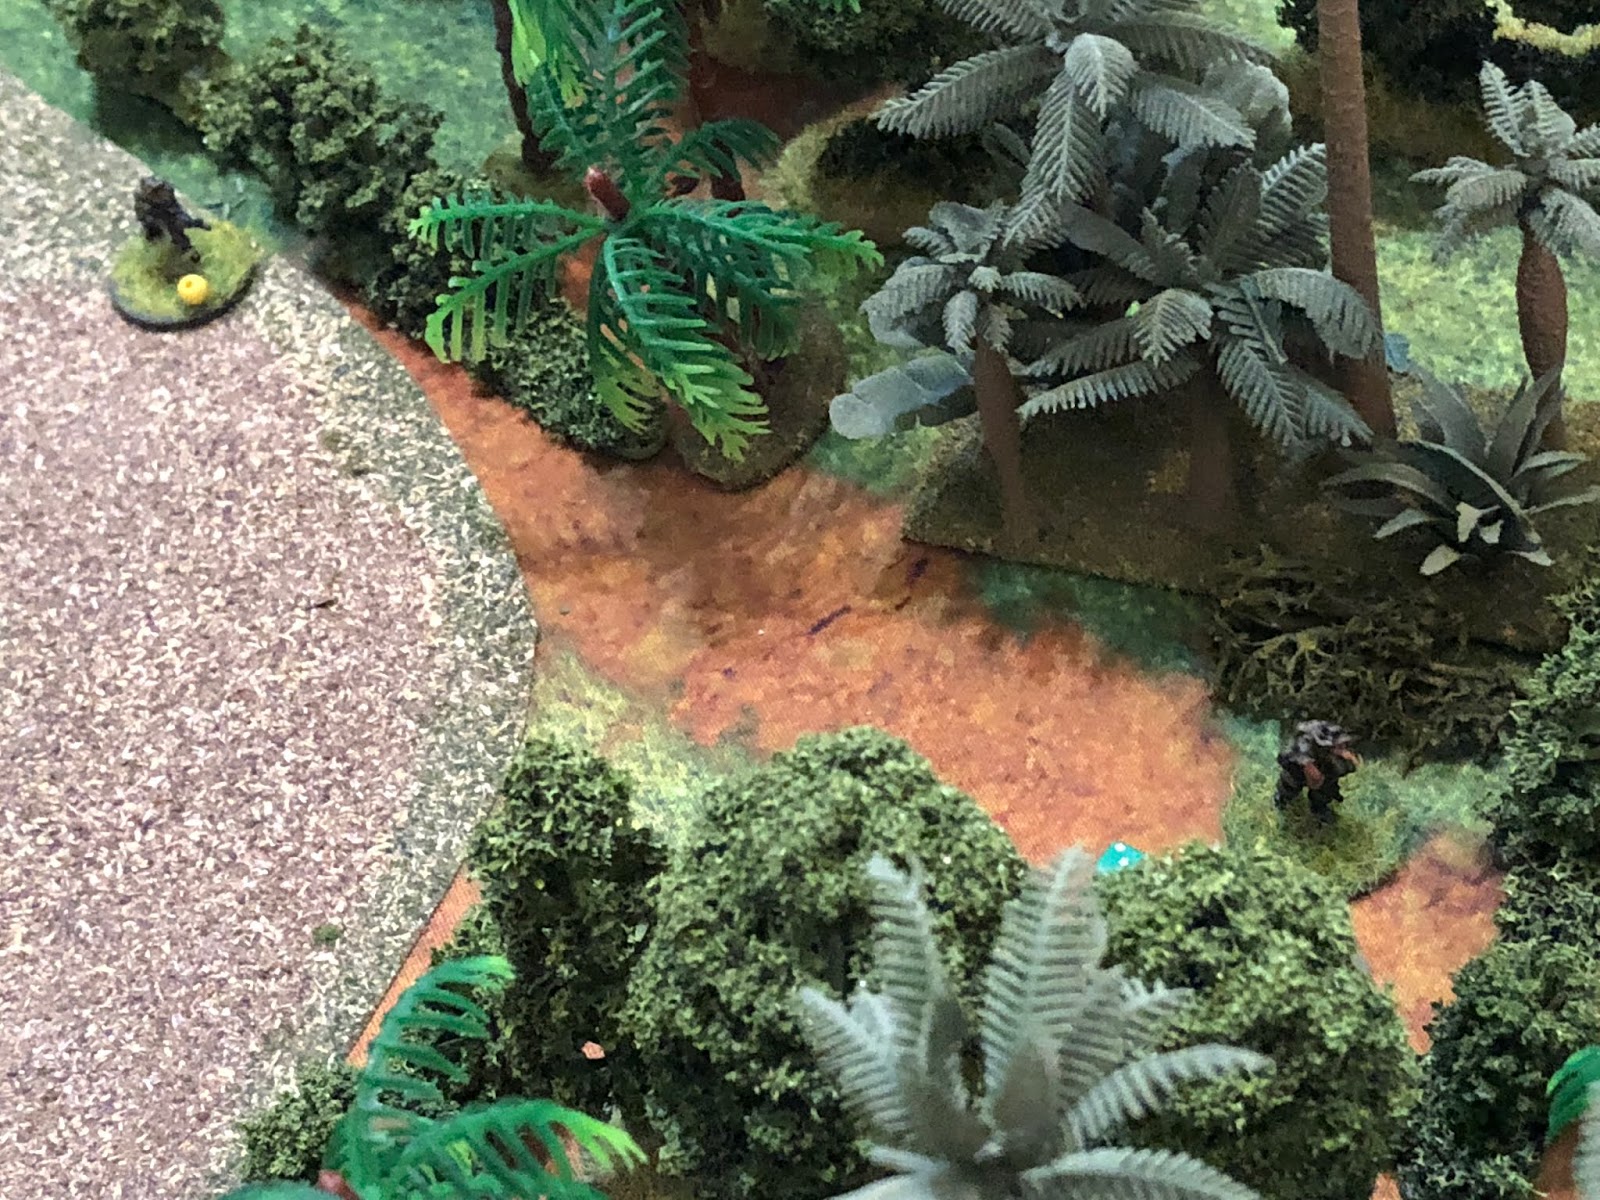
And with that, the refugee column set off into the jungle, looking to get to the border with South Leon and back to friendly lines, which would be quite a feat, particularly with all these bad government guys running around, looking to kill them, with Captain Stelosavo as yet unaware that the dead President's son is actually one of the refugees hanging out with the Cubans, putting an even bigger bullseye on their backs.
In any case, the column humps the jungle for the next couple days, dodging government patrols a few times, still heading for the border. They'd done a pretty good job of avoiding contact and keeping quiet, but now they'd run into something they just couldn't let lie. Which is the next batrep, of course!
V/R,
Jack


Superb- loved reading that.
ReplyDeleteCheers,
Pete.
Thanks buddy, I appreciate it!
DeleteV/R,
Jack
At least my Goat got to game!!
ReplyDeleteYeah man, he’s made it into quite a few games now. He was very consoling, too ;)
DeleteV/R,
Jack
Jack,
ReplyDeleteWonderful! I wonder how you are going to handle the ammunition situation, seems like firefight in the village caused a big expenditure in bullets....
Really enjoyed the little tie-ins from the movie!
V/r
J
Johnson,
DeleteThanks man, I appreciate it. To be honest, I didn't really do anything special to handle ammo expenditure, it's built into the "Combat Patrol" rules. Glad you liked the tie-ins, I was cracking myself up ;)
V/R,
Jack
Jack,
DeleteSweet, looking forward to the next one! Though one thing I didn’t see was if the Cubans went to see if there any survivors from the help crash...Maybe another mission for those boys...
Also I feel ya about Monica Bellucci.
V/r
J
Thanks man, I'm working on it right now. Yeah, the team couldn't go check with all the refugees and bad guy patrols running around, they had to head for safety, and yes, I am considering a TRAP mission. Not sure yet, we'll see. This weekend I'm planning on heading back to WWII to finish up my blitzkrieg campaign in France (or at least make a significant dent in it).
DeleteAnd time hasn't been kind to any of us, but Monica in her time, oh man...
V/R,
Jack
Jack,
ReplyDeleteOutstanding! I am gonna have to find movie stills now for my blog. Great report. Only thing missing was boats!
Joe
Joe,
DeleteThanks man, and the movie stills is funny, just don't over-do it like I did ;) Missing boats? Whatcha talkin' about?
V/R,
Jack
Ryder and his men needed to come down the river in an Alpha boat! In style man.
ReplyDeleteI like Combat Patrol but couldn't get past their morale system; had to sub in my own which was FoF. Pretty soon I was subbing in more and more until now I actually have FoF with subbing in CP for shooting and who hit what. I like they have cover built right into the flow.
Joe,
DeleteIn an Alpha boat?? That’s not particularly covert ;) I understand what you’re saying about the Combat Patrol mechanics, but so far I’ve had a good time playing them “as-is.”
V/R,
Jack
Really well done report Jack, thanks for taking so much time and effort.
ReplyDeleteThis post crystallized something that has been at the back of my mind for a while now: the importance of the immediate build-up to combat. I really enjoyed the first couple of turns in particular: great tension. It is one of the things I have loved about my Nuts! games, that feeling of moving out of the FUP/over the startline and wondering what is going to happen next. I think it is a key part of small modern skirmish games, starting just long enough before the action to allow the tension to build, but not so long that it is tedious.
Anyway, many thanks again.
John,
DeleteHey man, there you are! I’m so happy you’re here, wasn’t sure if you’d be interested in my modern, fake Cuba gaming.
Now that’s a very interesting point. I think I hadn’t fully developed the thought, but I agree with you, and it was on my mind. I had just re-read one of my fast-and-furious 5MAK, point-blank gunfights, and I was thinking to myself, “man, that’s kinda lame, the whole story is nothing but ‘guy 1 moves up and shoots at guy 2, guy 2 shoots back, guy 3 moves up, guy 4 shoots at him.’”
I’ve long been a fan of what someone smarter than I termed “pizza-box gaming,” which is playing small-sized games on small-sized tables, where the game begins with troops in contact, straight into the action with little to no pre-battle maneuver. I’m still fond of the concept, but I found myself thinking... well, where’s the thinking? Fast and furious is great, but every activation shouldn’t be shooting at someone, there should be some pauses to let the situation develop, some maneuvering to better position (that isn’t charging straight at the enemy, guns blazing), some thinking, some communicating, some re-forming.
I feel like I’ve been treating too many of my skirmish fights purely as immediate action drills (which, to be fair, is not totally out of scope, owing to the point-blank ranges of those games), and now I’m feeling like I’m wanting more, perhaps a bit more cerebral, which should allow me to insert more character into the fights.
So I don’t think all the that has to happen prior to the outbreak of gunfire, but it sure did add to the tension, and I can see doing more of that, rather than always starting with an ambush or pointmen running into each other.
V/R,
Jack
amazing ! , this is an awesome wargame concept , well executed ! Love it , love everything about it ! about to read it again .
ReplyDeleteJimmi,
DeleteHey buddy, thanks, I’m glad you liked them, it was a lot of fun. And those Flashpoint Minis looked pretty damn good, right? ;). Let’s go dude, I show you mine, you show me yours!
I received the package on Saturday, got the village and jungle finished already, will post soon over on Blackhawkhet blog.
V/R,
Jack
Hello Jack
ReplyDeleteMy first comment was swallowed by Google so will try and remember what I wrote...
Firstly, I am finally getting around to reading your latest blogging saga, even it is a month later than you posted! You do realise this is taking me away from finishing my WW2 grid battle posts?
Secondly, I agree with you and John about starting the narrative prior to shooting. This gives some feeling to making a decision before the battle and helps with a bit of context.
Lastly, I a great read and not Cuban is dead (yet). I think I need to get a copy of Combat Patrol. While likely too detailed for me, it does have some great mechanics. I have been following its progress and reading about it for a few years on Buck's blog but have not bought them yet and may need to wait until the house renovations have finished anyway!
Shaun,
DeleteSorry about the disappearing comment, happens every now and again, I guess. Glad you're getting some reading in, but those WW2 grid batreps should have been higher on the priority list ;)
Regarding the leadup to combat, I dunno. Sometimes I feel like a nut, sometimes I don't. A lot of times I like the 'pizza-base' concept, where the game begins with troops in contact, fast and furious. But sometimes I prefer to have troops moving, ships passing in the night, waiting to see when they collide. I think it really fits the Special Operations-type games.
Yep, the Cuban SF guys are some bad dudes, pretty tough and pretty proficient. Still, as in real life, a lot of luck involved. Any of the hits scored by the bad guys could have been a headshot vice getting popped in the arm, etc...
The Combat Patrol mechanics are pretty cool, and I think you could pare them down to get what you're looking for, which is what I typically do, though the rules are already relatively streamlined. The only time loser to me is the re-rolling all the command dice and reshuffling the decks. Not a huge time suck, but it is there, and I don't like having the dice out there on the table.
V/R,
Jack