All,
It's 1745 on 29 June 1990 and it's time for a diversion. I've been playing 5Core Company Command in 6mm, but I've got a hankering for some modern skirmish, so here we go. I've been playing out "Operation Chokehold," where Cuban mechanized forces have been on a blitzkrieg, pushing north and east to encircle the Cronistrian capital of Miran. This effort has been going swimmingly, but the operational planning had identified Cronistrian Communist armored forces to the north of the battle area. As a counter, known as "Operation Cro-Wings*," Lt Trojas' ODA 626 was broken up into five- and six-man teams infiltrated into various 'hides' along the northern edge of the Operation Chokehold area of operations. The teams settled into the hides to perform surveillance on avenues of approach to the north, acting as tripwires for Task Force Galban. The plan was for the recon teams to report if Communist forces were seen massing or moving towards Task Force Galban's left (northern) flank, providing time for the Cuban mechanized forces to prepare for any Communist counterattacks.
And that is exactly what happened. At approximately 1710, Team 3 of ODA 626, under GySgt "Turk" Dos Santos was settled into its hide atop Hill 781 when it spotted Communist forces and called it in to TF Galban headquarters. Not only was the info immediately relayed to TF Aguilera, who immediately set about preparing a reception for the incoming Communists (Cronistria fight #24), but Cuban F-4 Phantoms were sent in, arriving on station at 1730 and making several runs, devastating the Communist armor.
Turk's team remained in its hide, at 50% (half on watch, half sleeping), with no expectation of contact. Unbeknownst to them, Communist forces had identified the team's location via radio-direction finding equipment and dispatched militia to take on the Cuban Special Forces troops. At 1745 SSgt "Chick" Alfaro alerted the team via intra-squad radio: "Contact, contact, everyone up. We've got movement down-slope to the north."
*Operation Cro-Wings: yeah, this is a direct rip-off of "Lone Survivor" and the real-life "Operation Redwings."
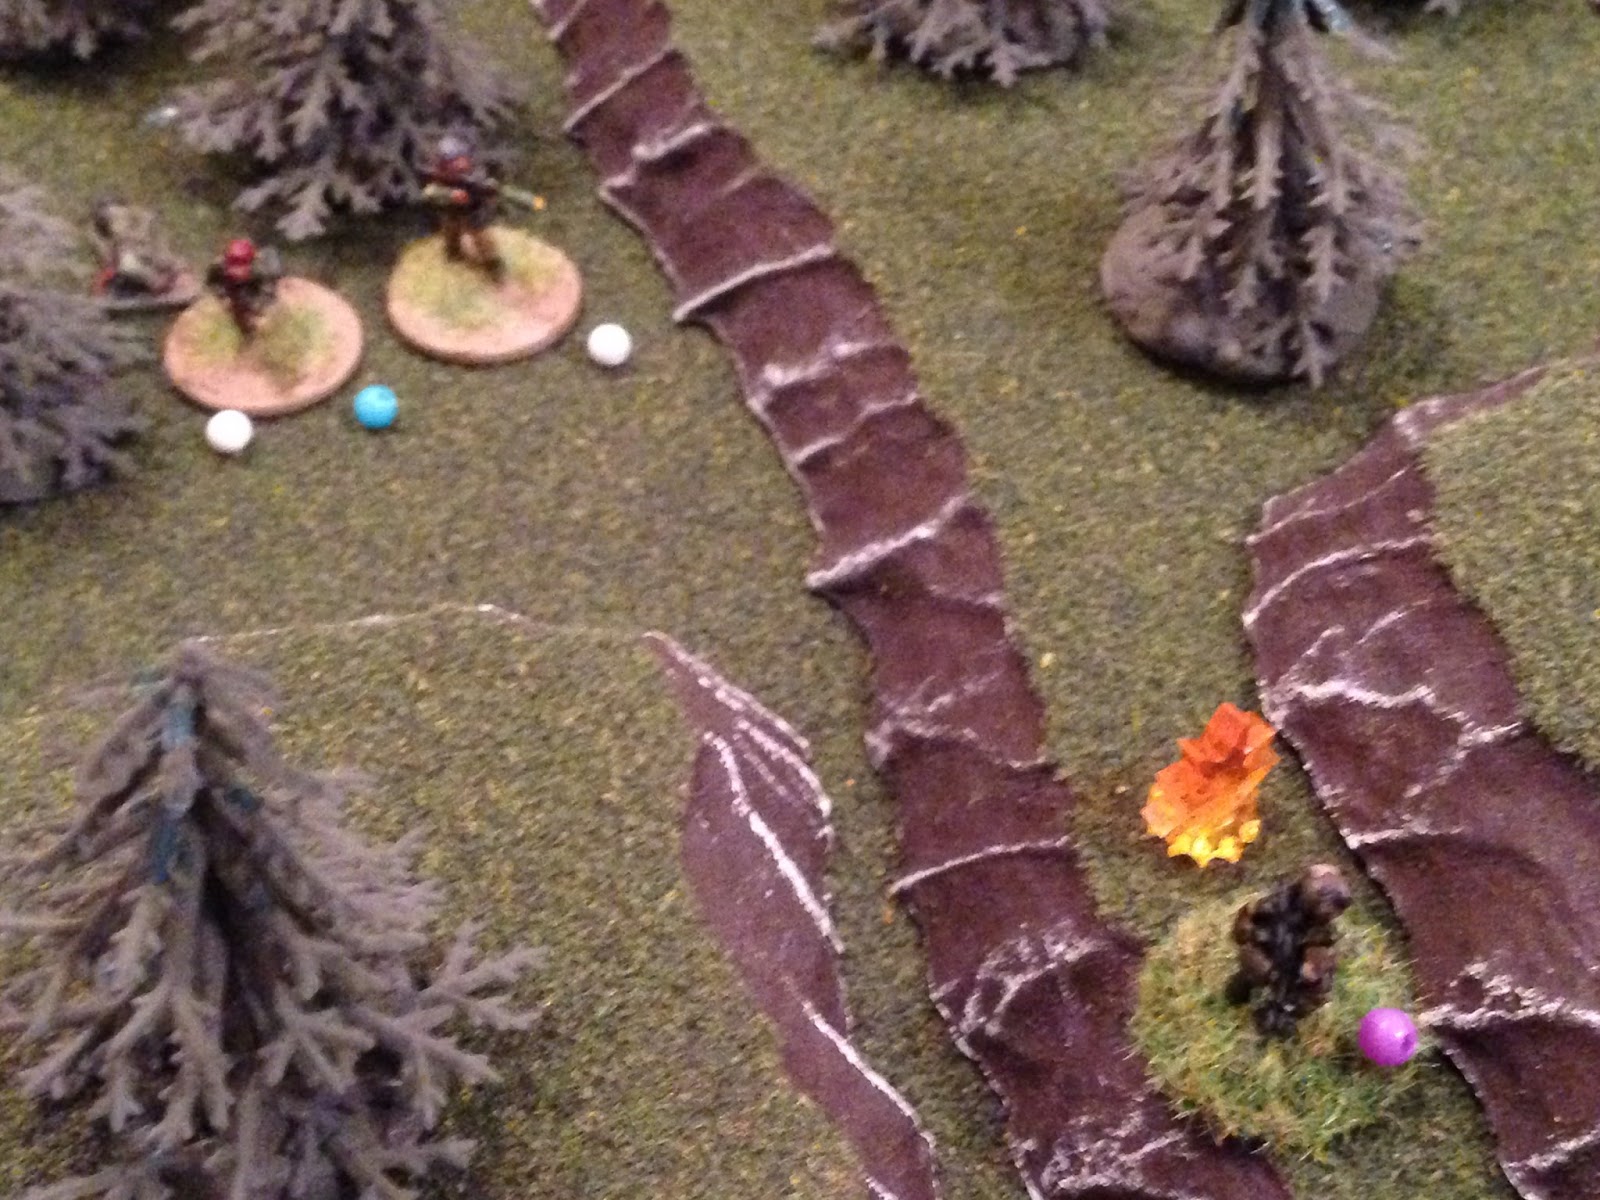
Overview of map, north is left. The team is in and around the bombed out house at bottom left, which is on the crest of Hill 781 (yes, I know the house is the absolute worst spot for a hide owing to target indicator issues, but it's a game and I wanted to break up the terrain a bit). Regarding Hill 781, think of the entire table as being pretty high up on a sizable mountain, with various peaks being labelled hills. So bottom left is Hill 781, top left is Hill 690, bottom right is Hill 691, and top right is Hill 850. Don't worry about all those, just know the original observation post is at bottom left and the team is running to exit the table at top right. As you see, the area is heavily forested with pine trees and there is a stream running across the board, though it's really just there for looks, doesn't mess with movement.

The opposing forces, with Cuban SOF at left and Communist militia at right. The good guys are Battlefront SEALs (Vietnam era) and the bad guys are Eureka Chechens.
The SF recon team, from top left: SSgt "Bear" Duarte, Sgt "Goss" Gallegos, SSgt "Chick" Alfaro.
From bottom left: GySgt "Turk" Dos Santos, Sgt "Badger" Canales, and Sgt "Bolt" Echevarria.
The bad guys: the bottom six are riflemen with AKs, then there are two RPGs and two PK machine guns. I'm a glutton for punishment, so here's the plan: the bad guys will start with these ten men on the board, at three separate entry points. As bad guys get whacked they will come back on the board, 're-spawning' at one of the three entry points. So theoretically there will always be ten bad guys on the board, no matter how many I kill, chasing my six guys. And if (when?) I take casualties I will have to take them with me.
I will make things a little easier on myself: in the rules (as with most rules), when someone gets shot there is an 'out of the fight' option. That guy is done for the fight, then after the fight I roll to see if what actually happened to him; there are options for 'dramatic scar,' knocked unconscious, light wound, serious wound, debilitating injury, and dead. To make things potentially easier for me, when one of my guys gets an 'out of the fight' result, I will move a buddy over to check on him, and then I'll make the casualty roll to see what actually happened to him. If he's dead or seriously wounded then one of my guys will have to carry him out, but if he's 'lightly wounded' or less he will be able to continue the fight, just moving a bit slower, some other penalties for shooting and reactions.

The board, this time with troops. The team is in and around the building at bottom left. There are five bad guys in the northeast (top left), and five bad guys in the southwest (bottom right). Those are two of the bad guy entry points; don't forget, the initial call of 'contact' is bad guys coming up the slope from the north, i.e., the bottom left. Once the team gets moving and the bad guys start taking casualties they'll start using the bottom left corner as an entry point.
Close up of the good guys: Chick and Goss are on watch in the OP (in house, at left), Bolt is on rear security at bottom right. The green beads signify guys lying down sleeping: Turk and Badger are at bottom center, Bear is at top center.
Five bad guys in the top left (northeast) corner of the board.
Five bad guys in the bottom right (southwest) corner of the board. Both bad guy teams have three riflemen, an RPG, and a PK (machine gun).
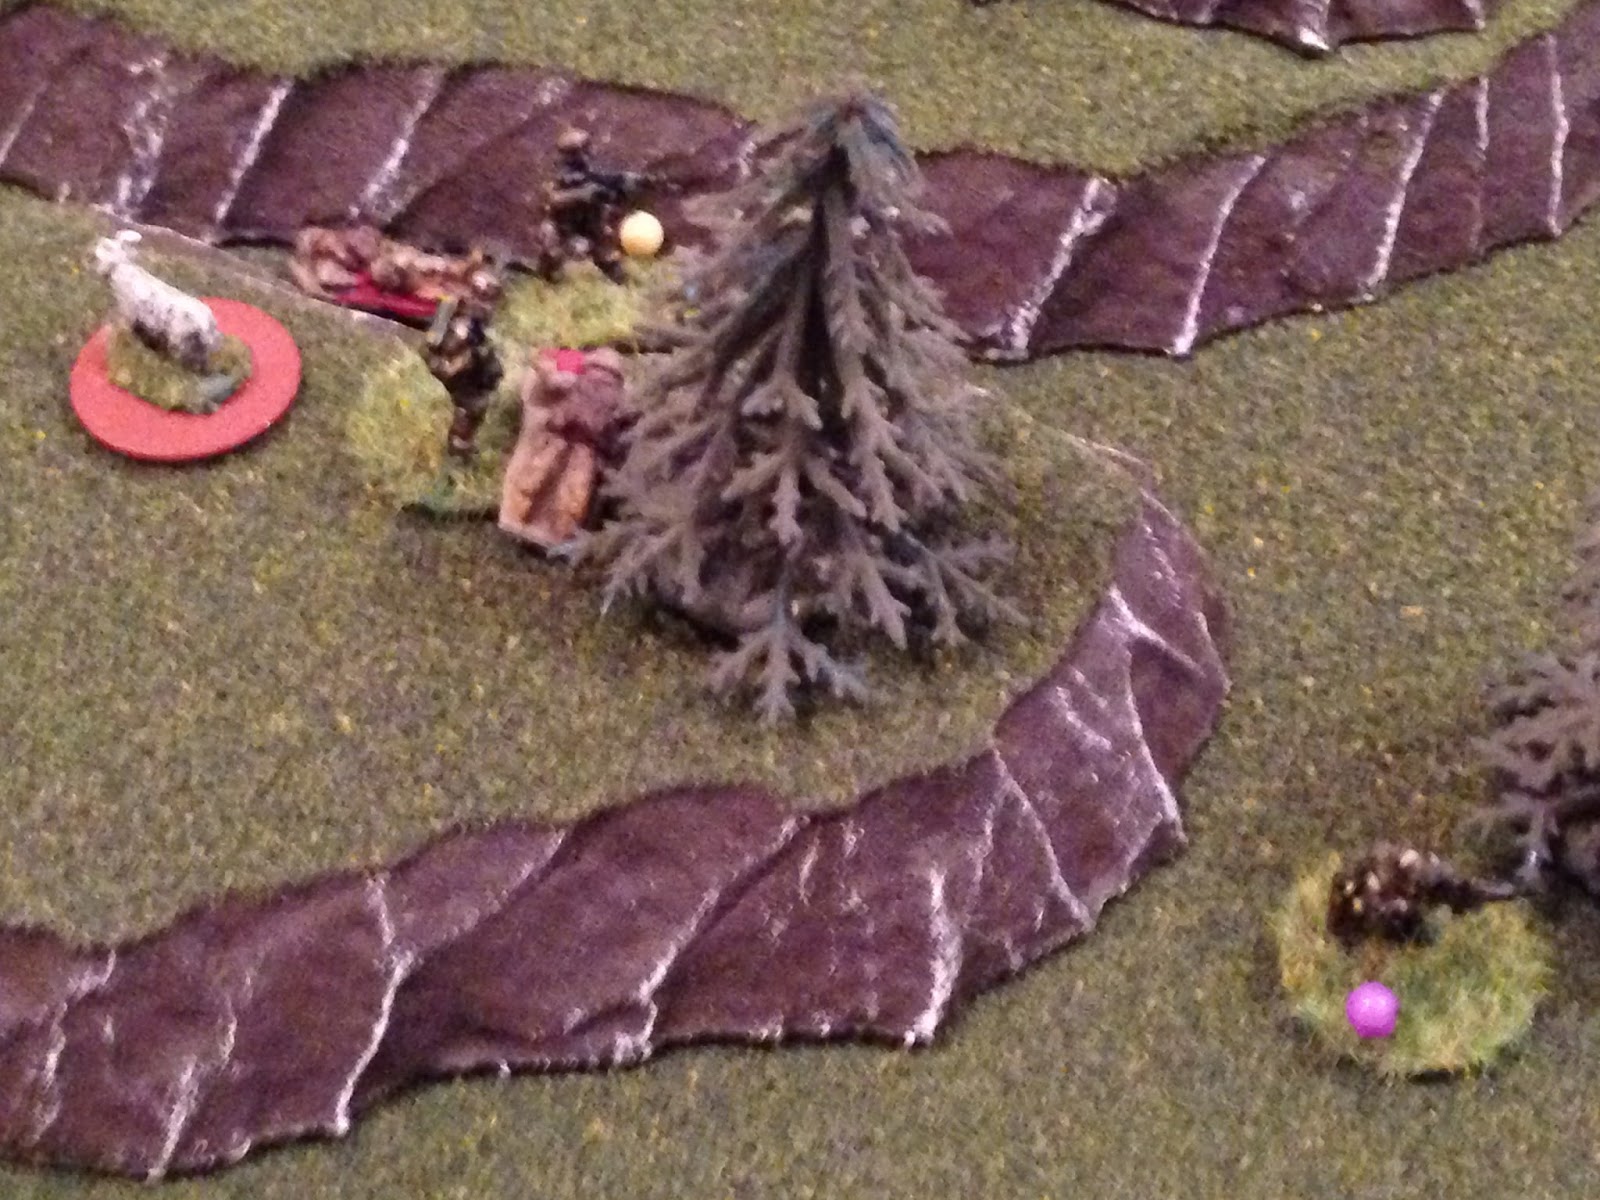
Looking east from the OP.
Looking south from the OP. So, bad guys coming from the north (off table to bottom), the east (left), and the south (top right).
Looking southeast from the OP, at the exit point. There are bad guys coming from bottom, left, and right. The team is going to run uphill, looking to get away from the bad guys and hopefully to a suitable LZ for extraction by helo.
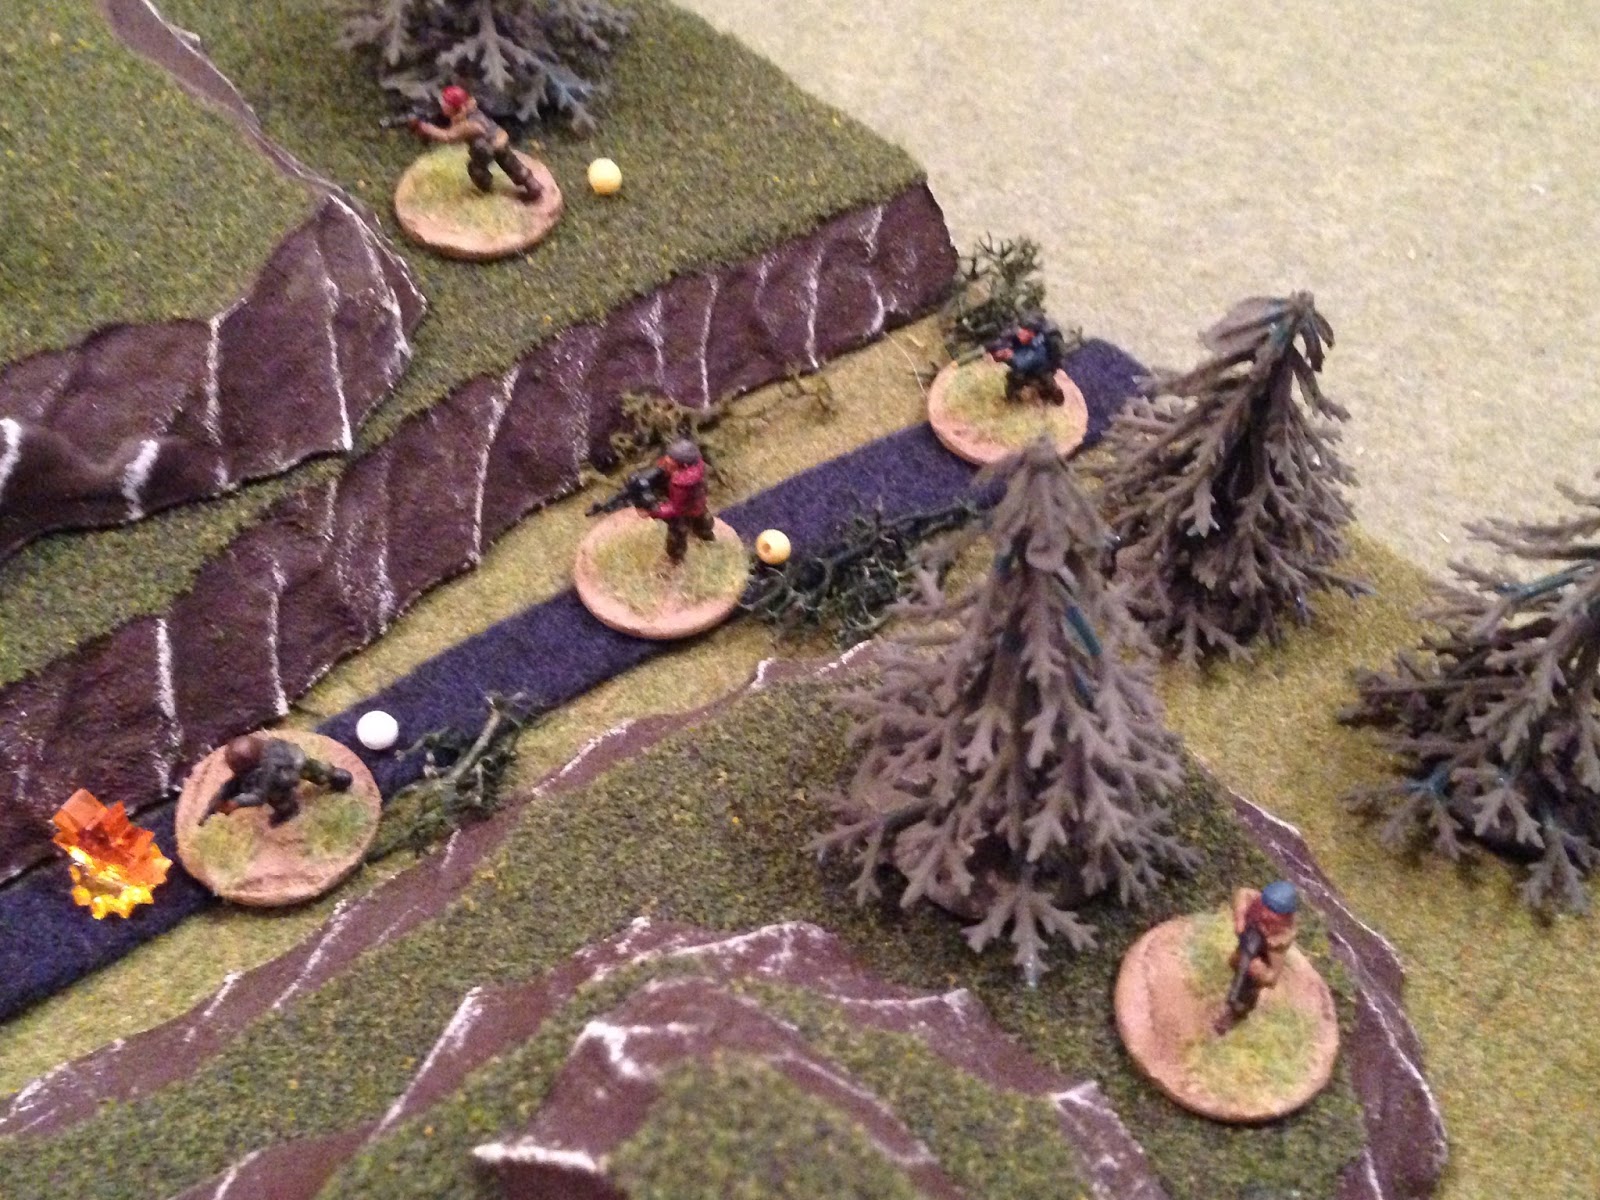
One of the three on watch, Bolt's eye is drawn to movement coming up out of the draw. What the hell? But then he spots movement in the distance, off to his left. And his right.
In reply to Chick's call of contact front (north), Bolt gets on the radio: "contact right (east) AND rear! We're spotted, going loud!"
Bolt (bottom center) faces left and fires east, down the draw.
An enemy rifleman goes down, and the PK gunner falls back (red bead).
Then Bolt (bottom center) pivots right and fires south down the draw.
An enemy riflemen is knocked down (white bead) and two others are pinned (yellow beads).
Chick cries out into the radio: "we gotta get outta here! Enemy to front (north), platoon size, coming up the slope. Bolt reports enemy to east and south!"
Turk replies: "all, break contact south! Rally point crest of Hill 850!"
Bear (bottom center), who had been sleeping in some brush on the east side of the OP, shakes the cobwebs out and replies "roger, moving." He spots bad guys engaged by Bolt to the east (top), sights in, and cuts loose.
The enemy RPG gunner in the east (top) is knocked down, and a rifleman falls back and hunkers (red bead at left).
Bear begins moving out towards the new rally point (center, from bottom left).
But as he moves towards the draw (bottom left, with Bolt at bottom center) he is spotted by enemy troops in the south (top right), who fire on him.
The rounds go high and Bear jumps in the stream (center left, with Bolt at bottom left).
Badger moves up next to Bolt (far right, from bottom left, where Turk is still lying down).
Badger (bottom left, between Bear and Bolt) cuts loose on the bad guys to the south (top right), knocking down a machine gunner.
Goss is laying down fire to the north (bottom left) trying to hold off the bad guys coming up the slope. Chick leaves him, moving out of the OP (top right).
Chick (bottom left, with Bear at bottom right) tosses a smoke grenade across the draw (blue bead).
Goss pulls out of the OP as well, moving up between Badger and Bolt.
Badger (bottom left) also tosses a smoke grenade (blue bead at right).
Turk is the last to the leave the OP, pulling up at far right.
The smoke grenades pop, screening a corridor for the team to begin moving up Hill 850 (top right).
But an RPG streaks in from the south (bottom right).
Uh-oh... For those not familiar with 5Core, 1s and 6s are great if you're shooting, not so great if you're being shot at.
Bolt goes down in a heap, Goss is knocked down (white bead), Turk, Badger, and Bear are all pinned (yellow beads).
Another enemy rifleman arrives in the northeast, where he checks on the knocked down RPG gunner, who's good to go and back in the fight (top center).
In the southwest, a pinned enemy rifleman moves up and checks two buddies that were knocked down; both are good. The rifle at bottom right...
Moves up (bottom left).
The two hunkering Communists in the northeast self rally (red beads). The rifle at top right...
Pushes ahead (top right).
Chick (bottom left, with Bear at bottom right) spots him (top right) and fires, knocking the enemy troop down.
Turk, pinned down (bottom center), stands up to go check on his men...
But the enemy rifleman in the southwest (bottom right) spots him (top left) and fires.
The rounds miss and Turk (bottom left) returns fire.
The bad guy goes down.
Turk checks Bolt (bottom center left): "Dammit!!! He's hit bad!" Goss and Badger are both good, back in the fight.
So, Bolt received an 'out of action' result. Instead of him just being out, I moved Turk over to check him, then rolled on the casualty chart, getting 'serious wound.' This means 1) Bolt is not only out of the fight, but 2) now I've got to have someone carry his ass all the way up Hill 850.
Chick (bottom left) lays down fire to the south (top right), knocking an enemy soldier down.
But enemy troops in the northeast (top left) open fire on him (bottom right).
Chick (top left) does down...
On 1D6...
Goss (bottom left, with Turk, Badger, and the seriously wounded Bolt, and Bear at far left) fires to the south (top right).
The PK gunner and RPG gunner both go down, and a rifleman falls back (red bead at top center).
Goss then moves up to Bear, rallying him (center left).
Badger moves to Chick (left, from bottom right) to check him.
Drawing fire from the enemy PK in the northeast (top center left).
With rounds hitting all around him, Badger (bottom center) calmly sights in and returns fire.
That's three times the bad guys have fired and totally missed; can't last forever...
The PK (white bead) is knocked down, a rifleman pinned (yellow bead), and the RPG gunner falls back, suppressed (red bead).
Badger checks on Chick: he's okay. Lightly wounded, he's up and back in the fight (purple bead).
Current situation: Chick and Badger at left, Turk with Bolt at bottom center, Goss in the draw, and Bear leaves the draw, moving up Hill 850 (top right).
On the far left, an enemy rifleman moves up (bottom left, good guys off camera to bottom right).
Goss (bottom right) spots him (top left) and fires...
Dropping him.
In the northeast, a pinned enemy rifleman moves to the PK gunner (top right) and gets him back in the fight.
In the southwest, a new rifleman and PK gunner come into the fight. The rifleman rallies a suppressed militia soldier (red bead).
In northeast, an RPG gunner comes on (top left) and rallies a suppressed RPG gunner.
Back in the southwest, an enemy rifleman moves into the draw to check on a buddy (bottom left).
Chick (bottom left) spots him (top right) and fires...
The knocked down soldier (bottom left) is killed, and his buddy is forced to fall back (red bead).
Then Badger (bottom left, Chick is next to him but obscured by the building edge) turns and fires the same way (top right).
Another enemy soldier falls in the stream, and a rifleman is knocked down (white bead).
Chick (left) looks on as Badger moves down to Turk (yellow bead at bottom right) and rallies him.
Turk immediately picks up Bolt and hustles down into the draw then back up the other side (center right, with Goss just to his left in the draw Bear leading the way at top center).
Chick follows, hauling ass across the draw (center, just above the draw, from far left). Bear (top center), looks left and spots a bad guy on the ground.
Chick (bottom center): "Bear, where ya goin'?!" Bear dashes through the smoke and into close combat (top center).
An enemy PK gunner (top right) spots the kerfuffle and opens fire, missing. Bear quickly dispatches the enemy soldier (bottom left).
*I actually rolled and he missed, but if he hit I was going to roll to see if the PK gunner hit my guy, his guy, or both.
Bear (bottom center) fires on the PK gunner.
Knocking him out (bottom right, next to a pinned rifleman). Two enemy RPG gunners are at top left.
They (top left) spots Bear (bottom right) and open fire.
Bear goes down.
Goss moves up (right, next to tree, with Chick at center and Turk carrying Bolt at bottom right) and spots Bear (top center) on the ground.
In the north (bottom left), the first enemy soldier appears there, a PK gunner.
And two riflemen come on in the northeast (top center, with RPGs at top left). The pinned rifleman (yellow bead at right) self rallies.
In the southwest, a PK gunner and a rifleman come on the table. They check a knocked down comrade (white bead), but he has succumbed to his wounds. Then the suppressed rifleman (red bead) tries to self rally, but he fails and runs off the map!
In the northeast, an RPG gunner dashes across the stream (far right, from far left).
The other RPG gunner follows, dashing into the stream (bottom left)...
But Badger (bottom right) is ready this time, and opens fire (top left).
Badger drops the RPG gunner (bottom right) and a rifleman (top right), and forces another rifleman to fall back (red bead at left).
Then Badger pivots (bottom right) south and fires, killing another enemy soldier (top right).
Then Badger sprints across the draw (top center, just above Turk carrying Bolt, from bottom center). Goss is at top left, Chick at far left.
Chick (bottom left) looks on as Goss moves up to check on Bear (top right).
He spots nearby enemy troops (top center) too late, and they open fire.
The rounds miss, and Goss returns fire, knocking down one of the bad guys.
Goss then drags Bear down the slope, into cover.
Bear is okay, lightly wounded (left, purple bead), so he's back in the fight. Chick, also lightly wounded, moves up (right).
But the enemy rifleman that Goss didn't get (top left, Goss and Bear at bottom left) spots Chick (bottom right) and opens fire.
But Chick is as cool as the other side of the pillow, calmly pivoting, drawing, and firing, knocking the enemy rifleman down.
Another total miss by the bad guys!
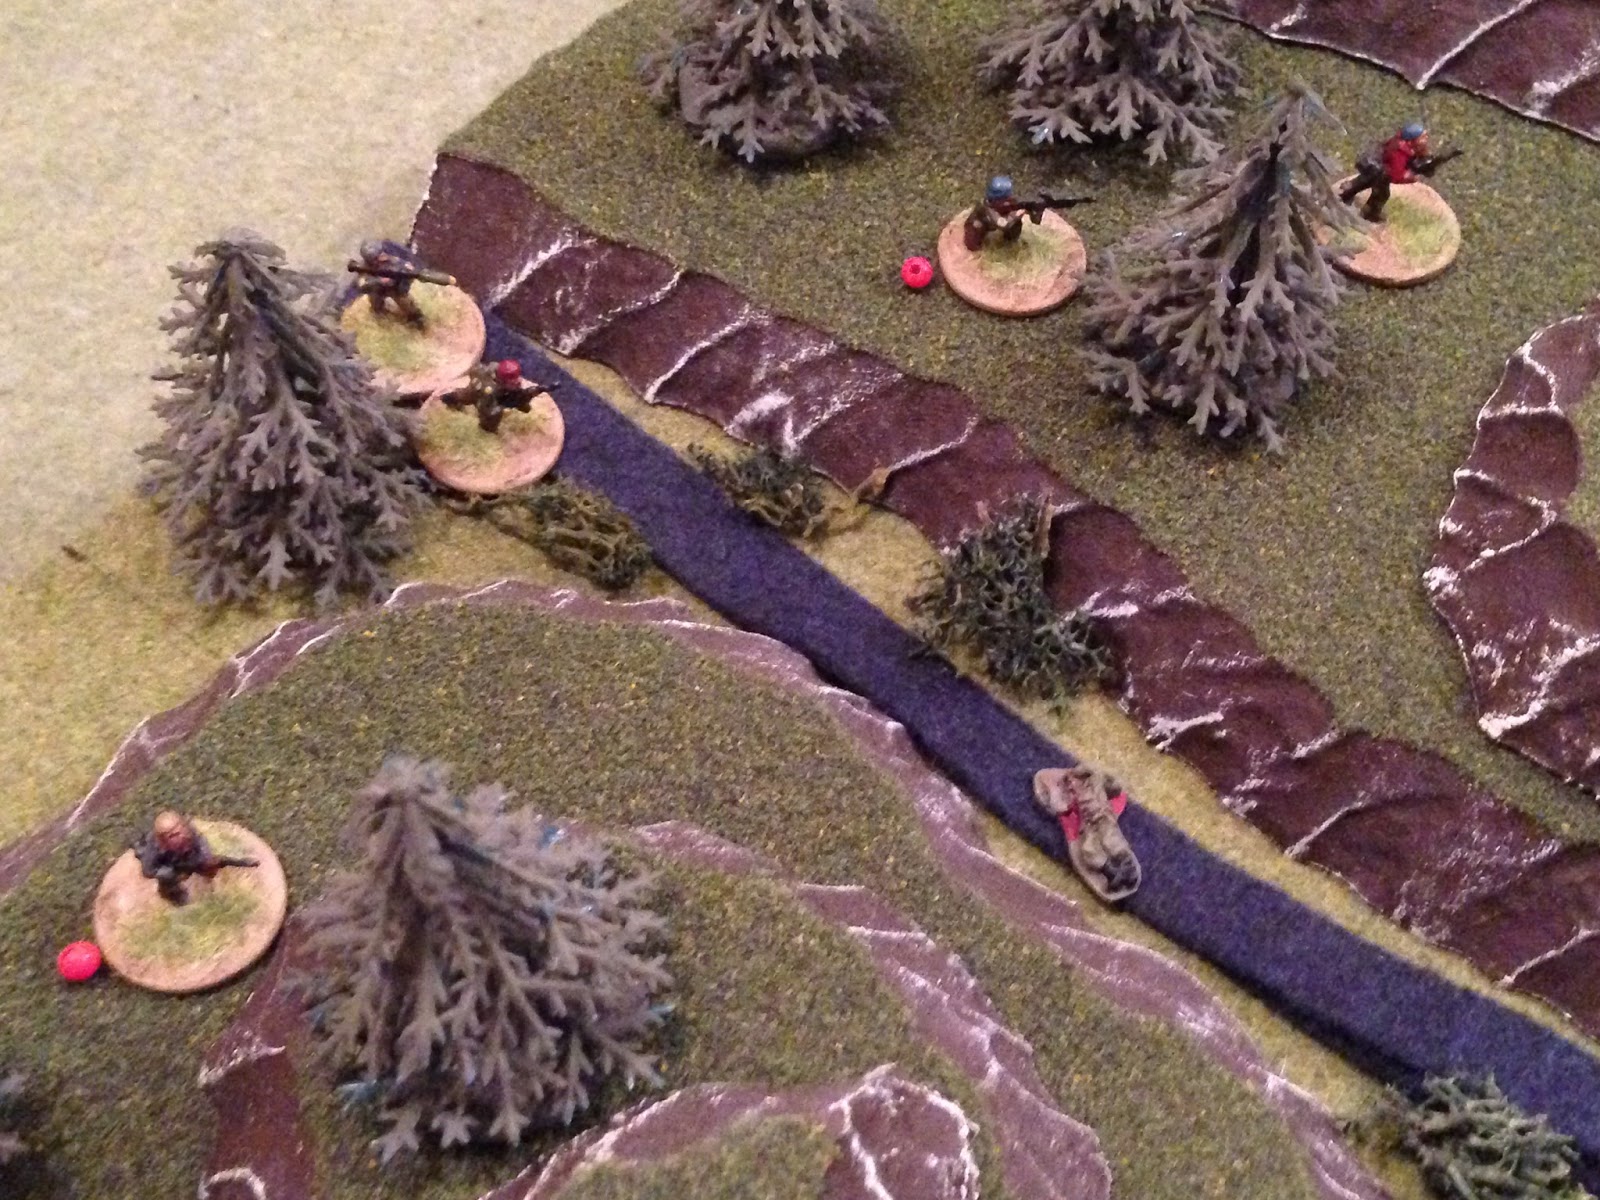
As Badger (bottom center) and Chick (top left) stand guard, Turk carries Bolt up the hill (top right).
But a bad guy in the southwest (bottom right) spots Turk (top left) through the trees and opens fire with his AK...
Forcing Turk and Bolt to fall back.
In the northwest, back at the original OP, a rifleman and RPG gunner join the fight.
While two riflemen and a PK gunner come on in the southwest (the guy that just fired on Turk is at top center).
Having driven back Turk, the same bad guy (bottom right) sights in on Chick (top left) and fires, knocking him down.
In the northeast, a PK gunner moves up the slope (center, with two companions at bottom left) atop Hill 781, the original OP, coming up behind the team (top center), who have so far only been concerned with bad guys to their left and right.
Badger moves up between Turk and Chick (top left) to help them out, but that same damn bad guy (far right) spots him and fires.
Knocking Badger down (white bead at center). He falls next to Chick, also knocked down (far left), and Turk, suppressed at bottom center (red bead). Goss charges into the mess to help clean up (between Chick and Badger).
Badger goes out of the fight and Chick stays down. That's a 1 and a 6 on the 2D6 check.
Goss (bottom left) returns fire (top right).
Forcing the rifleman to fall back (red bead at bottom left, from explosion).
Bear moves up (top left).
But he (bottom right) draws fire from the northeast (top left), with two enemy troops knocked down at center).
The bad guy (top left) misses, and Bear (bottom right) guns him down.
Then Bear tosses a frag at the two enemy troops writhing on the ground (blue bead).
The grenade knocks those two out of the fight (top left), and Bear moves further up Hill 850 (right).
Turk hauls Bolt up the hill (center, next to goat), with Bear at top left and Goss and Chick (at bottom center) next to Badger prostrate form.
Sticking in the southwest, the suppressed bad guy (red bead) self rallies, while his buddy moves up (center right, with Chick and Goss at top left).
Another bad guy moves up on the knoll (bottom right), and Goss (top left) cuts loose.
The bad guy goes down (bottom center), but a PK moves up (far right) and fires, pinning Goss.
In the northeast, at the original OP (bottom left), three bad guys moves up. A PK opens fire on Chick, Goss, and Badger (top center), but no one is hit.
Goss (yellow bead) checks Chick (white bead) and Badger (casualty figure). Chick goes out of the fight AGAIN...
But Badger is only lightly wounded, so back in the fight (bottom right).
I put Badger's figure back in the table, take off Chick's, and replace it with Badger's casualty figure. Dammit, I need to get moving!
Goss drags Chick up the hill (center, next to Turk and Bolt, from bottom center, with Badger at bottom right).
Turk rallies Goss (yellow bead at bottom right, with Bear at bottom left), then drags Bolt up the hill (top center). Turk is almost at the peak of Hill 850.
Bear (top right) has his head on a swivel: "Boss, we got bad guys back on the OP." Bear opens fire on them (bottom left).
But apparently his wounds have thrown off his aim, as Bear totally misses the bad guys. The PK (bottom left) returns fire, pinning Bear (top center, with Badger at far right).
The PK (bottom center) then turns and fires on Badger (top center, with other bad guys at top right).
But the PK misses, and Badger (top right) returns fire, knocking him down.
More bad guys move up around the knocked down PK gunner.
Badger (top right) slowly takes aim and fires.
Another bad guy is knocked down (top center, joining the PK gunner, just below him), an RPG gunner is forced to fall back (red bead at right), and two more men are pinned (yellow beads at bottom left).
In the southeast, enemy troops move forward, looking to close in on Badger (top left).
But Goss (top left, with Badger at left) spots them and opens fire.
One bad guy is knocked out (top left), the other two are forced to fall back (red beads).
Nice shootin', buddy!
In the northeast, a bad guy sprints up the flank (top center, from bottom left,
Current situation: Bear is lightly wounded and pinned at left, Goss is at center, with Chick, who was lightly wounded but has been hit and is down again. Badger is lightly wounded at bottom right, and Turk is at top, carrying the seriously wounded Bolt. Having drug him into the cover of the draw, Goss checks Chick's wounds.
Just another light wound. Goss slaps another dressing on Chick (bottom left, now back in the fight) as Turk carries Bolt onto the crest of Hill 850 and drops him next to the goat.
Having already driven them back by fire, Goss (top left) tosses a hand grenade over near the two suppressed enemy troops (red beads at right, the blue bead is the grenade).
The bad guy at top left is out, the guy at center (white bead) is knocked down, and the bad guy at bottom right (red bead) is suppressed.
On the left, Bear (bottom right) catches sight of the bad guy creeping up the mountain and fires,knocking him down.
Chick moves over to Bear and rallies him (top left), then fires to the northeast, at the bad guys on Hill 781.
One bad guy falls (center, at explosion), and an RPG is driven back (bottom left).
Badger (top right) takes an iffy shot at the other RPG gunner (bottom center) on Hill 781, who's already suppressed. and manages to knock him down.
It's the bad guy turn again: they have three men off board (they can come on, but don't activate this turn), five men knocked down, and two men suppressed. That means no one can actually activate this turn; the suppressed guys can roll to self rally, but that counts as their activation. The knocked down guys can't do anything, they have to be checked by a friendly. The suppressed guys successfully self rally, and three new bad guys come on the board.
Turk takes position on the crest of Hill 850 (top right), everyone else falls back towards the peak.
In the northeast, an enemy rifleman creeps forward in the trees to check on his buddy (top right)...
But Goss (bottom right) spots him (top left) and fires...
Both bad guys are out of the fight (top center right)!!! A PK (left) returns fire.
The enemy machine gunner (top left) misses, and Goss (bottom right) returns fire.
Forcing him to fall back (red bead, from explosion), suppressed.
In the southwest we have a similar situation: an enemy riflemen has been knocked down (white bead at bottom right), so a friend moves up to help get him back in the fight. But Badger (top left) spots the movement and fires, dropping him.
A slew of bad guys move up on Hill 781, in the northeast. Okay, not a slew, just two. The other three are guys that have been knocked down by fire (white beads).
But Chick (top right) is eyes down on the former OP (bottom left), and spots the movement. He opens fire.
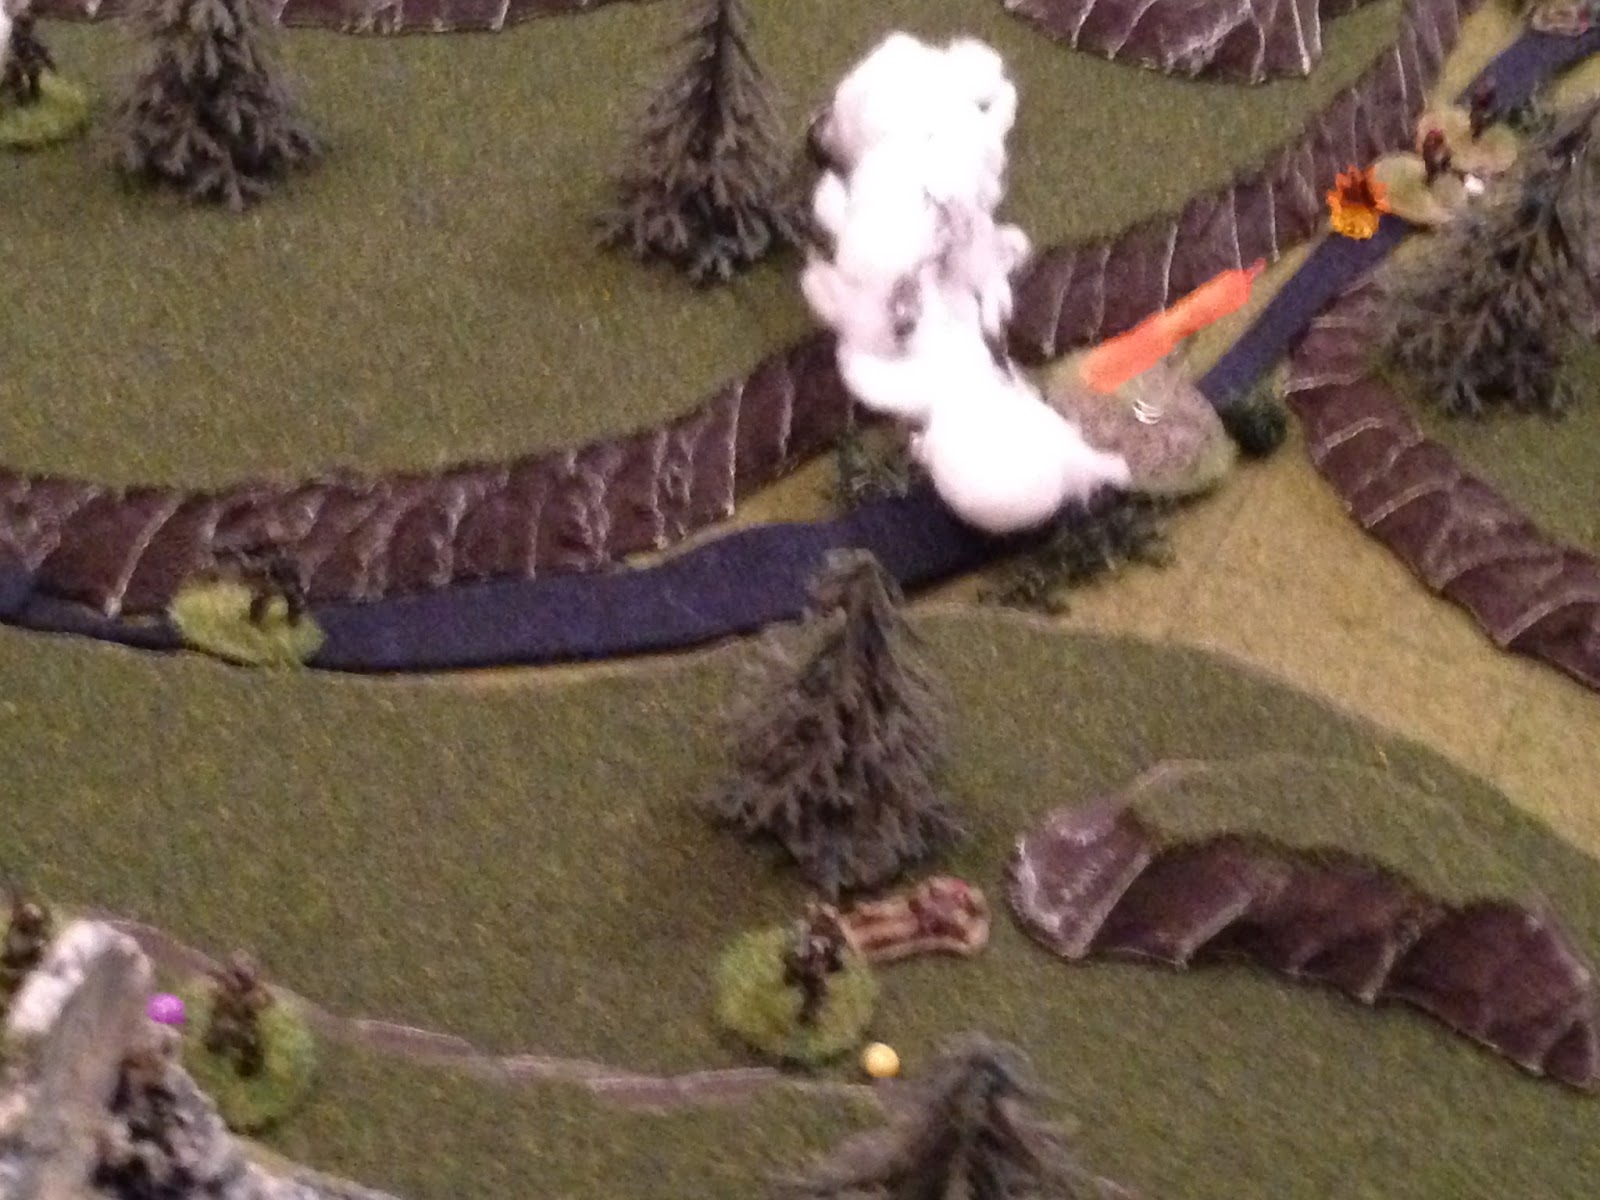
But he totally misses! An RPG is sent in reply...
The rocket slams into the ground (bottom left), pinning Chick and suppressing Bear (top center).
Turk lays down fire as Chick drags Bear to the top.
Back on Hill 781, Turk's fire pins one of the two RPGs.

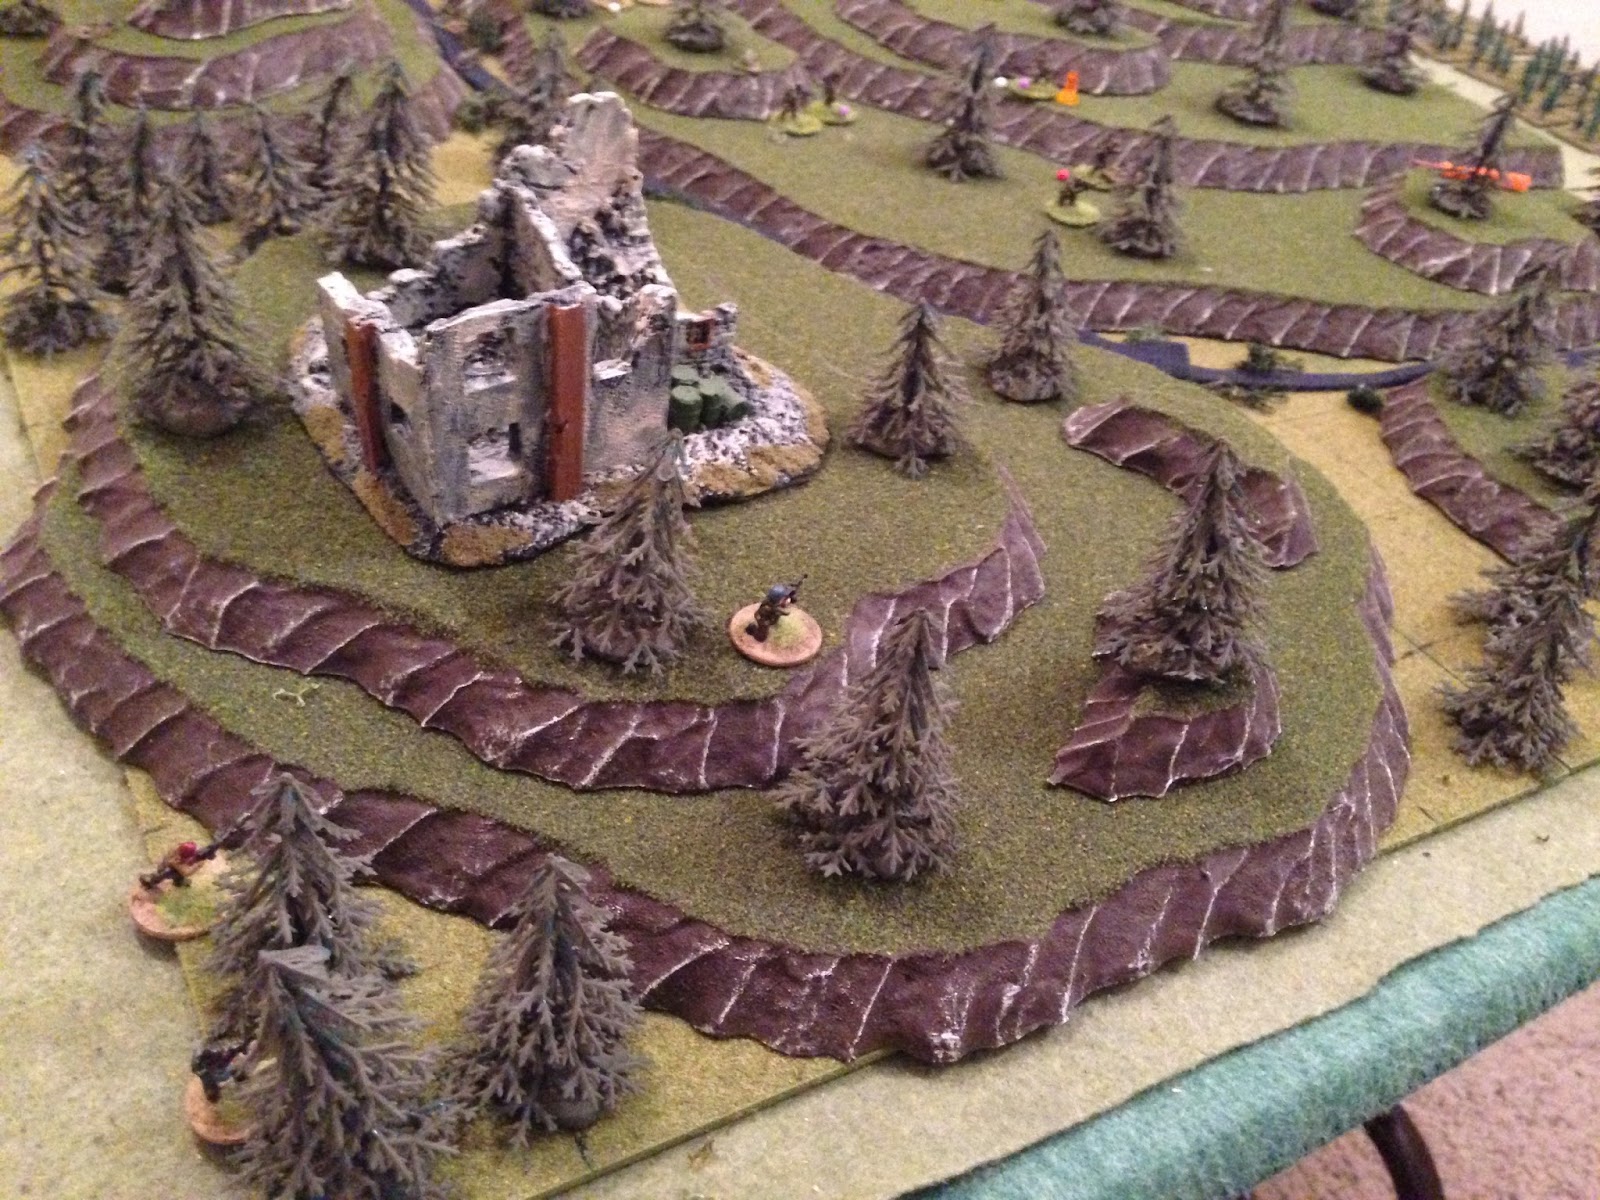
But that's enough to allow Goss and Badger to join the rest of the team on the rally point. The team paused to take a swig of water, redistribute ammo, and check wounds. Meanwhile, Goss made comms with TF Galban headquarters. To this point, TF HQ was only aware of the initial contact report by the team (of the enemy armor moving in), some clarifying instructions provided to fast air, and then the initial notification of compromise and being on the run. Fortunately SOPs were in place, so when the compromise code was passed HQ immediately contacted the nearest troops, Battlegroup Elias, to form a Quick Reaction Force (QRF) and standby for further instructions. Goss quickly provided a Situation Report (SITREP), to include the current grid location. TF HQ informed Goss there was not a suitable helicopter landing zone (HLZ) on Hill 850, the team needs to keep moving southeast to Hill 825, which has an HLZ directly east of it. "Get there, pop smoke, and the QRF will be on you."
Good grief, I'm exhausted. This game really took it out of me. Six guys manages to move all the way across the board, chased by bad guys on three sides, taking out twenty-three of them. Of the good guys, only Turk and Goss were untouched. Badger and Bear were lightly wounded, Chick was lightly wounded twice, and Bolt was seriously wounded. The game mechanisms worked great, just the constant replenishment of bad guys really stretches the time out as you never have the opportunity to 'break into the clear,' and the constant stream of new bad guys means you're always only a single bad roll from potentially getting overrun.
Hope you liked it, fight number two of Operation Cro-Wings coming right up. Oh, and someone please do me a favor: I've posted about eight batreps recently, and not received a single comment, and I did in the past, so I'm starting to wonder is something is wrong with the mechanism for leaving comments on the blog. So, if one of you doesn't mind, please leave a test comment here. Thanks in advance.
V/R,
Jack


Awesome report! :D
ReplyDeleteThanks man, and comments are working. That means I'm not as popular as I thought I was ;)
DeleteV/R,
Jack
You got HILLS and a GOAT !!!!!
ReplyDeleteYeah, finally got some real hills, but that's your goat!
DeleteV/R,
Jack
Hi Jack.
ReplyDeleteAs you know I generally comment on your AAR's over at the Pendraken Forum, but appreciate the amount of work that goes into your blog posts. Keep it up!
Yes, Sir, I saw your comment on Pendraken. Thanks Guillaume!
DeleteV/R,
Jack
What an amazing report. The stacking hills looks great and also creates a fantastic valley effect in the photos.
ReplyDeleteAnd well it appears even after all these years you are still a goat magnet ;)
Thanks John, hope all is well!
DeleteV/R,
Jack
Very nicely done...on a beautiful terrain, love the hills!
ReplyDeleteThank you Sir!
DeleteV/R,
Jack
Some really nice terrain here...
ReplyDeleteI like my new hills, pretty cool. Thanks Javier!
DeleteV/R,
Jack
Having actual highs and lows on the table does make a fantastic difference doesn't it?
ReplyDeleteLooks great.
Pretty heroic game. I wasn't sure if they'd make it but kudos for a fight hard fought.
I'm happy with how the hills worked and looked, just need to buy more (that's every single one I own, on a 2' x 2' board).
ReplyDeleteThe game was excellent, two more to go. Hopefully I can at least get one survivor out of this mess...
And about time you got back to commenting on your most prolific batrep poster!!! :^/
V/R,
Jack
I am floored that you finally got some hills. They look amazing! Not sure that your guys will survive 2 more battles...
ReplyDeletep.s. Comments are working. I read the other 8 batreps but very late after they posted (as in during the last few days) so did not comment.
Shaun,
DeleteHey man, how the hell are ya? Hope all is well, and you and the family are ready for Christmas.
Yeah, I finally sprung for some hills, and I'm pretty happy with them, just need more! They look great with these 15mm guys, I think 10mm is good too.
As you see, the team is in a bad way, but they're close. I've got the table set for game three, which will be the last of this set, one way or another.
No sweat about commenting late, you're wargaming family, hip on in whenever you like ;)
V/R,
Jack
I am fine. Wargaming in the ancient world at the moment, and also getting in some face to face games. And busy otherwise and so find myself playing catch-up with blogs.
DeleteShaun,
DeleteGlad you're doing well, and I understand about being busy! What are those face to face games about? Back to Operation Jupiter in 20mm?
I've been reading your Ancients batreps, just not much to say as I don't grasp the era. But it looks cool ;)
My youngster has got me looking to spread my wargaming wings. We both love Star Wars, and I've always had an interest in colonials and TSATF, and we just watched Gunga Din and he liked it.
I need more money and time!
V/R,
Jack
Not operation Jupiter I am afraid, but may have a FTF game on 20mm WW2 over the Christmas break. You have just reminded me I have four Operation Jupiter Games to write up from July! I have the pictures and recorded my narration as I played, so hopefully can generate AARs from that after so much time.
Deletethe FTF games were 28mm Dragon Rampant on a 6'x4' (huge to me!) table and 2 games of recently released Triumph! ancient rules on a 3'x2'.
I bought the X Wing minuates game cheap two years ago to play with my children. It is still in the box :-(. I also have some WW1 Wings of War (similar mechanics) I was given about 3 years ago (also aimed to play with the children) but also have not got that out yet either :-(
Colonials? As if you need another period right now! I like the period for books and movies, but never had much of an inclination to game it.
More money and time? You need to go on a time management course :-) Actually, could you imagine wargamers at a time management course - they would all leave after the first few minutes: "What do you mean priortise? It is all important - I want to do it all. This course is supposed to tell me how I can fit it all in - not how to take some stuff out! What a stupid concept - don't do some things! I'm outta here!"
Shaun,
DeleteWell, hurry up and post those four Op Jupiter batreps so I have something to read! And you can send the X-Wing and Wings of Glory stuff to me, my boy and I will post some batreps ;)
I don't know what Dragon Rampant is, I'll have to Google it. The problem with gaming Colonials is that I couldn't do just Pathans or Dervishes or Boers or Zulus or Egyptians, I'd have to do them all, and you need about a million of each to take on 100 British. I was just chatting with Ivan about this; I can't do it, I'd never get all the painting done!
And that's beautiful, you've got it nailed about time management for wargamers ;)
V/R,
Jack