All,
AKA, Operation Cro-Wings #2
It's 1805 on 29 June 1990 and Team 3 of Lt Trojas' ODA 626 is sitting atop Hill 850. They had been performing surveillance, from Hill 781 to the northeast, on a nearby road networks, serving as a tripwire to warn TF Galban mechanized forces of enemy counterattack. They spotted enemy armor moving in, reported it to TF HQ, and coordinated air strikes (some enemy forces still got through; that's actually the next fight, TF Aguilera fighting off the enemy counterattack near Pisa). However, enemy radio direction finding efforts triangulated the team's position and vectored Communist militia into the area. Team 3 was able to get the drop on the bad guys, but there were simply too many, and so the Cubans abandoned their positions and moved to Hill 850 in a running firefight. The team suffered one man seriously wounded (he has to be carried in this game) and three lightly wounded (for game purposes these men are now back to full strength for this fight).
Upon reaching the crest of Hill 850 the team made comms with TF HQ. They were informed Battlegroup Elias was standing by as QRF to get them out, but the team needs to continue moving southeast to Hill 825, which has a Helicopter Landing Zone (HLZ) just east of it which is suitable for extraction. The radioman informed the team leader, GySgt "Turk" Dos Santos of this development. "Uhh, fellas, I got bad news." Everyone turned to look as Turk showed them the problem: the team's back was to a 30 foot cliff; with enemy troops coming from the north, northeast, and southwest, the only avenue of escape was down the cliff, across a draw, and up Hill 825 to the southeast.
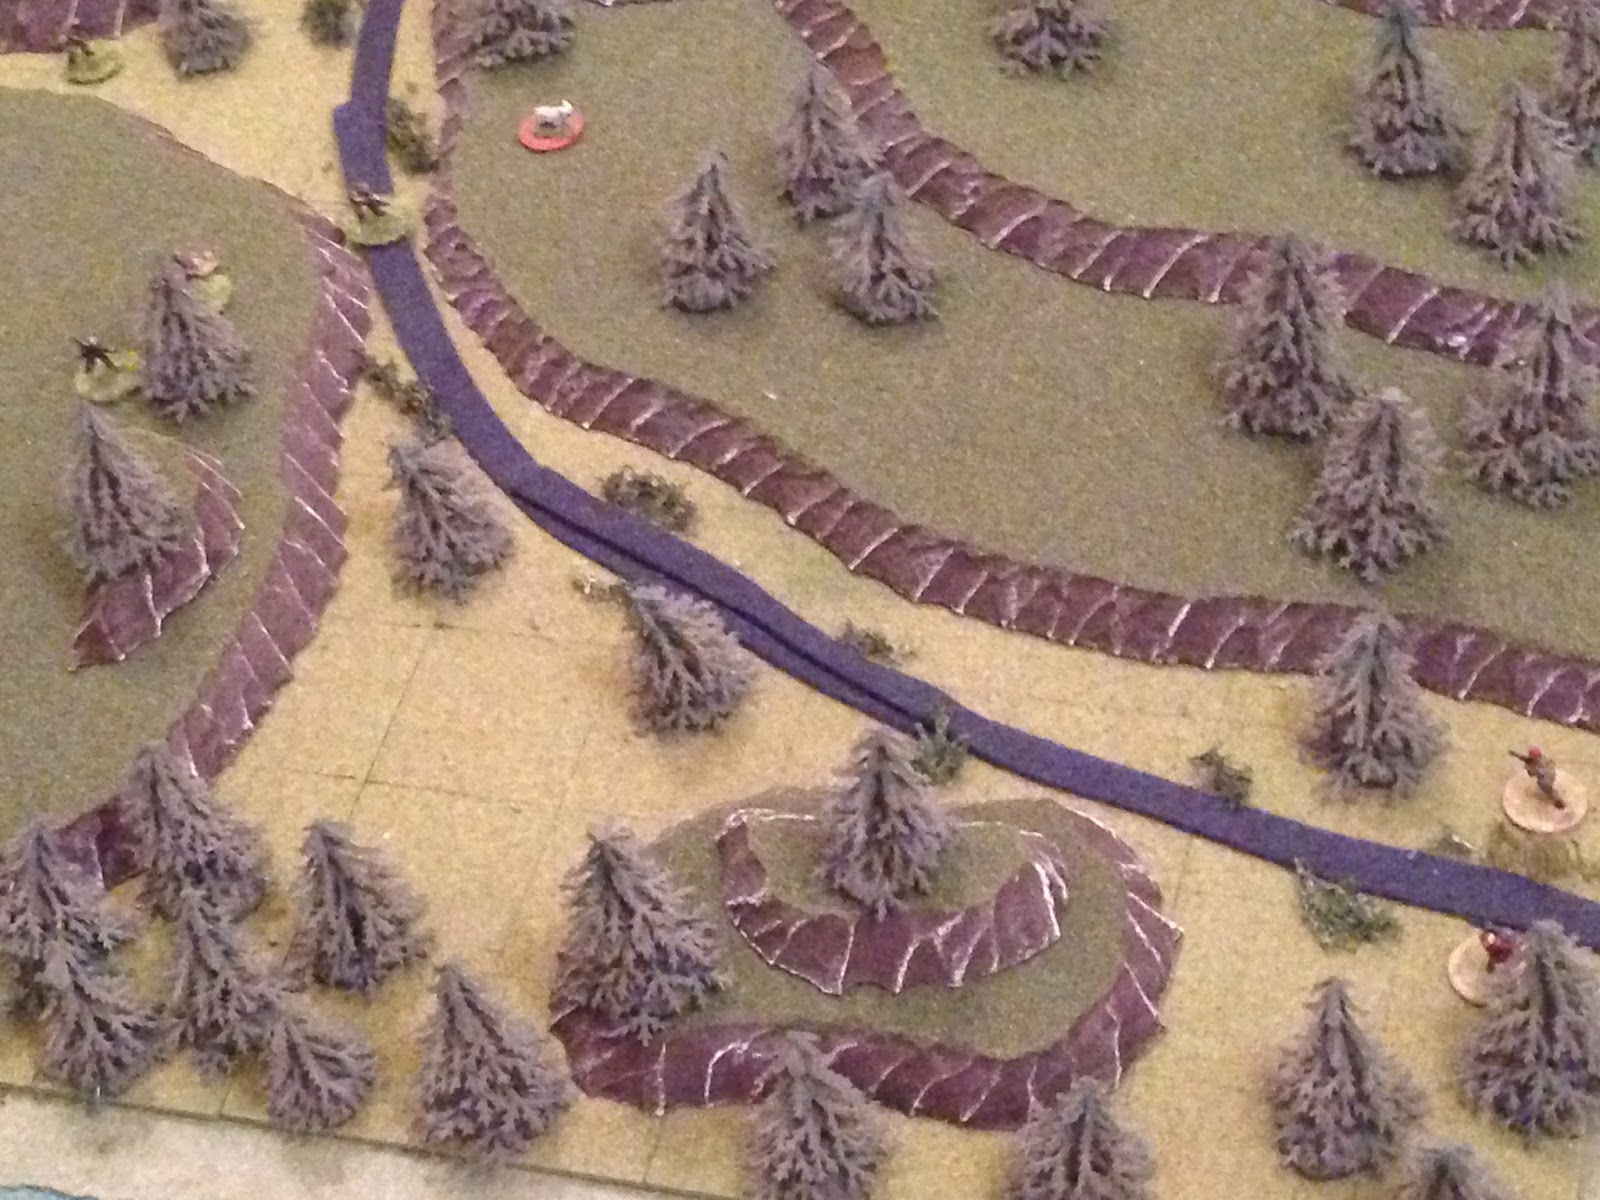
Overview, north is left. Hill 850, where the team is starting, is at bottom left, while the rally point is at top right, on the crest of Hill 825. Again a draw runs across the board, with a stream cut into it. Damn, I just realized this board and scenario concept is pretty much exactly the same as last time...
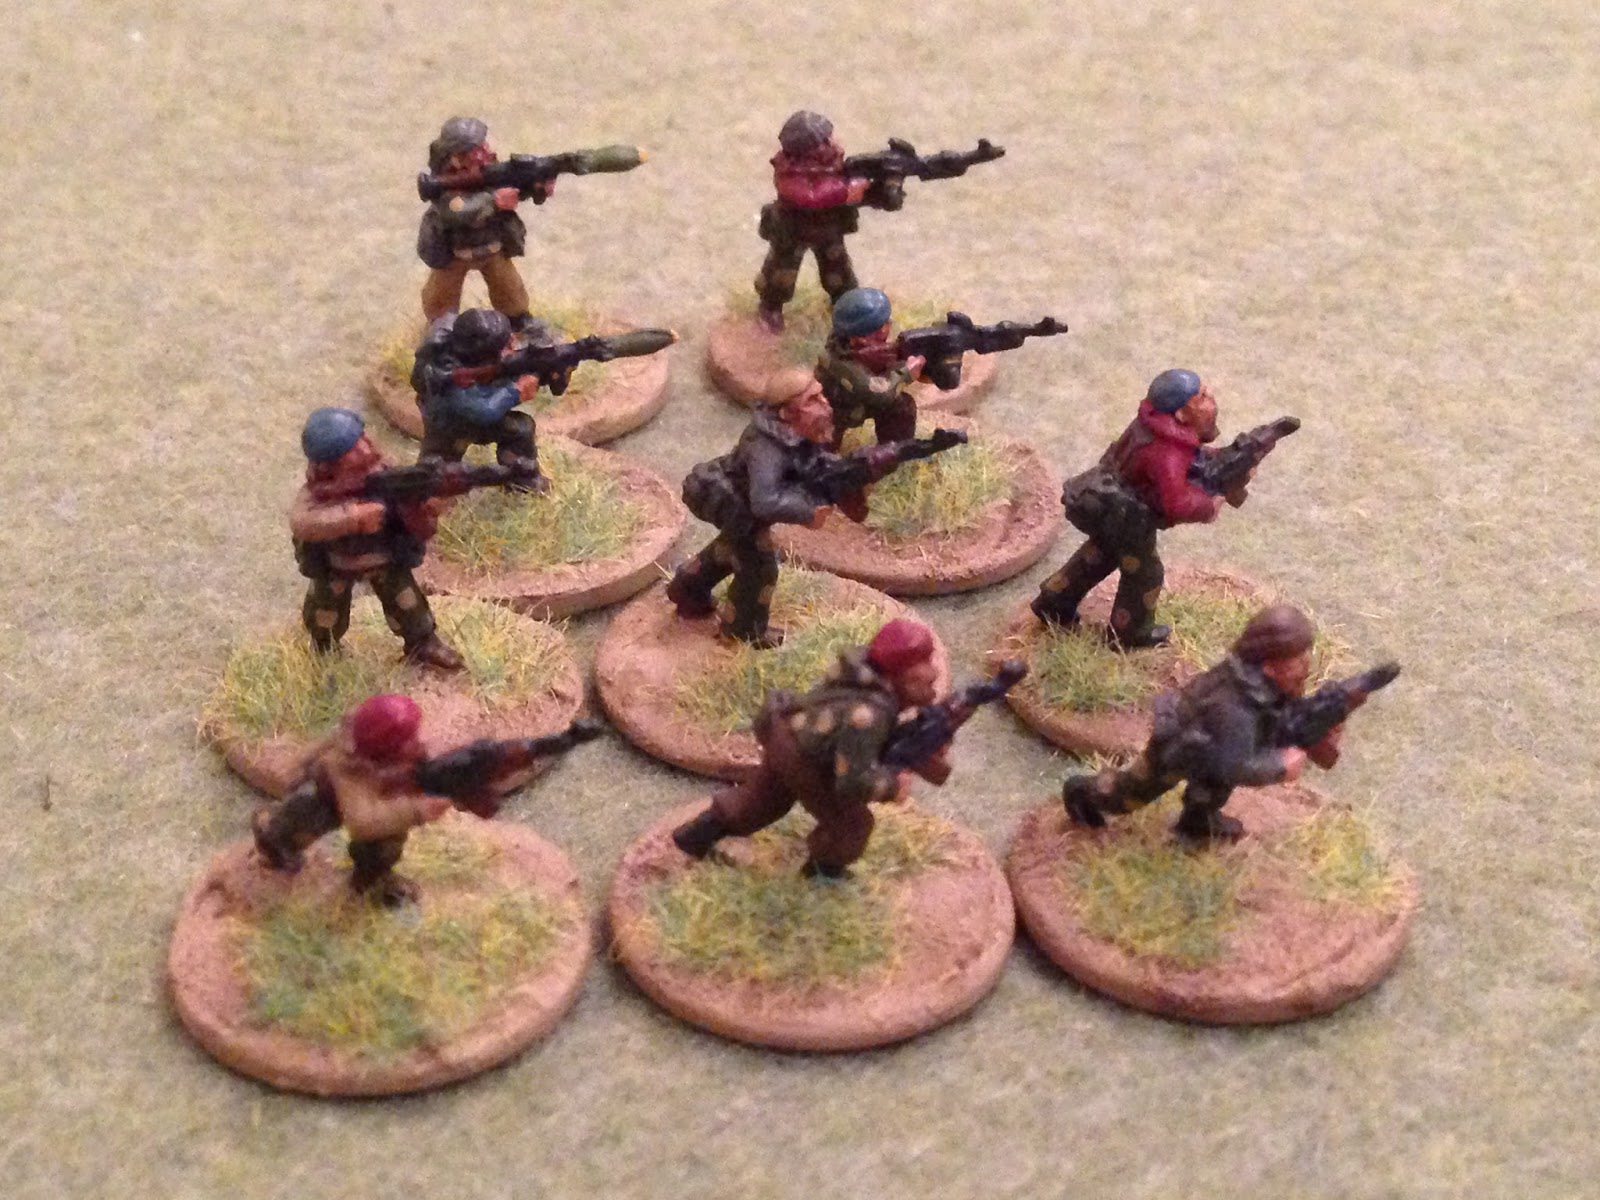
The opposing forces, with Cuban SOF at left and Communist militia at right. The good guys are Battlefront SEALs (Vietnam era) and the bad guys are Eureka Chechens.
The Cubans, from top left: SSgt "Bear" Duarte, Sgt "Goss" Gallegos, and SSgt "Chick" Alfaro.
From bottom left: GySgt "Turk" Dos Santos, Sgt "Badger" Canales, and the seriously wounded Sgt "Bolt" Echevarria, who will need to be carried from the start position to the objective.
The bad guys: the bottom six are riflemen with AKs, then there are two RPGs and two PK machine guns. I'm a glutton for punishment, so here's the plan: the bad guys will start with these ten men on the board, at three separate entry points. As bad guys get whacked they will come back on the board, 're-spawning' at one of the three entry points. So theoretically there will always be ten bad guys on the board, no matter how many I kill, chasing my six guys. And if (when?) I take casualties I will have to take them with me.
I will make things a little easier on myself: in the rules (as with most rules), when someone gets shot there is an 'out of the fight' option. That guy is done for the fight, then after the fight I roll to see if what actually happened to him; there are options for 'dramatic scar,' knocked unconscious, light wound, serious wound, debilitating injury, and dead. To make things potentially easier for me, when one of my guys gets an 'out of the fight' result, I will move a buddy over to check on him, and then I'll make the casualty roll to see what actually happened to him. If he's dead or seriously wounded then one of my guys will have to carry him out, but if he's 'lightly wounded' or less he will be able to continue the fight, just moving a bit slower, some other penalties for shooting and reactions.

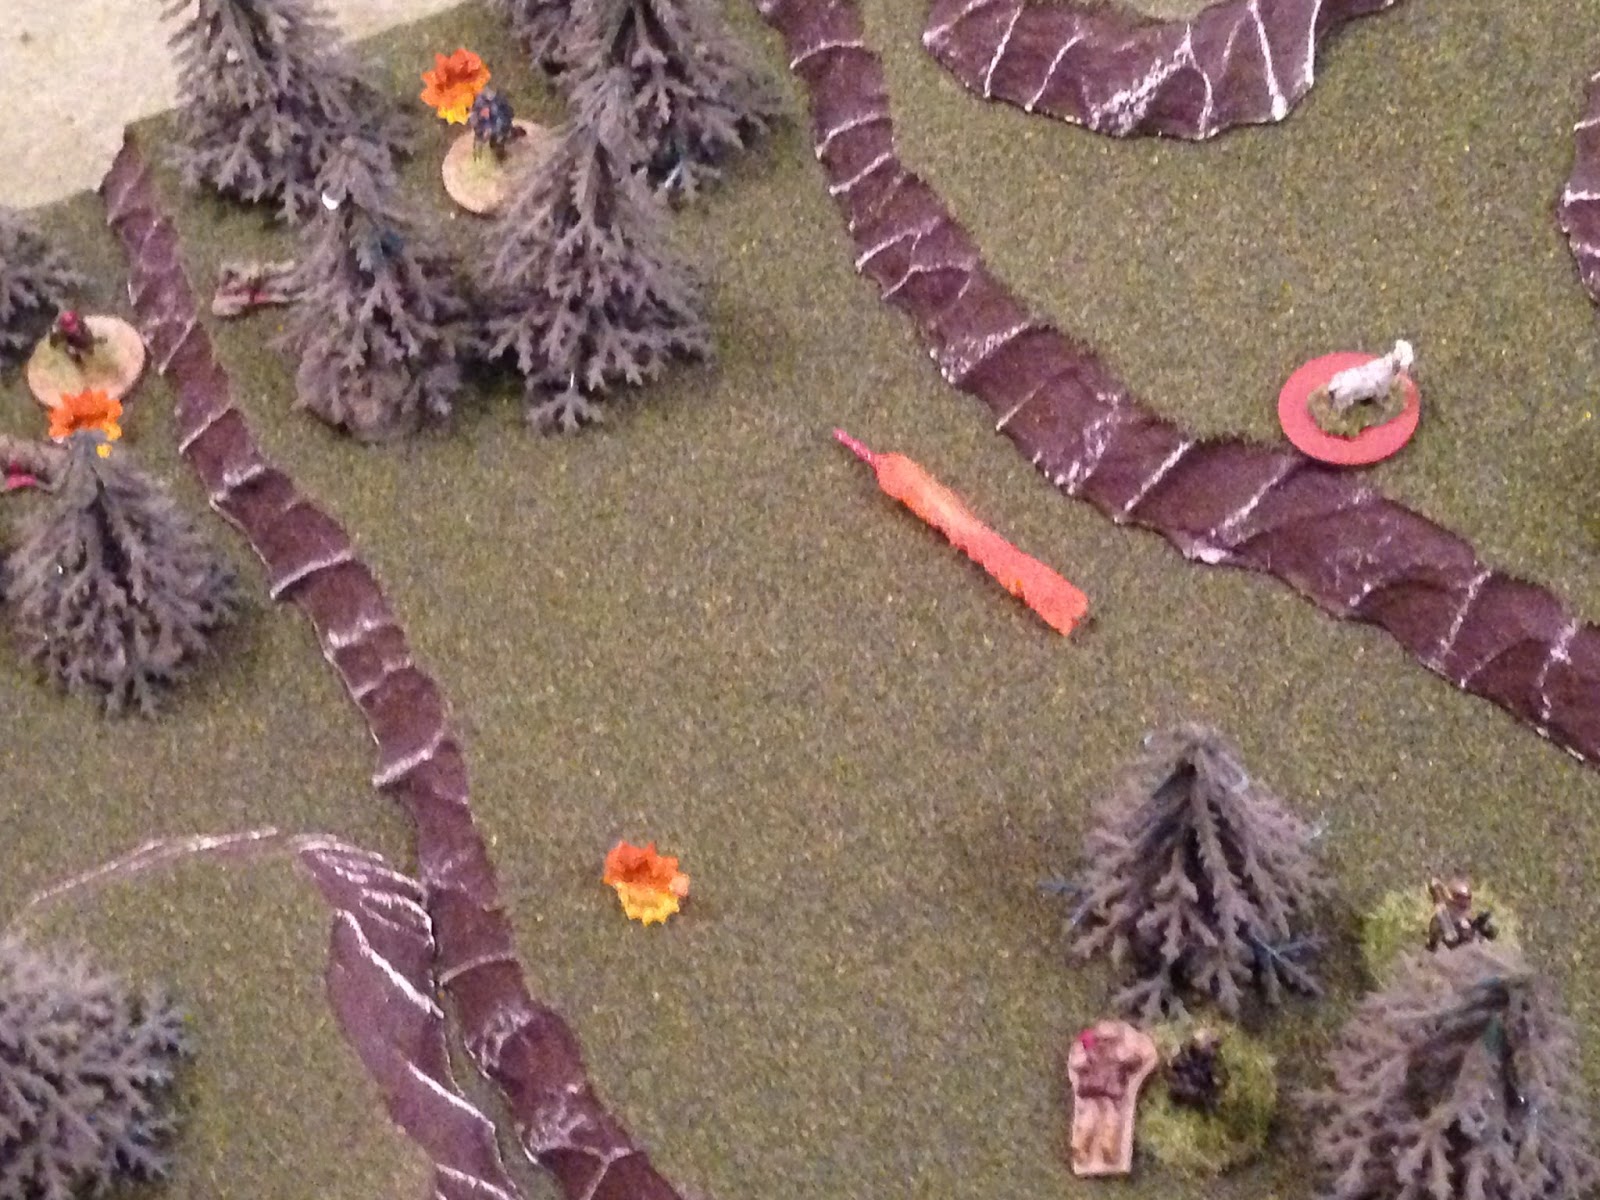
The team is on the board, atop Hill 850 at bottom left, trading fire with more than 60 enemy troops (off camera to bottom left) moving up, hoping to encircle and eliminate the Cuban Special Forces team.
The team atop Hill 850, about to take the elevator down. From top left to bottom right: Badger, Turk, Goss, Chick, then Bear behind them with Bolt laid out. Time to go.
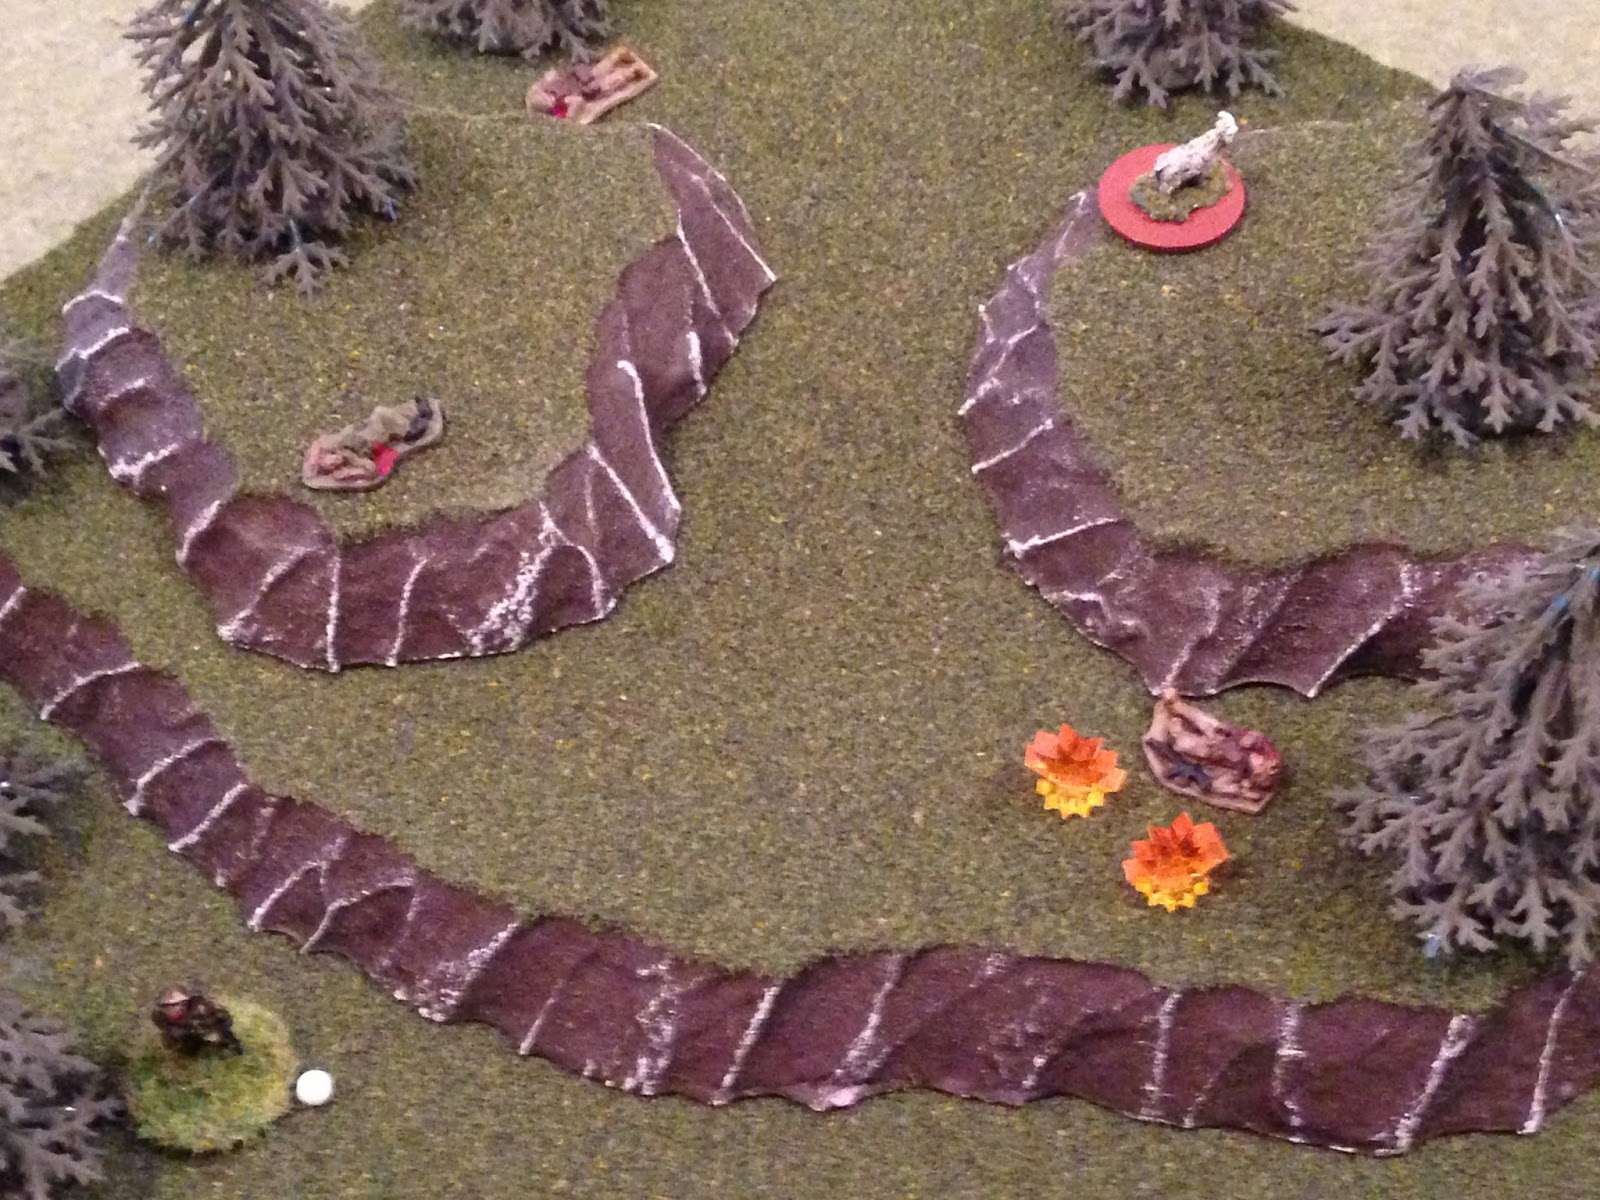
The team lays down fire as Bear grabs Bolt and skootches down the cliff on his ass.
Yeah, I was in a hurry and screwed up: the guy carrying the casualty should not have gone first, one of the other guys should have gone first.
Enemy rounds impact on the crest; Badger, Turk, and Chick lay down fire as Goss works his way down the cliff and joins Bear and Bolt at the bottom.
Badger and Turk pinch in as Chick moves down.
Badger is down, Turk is the last man on the crest.
Enemy fire reaches a crescendo as Turk drops down the cliff side.
Bad guys flood onto Hill 850.
"Contact left!!!" Goss (center top left) calls out, spotting enemy troops in the east (top center).
"Contact right!!!" calls out Chick (in the stream at left), spotting enemy troops in the southwest (bottom right).
The game starts now, with the team spread out at the base of the cliff and enemy soldiers behind them and on their left and right.
Chick (bottom center, with Goss at left) fires east down the draw (top), starting the gunfight.
Two bad guys are driven back, suppressed (red beads at bottom left and top right).
With Chick standing his ground in the stream (center, with Turk at bottom left and Goss at top left), Bear carries Bolt across the draw and up the other side (top right).
Goss (top right), fires over Badger's head at Hill 850, killing one enemy soldier.
He then turns and sprints across the draw (top right center, from the tree at center, with Badger at bottom left).
But a bad guy in the east (top left) spots him (bottom right) and opens fire.
The bad guy (top left) misses, and Goss (bottom right) returns fire.
Two Communist troops go down!
Back at Hill 850, Badger (top right) fires on bad guys on the crest.
Badger drops a bad guy on the crest and forces a PK gunner to fall back (red bead at bottom left).
Badger then begins moving towards the draw (center, from left, with Turk at bottom center).
But bad guys in the southwest (bottom right) spot him (top left) and fire.
The rounds miss, Badger (left) returns fire.
A PK gunner is knocked down (white bead) and a rifleman is forced to fall back (red bead).
Badger takes cover nearby (left, from explosion), still covering the crest of Hill 850 (off camera to bottom left).
Turk (bottom left) fires on the bad guy (top right) that Badger just suppressed, knocking him down.
Turk dashes across the draw and into cover (right, from bottom left).
A new rifleman enters on Hill 850 (bottom center). He tries to rally the suppressed PK gunner, but he fails and the machine gunner runs off the map!
In the northeast, two Communist riflemen come on, and they rally a suppressed RPG gunner.
A single rifleman enters in the southwest. He checks one of the knocked down bad guys (top left), but the man is dead.
In the northwest, a bad guy climbs atop Hill 850 (bottom left).
Badger (top right) spots him and fires.
Driving the rifleman back (red bead) and pinning the RPG gunner (yellow bead). The RPG gunner tries to self rally but fails and stays pinned.
In the northeast, an enemy RPG gunner creeps up the slopes of Hill 825 (top right, from left).
Turk (bottom right) spots him and fires, pinning the RPG gunner.
Turk continues pouring fire at the RPG gunner...
Forcing him to fall back (top left, from explosion).
Turk then dashes up Hill 825 (top center, from bottom right, with Bear carrying Bolt at bottom left).
An enemy rifleman in the southwest corner of the map (bottom right) spots Turk (top left) and fires at the movement.
The rounds miss high, and Turk (top left) returns fire, knocking the enemy rifleman down.
Man, I've been lucky as hell with all the missed shots by the enemy.
Bear carries Bolt up to Turk (top right, with Chick at bottom left and Goss at left).
Chick begins dashing up Hill 825 (center right, from stream at bottom left).
And Goss follows his lead (top center, from bottom left).
One of the Commies in the northeast (top left) spots Goss (bottom right) and fires, pinning him.
With Goss pinned at right (yellow bead), Badger (bottom left) turns and fires on the bad guys in the northeast (top center; there is a suppressed RPG gunner and two riflemen up there), knocking one of the riflemen down.
Badger moves into the draw (bottom left), but the other rifleman in the northeast (top right) opens fire on him.
Badger is able to push ahead through the fire (bottom left), ending up just below Goss (bottom center).
Two more bad guys arrive in the northeast (top left and top center). One checks the knocked down rifleman at top center, but he's bled out!
The bad guys are having absolutely terrible buddy check/rally and react fire rolls. I'm sure it will come back to haunt me...
A bad guy in the northeast moves south (right) to help rally the suppressed RPG gunner (top center), but Badger spots him and fires, dropping the Communist. The RPG gunner self rallies back into the fight.
On Hill 850, an enemy soldier moves up to rally two buddies.
Incredible!
They fail in spectacular fashion! The pinned RPG gunner falls back to the edge of the map, suppressed, while the suppressed rifleman runs off the map!
Badger (bottom center) and Goss (bottom right) fire on enemy troops in the northeast.
Badger drops his target (off camera to bottom left), but Goss (bottom right) totally misses, and the bad guy returns fire...
Forcing Goss to fall back (red bead, from explosion). Badger is at bottom left, Chick at bottom right, Turk and Bear carrying Bolt at top right.
Turk (bottom right) again fires on the enemy RPG gunner in the northeast, again pinning him.
While the enemy has had some bad dice rolls, my shooting dice ain't been so hot neither...
Turk dashes ahead, up Hill 825 (top right, from off camera to bottom right).
I wonder if I should have rushed the pinned RPG guy (left)...
Bear drags Bolt up to Turk.
Chick moves over to Goss (bottom center, with Badger at bottom left), rallies him, then fires into the woodline at top, pinning an enemy soldier.
Ooh, a combat shot. Sorry for the blurry photo... A bad guy comes on the board on Hill 850, where he rallies the suppressed RPG gunner there (red bead).
Three fresh bad guys come on the table in the northeast, adding to the two rifleman and RPG already there. This is turning into quite the situation.
Conversely, the bad guys have two knocked down troops all by their lonesome in the southwest, but they can't get any reinforcements there to get over and help rally those guys back into the fight.
The RPG gunner in the northeast, the one Turk pinned, then suppressed, then got rallied, then Turk pinned again but didn't close assault, launches a rocket at the cluster of Badger, Chick, and Goss...
The rocket is off a little (bottom left), but is close enough to knock down Badger (white bead) and pin Goss (yellow bead).
I really wish Turk would have close assaulted that damn RPG. And don't forget, for all the bad guys to top left (in the northeast), there's still quite a few bad guys up on Hill 850, behind these guys (off camera to bottom left).
A rifleman (far left) in the northeast fires on the cluster of troops...
Chick (center) is knocked down and Goss is forced to fall back, suppressed (red bead at far right).
Uhh, things ain't lookin' so hot all of a sudden. Really wish Turk would have close assaulted that RPG gunner. I've got two men lying helplessly on the ground (Badger and Chick with white beads), that can only be helped by a good guy moving into base contact with them, and the closest good guy is suppressed.
And the bad guys start moving up on Hill 850.
The first bad guy crests the hill (bottom left); Turk (top right) spots him and fires...
But only manages a pin. A pin!!??? NOOOOOOOOOOO!!! An RPG gunner calmly climbs up, dusts his sights off...
And tosses a rocket at Turk, Bear, and the already seriously wounded Bolt.
Luckily it's a little off: Turk is knocked down and Bear is pinned.
Goss gets his mind right, back in fighting shape (far right), and begins surveying the carnage. Bad guys to the northwest (bottom left), lots of bad guys to the northeast (top left), two buddies writhing around on the ground (Badger and Chick, left).
Bear shakes the cobwebs from the RPG explosion off and drags Turk and Bolt to the crest of Hill 825. Mission accomplished, except for the fact we need to get the other three knuckleheads up here too!
Bear checks Turk, but he's still unconscious. Start the breathing, stop the bleeding, protect the wound, treat for shock. Surprising, the things that stick with you ;)
The a$$h0le on Hill 850 has reloaded, and fires another RPG at the Cubans lying on the slopes of Hill 825...
Chick is actually put out of the fight, the third time in two games. Once someone can get to him and check on him I'll roll on the casualty table to see what's actually going on; so far he's been very lucky, two light wounds.
A rifleman on Hill 850 fires on Badger (top right), but misses. The bad guys on Hill 850 aren't looking to scoot down the hill and chase the Cubans, they're quite content to sit up top and rain fire down on them.
Another bad guy pops up on the crest of Hill 850.
Goss (top right) finally gets his stuff together and fires on Hill 850 (bottom left)...
A rifleman is knocked down (white bead, next to the pinned guy with yellow bead), while the RPG gunner is forced to fall back and hunker (red bead).
A bad guy in the northeast (top left) spots Goss's muzzle flashes (bottom right) and opens fire.
The rounds miss and Goss (bottom right) returns fire, pinning the bad guy.
From the northeast, three bad guys creep west down the draw (bottom left), closing the distance with Badger (still knocked down at center).
Another northeast bad guy creeps up through the treeline, looking to reach the peak and see what's going on, but when he hops up on a knoll Bear blasts holes in him, ending his trek.
With the bad guy at bottom left, Bear checks on Turk, and he's good to go, back in the fight.
Goss (off camera to bottom right) calls out the bad guys in the draw (bottom left) on the radio; Bear (top right) moves up until he has a field of fire, then cuts loose on them.
And it's devastating: one bad guy goes down, one is knocked down, and one is pinned.
With the bad guys in the draw (top center) more or less handled, Goss (top right) fires on Commies on the crest of hill 850 (bottom left).
The pinned rifleman on the crest becomes suppressed and falls back (bottom center).
Goss then sprints over, between Badger and Chick.
But a northeast bad guy (top left) spots him (bottom right) and fires.
The bad guy (top left, with guys in draw at bottom left) misses, and Goss (right) returns fire, knocking him down.
Then Goss, just for fun, tosses a frag (blue bead) into the draw).
Goss gets to work checking his buddies, and lo and behold, everyone is okay. Badger (left) is back in the fight, and turns out Chick (right) was just knocked out by that RPG (rather, two RPGs).
I've had some lucky casualty rolls, see if that keeps up. But don't misunderstand, Badger was not a casualty roll, he was just knocked down.
Goss's grenade goes off, killing another bad guy.
A PK gunner comes on the table at Hill 850, where he rallies a suppressed rifleman (bottom center).
The Communists finally get some guys on in the southwest, a rifleman and an RPG. Both check knocked down comrades; the rifleman is good (top), but the PK gunner (bottom right) stays knocked down.
In the northeast, a pinned rifleman falls back into the draw and checks on his buddy, and he's back in the fight (Badger and Goss are at bottom right).
Back on Hill 850, the RPG gunner (center, red bead) tries to self rally but fails and runs off the map! A rifleman moves up to the crest to check his knocked down buddy (top left).
But Badger (top right) spots him (bottom left) and cuts loose.
But, for the first time in two fights, Badger totally whiffs on his target. The Commie looks down on the three Cubans clustered together and empties an entire magazine in their direction.
My chickens are coming home to roost.
Badger (at explosion) goes down, Goss is knocked down (white bead), and Chick is forced to fall back (red bead at right). If this seems familiar, it's because almost exactly the same thing happened following an RPG earlier, but it was Chick knocked down next to Badger and Goss was hiding in the trees at right.
Turk (top right) howls with rage and returns fire on Hill 850 (bottom left).
His fire drops two bad guys (top left) and forces one back (red bead at bottom left), but the damage is already done. We just can't seem to get those three guys to the crest of Hill 825.
As a gamer, for the first time it crosses my mind that I might actually have to leave casualties behind.
Turk begins coming back down Hill 825 (right), but bad guys in the draw (bottom left) spot him and fire. Goss is knocked down at bottom center, Bear is at top center.
The bad guys (top left) miss, but so does Turk (bottom right) when he returns fire.
Then Bear begins moving back down the hill to help (top center, from top right, with Turk at bottom right and Badger and Goss at bottom left). He pulls up and fires on the bad guys in the draw (top left).
But Bear (top center) totally misses (that's two in a @#$%ing row!!!)!!! The bad guys in the draw (bottom left) return fire, knocking Bear down. Chick (off camera to right) successfully self rallies.
As three more bad guys join the fight in the northeast (top left).
The Commies in the draw (bottom left) fire on Turk (top right).
They (top left) miss, and Turk (bottom right) returns fire, pinning one bad guy.
What the hell is going on with my shooting???
The bad guys in the draw (bottom left) fire again on Turk (top right).
And Turk goes down (right, with Bear knocked down at bottom left).
At this point Chick is the only Cuban still in the fight.
The PK cowering on the reverse slope of Hill 850, tries to self rally (bottom left), but fails and runs off the map!
In the southwest, which has been very quiet since the opening minutes of the fight, an enemy rifleman checks the PK gunner (bottom right), and he's good to go.
The rifleman then moves straight north (which is left, guy at bottom center, from bottom right). The other two bad guys in the southwest (top right) prepare to move up).
Chick is hiding in the trees at top left. Did I mention he's the only Cuban still in the fight?
The two bad guys from the southwest move up (top center), and Chick (bottom center) decides it's time to give up his hiding place. He opens fire.
One bad guy is knocked down (top left), the other is forced to fall back (bottom right).
Chick (bottom left) then turns and fires on the enemy rifleman moving to the west (top right).
The bad guy is knocked out of the fight (bottom center), but the PK gunner (bottom right) returns fire on Chick (top left).
But Chick (bottom left) makes good use of his cover and concealment; the bullets do not find their mark, and Chick returns fire on the PK gunner, whacking him too!
Chick then sprints to his buddies (top left, from bottom right), and begins checking them over. Goss is quickly back in the fight, but Badger is seriously wounded and is going to need to be carried to the rally point.
At this point I decide to call off the dogs: no more bad guy reinforcements, they will have to make do with what they already have on table. At this point I have two men capable of acting, two men out of the fight (seriously wounded), and two men needing to be checked, which could get them back in the fight or could put them permanently out of the fight (as just happened with Badger).
From the northeast (bottom left), one bad guy dashes up the flank (top center), getting very close to Bear (top right), still knocked down and very vulnerable to close assault. Furthermore, Turk is also down, just off camera to Bear's right, an easy follow up to beating Bear in close combat.
The two guys in the draw (bottom left) try to self rally: one is good, the other remains pinned.
An RPG gunner from top left moves up (center top), where Goss (bottom right) spots him and fires, dropping him.
The last bad guy rifleman from top left darts down the draw (bottom left), but Chick (bottom right) spots him and fires.
The target gets whacked (bottom right) and his buddy gets suppressed (red bead).
Chick (bottom center) then pulls a frag out, cooks it off, then tosses it into the draw (blue bead at far left).
Another Communist meets his demise, whilst his comrade is knocked down (white bead).
Goss (bottom center) lays down fire as Chick picks up Badger and begins moving up hill (right).
Again a Cuban fires off a total miss, and the bad guy (left) returns fire on Goss (bottom center), pinning him.
In the southwest (bottom right), a bad guy sprints up the west slope of Hill 825 and checks on a knocked down buddy (center right, with Goss, Chick, and the seriously wounded Badger at top left). The knocked down Communist is back in the fight.
Now I need to deal with the situation in the northeast, where a lone bad guy rifleman is dangerously close to Bear, who is knocked down. The way I see it, the bad guy has three options, and I decide to roll a D10 to see which choice he will make:
8-10: the bad guy will fall back down the hill to help rally the guy in the draw.
4-7: the bad guy will hold his ground and fire at Chick, who is in plain view, carrying Badger.
1-3: the bad guy will charge into close combat with Bear.
I roll a '2,' and the bad guy charges Bear.
The Commie works Bear over pretty good (top left), then, with his blood up, decides to charge Chick (bottom center). Chick is carrying Badger and one hands a shot at the sprinting bad guy...
The rounds go wide! Chick drops Badger as the bad guy is on top of him. They grapple and fall to the ground...
Chick stomps him (bottom right), picks Badger back up, and hauls ass up to Bear (top left). Bear's out of the fight; not dead, but a 'permanent injury,' the type that will probably necessitate him being medically retired from the military. In game terms, we now have a third man out of our six-man team that needs to be carried.
With Chick, Bear, and Badger at left and Turk still down at top center, Goss (bottom center) turns and fires on the bad guys advancing from the southwest (top right).
A rifleman is knocked down (top left) and a PK gunner is forced to fall back (bottom right).
The game is pretty much over, unless I decide to let more bad guys come on the table, but I don't think my heart can take it. The few bad guys left are beat to the pulp, none able to activate on their own but to self rally.
Goss falls back to Bear (bottom left), whom Chick left when he carried Badger over to check on Turk (right). Turk is back in the fight, but he'll have a scar the ladies will love ;)
That's what I rolled on the casualty table for Turk, "dramatic scar."
The Cubans consolidate atop Hill 825. The boss, Turk, looked down the gentle slope to the east (off camera to top): 'there's the HLZ, call HQ." He then sets security while Chick begins checking and treating the wounded and Goss gets on the radio, calling in a SITREP. "Sparta 6, Sparta 6, this is Cherokee 3. Cherokee 3 is BUDWEISER (in position, awaiting extract) with three PEANUTS (wounded in action)." Goss continued with the SITREP.
"Roger Cherokee 3, SPARROWHAWK (the QRF) inbound in five mikes, roll to air guard (move to the radio frequency to speak directly to the helos)."
"Cherokee 3, Cherokee 3, this is Bandit 27, over."
"Roger Bandit, got you coming in from the November-Echo, break. We are at your angels 315, nearest military crest at your 10 o'clock."
"Roger, Cherokee 3, stop using all that military-talk and speak plainly son and we'll come and get ya."
"Bandit 27, Cherokee 3 is popping smoke."
"Bandit, Bandit, wave off, wave off, enemy ground fire from your..."
"...five o'clock..."
Dammit. Bandit 27 goes skittering down the sheer southern face of Hill 850, where Team 3 had only recently scootched down on their asses to escape the Communist militia troops giving chase. Turk immediately had Goss call in the loss Bandit 27 to Task Force Headquarters, as Bandit 28 dropped to nap of the earth, initiated evasive maneuvers, and set about returning to base.
Turk took the handset from Goss, speaking directly to Colonel Galban, the Task Force commander. The Colonel informed Turk the HLZ was to hot, ground elements from Battlegroup Elias were being dispatched immediately and would be in position for pickup in 15 minutes in the town of Tulm. Turk pulled out his map; where the hell is Tulm? "Boys' we're moving."
Another great fight. While the team knocked out nineteen more terrorists, it suffered two more serious casualties, meaning 50% of the team was no longer in the fight and required a team member to carry them to the pick-up site. The third fight of Operation Cro-Wings is coming up soon, but up next is actually the fight at the town of Pisa as Battlegroup Aguilera tries to fight off the Communist armored elements that fought their way through the Cuban airstrikes called in just prior to the first fight of Op. Stay tuned!
V/R,
Jack


No comments:
Post a Comment