All,
"Platoon" Fight #2
This is the second in my series of Vietnam-era, platoon-level fights based on the characters in the movie "Platoon." In the first fight I played out my interpretation of the initial fight scene in the movie, where SSgt Barnes and Sgt Elias led a patrol out on night ambush. In the movie, the FNG Gardner was killed, Tex was wounded bad enough to be MEDEVAC'ed, and Taylor was lightly wounded, ending up on light duty for a bit. In my game, the 'Platoon' got off easy, whacking five bad guys and taking no casualties, with Rodgriguez performing a bit of close combat heroics. Not enough to get him decorated, mind you, but enough to see him promoted from Private to PFC. So here we are, a few days later, and the 'Platoon' is on a sweep and clear mission, a general advance to contact-type scenario, looking to find the enemy and whoop up on him.
In order to get twice the bang for the buck, I'm playing these games in the overall campaign context of my "Cuba Libre" alt-history world, so I can 1) play the 'Platoon' stuff AND 2) keep my Cuba Libre gaming moving along. In the context of Cuba Libre, it's 1015 on 4 August 1990; the FSNL air defenses are down, Cuban close air support and interdiction strikes have been pounding the Communists positions, causing them to generally fall back to the east, towards the capital city of Pendrakenville. The 'Platoon' has been walking now for a few hours, not a shot fired on this lovely, sunny morning. But that's all about to change; coming to an open area, SSgt Barnes, the Platoon Sergeant, called a halt to confer with the squad leaders. Lt Wolfe tried to interject, but mostly Barnes just ignored him and continued issuing orders to Sergeants Elias, Warren, and O'Neill.

Overview, north is left. At top, in the east, is a ridgeline on Hill 196, with a road running through a saddle. At bottom left is a small hill, Hill 57, with a small village atop it, while there is another village spread thinly across the east side of the river, which is bridged near a crossroads in the center. For our purposes, we'll refer to them as 'north village' and 'south village.' At far right is a small footbridge, and a couple sampans/fishing boats tied up. Despite the presence of the two bridges, the river is fordable by men on foot throughout its length. Other than that, there's some traces of jungle to hide bad guys in, and rice paddies dot the landscape.
The small village atop Hill 57.
Across the river, the 'north village.'
And the 'south village.'
Here is the north spur of Hill 196.
And the south spur, which are pretty much identical.
For this fight, the entire platoon is in it. You've got Lt Wolfe and the command element (Plt Leader, Plt Sgt, RTO, and Medic) at top right, then Sgt Elias' 1st Squad, Sgt Warren's 2nd Squad, and Sgt O'Neill's 3rd Squad.
You may have noticed that, contra my normal M.O., the bad guys are not shown. This is because I have no idea what bad guys are going to show up on the table. I'm using my buddy Joe Legan's "Platoon Forward" system of blinds, so I could have a whole NVA company show up, or maybe a platoon, or a squad, maybe just a sniper, who knows. Only time will tell; the way it works is that the bad guys start with a certain number of blinds on the table, and as my guys run into them (spotting distance, not actual physical contact), I roll on a chart to see what, if anything, is there.
The mat is from The Wargaming Company, the roads are from Fat Frank, the river is from Wargamer's Terrain, the village pieces and most of the jungle are from Flashpoint Minis, the fields are from Hotz Mats, the Americans are from Battlefront, and the NVA are from Peter Pig. I'm playing solo in 15mm using Ivan's "No End in Sight" rules.

Overview, this time with troops. At least the American (Cuban) troops, as no NVA (FSNL) troops are on the table at the start. Here's the set up: Lt Wolfe and the command element are in a stand of trees just left of the road (bottom center left). Sgt O'Neill's 3rd Squad is atop Hill 57 at bottom left. Sgt Warren's 2nd Squad is in the tree-line at bottom center, and Sgt Elias' 1st Squad is in the tree-line at bottom right. The plan is for O'Neill's squad to serve as a base of fire (supporting position atop Hill 57, though it's not perfect as it's got plenty of sight-blocking terrain between it and potential enemy positions, but it's the best they could do to start) while Elias and his men break cover, with Warren's squad in reserve. Assuming the situation doesn't immediately go sideways, Elias's squad will make it up to the river and call a halt, at which time Warren's squad will move up to the river as well. Once that is completed, Elias and his men will push across the foot bridge (top center right). Once a foothold is established they will halt and O'Neill's squad will come up on the left, then Warren's squad will push across the main bridge. If that all works out, Elias and O'Neill's squads will fall in behind Warren's and the Platoon will continue moving east (top).

Sgt Elias' 1st Squad. No casualties were taken in fight #1, so all three squads have nine men in them, with a squad leader, M-60 machine gun team, M-79 grenadier, and five riflemen (some of whom are carrying M-72 LAWs, which I apparently forgot about during the fight...).
In the center, Sgt Warren's squad (you can just see 1st Squad at top right).
It's 'Platoon.' I gotta stop using ranks and just use last names...
Atop Hill 57, O'Neill has his men spread out and ready to cover Elias' movement.
The Platoon command group, between Warren's squad (far right) and O'Neill's (far left).
The enemy starts with three blinds on the table (using poker chips). The locations of the blinds were randomly generated.
Let's get it on!
Warren's squad (bottom right) looks on as Elias and his men step off (top right) towards the river.
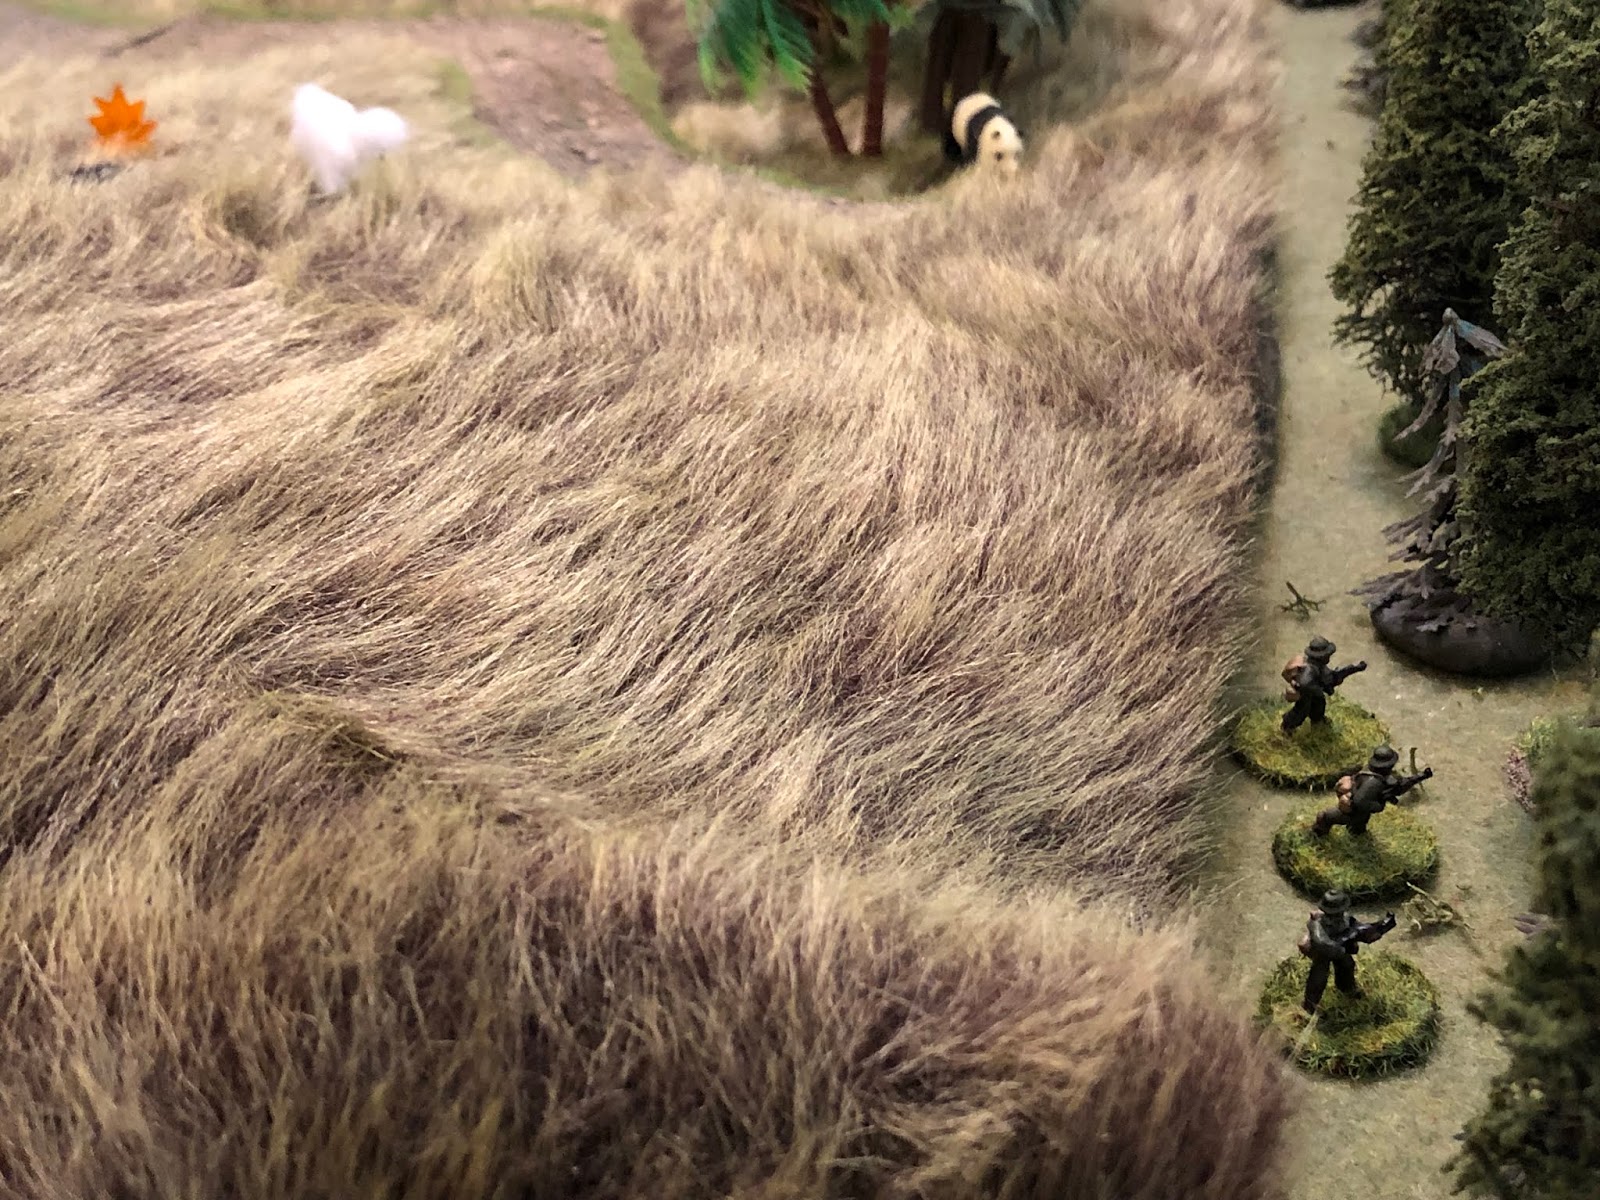
Westfall, on point (far right, the lead figure) spots movement and signals 'halt.' He's spotted something up on the South Spur of Hill 196 (top center).
I roll and it's nothing. Well, not really, but that's how it ended up. I actually really screwed up; I rolled terrible and so it was supposed to be something like "it's 'x' amount of bad guys, plus roll twice more on the chart," but somehow I screwed it up and treated it like more blinds, rather than rolling on the force table, so it actually ended up being nothing except generating another blind, so, in the end, what really happened was I picked up the spotted blind and moved it to another location...
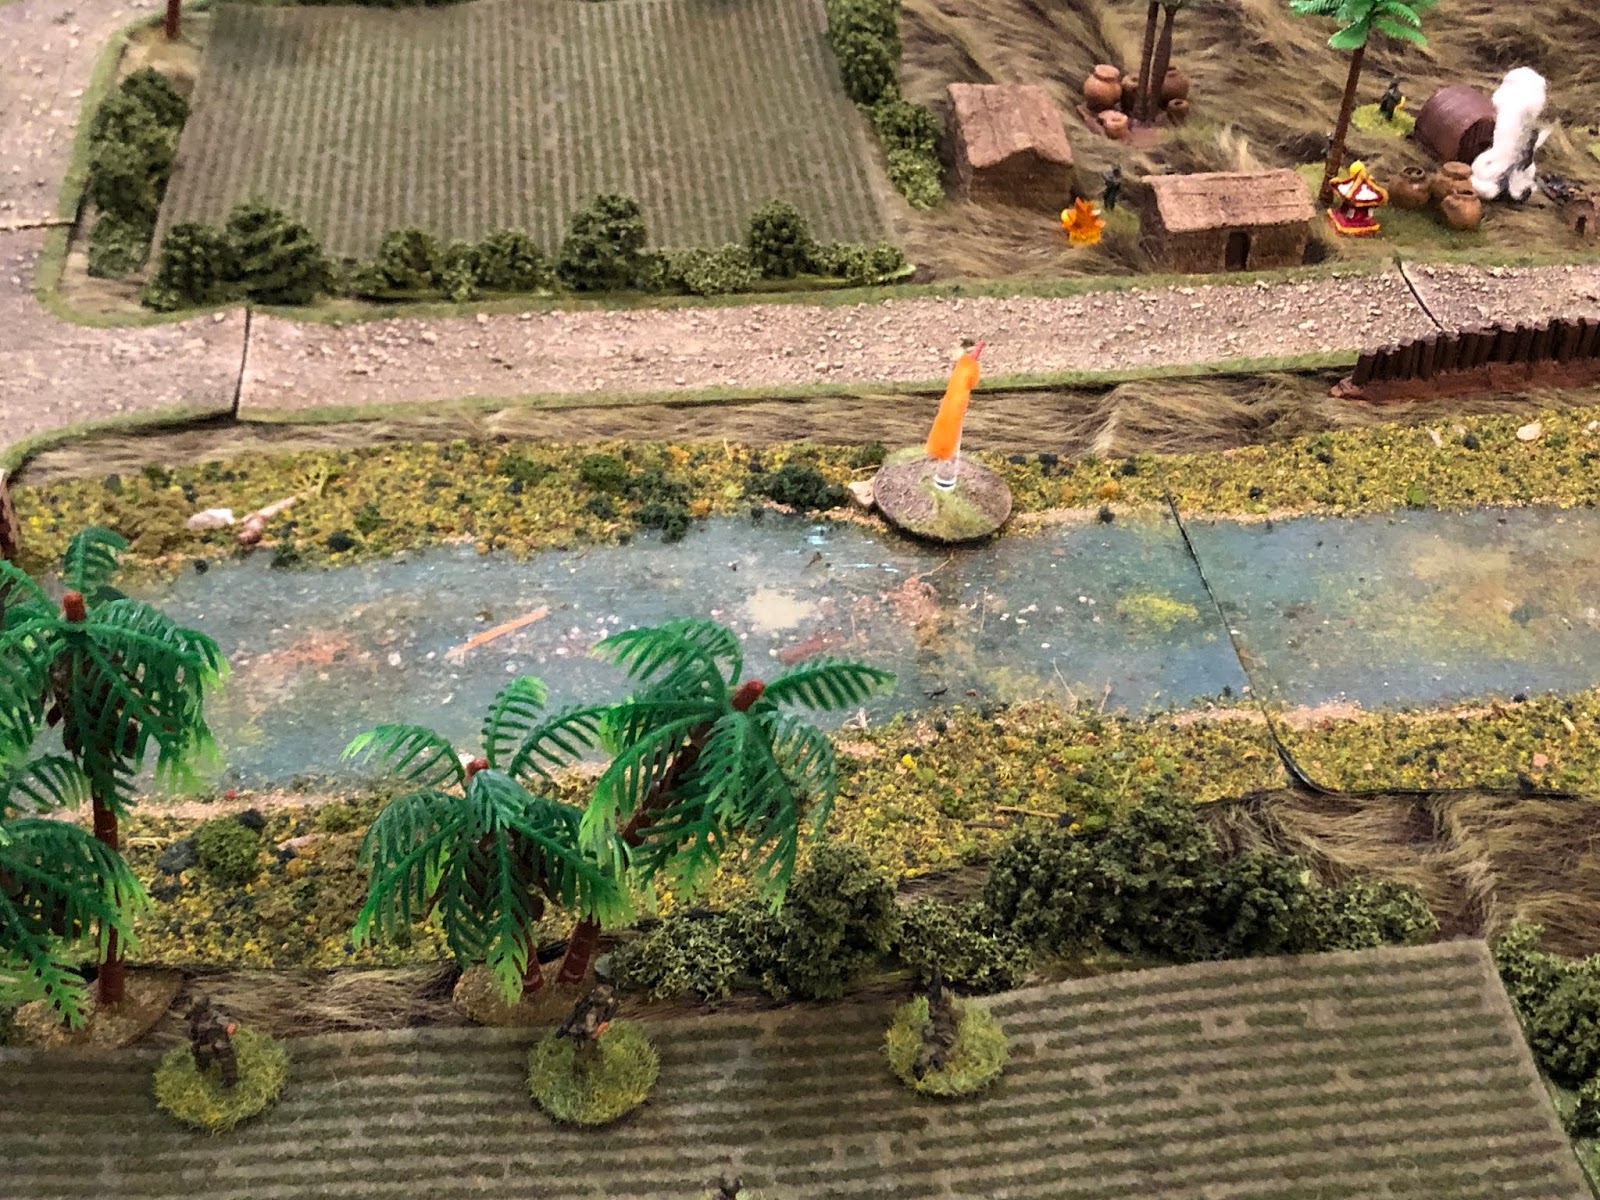
Which is even closer, in the south village.
Westfall creeps up to the nearest hedge.
He (bottom center) scans the village across the river, then again up the hill, but doesn't see anything.
Elias gets the rest of his squad up to the hedge (top right), then signals back to Warren to begin bringing his squad up, which he does, with Bunny leading the way.
Bunny nears the clump of trees at the river (left), eyes on the bridge (off camera to far left), which is unfortunate because, perhaps if he'd have been looking at the south village (top center)...
He might have spotted the enemy squad positioned there.
The enemy not only got a full rifle squad in the south village, they also got another blind, which was placed back up on the south spur of Hill 196.
Bunny reaches the tree-line (left)...
But as soon as he does (top center), enemy fire rings out from the south village (bottom right).
Bunny eats dirt (yellow bead) as Warren (two black beads) leads Tubbs, Flash, and Ebenhoch up.
Then signals for the rest of the squad to move up, as the odd, angry shot whizzes past.
Then I have to roll for the blind on Hill 196's south spur (far right), and it's a doozy. "Roll twice on the chart and add another blind." So I add another blind, it pops up at the river, near the sampans (bottom left), while two enemy teams pop up on the South Spur. First, an RPG team is added (their bases are visible at center right bottom, next to the bamboo stand).
And then, on the other side of the clump of trees, a rifle team is added (bottom center, with the RPG team off camera to bottom left). The newly arrived enemy rifle team opens fire on Sgt Warren's squad (top center, with Sgt Elias' squad at top left and Sgt O'Neill's squad atop Hill 57 at top right).
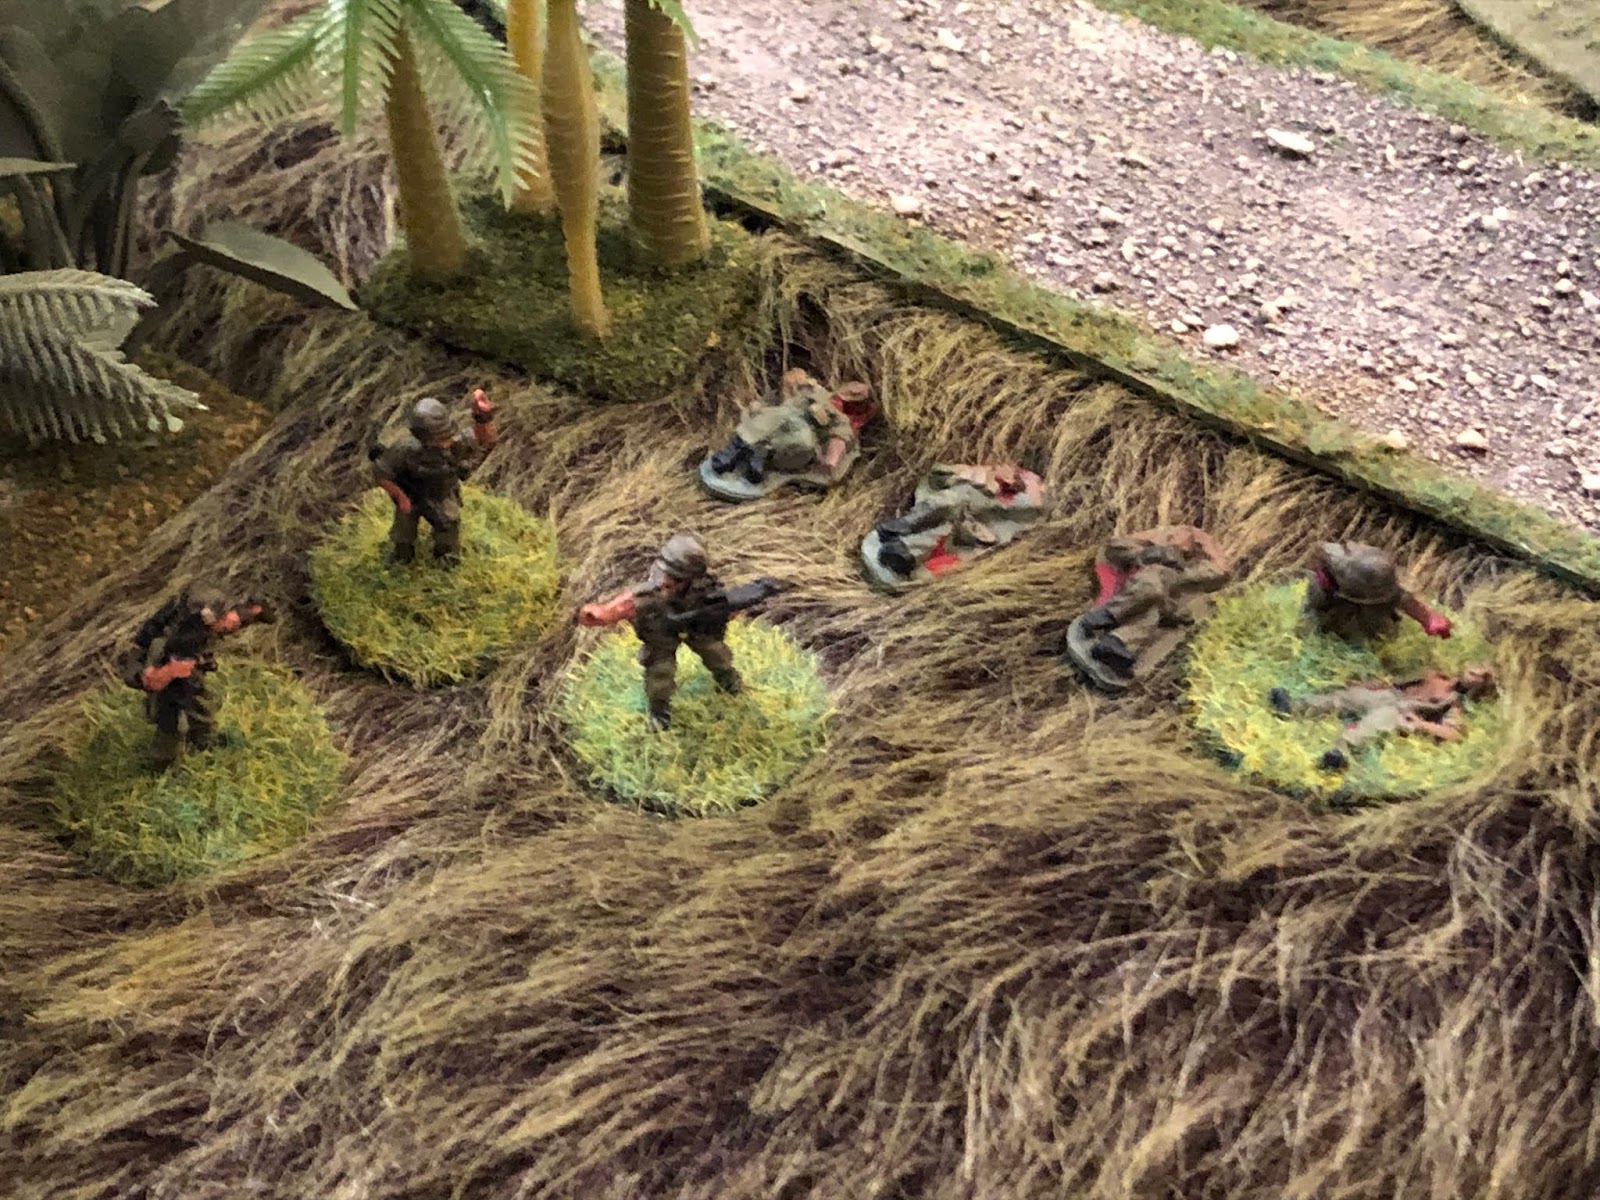
And we've got trouble! Shouts of 'Medic!' go out as Big Harold is hit and goes down, pinning Morehouse (with the M-60) and Francis. Lerner looks on from the relative safety of the hedge (bottom right).
Barnes (right, with Lt Wolfe at top, Ace, the RTO, at left, and Doc Sanchez at bottom): "@#$%!!! El-Teel, you call in arty on the South Spur, now! And tell O'Neill to get his squad up on the left, they can't see @#$% from where they're at! Come on, Doc!"
And with that, Barnes and Doc (center, from bottom left) set out to assist Warren (top right).
They reach the hedge (bottom left) and peer over, trying to get a read on what's going on.
But with Barnes and Doc exposed on the road (bottom right), it's time to roll up the blind in the north village (top left). Turns out nothing's there, but I have to add another blind!
It ends up in the rice paddy just across from Warren's squad (center top left).
It's feeling a bit too exposed, so it moves back a bit.
Barnes (far left) looks on as Doc loops around to the right (far right), trying to figure out the situation: "Lerner, what the hell is going on?" "I dunno man, we're taking fire from the south ville and up the hill, and Big Harold's down in the paddy, right over there. I think he's hit bad, man."
Barnes moves from the hedge (far left) into the paddy, looking to get Warren's squad straightened out and in the fight (center left top, with three black beads). "You boys better get your @#$% together, get your asses in the fight, now!"
Back in the rear, Lt Wolfe finally manages to get on the right net and get arty on the horn, but then he realizes he doesn't have his map out, and he can't remember where he put it, so he's not ready to call in arty on the South Spur. And he didn't tell O'Neill to move up...
And ol' Red is happy for he and his boys to sit tight in the village atop Hill 57. They don't really have a look at the enemy squad in the south village (far right top), but now that the Platoon is receiving fire from the South Spur (top right, North Spur at top left), they might be able to help. Tex (between the two hootches at bottom left) gets the Pig into action, burning through an entire belt as he pumps tracers into the enemy team that shot Big Harold...
The fire doesn't hit anyone, but is right on target, suppressing several of the enemy troops...
And forcing them to fall back, down the backside of Hill 196.
O'Neill's squad (bottom left) didn't see the enemy fall back, so they continue to fire on the South Spur (top right).
Then, over on the right and down by the river, Elias finally has his squad up and in the fight. He orders Crawford and Gardner up to the foot bridge (left), as the rest of the squad pours fire into the south village (off camera to top left).
The fire is intense, dropping one enemy soldier and suppressing three more, though the Communists pass their break test.
But now the enemy RPG team on the South Spur (bottom right, with the enemy squad below them, at center) spots Gardner and Crawford (top left) and opens fire, pinning both of them.
O'Neill and his squad hear firing from the South Spur (top right), but can't identify where it's coming from and thus cannot help...
King keeps laying down fire with his M-60, pinning another enemy soldier.
Tearing through ammo, most of the squad has to reload, as Crawford and Gardner (left) rally.
The entire enemy squad in the south village is pinned, but they keep passing their break tests. But it won't take much more to start driving their men back, individually.
And that's exactly what happens: another round of rifle fire sees one of the Communists break and run, tearing ass up the South Spur, right in the direction of where the rifle team was (the one that got driven back by fire from O'Neill's squad).
Elias fires at the runner (top center right), but misses...
The enemy squad leader is able to rally his entire squad, but it's all he can get done this turn.
While the Communist rifle team atop Hill 196 moves back up into position on the South Spur.
Tex and Junior (bottom left) spot the enemy team (top center right) moving back up and open fire, pinning two men, but these are rallied off.
And then, from the south end of the South Spur, the enemy RPG team fires a rocket at Elias' squad!
It lands short, pinning Taylor, Sandy, and Rodriguez.
I roll for the blind next to the sampans, and it's a machine gun team (far right)!
Lt Wolfe finally finds his map, figures out the coordinates, and calls it in. "Give me one on adjust."
"Roger, one on adjust. Stand by... Shot."
"Shot out."
Lt Wolfe and Ace look on at the South Spur (top right). They hear an explosion that sounds like it's a couple hundreds yards south (off camera to right), so Lt Wolfe gets back on the radio: "Red Leg, Red Leg, splash unspotted, say again, splash unspotted. Come left 200 meters and give me one on adjust!"
"Roger, come left 200 meters. Stand by... Shot."
"Shot out."
WHAM! The 155mm round lands on the back side of the South Spur, and both Wolfe and Ace can see it. "Red Leg, Red Leg, Splash."
"Splash out."
"Red Leg, we're on target, fire for effect."
"Roger, on the way."
So, the Lt did a great thing: he got arty on the horn, gave them (roughly) the correct coordinates, walked the rounds onto target, and is about to rain down hell on the South Spur. But he still didn't tell O'Neill to move...
O'Neill's squad continues firing on the South Spur (top right), oblivious of Barnes' desire to hae them move up to the river (far left), or that they really don't need to expend ammo on the South Spur since Lt Wolfe called in 155s on it.
Machine gun and rifle fire rakes the enemy position, and an M-79 grenade lands, just a hair off target. The enemy suffer a casualty and are suppressed.
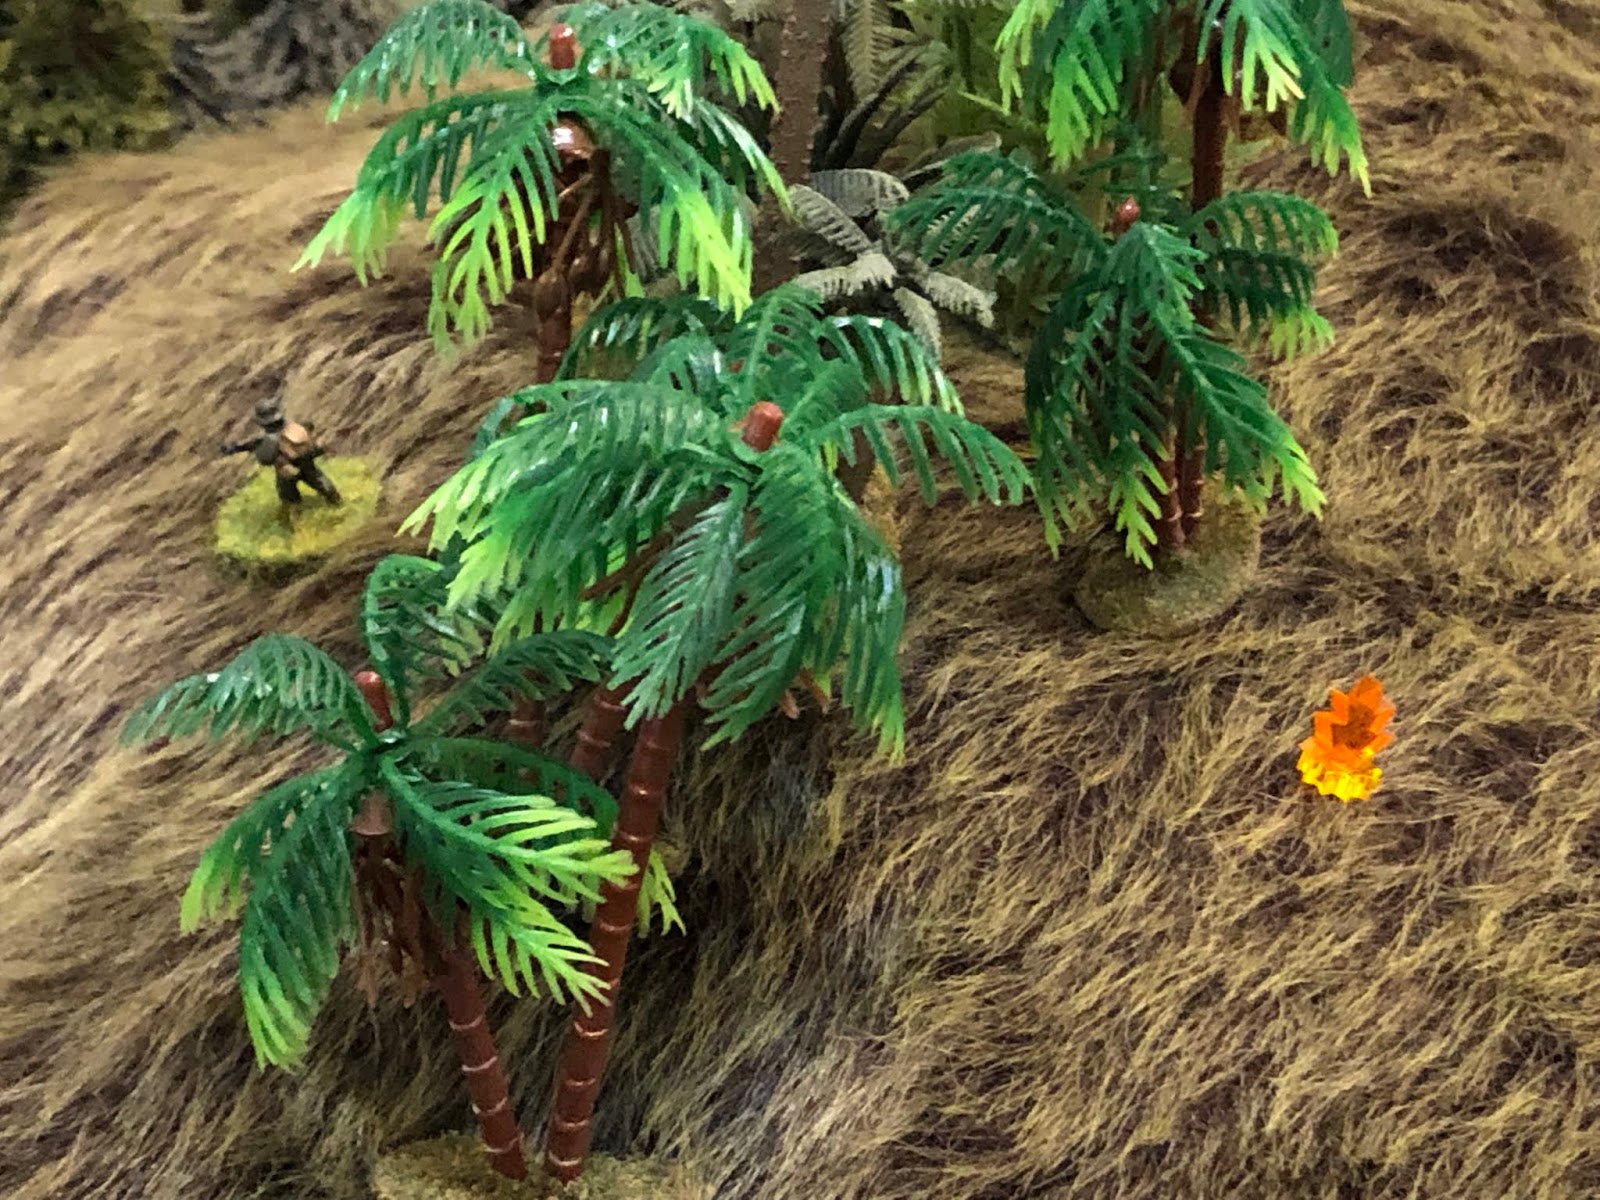
Which is enough to convince two of them to head for the hills! The enemy team leader (center left top) looks at his casualty, looks at his troops running off, looks at the Willie Pete smoke on the trees nearby (bottom left)...
And decides he might as well join his buddies.
Meanwhile, in the center, Barnes (left, with black bead) rallies Morehouse and Francis, and they get the M-60 into action (right).
Which is enough cover for Doc and Barnes to move over and check on Big Harold.
The enemy RPG team (bottom right) spots the movement in the rice paddy (top left) and opens fire...
Pinning Barnes and Doc Sanchez.
But both shrug it off, and Doc gets to work stabilizing Big Harold.
Morehouse continues firing on the RPG team (top right), pinning them.
Sgt Warren (bottom center, with Barnes just to his right) rallies Bunny (far left), as Flash fires into the south village (top right), pinning an enemy rifleman.
While on the right, King, Westfall, and Huffmeister continue to pour fire into the south village as Elias rallies Taylor, Sanderson, and Sanderson.
No one is hit, but again every single member of the enemy squad in the south village is pinned.
Two of them break and run, this time to the south (far right), rather than up the hill (where the dumbass that ran last time is still camped out, top center).
Elias spots them (top left) and fires...
Dropping one, but the other escapes.
As Gardner and Crawford dash up and over the foot bridge (top left)...
The enemy RPG team (bottom right) spots them (far left, just above the palm trees) and fires, pinning Westfall, but Gardner keeps going...
Until he (bottom left) suddenly finds himself face to face with the enemy MG team next to the sampans (top center)!
*See, this is one of those moments where you guys go, "now why in the hell did Jack run his men right into the enemy MG team?" And my answer is, as always, because I play solo, and I try to play as if the little toy soldiers don't have all the knowledge I have, only the knowledge that they might have. So, Crawford and Gardner were carrying out the plan, which was to get across the bridge, as their squad leader ordered them. The enemy MG team hadn't moved into view or fired, so no one knew they were there yet, so, as (bad) luck would have it, Gardner ends up nose-to nose with an enemy machine gun.
The enemy MG team opens fire...
But somehow Gardner is not hit, and manages to dive behind the cover of a nearby sampan, pinned!
With Crawford and Gardner pinned down at the foot bridge (far right), Warren (far left) orders Morehouse and Francis to get the M-60 firing on the enemy RPG team (top right)...
The gunner is pinned (far left) and the rifleman falls back.
While Bunny, Flash, and Ebenhoch (bottom) fire into the south village (top right), pinning a couple enemy soldiers there.
And causing two more runners (to center, from bottom center).
Bunny, Flash, and Ebenhoch fire on them (top center), but miss...
And they keep running, all the way home.
Warren, Tubbs, and Lerner move up to the firing line.
As Doc gets Big Harold stabilized. "He's alright for now, but we gotta get him MEDEVAC'ed Sarge, ASAP, or he ain't gonna make it."
On the right, Elias rallies Taylor as Sanderson pops a 40mm grenade into the south ville.
BAM!!!
And the south ville is now vacant as the rest of the squad runs!
Elias' squad chases the runners (top center/right) with fire...
But they all manage to make it to safety.
"Cover me boys, but watch your fire, I don't want to take one in the ass." And with that, Elias disappears through the hedge, moving up to the foot bridge (center left), intent on helping Crawford and Gardner out of their tight spot.
"Gardner, Crawford, you guys okay?"
"Yeah Sarge, we're okay, just I can't move, there's assholes up the hill shooting at us, and a @#$%ing machine gun right over there in the other sampan!"
"Okay, stay calm, I'm gonna getcha outta there."
O'Neill's squad (bottom left) continues firing on the South Spur (top right).
Causing another enemy rifleman to make a run for it.
But on the other side of the stand of trees, the enemy RPG team fires a second rocket at Elias' squad!
And this one hits nearby, dropping Westfall and pinning King!
The enemy RPG team high-fives each other, and loads another rocket, their last.
But over in O'Neill's squad, Tex keeps the M-60 pouring out lead.
And the RPG assistant goes down!
But it didn't really matter, because just as he went down...
155mm shells begin slamming into the South Spur!
155mm high explosive rounds rain down on the South Spur for a good thirty seconds, and then an eerie silence falls over the battlefield. Smoke rises from the craters and shattered jungle, revealing... Two enemy KIA (the other two bodies were already there, victims of Tex's machine gun fire).
The enemy MG Team takes advantage of the lull by picking their gun up and displacing back across the road, into a clump of nearby jungle (right, from far left, with Elias and Crawford visible at top left).
But Warren's squad (bottom left) spots the enemy MG team falling back (top right) and opens fire (dangerously close to Crawford and Gardner)...
Dropping the enemy assistant gunner in the street!
The other two MG team members get the gun set up and ready for action.
And immediately begin spitting lead at Elias...
Wounding Crawford and pinning Elias (bottom right, with Gardner already pinned at top)! "Aah, man, I can't believe I got hit..."
Barnes orders Morehouse and Francis to lay down fire on the clump of trees (top center), and they pin the enemy machine gun team.
Doc tells Barnes he needs somebody to take Big Harold back to the Lieutenant and call in a MEDEVAC. Barnes orders Francis to go...
Francis picks up Big Harold and begins to set off. Barnes yells after him: "and tell Wolfe to keep the arty going, just walk it down the South Spur and into that clump of trees, then move it north into the south village."
"Will do, Sergeant."
And Francis sets off to find Lt Wolfe and Ace.
Doc here's Elias' men calling for help (because Westfall is hit, top right), so he sprints that way (right).
And Barnes yells for Lerner to fall back and assist Morehouse (bottom right). Then Warren gets his men moving up to the bridge (far left), Bunny still in the lead.
*It is at this point that I realize I haven't been rolling a D20 on each activation roll for heroics and random events...
With the enemy MG fire abated, Elias and Gardner are able to lift their heads up and look around a bit.
As King, Huffmeister, and Taylor move up (center), while Sandy and Rodriguez sit tight with Wesftall (far right).
And Doc arrives to take care of Westfall.
Morehouse and Lerner slap a fresh belt in and continue raking the stand of trees (top right)...
Pushing the team leader back (from the gun, center).
Francis (far right) gets closer to Lt Wolfe and Ace (far left).
As Morehouse and Lerner keep the Pig hammering away...
Forcing the enemy gunner to fall back.
Elias signals Barnes to have Morehouse check fire, then moves up over the foot bridge and joins Gardner (top left), with King, Huffmeister, and Taylor looking on (bottom right).
They quickly rush forward, onto the foot bridge, and help Crawford.
While further back, Doc Sanchez gets to work on Westfall.
Elias, King, and Gardner fan out to search and clear the south village and clump of trees, as Taylor and Huffmeister pick Crawford up.
And the enemy machine gun team (bottom right), seeing Elias and his men coming (left), decide they've done their patriotic duty for the day and bug out.
Barnes, Morehouse, and Lerner (bottom right) scan for targets as Warren and the rest of his squad gets across the bridge (top left).
They fan out and begin searching and clearing the north village.
As you can see, there's another blind present here (just visible at top center). I roll it up, and it's nothing, but add another damn blind! This new blind gets placed atop the North Spur, and I roll it up...
It's a hardcore stay-behind, who's duty is to sit tight until a juicy target appears, then open fire, delaying the Platoon's advance, then bug out when things get too hot. Just a lone rifleman with an AK.
He (bottom left) immediately opens fire on Warren's squad...
Pinning Bunny (yellow bead). Hasn't really been Bunny's day I guess, certainly no Audie Murphy in this action...
Warren rallies Bunny (left) as Ebenhoch, Flash, and Tubbs move up on the right (right).
Hearing gunfire (on the North Spur, top center left) but unable to see anything, it finally occurs to O'Neill (bottom left) that he ought to move his squad up...
He orders them forward and they immediately begin moving downslope, towards the river.
But the bad guy (in the bush at bottom center) spots them (coming down the hill at top center), sights in, and opens fire...
O'Neill and his men had gotten complacent and hadn't stuck to a covered and concealed route, and now they paying for it: Tex is hit and goes down, while Junior, Parker, Tony, and Manny are pinned!
*Yes, I gave the bad guy too many dice, but justified it based on there being such a large, juicy target.
O'Neill, Fu Sheng, and Rhah rush forward, up to the treeline (top right). Some might say, abandoning their buddies on the exposed slope of Hill 57, but they're Army and that's expected...
They (bottom left) quite miraculously are able to spot the source of their misery (on the North Spur, top center left), and they immediately begin returning fire, pinning the enemy soldier.
*That was a helluva roll to spot the lone bad guy on the North Spur!
Junior and Parker rally (center), as Sal cuts left (bottom left), looking to stay in cover (he was the Tail-End Charlie and hadn't even gotten out of the village when the enemy opened fire).
Rhah and Fu Sheng (top right) continue laying down fire as the rest of the squad begins to recuperate and regroup.
The Commie (bottom left) rallies, then opens fire again, pinning Tony Kane (top right).
O'Neill and his squad (bottom right) return fire on the North Spur (top left).
As Warren and his men begin moving up on the right (center, from far left), looking to flank the bastard (top right).
But he sees them coming and decides it's time to split!
Taylor helps Crawford back as Doc continues to work on Westfall. Ultimately they get them stabilized and moved back to the Platoon HQ, where Tex has been brought as well.
And there it is: Lt Wolfe, SSgt Barnes, and Ace look on as Doc continues treating the casualties. Big Harold has expired while waiting for MEDEVAC, and while Westfall is stable, the war is over for him. Crawford and Tex will miss a couple fights, but they'll be back. In any case, it's a good thing Barnes got back when he did! When he walked up, Lt Wolfe was on the radio; having just called for the MEDEVAC helicopter, he was now talking to arty about walking rounds down the slope of the South Spur, which would have been useful about ten minutes ago, but right now was where Elias, King, Huffmeister, Taylor, and Sanderson were hanging out! Needless to say, Barnes put a stop to Lt Wolfe's second call for fire.
Well, what did you think? I had fun, but it did drag out for a long time, and I was pretty beat by the end of it. Despite having fun, whenever I play a game like this, I can't help but think "wow, as long as this took, I could have played 2 or 3, maybe even 4 fights using another set of rules." So No End in Sight is a lot of fun, but it's dragging with a full platoon on the table. The first fight, where I basically had a single squad (with three leaders) went much faster than this one did. I think it worked great coming up with a platoon scheme of maneuver and sticking with it until contact, and not knowing when contact would occur because of the Platoon Forward blinds system. Just need smaller fights with NEIS, and/or smaller tables, where it's more condensed. I get the feeling that NEIS is perfectly built for modern, urban fights, like Operation Iraqi Freedom, at the squad level, and where I'm screwing it up is by having larger tables for my Vietnam setting. In any case, I think for my next fight I'm going to give Chain of Command another try, see if it will go a bit quicker.
The next fight will be another non-movie fight, but somewhat based on the movie. Here's what I'm thinking: a couple days later the platoon is continuing its general advance. Like the movie, they find the tunnel complex; they call for reinforcements to deal with the tunnels, leaving Elias and his squad there to hold down the area until the reinforcements arrive. Meanwhile, Barnes and Lt Wolfe set out with the other two squads towards the village, but there they get contact and fight it out. Hmmm... Since I'm only running two squads, maybe I'll run with NEIS again.
Anyway, stay tuned!
V/R,
Jack


Blimey..that was full of action! It may have taken a bit of time to play through but it was worth it. Great AAR Jack.
ReplyDelete:P
Thanks, Jim, glad you liked it! Yeah, it was a long game, which I don't mind, per se, just want things moving along as quickly as possible to keep the campaigns moving, but without giving up the decision-making aspect of the games.
DeleteV/R,
Jack
Hello Jack,
ReplyDeleteI did read this a few days ago but did not have time to comment but now I have time I can't remember everything I was going to write! I did enjoy the report and I was thinking on the way through that it probably took longer than you normally play, and at the end you confirm that. Ah well, the perils of using different rules, or stretching the size of game the rules are designed for!
I seem to remember using Platoon Forward's A, B, C blinds method to generate the opposition for one or two games, but I pre-rolled for them and put them on the table rather than wait until revealed. For the skirmish games I have played (the comic book reports) I basically used the NUTS! PEF system as my rules are loosely based on NUTS! But the Platoon Forward blinds system is ideal for the type of game in this report.
Hey buddy! Well, your bad memory doesn't leave us much to talk about, now does it? ;) Yep, the rules took a long time but, to be fair to me, they are designed for platoon-sized fights (which is how I played it) and they're not new, I've played them several times before (remember the first few fights in the Philippines by my US Marine platoon?). The reason I went away from the rules after the Philippines was because they were taking too long, but I had to give them another chance.
DeleteRegarding the Platoon Forward blind system, yes, I've done that as well. Then what I do is make real and dummy blinds, shuffle them up, and place them (semi-) randomly. Then I flip them over to determine enemy dispositions. It saves time as you don't have to stop in the middle of the game to figure what, if anything, the blinds are.
V/R,
Jack