Current situation: It's 0830 on 4 August 1990 in South Leon. Lt Gouveia has been promised a SLA mechanized battalion, and he has secured (limited amounts of) Cuban air support. The desired end-state is joint Cuban/SLA possession of Hill 114; to that end, the SLA battalion scheme of maneuver is to probe to the northeast of Hill 114 (this fight, which is taking place directly north of the map used for Operation Chunky Bandit fights 1-8), seeking to find an opening in the enemy defenses and exploit it with a hasty attack on the objective, or go firm and secure the right flank of the attack. While this is occurring, Cuban air support will pound Hill 30 (at center right of the Op CB fights 1-8), and then SLA forces will assault and hold Hill 30 (will be Op CB #10) to secure a position to support the Hill 114 assault by fire and secure the left flank of the attack. The SLA command, of course, expects the enemy to vigorously counterattack Hill 30 (will be Op CB #11). Then SLA forces will conduct an air assault to the northwest of Hill 114 (off the map for Op CB fights 1-8 to top left) to isolate the objective, preventing withdrawal and reinforcement (this will be Op CB #12), and then the assault on Hill 114 will commence (will be Op CB #13). Again, SLA leadership presumes the enemy will vigorously counterattack if Hill 114 falls (will hopefully be Op CB #14, assuming the attack on Hill 114 succeeds, but that applies pretty much to all of these).
Three hours ago (0530 local time) Staff Sergeant "Tahoe" Gallarraga accompanied the SLA mechanized battalion's A Company on a probe northeast of Hill 114, where they discovered the enemy had prepared defenses in that zone, though they were able to secure Hill 27 and thus fulfill their mission of anchoring the right (northern) flank of the upcoming attack on Hill 114. Tahoe was awarded the Bronze Star for his actions taking Hill 27.
Two hours and thirty minutes ago (0600 local time) Staff Sergeant "Gundog" Baerga accompanied the SLA mechanized battalion's B Company in the assault on Hill 45, which succeeded, but with heavy casualties, including SSgt Baerga himself, lightly wounded and evacuated. The remaining SLA elements quickly established defensive positions atop Hill 45.
Ninety minutes ago (0700 local time) Master Sergeant "Faceman" Soriano, with elements of D Company, air assaulted into LZs northwest of Hill 114. The SLA force landed in the middle of a hornets' nest, getting a CH-47 shot down and taking heavy casualties (including Face, himself, who...), though they eliminated a bunker and two entire enemy platoons of infantry, accomplishing their mission of tying up enemy forces northwest of Hill 114 and cutting, at least temporarily, Route 1, blocking reinforcement to, and escape from, Hill 114.
One hour ago 1st Lt "Lobo" Gouveia accompanies the South Leon Army (SLA) C Company (reinforced), assaulted the eastern central slope of Hill 114. C Company paid dearly, having to essentially annihilate the FSNL (Communist) defenders in their defensive positions, but now the stage is set to accomplish the objective of Phase 1 of Operation Chunky Bandit.
Now (0830 local time) we join 1st Lt "Lobo" Gouveia, SSgt "Tahoe" Galarraga, and Sgt "Snoop" Concepcion, the last three members of TF Black still in action. TF Black has borrowed a few SLA soldiers to carry gear up to Point 112, the military crest of Hill 114, where they will establish the long-awaited Observation Post and begin calling in Cuban airstrikes to cut Route 1. The remains of TF Black is being escorted to Point 112 by the SLA C Company's 3rd Platoon. This would soon be known as "The Bloodletting at OP ANGEL."

Overview, north is up. Sure, the map looks flat, but that's because the play area is so small. At this point we are actually on top of Hill 114, so that the last fight actually took place just off camera to right. The finger at top right is the opposite side of the north finger 1st Platoon assaulted (with the blockhouse), while the south finger has a much more gradual slope into the plateau atop Hill 114 so that it's not noticeable, but the defensive position where the enemy recoiless rifle was at is just off camera to bottom right. For that matter, the northeast slope of Hill 114, which was run into in Operation CB #1, would be off camera to top center right, and the enemy positions seen in the air assault (Operation CB #12) are off camera to top left. So at far left bottom is Point 112, where the remains of TF Black will establish their OP, and just off camera to left Hill 114's slope tapers off to the west, where it runs into Route 1. The ground here is cut up by previous Cuban airstrikes on Hill 114, so it's mostly craters, bombed out stands of trees, a couple of scorched spots (top left and bottom right) from Cuban napalm, and a few patches of trees that weren't touched by the bombing.

The opposing forces, with SLA on the right and FSNL (communist neighbors to the north) at left. The troops are all Pendraken 10mm, except the Cubans (the one stand that is not entirely grassed), which is Minifigs UK. I'm playing this series of fights (the SLA operation to take Hill 114) using Ivan Sorensen's "Squad Hammer" rules, modified a bit.
The SLA/Cuban force, six stands of rifles, a Browning .30-cal MG team, the SLA platoon commander (singly based), and the remains of TF Black (bottom left), which actually had to be augmented by some spare SLA troops to help them carry all their comm gear up to the observation post. I'm playing a bit smaller echelon this game, so that each stand is a fire team/weapons team, though it doesn't change the rules at all.
The enemy has nine-fireteams worth of men, but they are not a cohesive fighting force. They are actually comprised from various headquarters, support, and beat up infantry units from the past five fights in/around Hill 114. They are severely scattered and disorganized, but not cowards. Amongst this group are survivors from the last fight: the recoiless rifle team, 2nd Squad, 2nd Platoon, and the crew of Bunker #2 from the southern finger, and the 82mm mortar team from the northern finger.
So it will be up to this young man, an FSNL Lieutenant, to rally them to the cause. Damn, I need better lighting...
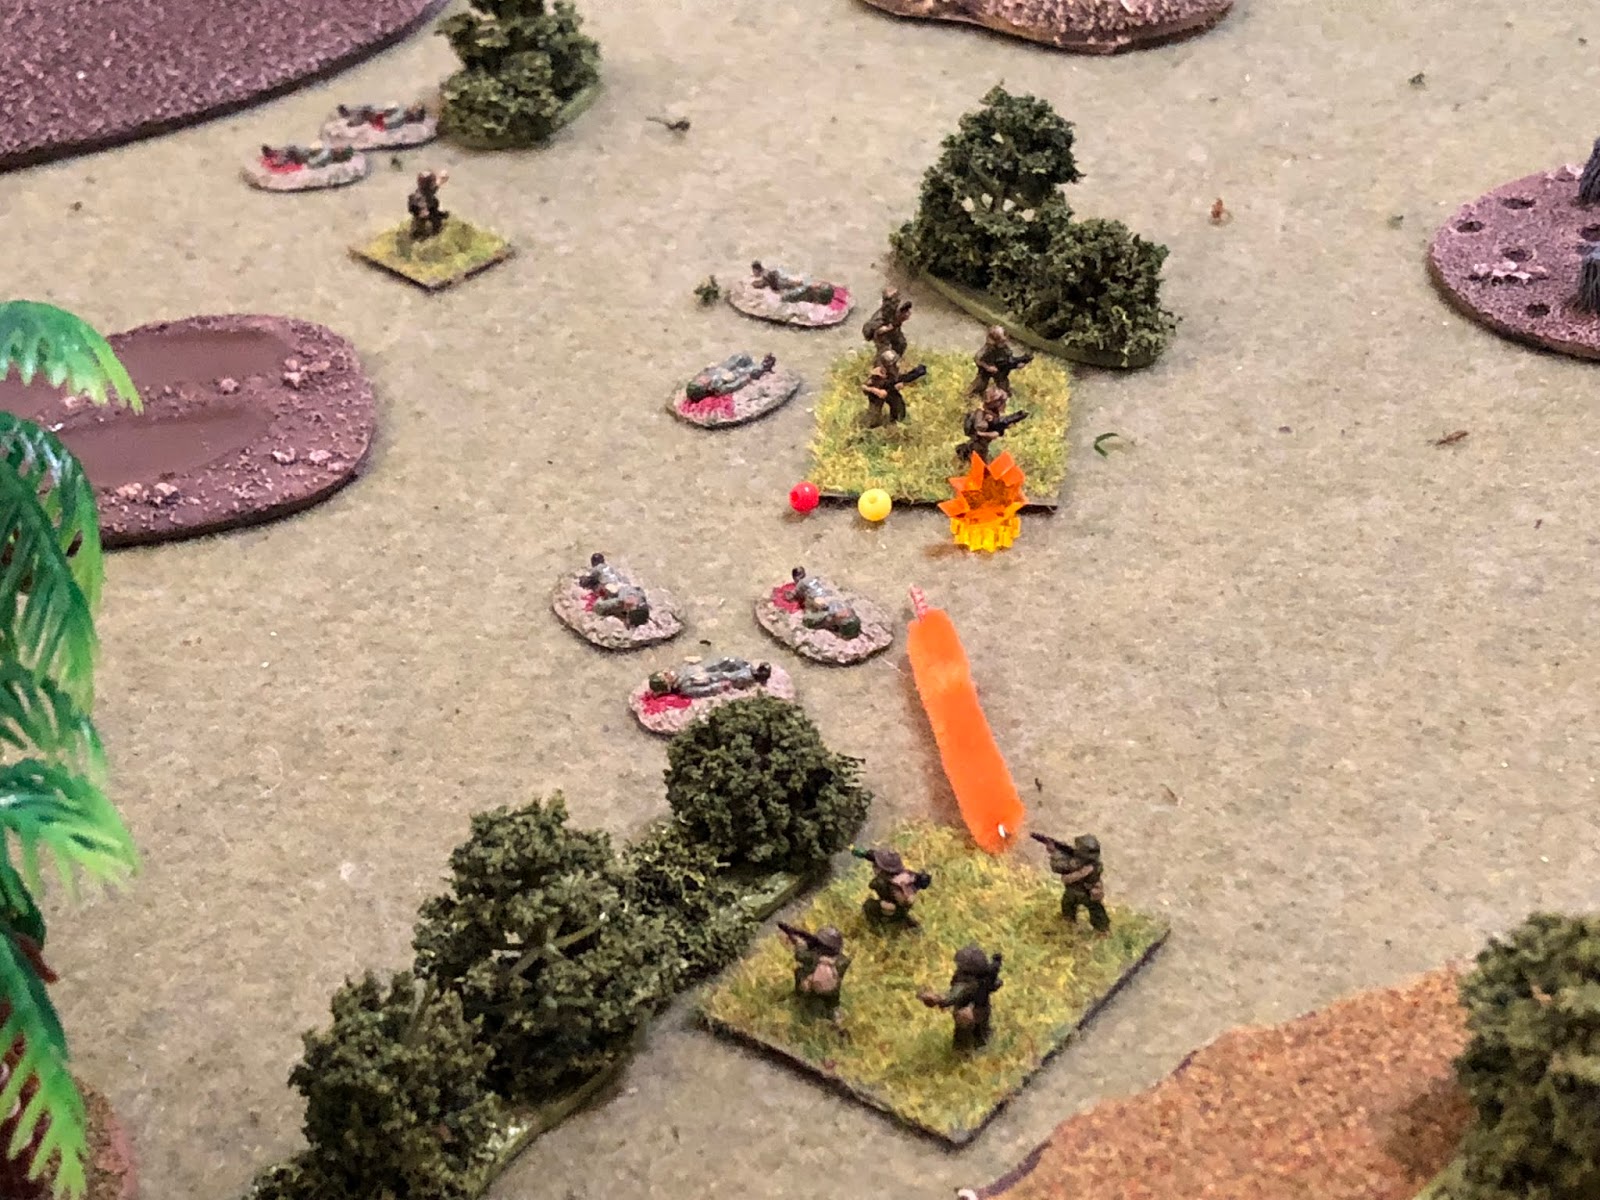
Overview, this time with troops. You can see the SLA/Cuban force at far bottom right. Their goal is simple, to get the Cuban stand up to the top of Point 112 (far left) so they can get up on comms and start orchestrating the destruction from above. The FSNL troops are spread across the map, single, confused stands running to and fro with no direction.
From the last fight, the 82mm mortar team is at top right, 2nd Squad, 2nd Platoon is the two stands at bottom center, the recoiless rifle team is at bottom left, and crew from Bunker #2 is at center. At top left are stragglers from the air assault on Route 1, at top center are stragglers from the probe to the northeast, at top center right are stragglers from the defense of Hill 45, and at center left are stragglers from the counterattack on Hill 45. The enemy Lieutenant is also at top center right.
The SLA/Cuban force, with the two fireteams of 1st Squad leading the way (left), the Lieutenant just behind them with the MG team, 3rd Squad at top left, and 2nd Squad at far right, with the Cubans just behind them.
Their objective. Go West, young man! The proposed Observation Post (OP) is located here; this the area reconnoitered and reported back by the SLA Scout Snipers in Operation Chunky Bandit #4. This peak is now being referred to as OP ANGEL.
A look at the battlefield to give you an idea of the FSNL 'deployment,' staring in the northwest (top left) corner of the board. Here you can see three fireteams: stragglers from the air assault (top left), the probing attack (top right), and Hill 45 counterattack (bottom right).
Moving right (clockwise) to the northeast, the FSNL Lieutenant is at top center left. Enemy fireteams are: probing attack (top left), defense of Hill 45 (center top), and northern finger 82mm mortar team (top right without mortar).
The southeast, or bottom right, corner, with the SLA/Cubans at right, a single enemy stand at top left (2nd Fireteam of 2nd Squad, 2nd Platoon on southern finger).
And in the southwest, with bad guys in and around the objective area. Enemy fireteams are: Bunker #2 crew (top right), 2nd Fireteam of 2/2 (just visible at far right), 1st Fireteam, 2/2 (bottom right), and the recoiless rifle taem (bottom center left).
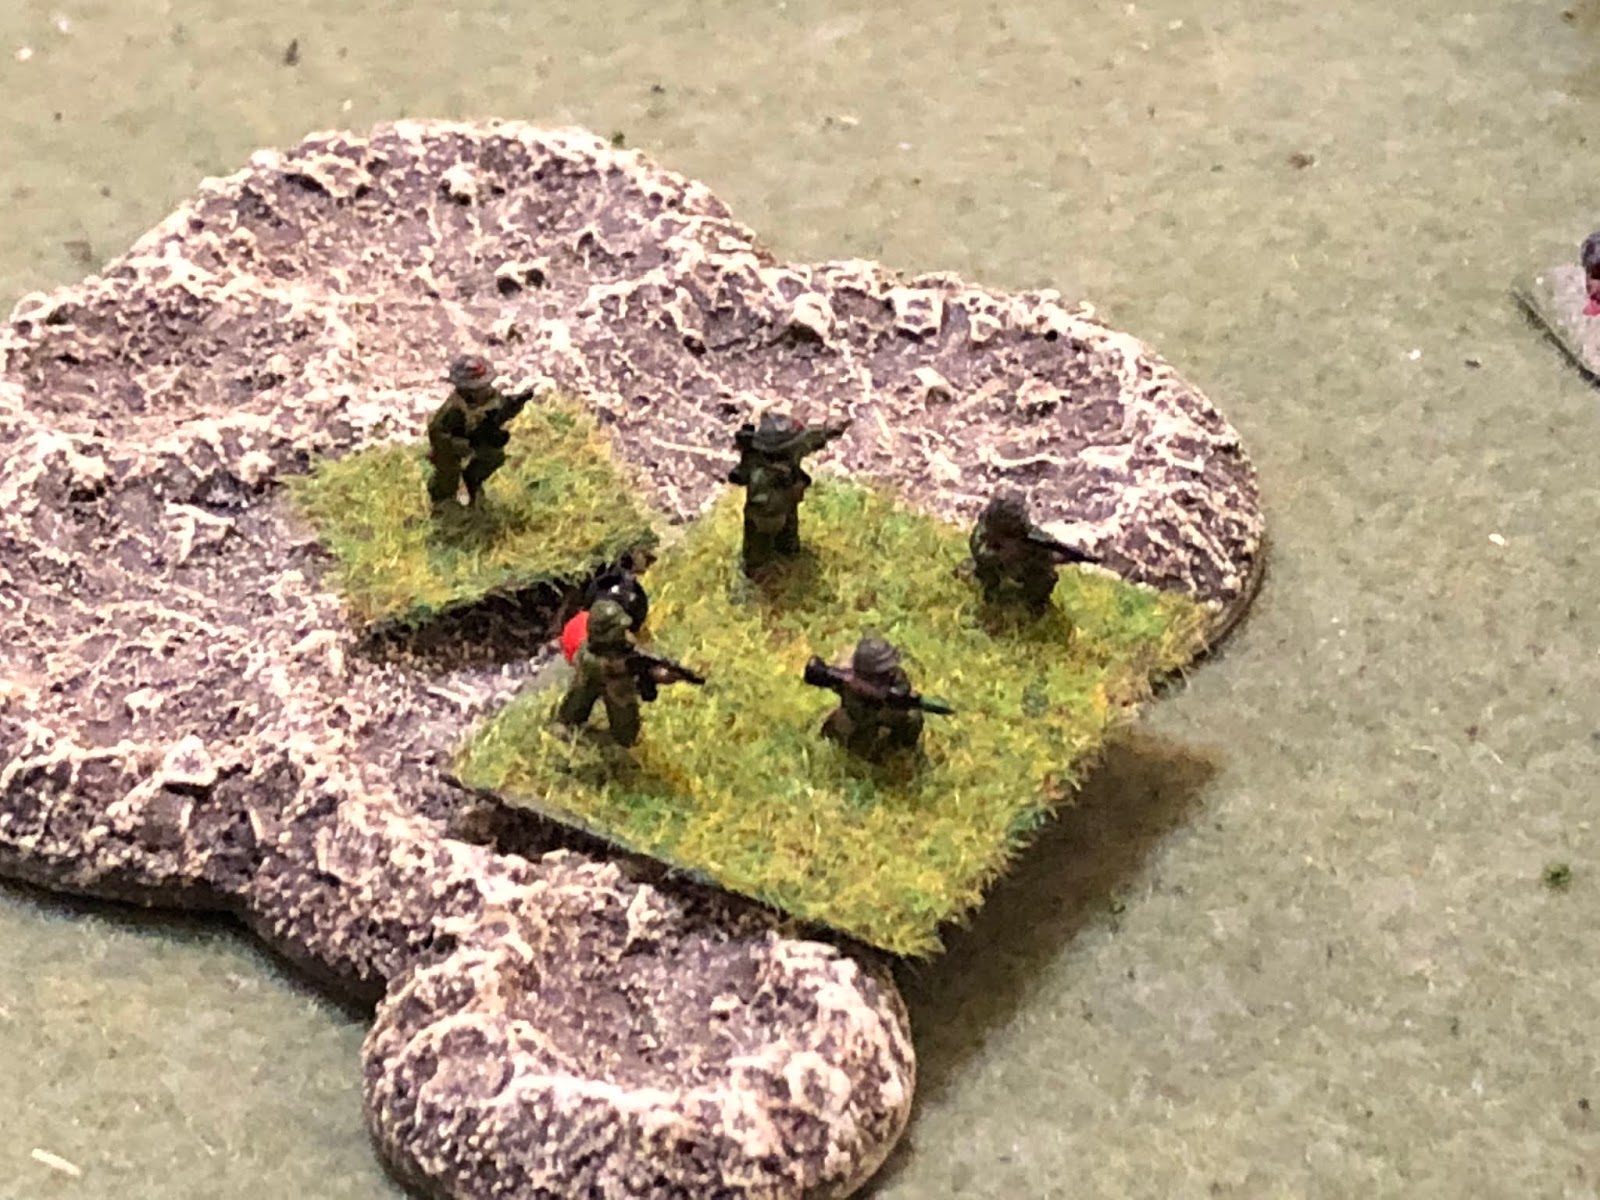
The enemy leader, frantically searching for a way to rally the troops.
You can see him at top center, with five teams of riflemen nearby, so plenty of folks for him to influence and inspire to stop the SLA and Cubans from doing their dastardly deed.
The Communist leader (far left) looks east and spies the SLA forces (top center/right) streaming up the saddle between the two fingers constituting the shattered FSNL defense on the east slope of Hill 114. "Dammit," he muttered to himself, "I must get these men out of here before they, too, are swallowed up by the traitors and their imperialist running-dog lackeys."
Looking east to west from the backside of the northern finger in the northeast, the 82mm mortar team moves downslope, running away (far right, from bottom center, OP ANGEL at top left).
And with that, 2nd Fireteam, 1st Squad (2/1) moves up across a patch of napalm-scorched earth (center bottom left, from right), staring at the backs of the enemy's Bunker #2 crew (left)…
They take up position behind a hedge and open fire...
Ruthlessly gunning down the fleeing Communist soldiers!
The FSNL Lieutenant (center top) looks on as stragglers from the Hill 45 defense run by, fleeing west (top center, from right).
In the southwest, the 2nd Fireteam of the enemy's 2nd Squad, 2nd Platoon (2/2/2) runs west (bottom left, from center bottom).
While in the center, the SLA Lieutenant and 1/1 move up (center, from far right).
1/1 takes up position behind some scrub and spots stragglers from the Hill 45 counterattack. The SLA riflemen calmly shoulder their weapons and open fire...
Being caught running away, in the open, the enemy team is roughly handled, nearly being eliminated (4 hits). They promptly run for their lives (bottom center, from explosion at far right).
Looking west to east in the southwest, the guys that just got beat up are at left: the recoiless rifle team runs west, almost exiting the map (bottom center, from right, where both fireteams of the enemy 2/2 are).
Looking east to west, the SLA 2nd Squad moves up on the left flank (left, with 1/2 at center, their Lieutenant and 1/1 at right, 3rd Squad and the MG team at bottom center right, and the Cubans at bottom left). 2nd Squad is unable to see any bad guys.
In the southwest, the route continues. The enemy 1/2/2 moves west, chasing their recoiless rifle team (far left).
On the SLA left, the 1st Lt "Lobo" Gouveia cautiously leads his team forward (center bottom, from far right), pulling up behind 2nd Squad (bottom left). Lobo bit his lip in anticipation: we're so close, almost there, gonna turn this thing around, show these Commies they made a big mistake...
And as the Cubans move up, MG Team moves up between 1st Squad's two fireteams, next to the Lt (center top left, with 3rd Squad kinda holding reserve at top right).
In the north, the FSNL Lieutenant (bottom left) is crouched down, trying to figure out whether to run or fight, wanting to fight but not sure how, or why. He's spotted the imperialists' puppets moving in from the east (top); why such a small force, moving so quickly, why not more methodical, like their units to the north and south? What are they up to? His eyes lock in a specific group in the southeast (top right). What is it about them?
They are different. They have white men, and brown men, not just black men. And their uniforms are different, and they wear floppy hats, not helmets. And they're carrying many things, not just in the large packs on their backs, but even in their hands. These men are special! We must stop them! I don't know what they are doing, but I will stop them, or I will die trying!
He quickly grabs a nearby group of men, stragglers from the defense of Hill 45, and they sprint right (top right, from top left), attempting to cut off the Cubans (off camera to top right). As they run, the Communist Lieutenant is beckoning to other groups of FSNL troops to join him.
Looking east to west, the SLA 3rd Squad moves up in the center (center, from bottom right), right behind 2/1, with the Lt, MG team, and 1/1 to their right and 2nd Squad to their left. The enemy Lt and Hill 45 defenders are behind the trees at top center, the only bad guys so far really looking to get into the fight.
That was all about to change...
Looking west to east in the north, the enemy stragglers from the air assault (bottom left) see their Lieutenant running and calling (tp center right), and they're digging what he's cooking...
So they sprint ahead to assist (far right top, with their Lt and Hill 45 defenders above them, the Hill 45 counterattack stragglers, beat up by the SLA 1/1, at far right, and the northwester probe stragglers at top left.
Though the Communists are finally starting mount a defense in the center (top right), they still have men running in the southwest, where the 2nd Fireteam, 2/2, moves closer to the exit (bottom left, third from left).
The Communist Lieutenant leads the Hill 45 defenders into position in the center (top center, from left, with the air assault defenders at center and the Hill 45 counterattackers at bottom center).
The Communists spot 2/1 (top center) and open fire, though they fail to hit anything.
As they're firing (far right), the air assault defenders move into position on their left (center right).
And they (bottom left) open fire on the SLA MG Team (top center, with 2/1 and 3rd Squad at top right, the Lt next to the MG Team, and 1/1 at top left)…
The fire is ferocious and almost puts the MG Team out of action (3 hits) before they've even got the Browning into action!
And as things firm up in the enemy center (bottom right, SLA at top right), that inspires more Communist teams to cease their flight and join in. The enemy 82mm mortar team moves back up the northern finger (left top, from left, with northeast probe defenders at far left) and takes up defensive positions.
They (bottom center) are above and around 1/1's (center left) defilade, they deliver ferocious enfilading fire into 1/1's flank...
Putting a hurtin' on them (top left, 3 hits, with SLA Lt at center right and the MG Team beat up at bottom right)!
Caught in a crossfire (enemy 82mm mortar team off camera to top left, enemy Lt, Hill 45 defenders, and air assault defenders off camera to bottom left), the SLA Lieutenant sets about rallying the MG Team (center), but it's not much use (-1 hit, 2 total). He looks to 3rd Squad and orders men right to shore up that flank; 2/3 promptly charges in (top center, from far right).
They (bottom right, 1/1 at bottom left) immediately return fire on the 82mm mortar team (top center, with northeast probe defenders at top left), to no effect.
And as that is happening (82mm mortar team at left, 2/3 at top center right), the northeast probe defenders rush east and take up positions in a nearby set of craters (center left, from bottom left), slamming the door in the north.
As 2/3 (top right) is focused on the 82mm mortar team (far left), the northeast probe defenders (center bottom) catches them in the open and unawares...
Gunning them down (right, with 1/1 beat up at left)!
And as their squad-mates are gunned down (top center right), 1/3 was already on the way (top center), taking up position between them and 1/1.
1/3 (center bottom left, with 1/1 below them) quickly goes to guns on the northeast probe defenders (top left, with 82mm mortar team at bottom right), but the situation is desperate and they only manage to a couple casualties (2 hits).
And with all their buddies getting back their fighting spirit (Communists in the northeast, top left, and center, right), the Hill 45 counterattackers, beat up earlier by 1/1, move up to help fill the line (center left, from bottom center).
They (bottom center, with the air assault defenders at far right) spot 3/1 through a gap in the jungle and open fire, causing a couple casualties (2 hits).
With things falling apart in the center and right, the Cubans remind 2nd Squad (left) the mission is to get to OP ANGEL (top center left), and so 2/2 moves up (far left) in the bushes, following the fleeing bad guys in the southwest (top left).
2/2 gets into position (bottom left) and opens fire...
Seriously disrupting 2/2/2's day (4 hits at bottom center, 1/2/2 above them and the recoiless rifle team above them)!
With the SLA Lieutenant (bottom right) screaming at them, the MG Team finally gets the Browning .30-cal into action. The gun is on the tripod and bucking sending rounds at the enemy Hill 45 defenders (top center, behind the hedges, with the Communist Lieutenant visible just right of them).
The enemy team is under heavy fire from the MG Team (bottom right, taking three hits). Their Lieutenant and air assault defenders (center) look on, as do the Hill 45 counterattackers (top left).
With the MG Team (bottom right) pounding away and the situation deteriorating fast, the 2/1 team leader decides something needs to be done ASAP, so he heads his men forward (top left, from center), looking to envelop the enemy center (top center).
2/1's men level their rifles and hammer away at point blank range...
Putting the Hill 45 defenders out of the fight!
And the worm is turning: as 1/2 is doing their thing (top center left), 1/2 moves up on the left, joining 2/2 (far left, with Cubans at bottom center left, MG Team, Lt, and 1/3 at far right).
The SLA troops open fire on the enemy's 2/2/2 (top center)…
Finishing them off (top right)! But it's a double-edged sword: at the time, the enemy's 1/2/2, 2/2/2, and recoiless rifle team were intent on saving their butts by fleeing west (down), but now they can hear the roar of a real fight to their northeast (top left), meaning there are other friendlies nearby and putting up a fight, and now they've had some comrades whacked right next to them, they realize flight might not be the safest option. They both decide to fight!
*Unfortunately...
1/2/2 immediately faces about and moves east (top right, from center right).
Where they return fire on the SLA's 2nd Squad (top right), though they don't hit anything.
As 1/2/2 (bottom right) is firing it up, the recoiless rifle team says, "you know what, bump that, we're outta here," and they run (top left, exiting the field of battle)!!!
*Every little bit helps!
With 2nd Squad doing their thing (far left) and 1st and 3rd Squads having to hold their own in the center and right (right), Lobo leads his team forward (center left, from bottom left), looking to help seal the deal in the center (2/1 is at top left, having charged ahead to envelop the enemy center).
The Cubans (bottom right, with 2/1 at far left) can see enemy activity in the grove (top center) and open fire, to no effect.
Back on the right, 1/1 (casualty and red bead at bottom right, with 1/3 just visible right of them, the SLA Lt and MG Team to their left, Cubans at far left, 2/1 at top left) sight in on the Hill 45 counterattackers (top right) and open fire, scoring one hit (4 total).
The SLA MG Team (bottom center, with yellow bead) can't spot any enemy troops in the center (top center/left), so they turn their focus north (top right).
The gun (bottom center, with Lt, 1/1, and 1/3 above them) gets going again, this time on the northeast probe defenders (top left, with their 82mm mortar team in the bushes at top right), roughing them up a bit (2 more hits, 4 total).
With the MG Team (far right) laying it down, the Cubans (left) continue firing into the grove (top center), putting a couple casualties (2 hits) on the air assault defenders.
With the Cubans (bottom right) laying down suppressive fire, 2/1 (far left) pops up to take a look...
The enemy Lieutenant (bottom center, air assault defenders above him) is no idiot. He hears the volume of fire pick up (off camera to right), and he sees 2/1 (off camera to bottom right) turkey-peeking...
He falls back through the hedges...
Just as the SLA's 2/1 comes busting through the brush, firing as they go! The air assault defenders take a couple more casualties (4 hits total, almost out of the fight).
The Cubans (bottom center) continue laying down fire as 2/1 (top left) envelops the Communist Lieutenant and air assault defenders (top center left). 1/1 then dashes up into the cover of some nearby craters (center top left, from right, where the MG Team, Lt, and 1/3 are).
They quickly get into position and add their weapons to the fight in the grove...
The air assault defenders are knocked out! With his center crumbling, the enemy Lieutenant...
Falls back into the craters with the Hill 45 counterattackers (bottom left, from left), and quickly directs them to fire on 2/1, where they cause a couple casualties (2 hits).
As that is happening in the center (bottom right), the Communist 82mm mortar team (top left) watches as their compadres, the northeast probe defenders, leave the shelter of their craters (far left) to advance (center left) on the SLA's 1/3 (top center, with SLA Lt and MG Team at top center right, 1/1 at right, and the Cubans just visible at top right). A bold move, but the SLA has definitely left its right flank (top center) vulnerable while focusing on the center and left.
The Communists open fire at point blank range...
The fire is devastating, staggering 1/3 (3 hits, 5 total, top center, with Lt and MG Team at bottom center)!
Seeing the success of their comrades (center) against 1/3 (left), the Communist 82mm mortar team moves further northeast (far left, from center bottom).
Seeing how precarious 1/3's (left) situation is, they choose to fire on the SLA commander and MG Team (left top, with Cubans above them and 1/1 at top center).
The SLA Lieutenant looks on as his MG Team is gunned down!
In the southwest, things have gone relatively quiet since 2/2/2 was gunned down (casualties at left) and the recoiless rifle team ran away like cowards (off camera to left); 1/2/2 moves up OP ANGEL, taking cover behind a rocky outcrop.
They settle in (bottom left) and resume firing on the SLA's 2nd Squad, though they continue their streak of hitting nothing.
Having said that, 1/2 (bottom center, with 2/2 behind them) returns fire harmlessly.
But while 1/2 is laying down cover fire (far left), the Cubans and 2/2 take advantage of the rupture in the center and dash through (center top, from bottom left, with 2/1 just right of them, 1/1 at right bottom, and the enemy Lt and Hill 45 counterattackers at top right), moving up OP ANGEL!
1/2 (bottom left) continues firing on the enemy's 1/2/2 (top center), and the Cubans (right) look on as 2/2 moves further up OP ANGEL (top right), looking to flank the enemy.
Under fire and now flanked by SLA soldiers above them (top right), the Commnists surrender!
*Don't know if you can make it out, but those are actually surrendering troops, hands raised and all. I use them all the time, but I don't know that I've ever explained or really showed them. It is 10mm and my lighting sucks, so they are a bit hard to see...
But while things are going swimmingly on OP ANGEL (top right), things are getting ugly on the SLA's right flank. From the back side of the northern finger, the enemy's 82mm mortar team moves down (far left), flanking 1/3 (just right and above them, with the SLA Lt above them and their buddies, the northeast probe defenders, at center).
*It's interesting because while the 82mm mortar team has remained in the fight, they've been very timid; it would have made more sense for them to move into close combat with 1/3 and quickly finish them off, then move on the SLA Lieutenant, maybe charge, or at least move in behind 1/1 (top center). But I roll to see what they'll do and they keep taking baby steps, and it does help.
Having said that, all is not well. The 82mm mortar team has flanked 1/3 and delivers point blank fire into them...
Knocking them out! They fall next to their comrades, 2/3. The SLA Lieutenant now finds himself alone on the right flank, facing down two enemy teams amidst a the broken bodies of his loyal soldiers...
And while the 82mm mortar team (bottom left) is cutting down 1/3, the northeast probe defenders decide to charge, leaving the cover of the bombed out patch of woods (far right) to rush 1/1 sheltering in the craters in the center (top center)!
*If they can pull this off, this is huge, they'll be behind the rest of the SLA force (off camera to top center/right).
Both teams, SLA (left) and Communist (right) are already severely beaten up, and the enemy troops crash into 1/1's flank.
1/1 is quickly put out of the fight! And while this penetration is significant, it's not as bad as it could be since the enemy team is too exhausted to follow up the attack by pushing further.
The SLA Lieutenant (center) has got the northeast probe defenders at far left and the 82mm mortar team at top right. He has an idea...
*Yeah, I'm about to cheat a bit! I wouldn't have done it if the northeast probe defenders would have kept going, but now that they're spent and the 82mm mortar team is so timid, why not?
*Sorry, I don't have an MG manned by only one guy, so I had to make that up about wounded troopies...
He turns it on the 82mm mortar team and cuts loose!
The gun rattles and rolls, roughing up the 82mm mortar team (4 hits)!
*If they weren't timid before, they will be now!
Back in the center, the Communist Lieutenant has lost two teams and is working on making sure he doesn't lose a third: he rallies the Hill 45 counterattackers, and he's feeling extra heroic and thus is extra inspiring (-3 hits, down to 1 total)! He decides the time is right to push his luck...
The Communists charge 2/1!
The SLA soldiers are so shocked at the sight of the Communists charging them that they barely put up a fight (1 hit on the enemy, for 2 total) as they are wiped out!
Their blood is up, they're feeling their oats, yadda yadda yadda, they turn right and charge up OP ANGEL, crashing into the Cubans, who are busy dropping packs and chucking gear to fight as the Communists crash into them, led by their Lieutenant!
*This is crazy! Things have somewhat stabilized on the right, the enemy doesn't have much left there, while the SLA still has all of 2nd Squad available, if they can just get there, but this is key: if the Commies can knock the Cubans out of the fight they will not be able to stand up the OP and become Forward Air Controllers to call in air on enemy reinforcements coming down Route 1, so all of Phase 1 thus far would be a complete failure!
The two sides clash, nothing but blood, guts, and spittin' ass (3 more hits, for a total of 5, on the enemy, 4 hits on the Cubans)!!!
1/2's dilemma: 2/1 is at bottom center. The Cubans are clashing with the Communists on OP ANGEL at top left, and the SLA Lt (just off camera to right top) is alone on the right flank facing two enemy teams (one is visible at top right, the other off camera to top right). What should 1/2 do???
They move right (center right top, from bottom center), figuring they couldn't get there to help the Cubans in time anyway (they can't reach to get into close combat, and they can't fire into the melee for fear of hitting the Cubans).
The Cubans are either going to have to hold their own, or hold out until 2/2 (off camera to far left) gets there. Don't worry, it's not like it's all, Operation Chunky Bandit fights 1-14, for naught if the Cubans get wiped out or anything...
1/2 gets to the edge of the crater field and opens fire at point blank range...
Easily finishing off the severely depleted remnants of the enemy's northeast probe defenders.
But there it is, the weight of the world. The Cubans are locked in close combat with the Communist Lieutenant and Hill 45 counterattackers, while 2/2 (top left) has moved up OP ANGEL and taken the enemy 1/2/2 prisoner.
*The picture doesn't really make sense in normal terms, and I suppose some guys will hate it because it's one of those 'gamey' things that sometimes happens in, well, war-gaming. That's the end of the turn, so I count up units on each side: the Communists have three, the SLA has five. I get three Commie cards and five SLA cards, put them together, and shuffle them up. This entire thing is literally going to come down to a card draw, because whomever's card comes out first is going to win the whole thing: if a Communist card comes out, they will choose to continue the close combat already in progress and surely wipe out the Cubans, who already have 4 out of a possible 6 hits. If a SLA card comes out, 2/2 will come back and charge into the close combat, where they will assuredly knock out the enemy unit, which already has 5 out of a possible 6 hits. There is one wild card; the enemy Lieutenant is a single man, so I don't really have him 'statted out' in terms of how many hits he could take, or inflict.
I suppose it could be possible for a SLA card to come out, 2/2 charges, rolls low and wipes out the northeast probe defenders but not the enemy Lieutenant, and then a Communist card comes out and the enemy Lieutenant rolls high and takes out the Cubans?
Anyway, time to find out...
Yep, I didn't cheat, but that won't stop Shaun, now will it? 2/2 charges back down OP ANGEL (left) and enters the melee...
They take several casualties (3 hits), wiping out the enemy team AND their Lieutenant in the process!
*Back from the brink...
In the north, 1/2 (bottom left) and the Lt (still managing the MG at center right) face down the enemy 82mm mortar team (top right)…
The timid mortarmen promptly surrender.
The SLA 3rd Platoon checks casualties, redistributes ammo and water, and pulls security as the Cubans set up on the military crest of Hill 114...
1st Lt "Lobo" Gouveia, SSgt "Tahoe" Galarraga, and Sgt "Snoop" Concepcion, the last three members of TF Black still in action and supported by members of the South Leon Army, are in business, directing traffic.
And putting the flyboys to work.
But what a slaughter. From a reinforced rifle platoon of about 45 men, the SLA suffered 30 casualties, while the Communists saw almost their entire force annihilated: five men (the recoiless rifle team) fled the area to survive, ten surrendered, and thirty-five were killed.
As bloodbaths often do, personal valor was much on display here, on both sides. The SLA Lieutenant, for his combat leadership under intense enemy fire, and ultimately manning a machine gun on his own to hold off the enemy collapsing his right flank, was awarded his country's version of the Distinguished Service Cross. The team leaders for 1/3, 2/3, and 1/1 all received the Bronze Star, posthumously, while the team leader for 2/2 was the only surviving team leader to receive the award (for saving the Cuban team via close combat).
Regarding Phase 1b, I used the "Squad Hammer" rules for six straight games and had a good time. For fights of the echelon I played here I will probably continue to use 5Core Company Command, but I worked out the kinks for the system and feel extremely confident I can get them to do what I want them to do in higher echelon (battalion/brigade/divisional) fights, so we'll definitely be coming back to these (I intend on these being the staple for my WWII Caen project).
But with that, this portion Phase 1b of Operation Chunky Bandit is now concluded, OP ANGEL is in operation, directing aerial interdiction operations to sever Route 1 and isolate enemy forces in vicinity of Pendrakenville, the South Leonian capital city. Now we move to the 'other' portion of Phase 1, where TF 23 and TF Dusty are working west of Route 1 to locate and destroy FSNL command and control nodes. We will also have some aerial dogfights, where first Cuban fighters attempt to protect Cuban/SLA ground forces from FSNL air attack, and then, once OP ANGEL is in operation and Task Forces 23 and Dusty have done their jobs, the Cuban Air Force takes the fight to the enemy. Then we'll move into Phase 2, the breakout by Task Forces Redleg and Razor, cut off north of Pendrakenville. I'll also be stepping out for a bit to visit the South Pacific, aerial dogfighting style.
V/R,
Jack


Great stuff as usual.
ReplyDeleteCheers,
Pete.
Thanks, Pete!
DeleteV/R,
Jack
I appreciate it, Andy!
ReplyDeleteV/R,
Jack
Hello Jack
ReplyDeleteI am finally here with only one to go to catch up! I did note your comment in the above post about whether you did some sleight of hand with the last card draw. For the record, I do not think you cheated - I really do think the Cuban card was drawn. But we will never know what would have happened if a Communist card was drawn... :-) Actually I believe you would have not have changed the card draw but ,maybe reached for the "magic dice" for the following close combat :-)
These have been a great series of battle reports so far. Although weeks behind, I will be a little sad reading the next one as it is the last one in my reading backlog.
Hiya Shaun,
DeleteGlad you made it, a real glutton for punishment! ;)
I don't think even the magic dice could have saved that one, there was no way the Cuban SOF team wasn't getting knocked out if the bad guys got the drop on them. I'm certainly glad you liked the series of batreps, they were a lot of fun for me and I'll definitely be playing more Squad Hammer.
And don't feel sad, I'll be working on getting some games in this coming weekend, and then I'll have a four-day weekend for Thanksgiving. I also have seven (7!) dogfights to write up, but while they were fun to play, I'm having no joy writing them. They're much bigger aerial fights than I've done before (about 16 aircraft on the table, total), and so there are a million pics for each batrep, and unlike the ground fights, I have to edit each and every photo to make it easier to follow along, which takes FOREVER. So I'll get to them when I can, but just know that they are patiently waiting in the wings.
V/R,
Jack