Current situation: It's 0530 on 4 August 1990 in South Leon, and 1st Lt "Lobo" Gouveia has solicited the support of local South Leon Army (SLA) units to divert precious resources to carry out an operation to take Hill 114, following which Lt Gouveia's ODA-313, AKA "Task Force Black," will establish an Observation Post (OP) overlooking Route 1 (the major north-south artery which enemy troops are using to reinforce Pendrakenville and Diwala) and call in air strikes to halt the flow of enemy forces, which was the original plan. Lt Gouveia's team spent the past week engaging enemy forces in vicinity of Hill 114, both inflicting and taking heavy casualties, and on the night the Cuban commandos were set to infiltrate Hill 114 and establish their OP they were ambushed on Bridge #1. Not only did the Cubans not accomplish their mission, thereby forcing the delay of the coming offensive to re-take Pendrakenville and Diwala, but they also allowed an enemy logistical column to sneak "special munitions" out of the area.
Lt Gouveia has been promised a SLA mechanized battalion, and he has secured (limited amounts of) Cuban air support. The desired end-state is joint Cuban/SLA possession of Hill 114; to that end, the SLA battalion scheme of maneuver is to probe to the northeast of Hill 114 (this fight, which is taking place directly north of the map used for Operation Chunky Bandit fights 1-8), seeking to find an opening in the enemy defenses and exploit it with a hasty attack on the objective, or go firm and secure the right flank of the attack. While this is occurring, Cuban air support will pound Hill 30 (at center right of the Op CB fights 1-8), and then SLA forces will assault and hold Hill 30 (will be Op CB #10) to secure a position to support the Hill 114 assault by fire and secure the left flank of the attack. The SLA command, of course, expects the enemy to vigorously counterattack Hill 30 (will be Op CB #11). Then SLA forces will conduct an air assault to the northwest of Hill 114 (off the map for Op CB fights 1-8 to top left) to isolate the objective, preventing withdrawal and reinforcement (this will be Op CB #12), and then the assault on Hill 114 will commence (will be Op CB #13). Again, SLA leadership presumes the enemy will vigorously counterattack if Hill 114 falls (will hopefully be Op CB #14, assuming the attack on Hill 114 succeeds, but that applies pretty much to all of these).
So Staff Sergeant "Tahoe" Gallarraga has been assigned to accompany the SLA mechanized battalion's A Company, whose mission is to see if they can catch the enemy off guard and sneak onto the backside of Hill 114, or, if not, secure some terrain features northeast of Hill 114 in order to secure the right flank of the assault on Hill 114.

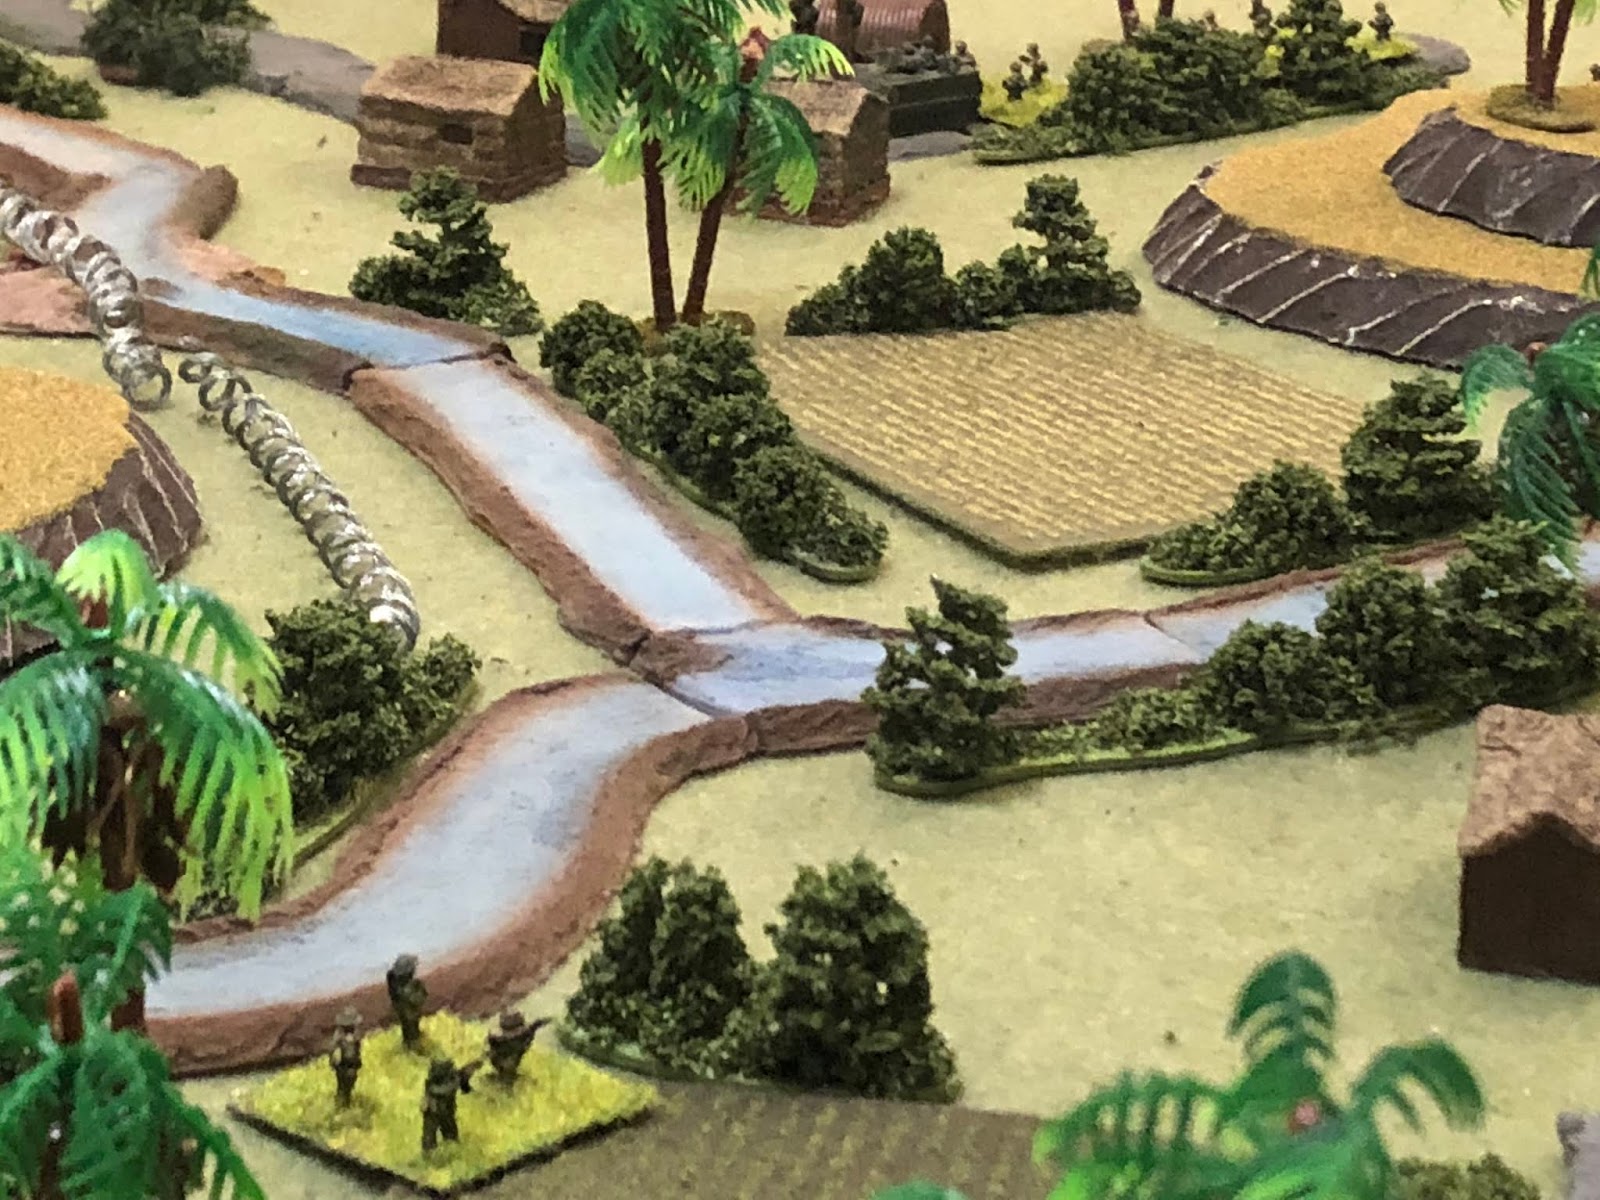
Overview, north is up. Hill 114, the ultimate objective, is at bottom left, though I wouldn't expect the SLA troops to be able to just mosey on up there. At top center is Hill 27, at right is Hill 29, at center is village #1, top right is village #2, and at bottom right is village #3. The river is crossable, with penalty, by infantry anywhere; vehicles can only cross at the three fords (top left, top center, and bottom center), and infantry cross at the fords without penalty.

The opposing forces, with SLA on the right and FSNL (communist neighbors to the north) at left. The troops are all Pendraken 10mm, except the Cuban (singly-based dude at bottom center right), which is Minifigs UK. The M-113 ACAV is also Pendraken, though the M-48 is plastic from Takara. The two bunkers at bottom left are from Flashpoint Miniatures, and the sandbagged position is from Miniature Building Authority. I'm playing this series of fights (the SLA operation to take Hill 114) using Ivan Sorensen's "Squad Hammer" rules, modified a bit.
The SLA force: two rifle platoons (of three rifle stands each), the company commander (stand with only three man on it at bottom left), an 81mm mortar team (just above the CO), an M-48 tank (Zuma 1-1), and an M-113 ACAV (Scar 2-2). SSgt "Tahoe" Gallarraga is the single figure at bottom left.
The bad guys: a rifle platoon at right (platoon leader and three rifle squads), two squads in bunkers, and a 12.7mm HMG ("Dshk") in a sandbagged position. They'll also have some barbed wire.
Overview, this time with troops. Unfortunately for the SLA/Cubans, the bad guys were expecting trouble to the northeast, so they're well prepared, with defensive positions on Hill 114 (bottom left), an outpost on Hill 27 (top center), and roving patrols between them (top left). The SLA forces had divided into two roughly equal parts: top right, and far right, with their mortar set up on the lee of Hill 29 (far right).
On Hill 114 the bad guys have their Dshk (bottom left) and a bunker (center), with wire protecting them on the western edge of village #1 (top right).
The enemy has a bunker atop Hill 27 (top center right), protected by wire on the west bank of the eastern fork of the river (right), and a roving, platoon-size patrol is nearby (far left).
The SLA deployment: the Scar and 2nd Platoon, accompanied by Tahoe, are at top right, while Zuma and 1st Platoon, accompanied by the CO, are at bottom right, with the 81mm mortar team at center right, on the backside of Hill 29).
A look at village #1, with enemy wire at left (Hill 114 off camera to bottom left).
Village #2, where Scar leads 2nd Platoon forward.
And village #3, where Zuma and 1st Platoon are moving up.
Time to fight!!!
The game is afoot! The action starts in the southeast, where the SLA 1st Squad, 1st Platoon (1/1) moves up (far left, from bottom center), halting near a stand of trees, searching for signs of the enemy and finding none (Hill 114 is at top left, its bunker visible just above the trees 1/1 is catching some shade from). The SLA CO (bottom center, behind Zuma, the tank), is nervous; he knows the enemy is out there...
The enemy bunker on Hill 114 (bottom center left) has spotted movement (1st Platoon, top center)…
The enemy (bottom left) doesn't see 1/1 (far right), but they do spot 2/1 (top right). Their PK machine gun roars, spitting green tracers northeast...
Machine gun rounds zip and flash by 2/1 (near explosion at center top); the CO orders Zuma forward (far left, pulling up next to 1/1, from right center).
1/1's Sergeant is on the tank-infantry phone, directing fire, talking the tank onto the enemy bunker (top center). The 90mm gun roars...
But the HE round crashes harmlessly into the earth!
As the tank round throws up showers of dirt (far left, just right of the bunker), further up Hill 114 the Dshk (bottom center) has spotted 1/1 (top center right), and it begins slewing massive, thumb-sized rounds at the hapless SLA infantry...
Causing heavy casualties (taking five hits, and they can only take six)!
With 1/1 (top center left) in jeopardy, the SLA CO dashes that way (the lower of the two infantry stands, coming from center bottom), but the CO is unable to rally them as his team had to sprint just to reach 1/1).
The enemy's patrol platoon (bottom center) is alerted by the gunfire in the southeast (top right, where you can see the SLA 1st Platoon under fire). They are as yet unaware of the presence of the SLA 2nd Platoon (top left, with Hill 27 and its bunker at far left), so they send their 1st Squad to scout ahead (center right).
But the scouts (bottom left) aren't able to see anything yet (2nd Platoon at top center).
Back in the southeast with 1st Platoon the SLA CO (center bottom, just above Zuma, the tank) calls on his mortar team (top right).
"Roger!"
The 81mm mortar (bottom right) pumps out three rounds at the enemy Dshk (top left)…
And the rounds are on target (scoring two hits, remember that the position does not have overhead cover)!
Back in the enemy center, the enemy platoon leader takes his 2nd Squad up to join the 1st (center right, from bottom left, where their 3rd Squad remains). They still don't see the SLA forces.
And the same remains true as their 3rd Squad joins them. This is not totally unexpected, there's a lot of foliage between the antagonists, and don't forget, this platoon has not been spotted by the SLA troops, either.
Back in the southeast, the mortar continues pumping out rounds (far right) as 1/1 tries to recover (far left); 3/1 moves up onto Hill 29 (center top right, with 2/1 to their left, just below them). They search for any signs of the enemy...
From their new perch (bottom center) they are able to spot the enemy bunker on Hill 114 (center top left, with the Dshk at top left). They open fire, to no effect.
The SLA 2nd Platoon (top center) has been slow to move, with all the action south (off camera to right) of them with 1st Platoon, but it actually helps them out. The enemy bunker on Hill 28 (bottom center) has tried their best to hold fire, waiting on the SLA 2nd Platoon to move up, but they can't hold it any longer. Their machine gun opens fire, not really hitting anything, but shocking the crew of Scar (1 hit).
Scar's vehicle commander spots the fire from the enemy bunker (top right) and charges ahead (center, from bottom left), firing his M2 .50-caliber HMG as they moved, though didn't hit anything.
Tahoe leaves 1/2 (bottom left), dashing forward to join Scar (top right).
Back on Hill 114, despite the SLA mortar fire, the Dshk (bottom center) is still in the fight. They spot 1/1 (top center right) and open fire...
The CO and Zuma's commander look on helplessly as 1st Squad, 1st Platoon is rendered hors de combat...
And things just get worse as further downslope, the Hill 114 bunker (bottom center left) continues firing on 3/1 (top center)…
Roughing the SLA riflemen up quite a bit (four hits!)! The members of 2/1 (bottom right) sit tight, smoking and warming up C-rats...
Back on the enemy left, the Hill 27 Bunker (bottom center) continues its machine gun fire on the M-113 ACAV, Scar (top center left)…
The rounds fail to penetrate, but the crew is getting a bit shaken up (two hits now).
*Game notes: first, if you're trying to figure out how many hits there are by the beads/bodies next to the units, don't, I was working on figuring out a marking convention, kept changing throughout the games. For example, right now a red bead is two hits, but later I changed it to three, because a dead body was supposed to be three, but then I realized I didn't want bases 'carrying' around dead bodies, so I'd lay a body down when a unit got three hits, but then I'd leave the body and put a red bead on them if they moved away.
Second, I kinda forgot about the 'firefight' rule in Squad Hammer, and now that I've played three games, I don't think I need it.
Scar sits tight and returns fire with its machine guns, but they're having no luck against the thick, earthen walls of the bunker, as Tahoe (bottom left) steadies the crew (rallies both hits off them).
Back on Hill 29 (bottom right), the SLA 81mm mortar team continues working over the enemy HMG position (top left)…
And the Dshk is knocked out!!!
Back in the center (Hill 27 at left, Hill 114 just visible at bottom right, the SLA at top), the enemy rifle platoon now hears gunfire to its front left (2nd Platoon at top left) and front right (1st Platoon at top right). The platoon leader (bottom left) again sends his 1st Squad ahead (center) to scout things out.
But apparently they're (bottom center) not very good at this scouting stuff, as they still can't seem to spot any of the SLA troops!
But the flip side is, the SLA forces have not spotted them (top right), either! Not knowing there's any enemy rifle squad nearby, the SLA CO and Zuma move right (center, from far left), hoping to cover and fortify the rest of the platoon, which is still being engaged by the enemy bunker on Hill 114 (off camera to top center).
The tank is able to re-acquire the bunker (top left), and again the 90mm cannon booms!
And again Zuma's crack crew manages to miss the bunker on Hill 114!
With Zuma plugging away, the SLA Co moves up (top right) to rally 3/1 (top center), getting them back in good shape (removed three hits, down to one).
But the Hill 114 bunker (bottom center) is relentless; they slap a fresh belt in the gun and re-commence...
Tearing 3/1 a new one, knocking them out of the fight!
Tahoe (bottom left) was still busy soothe-saying the M-113 ACAV, Scar, when all of a sudden its vehicle commander let out a whoop and charged his vehicle up to the ford (center), hammering away with its machine guns, finally having some effect on the Hill 27 bunker (top right, 1 hit).
Tahoe immediately grabs 1/2 and dashes forward in trace of Scar (to left, from bottom right)!
At this range the enemy's firing embrasure is clearly visible; Tahoe and the SLA riflemen open fire, scoring another hit on the enemy bunker.
With Scar, Tahoe, and 1/2 blazing away (top left) at the enemy bunker, 2/2 moves up to support them (top center, from bottom right, where 3/2 is holding fast).
They (bottom left, with Scar, Tahoe, and 2/1 above them) get their M-60 machine gun into action, and it's devastating...
The bunker takes three more hits, for a total of five.
*I've given the bunkers a whopping 8 strength points, and when they get hit it's mostly with a D3.
But those are some real bastards in the bunker, and they're not going anywhere. They are, however, a little shaken up, and so when they return fire it's not particularly accurate, having no effect on Scar, Tahoe, and 1/2!
But as the epic fight is unfolding in the north around Hill 27 (top center/left), the enemy's 1st Squad, not actually having seen any SLA troops, but not having been seen either, continues creeping east (bottom center, from the fork of the river at left), sneaking up on Zuma (bottom right)…
RPG!!!
Zuma is still in action, though badly hurt! They took a direct hit from the RPG, wounding two of the crewmen, and they're all shaken up, but the vehicle is still a runner.
Meanwhile, the CO (top right) is in trouble: his battalion commander hears all the chatter on the company net and commences chewing the company commander's ass! "This is a @#$%ing probe, you @#$%ing @#$%!!! I told you to take what you could get, do not, I repeat, DO NOT, become decisively engaged, and DO NOT take heavy casualties, you are just supposed to be checking the enemy's defense in the northwest and secure our flank, you @#$%!!! Now get your @#$%ing @#$% together!"
The CO (center right) screams at Zuma's TC to fall back, and the tank quickly backs out of the line of fire (top right, from center bottom), almost running over 2/1 (right)!
Over on Hill 27, the enemy bunker has gotten its marbles back! They shift fire from Scar, Tahoe, and 1/2 (center), swinging their machine gun onto 2/2 (top left), who just roughed them up. The gun chatters...
And 2/2 is gunned down!
While the Hill 27 bunker (far left) is doing its damage, the enemy rifle platoon leader grabs his 2nd Squad and moves up (center, from bottom center, with the RPG-shooting 1st Squad above them, in the bushes), looking to get into the fight.
Where they're able to spot Scar, Tahoe, and 1/2 (top center left). They line up an enfilading shot and open fire...
But they're only able to score one hit on 1/2 (bottom left)! Meanwhile, Scar crosses the river, trundles through the concertina wire, and moves up to Hill 27, where the vehicle commander practically sticks the barrel of his .50-cal into the firing port of the enemy bunker and continues blazing away! Two more hits means the bunker on Hill 27 is teetering on the edge of extinction...
So Tahoe decides now is the time, and he leads 1/2 in a rush through the hole in the wire created by Scar. They close assault the enemy bunker!
Quickly knocking it out!
Tahoe and 1/2 consolidate their gains (top left), while the enemy platoon leader (far right, with his 2nd Squad) motions his 3rd Squad to move up and check it out (far left, from bottom left). They cautiously cross the ford...
While back on their right, the enemy 1st Squad (bottom left) has driven off the tank, Zuma (just visible, smoking at top center), and now is engaging the only remaining squad in 1st Platoon, 2nd Squad (center right, with the CO left of them). The AKs and RPDs crackle, but score no hits through the heavy brush.
Having destroyed the enemy Dshk, the 81mm mortar team (far right) shifts fire to the north, targeting the enemy platoon leader and 2nd Squad (far left, with 1st Squad below them and 3rd Squad above them, Scar, Tahoe, and 1/2 at top center).
But the mortar rounds fall long...
The SLA CO and 2/1 fall back onto Hill 29 (center, from bottom right), bracketing the 81mm mortar team, looking to minimize their exposure to enemy forces on/around Hill 114 (off camera to bottom center), while over on their right, in 2nd Platoon's area...
The enemy 3rd Squad, not exactly sure what is up there on Hill 27 (Tahoe and 1/2 are at far left), decides to circle around a bit (center, from bottom left) to the south, before popping up to take a look (the enemy platoon leader and 2nd Squad are at bottom right)…
They spot Scar and quickly loose an RPG!
But miss!!!
*That was hard to do, missing with their RPG at that distance.
Scar moves up, blasting away with their machine guns...
Ripping the enemy squad to pieces, nearly eliminating them (5 hits)!
And then 1/2 moves over, firing as they go...
And does exactly that.
At which point the fight is over. The enemy commander does not have the forces to eject the SLA troops from the area without coming out of their defensive positions, and that's not happening, and the SLA CO finally decides to heed his battalion commander's guidance, settling in for the stalemate but accomplishing his mission of securing the northern flank of the assault. Here you see the remaining two enemy rifle squads and their platoon leader falling back to Hill 114.
And consolidating there.
While the CO (far right) sends Zuma (left) back for repairs...
W
hile consolidating his position on Hill 29 (bottom left) and Hill 27 (top right, with Hill 114 at top left).
Well, that was a heckuva first fight with the new rules, and lots of fun. Even better that I actually accomplished my mission. The rules are nifty in that you don't get to move everyone ever turn, but you do know how many actions you're going to have, so you can plan accordingly, and the spotting roll (once engaged) sort of fills in as a pseudo-morale roll, which works out. Additionally, the spotting roll can cause some nifty stuff to happen; I say nifty, some folks will be aggravated, but I like the fact you can move your guys up, intending on firing at enemy 'x,' but they don't see enemy 'x,' they only see enemy 'y,' so if you want to fire, it's gonna have to be at 'y,' and then you have to decide if that's better than nothing, or going to cause you more problems than it's worth. In this case, it actually helped the enemy 1st Squad remain hidden until they were able to creep up close enough to bust Zuma with an RPG!
The battle was quite bloody: the SLA forces suffered a damaged tank and 15 casualties, while the FSNL lost a Dshk and 21 men. The vehicle commander for Scar 1-1 was awarded his country's equivalent of the Bronze Star, as was SSgt "Tahoe" Gallarraga, for their actions in taking and holding Hill 27.
Anyway, next up is the fight for Hill 45. Hill 45, you'll recall from Operation Chunky Bandit fights numbers 4 and 5, is not a happy place, the Cubans having been dealt a bloody nose their, twice. In any case, Company B, with SSgt "Gundog" Baerga, is currently in the assembly line, preparing to step off in the attack, as Cuban F-4 Phantoms mercilessly pound Hill 45 and the village of Siagnoa.
V/R,
Jack


Great game report- I'm getting to be a fan of the Nordic Weasel rules so I think I should pick up. Squad Hammer.
ReplyDeleteCheers,
Pete.
Thanks Pete! These are fun; 5Core Company Command is still my favorite for this level of fight (and 5 Men at Kursk for skirmish), this series of fights is really just play-testing, my long-term plan is to use these for larger scale fights where each unit is a company or battalion.
DeleteV/R,
Jack
Nice report Jack. :)
ReplyDeleteThanks buddy, I appreciate it!
DeleteV/R,
Jack
Stirring stuff...action packed to say the least. Those bunkers took a lot of punishment!
ReplyDeleteThanks Jim, glad you liked it, and yeah, the bunkers are a real bastid. Two more bunkers in the next fight, should have it posted Thursday night.
DeleteV/R,
Jack
Thanks Andy, glad you liked it!
ReplyDeleteV/R,
Jack
Great report, thanks Jack. Can you give a really basic summary of how the rules work, it would help in following the action better?
ReplyDeleteJohn,
DeleteI’m almost done with CB #11, so I’ll do it in CB #12. If I remember ;)
V/R,
Jack
your welcome
ReplyDeleteAndy,
ReplyDeleteI’m not 100% sure of the causality, but after you stopped by the views for this batrep went from 22 to 140 overnight. So keep up the good work! ;)
V/R,
Jack
Thank you very much I'm glad to be of service. it would be interesting to check on other posts I've shared to see if it's the same
ReplyDeleteTake care
Andy
I'll try and keep an eye out, and let you know.
ReplyDeleteV/R,
Jack
Thank you very much
ReplyDeleteVery nice as always !
ReplyDeleteThanks, Legion, I appreciate it!
ReplyDeleteV/R,
Jack
Another set of rules! I am very jealous. I do like trying out different rules and you are certainly doing that, and i am not :-(
ReplyDeleteGreat write-up and as you can see I am still plodding through the backlog of your battle reports.
Shaun,
DeleteHey buddy, hope all is well. Yes, was finally able to get "Squad Hammer" out and onto the tabletop, and had a good time with it. This set of six games with Squad Hammer was a success, so I'll be using it for some higher echelon games in/around Caen. I hope you enjoyed it, thanks for stopping by and commenting.
V/R,
Jack