All,
AKA, Ambush Alley in South Leon #2
It is now 1730 on 4 July 1990; two days ago militia members of the Free Leon Army (FLA, the bad guys) ambushed a South Leon National Police (SNLP) patrol. Task Force Razor, a Cuban paratrooper company led by Captain Soares and his trusty sidekick, Lt Hinajosa, moved out smartly, rescuing the SNLP officers, but at a cost of 1 KIA and 4 WIA to themselves. Everyone on the Cuban Liberation Expeditionary Force (CLEF) and South Leon government side were shocked; the FLA insurgency had been but a rumor of war for years, with various low-level bombings, assassinations, and sniper fire, but nothing anywhere near the size and ferocity of the attacks on 2 July. And now it was happening again...
Captain Soares was relaxing in the Tactical Operations Center (TOC) when the radios jumped to life. Before he could even discern what was happening, a South Leon Army (SLA) liaison officer burst into the TOC: "Sir, we need your assistance right away!" The stuff was going down again, right here in Diwala. More than 50 FLA insurgents were assaulting the 2nd District SNLP station in eastern Diwala; a SLA quick reaction force (QRF) was dispatched, but then they were ambushed! Task Force Razor is tasked with escorting a three-man sniper team into an overwatch position to deliver precision fires in support of the QRF and the SNLP station. Task Force Razor will deliver he precision fires then fall back; Captain Soares does not want to close with the SLA QRF or the SNLP station during the fight for fear of friendly fire incidents.
As Captain Soares and Task Force Razor mounted up, the SLA liaison officer informed him FLA insurgent activity had been noted in and around the designated sniper position; "to late to change the plan now, looks like we're fighting our way in boys."
Overview, somewhere in Diwala, north is up. Nothing fancy, just a 2' x 2' surface with plenty of buildings and walls.
I'm playing this out in 15mm using the old school "Ambush Alley" rules, as written. The is the first scenario out of the book, "Contracting Trouble," a classic of modern wargaming. My intent is to play out all five scenarios in the book in a row, to learn the rules, put them through their paces, and see if I dig'em.
The opposing forces, with Task Force Razor at left and the FLA insurgents at right.
Task Force Razor: one Amphibious Assault Vehicle (AAV), callsign Swampy 66 (not the same track as game 1), the sniper team (Saturn 31), the boss, Captain Soares (Razor 6), and three assault teams (Razor 01, 02, and 03, with 03 led by Lt Hinajosa).
The AAV is from Irishserb, while the troops are all Eureka Minis.
The bad guys, AKA, the Free Leon Army (FLA), local insurgents looking to overthrow the democratically-elected government. There are seven Leaders (Flytrap Factory Taliban, and all the rest of the terrorists are from Rebel Minis), nine RPGs, eight RPKs (Light Support), and eighteen riflemen with AKs.

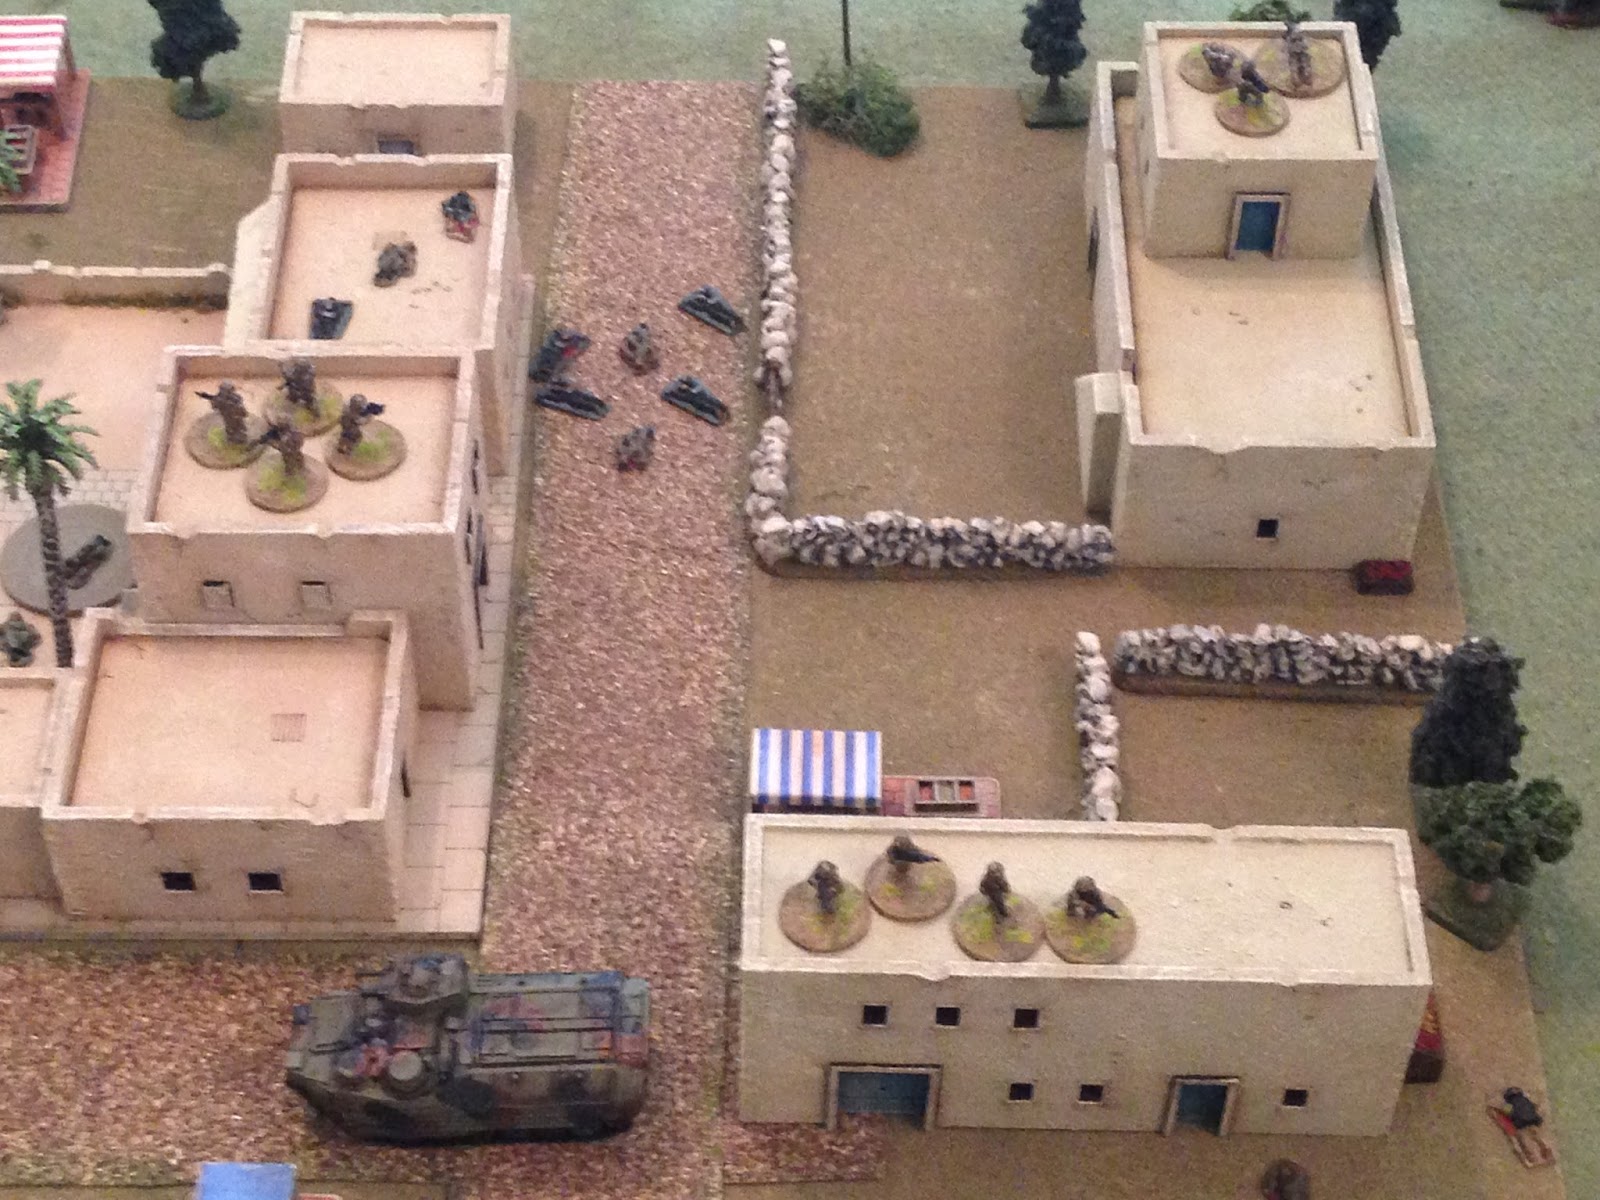
The map, this time with troops. Task Force Razor is at bottom center, the objective building at top right. The mission is to get the sniper team to the objective building, have them deliver precision fires in support of the SLA QRF and SNLP station, then withdraw back the way they came. The game starts with Insurgent groups at bottom right, top center, far left, and two guys with an RPG on the roof at bottom left. The khaki-colored poker chips are 'hotspots,' i.e., locations where Insurgent reinforcements can come on the table. At the end of each turn I will roll to see if the bad guys get reinforcements (the Insurgent Level is 4, not 'automatic' like last game), then I roll on a table to see what the bad guy reinforcement group is comprised of, and then I roll to see which hotspot they come in on. If I can get good guys onto a hotspot and sit there for a turn, they 'kill' the hotspot, so bad guys can't come in there anymore, and if the roll an eliminated hotspot, they lose that reinforcement group.
I'm about to start the fight, and I'm supposed to draw a "Fog of War" card at the start, but I forgot. And just like last game, the boy and I are playing co-op against the bad guys, and we didn't fail any reaction tests with a '1,' so no Fog of War cards this game.
Task Force Razor, again with Captain Soares leading the way on the road, then Razor 03, 02, and 01 from left to right, with Swampy 66 on the road, Saturn 31in the track.
The southwest, looking southwest to northeast. You can see bad guys at center bottom, far left and top left, as well as a couple hotspots.
The northwest, with bad guys at far left and top center (same bad guys from the previous pic) and three hotspots.
The northeast, bad guys at top left (from previous pic).
And the southeast, with bad guys at bottom center and a hotspot at right.
Let's get it on!
And as soon as Task Force Razor arrives on the scene they are greeted with an RPG!
The rocket lands between Razor 03 (left), Razor 03 (center), and Swampy 66, and no one is hit. Razor 02 returns fire.
Dropping both insurgents on the rooftop. Razor 02 pushes up the street (top center right, with Capt Soares to their right and Razor 03 at far right).
On right, Razor 01 climbs up on the roof.
Where Razor 01 runs smack into an Insurgent group. The Cuban paratroopers are lumbering up onto the roof...
*Sorry, I screwed the photo up: I marked the good guys as firing, but I was just supposed to be showing them and the bad guys coming face to face. No one has fired yet, it's time to test to see if the Cubans or the insurgents will fire first.
And the bad guys end up getting the first shots off...
But the tough paras shake it off and return fire, eliminating the entire group of six terrorists!
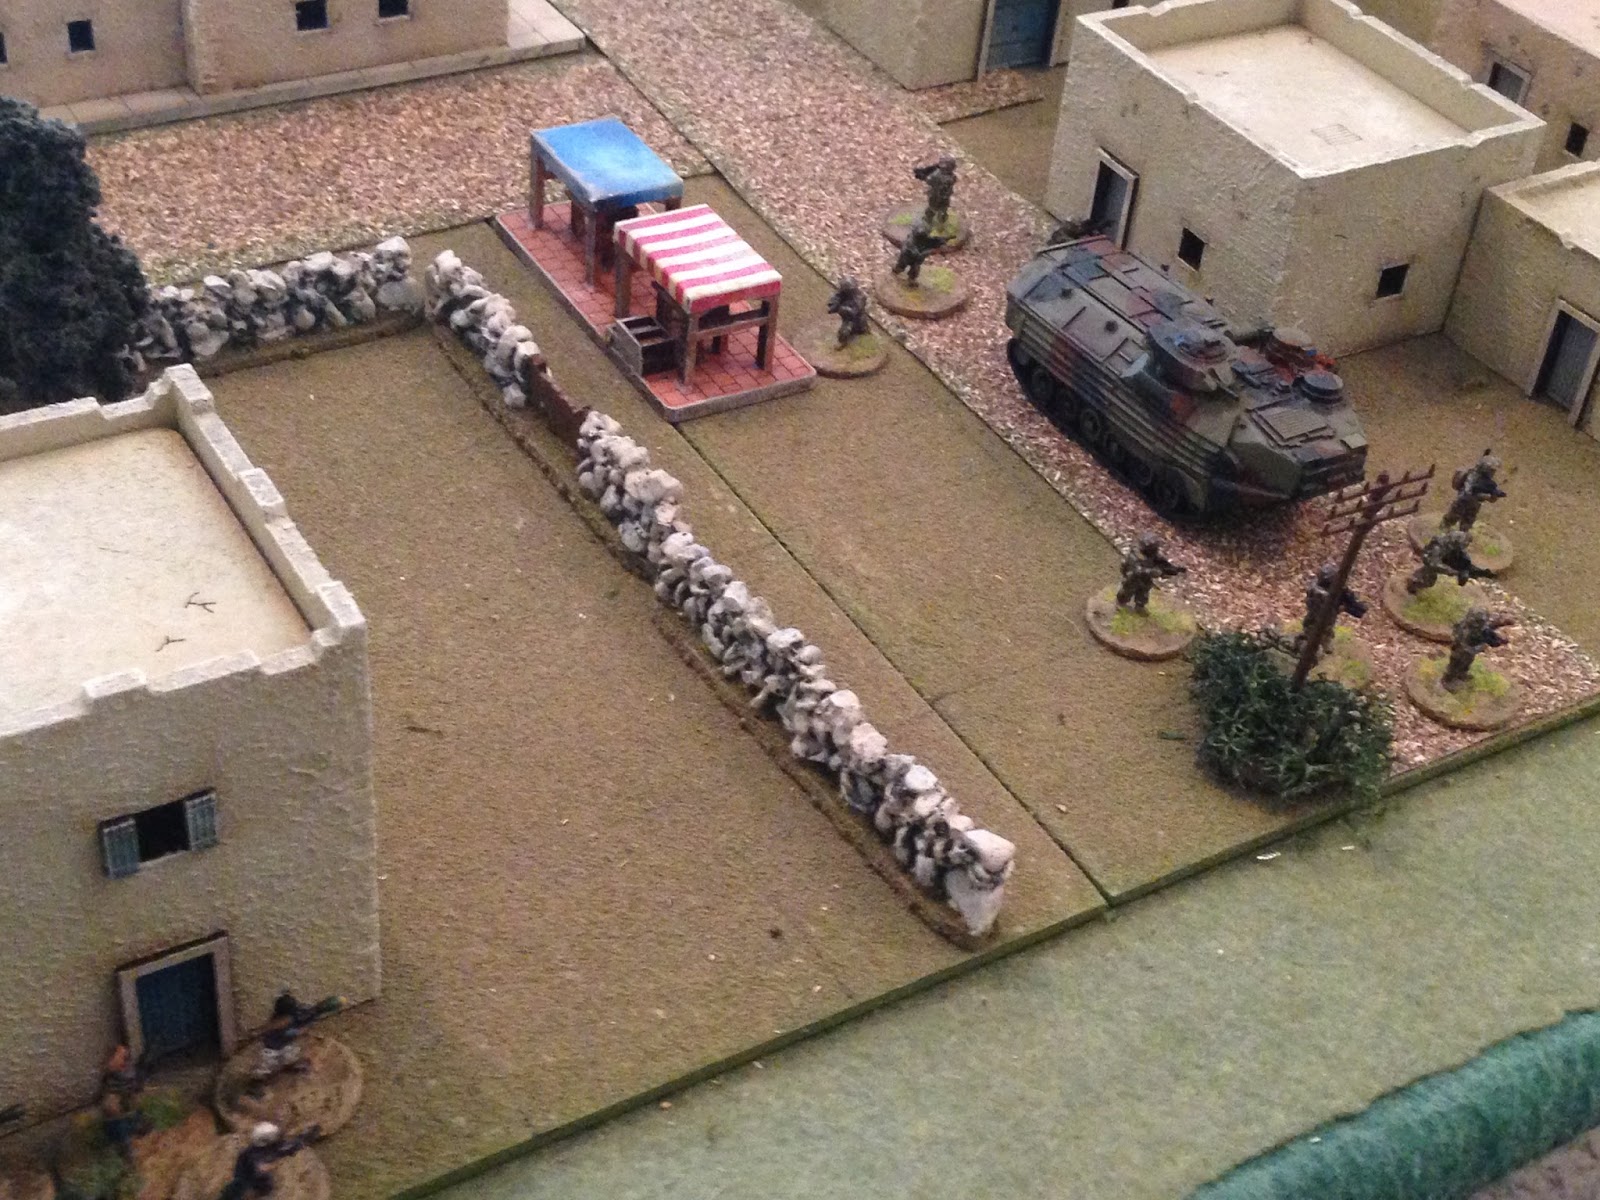
While Razor 01 is in their gunfight (top center), Lt Hinajosa and Razor 03 hop the wall in the west (bottom right) and Captain Soares leads Swampy 66 up (top left).
As Swampy 66 halts behind Captain Soares, the sniper team, Jupiter 31, hops out (center, with Razor 01 at bottom right and Razor 02 at bottom left), their team leader's eyes glued to a likely avenue of approach (hotspot at top right).
In the north (looking east from the northwest corner), the Insurgents are spending more time this fight marshalling their forces, rather than just charging in. They know the infidels are moving north, so they begin moving into ambush positions at the north end of the table. One Insurgent team moves into an alley (far left, from center), while another moves north, up to the edge of cover (bottom center, from bottom right, I remembered to use 'out of contact movement'!).
And then enemy reinforcements arrive, and where do they arrive? Yep, right on the hotspot the sniper team just popped out next to (bottom center, with Jupiter 31 at center and Razor 01 at left center).
Razor 01 and Jupiter 31 both call the new threat out on the company net, but Razor 01 is the first to get their guns in the fight.
Four more insurgents down, and the other five run!
*Yeah, I'm still screwing up, rolling D6 for enemy morale instead of D8...
Razor 01 jumps down and moves east, looking to shut down that side an area the bad guys can use to flow more reinforcements into the fight (bottom center, from far left). Meanwhile, Jupiter 31 moves onto the rooftop at top center.
*Razor 01 hopped onto the hotspot, and if they can spend all of next turn there, it will be eliminated.
On the left, Razor 03 moves up (center, from bottom center), and after all the contact yesterday, Lt Hinajosa is a bit shocked at how quiet it is on this side. But they're in a great position to isolate the area west of the plaza (plaza at top center), using the north-south running road at left as a fire lane. But gotta watch for insurgents coming up behind them (hotspot at bottom left).
With Razor 03 in position (bottom left), Swampy 66 goes on Overwatch, covering Razor 02 as they sprint across the street (center right).
But Razor 03 (top right) is too late, the western insurgent group is able to make it safely across the street (center, from bottom center right, with another group of terrorists at far left).
And as that group gets into the plaza (bottom right), the other group leaves the alley, climbing atop a building to get a better look (center). Though the track, Swampy 66, is on Overwatch, it can't see the bad guys that just move up due to being masked by the taller building.
And then insurgent reinforcements again arrive at exactly the worst spot they could: this time in the southwest (bottom left), behind Razor 03 (center).
Jupiter 31 (right) goes on Overwatch, as Captain Soares and Razor 02 move up the street (center top).
The bad guys (top right) prepare to fire on Razor 02 and the CO (center), but Jupiter 31's snipers get in on the action.
Dropping the insurgent group leader and two riflemen! The CO and Razor 02 (bottom left) open fire, but the other three bad guys are already heading for the hills (top right).
As Jupiter 31 (left) scans for new targets, Razor 01 shuts down the eastern insurgent hotspot (top center).
Swampy 66 spins left, facing west on Overwatch, while Razor 03 dashes across the street (center, with Capt Soares and Razor 02 at top right and bad guys at top left).
The northern insurgent team moves south, hugging the opposite side of the building Razor 03 is up against (top center left), while the southwest bad guys...
Use out of contact movement to haul ass, all the way from off camera to bottom right, left along the bottom or the pic, up across the street, and into the plaza (left center). The bad guys are trying to mass as many bodies at point blank range as they can.
And then a single insurgent arrives as reinforcements, with an RPG, in the southwest (bottom left).
Jupiter 31 remains on Overwatch (bottom center) as Razor 01 moves up (top center left), nearing the objective building (top left).
Swampy 66 is also on Overwatch, and the snipers (right) look on as Capt Soares and Razor 02 move up the street (top center), adjacent the objective building (top right, with Razor 01 just off camera to right and Razor 03 just off camera to bottom left).
Lt Hinajosa of Razor 03: "well, ready boys? This is it."
The young Lieutenant then leads his troops up onto a nearby building (top left).
The bad guys get in the first shots...
But the fire is wild an inaccurate, allowing the Cuban paratroopers to return fire down on the bad guys, at point blank range.
Three terrorists fall (right), and the other four run (bottom left). The other insurgent group is nearby (top left), but doesn't have a clear shot at Razor 03 (top right).
*That was kind of cheating, I guess. In real life, Razor 03 had no idea what's on the other side of the wall, in the plaza, but I let them move up into the perfect position to engage one enemy unit while being masked from the other. It would have been more realistic to move onto the building at far right, which left them open to having to deal with both bad guys. In real life we'd have probably walked around the corner, on the street (bottom right).
Realizing they are being hemmed in on two sides, the insurgents in the plaza decide to charge the Cubans in the street (Razor 03 is just visible at top right, Capt Soares and Razor 02 are at left)!
Captain Soares orders Razor 02 to fall back behind a nearby wall as the insurgents pop into the street...
Drawing them into Jupiter 31's (bottom right, with Razor 02 at center) field of fire. The sniper team opens fire. Two bad guys fall, but the group stands!
Meawhile, in the southwest, the lone RPG gunner creeps forward (bottom center, from bottom left), looking to get his chance at a lucky shot on Swampy 66 (top right).
For the first time this fight, the bad guys fail their reinforcement roll, NO SOUP FOR YOU!
Back in the street, the insurgent leader urges his men forward, but Captain Soares and Razor 02 open fire at point blank range, taking advantage of the time Jupiter 31's fire bought them.
The terrorist cell is eliminated and Capt Soares leads Razor 02 forward.
As Razor 01 (far right, with the CO and Razor 02 at top left) moves up to the objective building and stacks, preparing to clear it.
On the left, Razor 03 is able to move up onto a nearby roof, into a dominating position with 360 degree observation (center, with CO and Razor 02 at top right, and Swampy 66 just off camera to bottom right).
In the southwest, the lone RPG gunner sits tight; he's the only insurgent on the entire battlefield right now, and he senses that now is not the time to take any chances.
Swampy 66 and Jupiter 31, top right, are both on Overwatch, with nothing to do but gun him down if he steps out from behind cover.
But, as (bad) luck would have it, the enemy gets reinforcements, and the arrive in the southwest, near the lone RPG gunner (top right).
With the way things are shaking out, it's appearing the insurgents will not be able to keep the Cubans from accomplishing their mission, that their only hope to score any kind of victory is to wait patiently in the southwest and hit the Cuban Task Force as its leaving the area (which will be just off camera to top right, the same spot they entered).
Razor 03 (top left) and Swampy 66 (bottom left) go on Overwatch as Jupiter 31 comes down off the building and moves forward (center, with CO and Razor 02 at top center left, and Razor 01 at far right).
Razor 01 bursts into the objective building; clear!
With Razor 03 looking on (bottom right), Captain Soares and Razor 02 move up, looking to shut down another enemy hotspot (top center, with another at top left).
The terrorists will have a much more difficult time bringing reinforcements on if we can shut down two of their five hotspots.
In the southwest, the enemy forces consolidate into one group, with two RPGs! But again no reinforcements arrive!
While the sniper team, Jupiter 31, gets into position. They check in on the net, ready to start gunning down bad guys to the north, the ones assaulting the SNLP station and ambushed the SLA QRF.
The snipers (bottom right) are doing their thing as Razor 03 (top center) and Swampy 66 (top left) are on Overwatch, and Razor 01 (left) falls back, looking to get atop the building at far left.
While in the north (objective building off camera to top center right), Razor 03 (top right) looks on as the CO and Razor 02 (far left) kill another insurgent hotspot.
The bad guys get reinforcements, but again it's a single RPG gunner, and the poor bastard shows up right between Razor 02 and Razor 03. He'll not be long for this world...
Razor 03 (left) and Swampy 66 (bottom left) are on Overwatch as Razor 01 (bottom right) moves up and the snipers (top right) are engaging targets off camera to north (the first turn of three).
And it's time for the bad guy in the plaza to die...
We tested, bad guy against Razor 02 (top left) and Razor 03 (top right): he did as good as he could, a six, but the boy rolled a 7 and an 8 for the good guys.
So Razor 03 whacks him.
As Captain Soares and Razor 02 move west (top center left, from top right). No reinforcements for the bad guys again.
The snipers of Jupiter 31 (top right) continue banging away, as Razor 03 (left), Razor 01 (bottom center), and Swampy 66 (bottom left) assume Overwatch.
As the CO and Razor 02 move onto another insurgent hotspot, this one in the northwest. Again the bad guys don't receive reinforcements!
So the sniper keep firing, MISSION COMPLETE. Precision fires by Jupiter 31 have broken the back of the terrorist assault on the SNLP station and the ambush of the SLA QRF. The insurgents fall back and the QRF is able to reach the police station. Everyone else in Task Force Razor sits tight, on Overwatch.
And right after the CO and Razor 02 kill another terrorist hotspot (bottom left), the bad guys finally receive more reinforcements, and they're very lucky to land on a hotspot that's left (there are only two). The bad guys come on in the alley way (top center, with Razor 03 at top right), which is the safest place you can come on.
*They used the same hotspot as the lone RPG guy in the plaza; you don't have to land on the hotspot, just within 6 or 8 inches. When the lone RPG guy came on, Razor 02 was at left center, close to where the reinforcements are, so there was just nowhere to go with the lone RPG guy. But putting this group in the alley at least cuts Razor 03 out of the picture, only Razor 02 (well, and the snipers, off camera to top right) can see them.
Capt Soares (bottom center) and Razor 02 engage the enemy reinforcements in the north (top left).
The bad guys are trapped in the alley and mowed down (top left). The Captain leads Razor 02 forward (center), looking to get back to the main body as the snipers are finished and it's time to head for the barn.
Razor 03 (top left) and Razor 01 (bottom right) are on Overwatch as Swampy 66 backs up to the Objective Building.
So Jupiter 31 can dash down and hop in the back. No reinforcements for the bad guys.
Razor 01 (top right) and Razor 03 (top left) are on Overwatch as Swampy 66 moves south, back down the road (center right), and Captain Soares and Razor 02 double time up to the neck (bottom left), trying to catch up to the track.
The enemy rolls for and receives reinforcements, but they are lost when they roll to land on a dead hotspot.
Swampy 66 (center right) and Razor 01 (top right) are on Overwatch as the Captain and Razor 02 tie-in with the main body, and Razor 03 (top left)...
Comes down and hops in the track. The bad guys again roll up reinforcements and lose them to a dead hotspot!
Captain Soares and Razor 02 move out, leading Swampy 66 (bottom right), as Razor 01 comes down and assumes rear security (far left).
But the bad guys get reinforcements this time, and they come on with another RPG, in the southwest (left). It's time to act, lest the infidels escape!
The Task Force moves up, in sight of the insurgents at bottom left.
Time to test, see who gets the first shot off...
The bad guys (left) beat the good guys (right), but didn't get a four, so they didn't pass!
Which means Captain Soares and Razor 02 spot the enemy soldiers and open fire!
But the Cuban fire only drops one man (though another 'shrinks'). The enemy returns fire!
The bad guys roll a tremendous amount of hits, but the boy saves our ass with his incredible rolls! I'm playing it correctly now, where all you have to do is tie with Defense dice.
The other insurgent group moves up (left).
And then they get even more reinforcements in the southwest, but I think it's too late! Well, I hope it's too late.
Captain Soares and Razor 02 (bottom left) again engage the initial insurgent group (top left).
Dropping the remaining four bad guys (bottom right), and then Razor 02 moves out of the kill zone (off the map, which was probably a bit hasty). Razor 01 looks to engage the other insurgent group (bottom left), but they don't have a clear shot and the bad guys open up first!
I'm really not enjoying losing these reaction tests to the enemy, but I'm playing it right now, allowing insurgent groups with a D8 leader to test using D8.
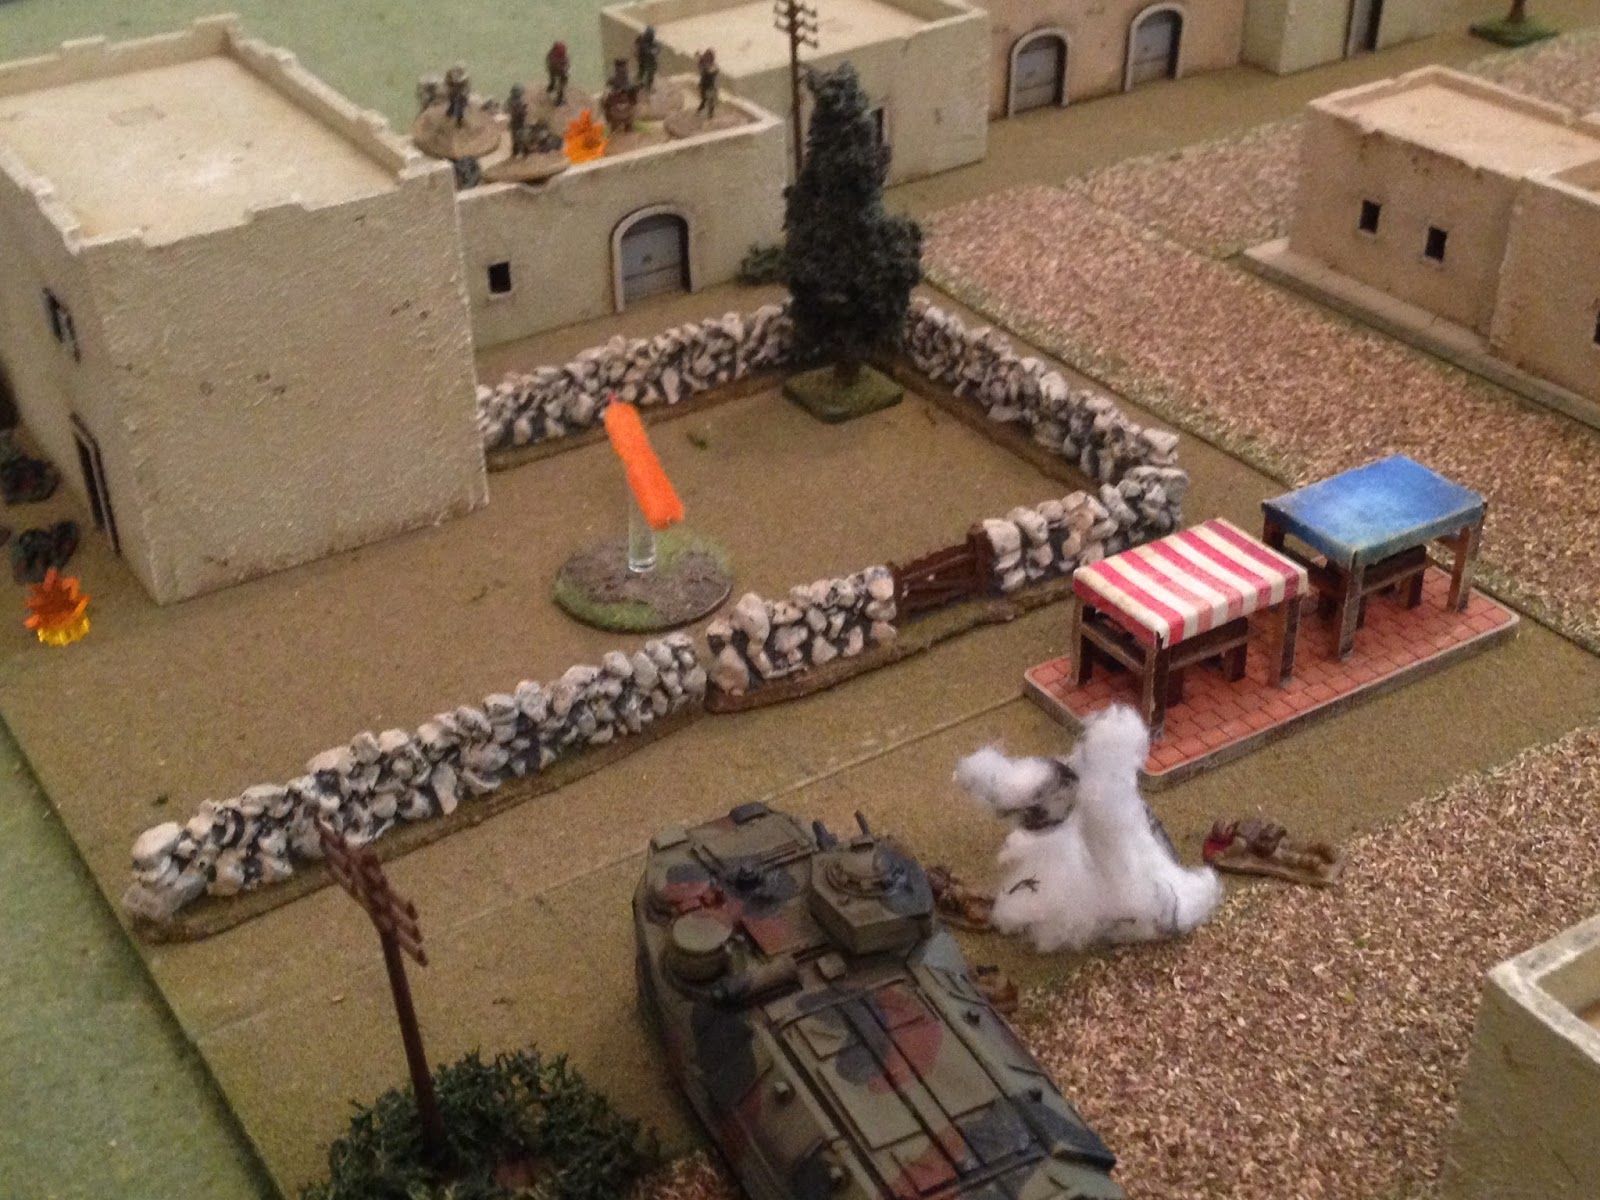
But the boy can't save us this time: the RPG hits right in the middle of Razor 01, and all four men are down! Captain Soares looks on in horror...
Swampy 66 returns fire with its .50-cal...
The heavy machine gun knocks down four bad guys and sends the other two running (top right). The last insurgent group looks on: "what the hell is going on over there?" "Are you sure we want to get in the middle of that, Ahmed?"
Jupiter 31 (right) and Razor 03 (center) dismount to pull security and handle the casualties.
As the last insurgent group bravely moves up. But no reinforcements for them.
The track swings its turret and fires on the new group of hostiles...
But the .50-cal doesn't hit anything! Razor 03 (bottom center), just out of the track and still getting its bearings, realizes there are bad guys on twenty-five meters away (top center). Lt Hinajosa: "shoot the #$%^ers!!!"
And Razor 03's marksmanship isn't all it could be, either. They only whack one bad guy, but the rest fail their morale roll and run for the hills!
*It really aggravates me now, as I'm typing this, that I've been screwing up the morale rolls. That fight was pretty easy, right up until the dramatic finish here, which should have been more dramatic as a whole bunch of insurgents ran that shouldn't have.
Jupiter 31 is on Overwatch (top right) as Captain Soares and Razor 03 collect and check the Razor 01 casualties (those guys are always getting whacked, aren't they?).
It turns out that two of the paras were only stunned by the RPG, but one was killed and another severely injured. Captain Soares quickly got the four members of Razor 01 loaded into the track, and Jupiter 31 came down and loaded as well, helping to carry the casualties.
And then Swampy 66 pulled into gear and lurched forward, leaving the battlefield, with Captain Soares and Razor 03 pulling rear security.
Again, mission accomplished, with a very easy first half, and then getting really ugly at the end. And only not uglier because I've been screwing up the insurgent morale rolls; one more game of screwed up morale rolls, then I finally get it right in game #4.
The game felt really good, I think I've got a firm handle on the tactics now, getting troops into Overwatch, forcing the insurgents into bad situations, and, in turn, I'm learning to have the insurgents marshal their strength a bit more, build up for that one shot at causing some real problems. But it's difficult; you don't want to just sit back and let the Regular player cavort around the battlefield as he pleases, easily accomplishing every mission. So you've got to be measured, take high-percentage shots when you can. Well, with the insurgents, high percentage is not the right term, but higher-percentage, times when hopefully you can overwhelm the Regulars with numbers. Though, to tell you the truth, it hasn't been the numbers that have been causing Regular casualties, it's been that lucky roll once or twice a game, that sees the Regulars lose the Reaction Test, or win and fire but miss, and then that fantastic firepower roll by the Insurgents and then the Regulars fail to match.
So I dunno, I'm a bit torn; if it's a matter of getting lucky, then that dictates you don't hold back for one big attack, you take as many small shots as you can, hoping one gets through an causes some casualties. Because once the Regulars suffer some casualties they really bog down, having to pull other units out of the fight to see to their casualties, which is when it would be the perfect time to strike with a large force. Fun stuff.
In any case, Task Force Razor again accomplished its mission, escorting the snipers in and back out of the battlespace, saving the South Leon Police and Army. In the process they caused the enemy 38 more casualties, though they suffered a second fatality and their fifth wounded (one and one in this, the second, fight).
Coming up, it turns out the South Leon Army and South Leon National Police at the police station suffered a lot of casualties. Most of the police and soldiers were required to help evacuate the wounded and dead, leaving precious few men back at the police station. Their morale low from the ferocity of the enemy's attack and the tremendous casualties, it didn't take much to push them over the edge, so the minute they felt like they were isolated, abandoned, and left to die, they all decided there were better places to be than the police station.
Not wanting to sacrifice the police station (and the weapons, equipment, comm gear, and ammunition it contained), the South Leon government again reached out to Task Force Razor for help, and once again Captain Soares responded in the affirmative. Task Force Razor had returned to base, dropped off the snipers and track, had its wounded seen to, then loaded up on water and ammo before moving out on foot towards the police station. It was nearly 2230 before they arrived; they immediately set about organizing the defense, then went to 50% to get some rest. Several hours later the sentries began sending in reports of movement at all quarters; the Free Leon Army was about to make a second all-out assault on the SNLP police station.
V/R,
Jack


No comments:
Post a Comment