All,
This is the second fight of a three-fight series for the opening round of my South Leon campaign, which is actually a thinly-veiled Vietnam campaign being used to keep my Cuba Libre story going. Task Force Fulgencio, comprising a company of Marines, a company of paratroopers, and various intelligence, special operations forces, and combat support detachments has deployed to prop up the fictional country of South Leon, which is suffering from guerrilla war begun by domestic Marxists and supported by its Communist neighbor, the
Fédération Socialiste Nationale de Leon.
1st Lt Ordonez' company of Marines was dispatched to the border with FSNL, while the parachute infantry company was sent to the capital of South Leon. The Marines have been aggressively patrolling the DMZ, and the first real contact with infiltrators from FSNL occurred several days ago. Lt Peres' 1st Platoon met the enemy in an abandoned village, where the guerrillas sprung an ambush. Both sides were bloodied, but the Marines ultimately carried the day.
It is now approximately 1045 on 7 June 1990, and Lt Lupe's 2nd Platoon has been on patrol since the wee hours of the morning.
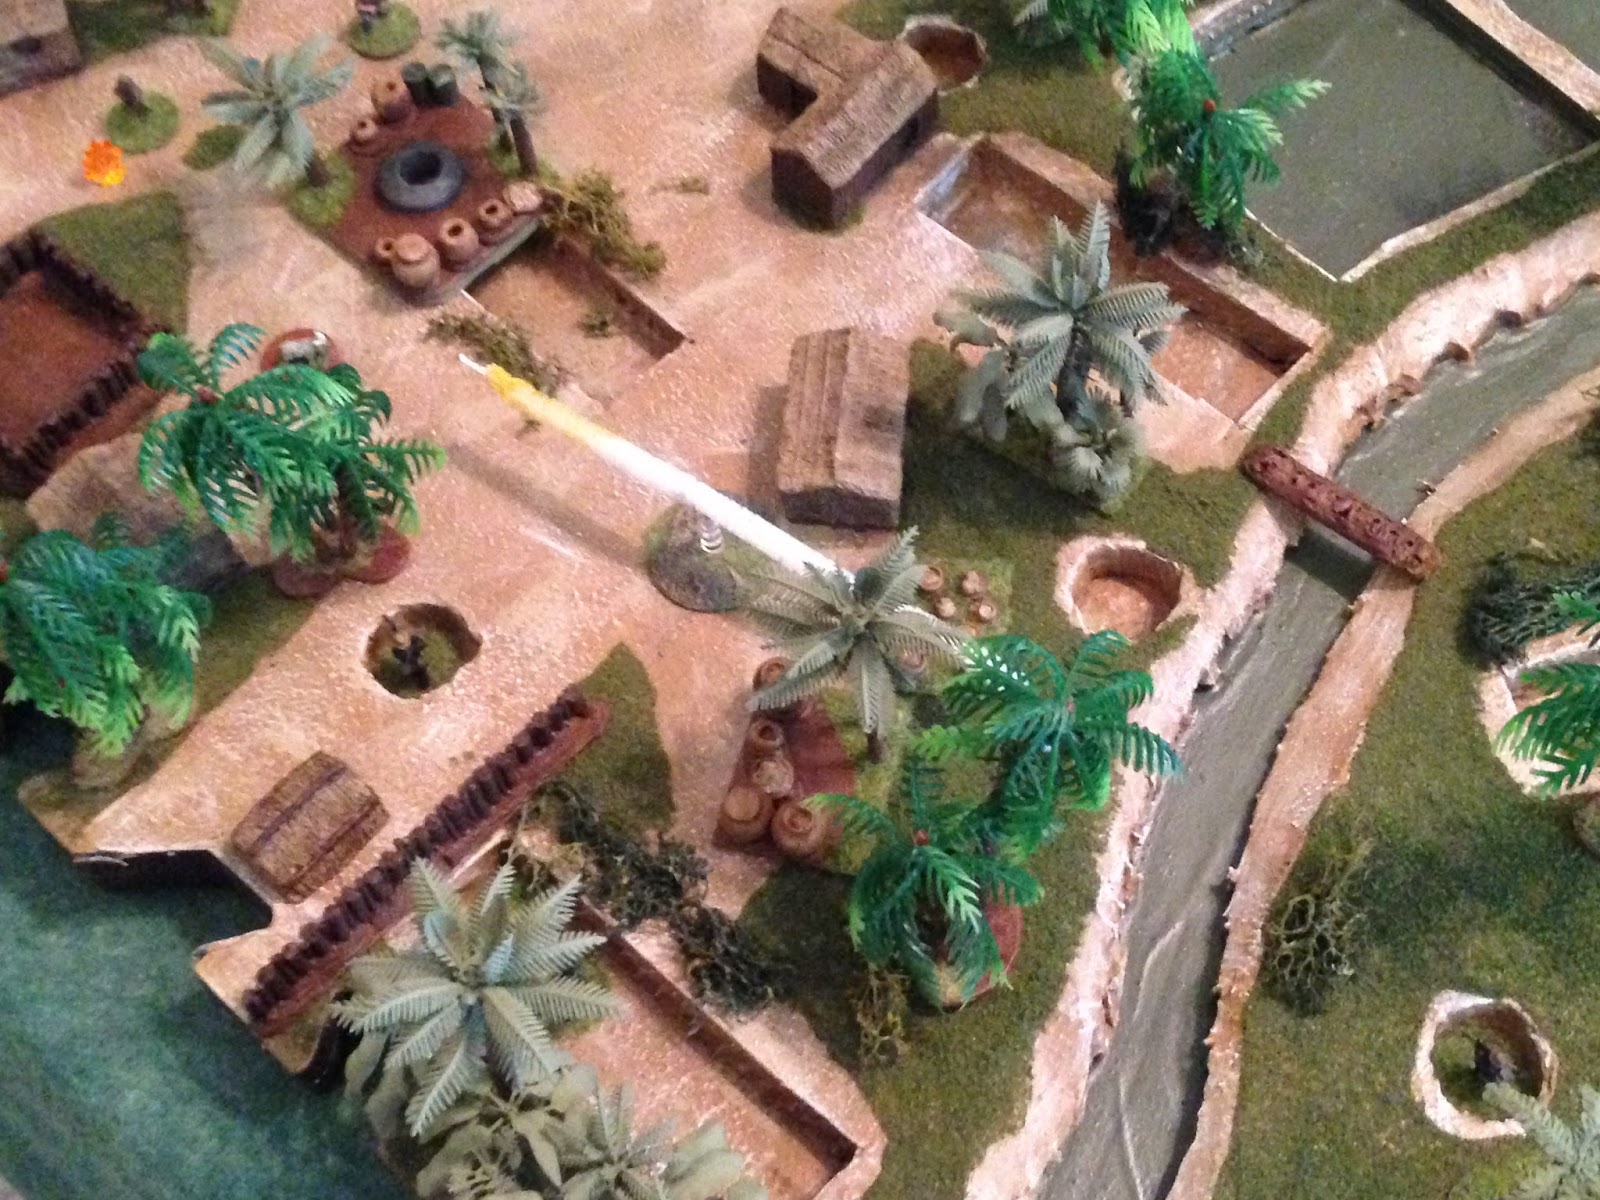
The table, 2' x 2', north is up. The Marines are entering the village from the south (bottom of the table).
Yes, this is the same table I used for the previous battle, simply turned sideways. I hate to tell ya, but the third battle uses the same table turned yet again. If you want to get lots of fights in you've gotta make some sacrifices ;)
The opposing forces, with Marines on the left and FSNL troops on the right. There are a total of 13 Marines, and don't worry, they won't be fighting all those bad guys. I have simply lined up all the bad guys that are available. As I'm taking this picture, I don't yet know the enemy force size or composition, that will be figured out once the table is set (I'm using the blinds system from Joe Legan's "Platoon Forward").
Thirteen Marines will take part in the fight. This has no bearing on any T/O; what I'm doing is fighting a roughly squad-sized skirmish, so the only Marines on the table is basically the 1st Squad of the platoon and some Plt HQ guys. the concept is the fight is short and sharp, and the other two squads are maneuvering to the flank(s). The Platoon leader is in the fight because he's up front with the point squad (and because I want the platoon leaders in the fight as they are the named characters in my campaign).
These minis are all 15mm US Marines from Jimmi's excellent Flashpoint Miniatures, resplendent with their M-14s. I went with all the riflemen having M-14s as I was shooting for some very early Vietnam War (1965) feel, facing off against the Viet Cong.
So we've got the Lieutenant (bottom left, the knucklehead brandishing a .45 pistol), his Radio-Telephone Operator (RTO, just above him), seven riflemen with M-14s (one is the squad leader, a Sergeant, rifleman in 2nd row at far right, and one is a Corporal, rifleman in 2nd row, 2nd from left), an M-79 grenadier (2nd row, 2nd from right), a two-man M-60 machine gun team (top row, two on right), and the platoon Corpsman (top row, far left).
And yes, for the Sergeant and Corporal I'm again going with Sgt Garcia and Cpl Benavides. I can't keep coming up with discrete names!!!
The enemy force: these are all Viet Cong from Martin's excellent Peter Pig line of figures. There's a boatload of riflemen, a few RPDs, a few RPGs, a few NCOs, a Goryunov machine gun, a recoiless rifle, and an 82mm mortar. However, on second thought, the table is too small and so I won't include the mortar in the possible enemy forces.
Lt Lupe leads 2nd Platoon's 1st Squad into the area. At left is Cpl Benavides and three other Marines. At center is Lt Lupe, his RTO, the platoon Corpsman, and the M-60 machine gun team. At right is Sgt Garcia and three other Marines.
The Marine left, where Cpl Benavides leads a fireteam forward. His team includes the M-79 grenadier.
The platoon HQ group (bottom center) and the machine gun team (top center).
On the right, Sgt Garcia leads a fireteam forward. "Hey LT, we got weapons over here (bottom center and far right)! I got some fougasse, claymores, mines, grenades, and a recoiless rifle."
And the enemy is present, seven bad guys total. At top left and top right are riflemen. At far left (in trench) is a recoiless rifle tam. At bottom center is an RPG gunner (in a one-man hole) and a machine gun team (in trench).
The whole table, looking north to south, with enemy at bottom and Marines at top.
The FSNL's far left, with a rifleman in a fighting hole and a recoiless rifle team in a trench behind a retaining wall.
The enemy center, with an RPG at right and their machine gun team at left.
And the lone enemy scout on their right (bottom right), across from Cpl Benavides' fire team.
The enemy (bottom and right) anxiously observe the advance of the Marines (left and top left).
The fight starts on the enemy right, where the guerrilla (bottom right) there fires his rifle, targeting Cpl Benavides.
Not only does Cpl Benavides go down, the grenadier is knocked down (white bead) and a rifleman is pinned (yellow bead).
Dammit!!!!
One of Cpl Benavides returns fire, spraying wildly with his M-14 on full auto. Hitting nothing...
The enemy scout dashes right (top right, from bottom left) and flops down in the mud.
With the ambush initiated by the scout (off camera to top right), the RPG gunner (bottom right) raises up in his hole and fires a rocket at Sgt Garcia's fire team.
Sgt Garcia and a riflemen are dropped by the blast, and another rifleman dives in a nearby trench and hunkers down.
Holy @#$%!!!!
Sgt Garcia's remaining rifleman (bottom center), his eyes drawn by the RPG's plume, spots the enemy machine gun team (top center). He drops to a prone firing position and fires, causing the enemy gunner to hunker in his trench.
Standing with the LT and his RTO (bottom center), Doc sees the carnage in Cpl Benavides' team on the Marine left, and begins sprinting that way (he's in the paddy at left, just below the kneeling rifleman with black bead). The pinned Marine (yellow bead) at far left gets himself back in the fight.
Back on the far right, the hunkered rifleman there tries to get back in the fight, but only gets up to pinned.
The FSNL machine gunner rallies back into the fight.
Please note he is still prone in the trench.
*This was a random event for the bad guys. My luck is not looking so hot right now...
On the enemy far right, the scout pops up...
But the Marine M-60 gunner (bottom left) spots him (top right) and opens up, knocking the guerrilla down.
*This would be key as he was the only enemy soldier on the right, and a man that is knocked down cannot self recover, he must be aided by a comrade moving into base contact. The FSNL could never get anyone over there, so he simply laid there the rest of the fight.
In the FSNL center, the machine gunner pops up to man the gun...
But the Marine rifleman that initially caused him to cower down (bottom center) is still lying in his prone firing position, waiting for the gunner to pop back up. The Marine spots the enemy and fires...
But he misses, and the enemy machine gun (bottom center) returns fire with a long burst, knocking the Marine down.
Good grief!!!
On the Marine left, Doc continues his sprint and reaches the down grenadier (bottom left, white bead), but he can't yet be revived (he remains 'man down')! The rifleman to the left of them fires on the enemy machine gun team (top center). His rounds miss their target, and he begins moving forward.
I can't catch a break. The enemies opening salvo puts three Marines out of the fight, knocks another down, hunkers one, and pins one. I can't get guys rallied, I can't get 'man down' guys back in the fight, and if you haven't noticed, I can't hardly hit anything!!!
But as he moves forward (top center), he's spotted by an enemy rifleman (bottom center), who fires his AK...
Finally enemy fire misses, and the Marine makes it to the treeline (top center). Doc is tending to a Marine at bottom left.
In the center, the -60's A-gunner sprints to his buddy (top right, from bottom left), the one the enemy machine gun fired on. The rifleman is good to go, back in the fight.
And then the A-gunner (bottom center) fires his M-14 at the enemy machine gun (top center)...
The enemy gunner is killed and his assistant is pinned!
Finally!!!
But the enemy RPG gunner returns fire with his AK, pinning the A-gunner.
On the enemy left, the recoiless rifle team (bottom right) finally gets in the fight, firing a round at the remnants of Cpl Benavides' team (top left)...
The round lands harmlessly (left), but Doc grabs his patient and drops him out of the line of fire (white bead at bottom center).
The A-gunner and his buddy (bottom right) are happily congratulating themselves about knocking out the enemy MG team when suddenly a hand grenade lands between them (blue bead), thrown by the enemy rifleman just to the right of the recoiless rifle team at top left.
But the A-gunner kicks the grenade to the right, where it explodes harmlessly.
He then raises his M-14 and fires on the enemy soldier that threw the grenade (in the hole at top left), knocking him down.
The A-gunner is turning out to be quite the little marskman, the only guy that can hit anything.
The rifleman next to the A-gunner (bottom center), still lying in his prone firing position, takes aim at the pinned enemy assistant gunner (top left), suppressing him.
Doc finally manages to get the grenadier patched up and back in the fight.
The rifleman with Doc and the grenadier begins moving forward (center)...
But he draws react fire from the recoiless rifle team (using their rifles), pinning him (yellow bead at center). The grenadier moves up as well (bottom center left), but the enemy RPG gunner spots him and fires his AK, pinning the grenadier! Everyone on the left but Doc is pinned!
The A-gunner and his prone buddy are hanging out at bottom left: "Joe, we gotta get something going here man, we're getting chewed to pieces." The A-gunner moves right, wanting to see what happened to the guy he just shot at, the one in the hole that had thrown the grenade (the A-gunner is visible at the base of the trees at top center, and the trees are obscuring the fighting hole containing the suppressed FSNL rifleman that threw the grenade).
But as the A-gunner creeps up (bottom right), he spots the enemy RPG gunner in his hole (top left) and fires, knocking him down. The A-gunner hears a loud metallic clang (the recoilless rifle team is in the trench just above the wall to the right of the orange tracer).
The clang was the sound of the enemy recoiless rifle team (bottom right) slamming another round into the chamber (chamber? Is that the right term? I dunno, we didn't have recoiless rifles in the Corps, and though I ran into some in Afghanistan I never fired one). They send another 90mm round at the Marines on the left (top left)...
The round is right on target, dropping the grenadier and a rifleman, and hunkering the last rifleman (red bead at top left).
With the enemy assistant machine gunner (red bead at top left) suppressed and the RPG gunner knocked down (white bead at top center), the assistant for the recoiless rifle (bottom right) takes off out of the trench, sprinting to get across the foot bridge (right) and help his comrades.
But the A-gunner (bottom right), Lance Corporal Saenz, spots the retreating guerrilla (top center left) and fires...
Putting him out of the fight.
On the Marine left, Doc sprints up to help a suppressed rifleman, but he's only able to recover a little (up to pinned)...
The Marine rifleman that's been lying prone (at bottom left), keeping an eye on the enemy machine gun position, hops up and sprints forward and jumps into a trench (top left, with LCpl Saenz to his right).
With his buddy nearby (bottom left), LCpl Saenz rushes forward and jumps into the hole with the hunkering enemy rifleman (top left)...
But the enemy trooper was playing possum (bottom left). After a brief scuffle where knives were drawn, LCpl Saenz manages to crawl out of the hole and dart back to his buddy, jumping in the trench with him and hunkering down (red bead), as the enemy rifleman gets to his feet.
*I can't believe this! The Marine was +1, and the enemy was -2, and I rolled a draw!!! This game has been unbelievable. But as bad as my dice have been, I'm still in it.
So far the M-60 gunner has held fast at the hooch at bottom center of the table, and Lt Lupe and his RTO have hung back in the rear, panicking on the radio: "Contact, contact! Redleg 6 this is Redleg 2 Actual, we have contact, multiple men down, heavy enemy resistance, estimate at least company strength! We need supporting fires, we need 3rd Platoon, we need MEDEVAC, dammit Redleg 6 we need support!"
Lt Ordonez, the company commander: "Calm down Lieutenant."
Lt Lupe: "Redleg 6 we've got men down everywhere, I can't see anything, we're being overrun, broken arrow, broken arrow, request supporting fires on my pos!"
Lt Ordonez: "Calm down Lieutenant, now tell me what's going on. Where is Sgt Garcia? Where are your 2nd and 3rd Squads? What's your grid, son?"
Lt Lupe: "Redleg 6, we're at... Dammit, where's my map! I need my map! Sgt Garcia is down, Cpl Benavides is down, they're all dead, we gonna die!!!"
Lt Ordonez: "Now you listen to me Lieutenant! It's time to cowboy the @#$% up, so strap on your helmet, find your rifle, and you get your candy-ass up there and lead those men! Fight, Lieutenant! Redleg 6, out!"
Lt Lupe finds his rifle and helmet, then leads the RTO (right) and M-60 gunner up (bottom left).
The enemy rifleman that just ejected LCpl Saenz from his hole (center) tosses a grenade and hops the wall, joining the recoiless rifle gunner (far right)...
The grenade rolls up next to the trench (blue bead)...
And now both Marines in the trench are lying on the floor, suppressed...
The rifleman runs down the trench and pops out next to the body of the recoiless rifle's assistant (top left)...
The RTO (bottom left) spots him and fires, but misses.
As bad as things are going for the Marines, the recoiless rifleman sees the enemy is too close to use the weapon, and he doesn't want it to fall into enemy hands so he spikes it (drops a grenade in the breech, destroying it), grabs his rifle, and moves up to the wall (bottom left).
But the M-60 gunner (bottom left) spots him (top right) and opens fire...
The recoiless rifle gunner goes down (bottom left), and his buddy jumps in the stream and hunkers (top center).
Doc again tries to rally the Marine on the far left, and again he stays pinned.
That's three damn times he's done that! Three 1's on in a row on a D6!!!
Lt Lupe moves up to the trench, and the Marines are heartened to see their leader. Both rally and get back in the fight.
And all of a sudden the fortunes have reversed. With the LT, RTO, -60 gunner, LCpl Saenz, and his buddy, the Marines have five men on the center right ready to fight. Doc finally gets the rifleman on the left back in the fight, and they're up and ready to go. But now the enemy doesn't really have anyone left: the scout on their right has been knocked down since early in the fight, with no way for friends to reach him and get him back in the fight. The RPG gunner is in the center, but he's in the same boat. The reason the recoiless rifle assistant and then the rifleman on that side both sprinted for the foot bridge was to get over and rally the RPG gunner and assistant machine gunner, who was suppressed. But the recoiless rifle assistant was killed and the rifleman is now suppressed, lying in the stream.
It feels strange, but for all intents and purposes the fight is over, the Marines have won by sheer weight of numbers, despite losing five men right off the bat.
And the move up (LT is at bottom left, the newly rallied Marines at top center).
Looking south to north, the Marines move up at far left, top center, and top right.
Doc and a rifleman move up on the far left, capturing the incapacitated enemy scout there.
The LT and RTO move up in the center, capturing the suppressed assistant machine gunner.
While on the right, LCpl Saenz and two riflemen move up and capture the incapacitated RPG gunner (left) and suppressed enemy rifleman in the stream (center right).
Well, I'm still a bit in shock. I suppose I cheated a bit: in fairness, I could have rolled activation for the enemy one last time (right after Lt Lupe moved up, rallied the two Marines in the trench, and they moved up), and then had the enemy assistant machine gunner and the rifleman in the stream attempt to self rally. If either failed with a 6 they would have run off the map, if they failed with a 1 I would have simply moved forward and scooped them (as I did here, though not without risk as you saw when LCpl Saenz charged the suppressed rifleman in the fighting hole and was rejected), and if they would have passed they wouldn't have been able to move or react fire so I could have moved up and simply gunned them down. Though maybe I would have missed ;)
Either way, I'm pretty sure they wouldn't have been able to reach either of the knocked down guys, they simply might have been able to escape by running off the map (if they were really lucky). In any case, the Marines ultimately suffered 2 KIA and 3 WIA, while the FSNL guerrillas suffered 3 KIA and 4 captured. Lt Lupe was not relieved, but he received a severe ass chewing that evening when Lt Ordonez helo'ed out to 2nd Platoon's night defense position for the express purpose of chewing Lt Lupe's ass. Lt Lupe recommended LCpl Saenz for the Bronze Star, but Lt Ordonez rejected it, partly due to the fact he was pissed at Lt Lupe, partly due to the fact Saenz got his sorry ass thrown out of the fighting hole by a cowering enemy soldier, then ran back with his tail between his legs and flopped in the trench next to his buddy.
What a fight, I'm exhausted! I've got one more to write up and post, then I change gears for some modern Middle East fights. My boy and I played most of a game, and have two more to go in that operation, playing co-op with SOF against insurgents. Sorry, my wargaming butterfly-ness simply won't allow me to stay focused on any one arena for too long ;) Stay tuned.
V/R,
Jack


Woo-hoo! Another roller coaster ride. You must have lost those "magic" dice you had last year...
ReplyDeleteYeah, 'magic dice.' Much like the Panda's affinity for goats, it just never seems to go away ;)
DeleteI meant to post the last batrep this evening, but time got away from me. Got sucked into a big (but interesting) discussion on TMP about light machine guns.
V/R,
Jack
wow ! .. another great fight !...this is what I love about wargaming ...the unpredictablity, and that a game sometimes takes on it's own personality. Credit to the rules .
ReplyDeleteSuch a great looking table ! ..I know I've seen it before but the photos here are fantastic.
great work Jack !
This comment has been removed by the author.
DeleteJimmi,
DeleteThanks buddy! I'm glad you're enjoying the batreps, the games were a lot of fun. And the rules are great, I love the fact the game can turn in an instant.
V/R,
Jack