Current situation: It's 0620 on 4 August 1990 in South Leon. Lt Gouveia has been promised a SLA mechanized battalion, and he has secured (limited amounts of) Cuban air support. The desired end-state is joint Cuban/SLA possession of Hill 114; to that end, the SLA battalion scheme of maneuver is to probe to the northeast of Hill 114 (this fight, which is taking place directly north of the map used for Operation Chunky Bandit fights 1-8), seeking to find an opening in the enemy defenses and exploit it with a hasty attack on the objective, or go firm and secure the right flank of the attack. While this is occurring, Cuban air support will pound Hill 30 (at center right of the Op CB fights 1-8), and then SLA forces will assault and hold Hill 30 (will be Op CB #10) to secure a position to support the Hill 114 assault by fire and secure the left flank of the attack. The SLA command, of course, expects the enemy to vigorously counterattack Hill 30 (will be Op CB #11). Then SLA forces will conduct an air assault to the northwest of Hill 114 (off the map for Op CB fights 1-8 to top left) to isolate the objective, preventing withdrawal and reinforcement (this will be Op CB #12), and then the assault on Hill 114 will commence (will be Op CB #13). Again, SLA leadership presumes the enemy will vigorously counterattack if Hill 114 falls (will hopefully be Op CB #14, assuming the attack on Hill 114 succeeds, but that applies pretty much to all of these).
Fifty minutes ago Staff Sergeant "Tahoe" Gallarraga accompanied the SLA mechanized battalion's A Company on a probe northeast of Hill 114, where they discovered the enemy had prepared defenses in that zone, though they were able to secure Hill 27 and thus fulfill their mission of anchoring the right (northern) flank of the upcoming attack on Hill 114. Tahoe was awarded the Bronze Star for his actions taking Hill 27.
Twenty minutes ago Staff Sergeant "Gundog" Baerga accompanied the SLA mechanized battalion's B Company in the assault on Hill 45, which succeeded, but with heavy casualties, including SSgt Baerga himself, lightly wounded and evacuated. The remaining SLA elements quickly established defensive positions atop Hill 45.
Now we join Sergeant "Racer" Palmeiro, who brought a .30-caliber machine gun team up Hill 45 to bolster the defense put on by B Company, as an enemy infantry company closes in to re-take the vital position.

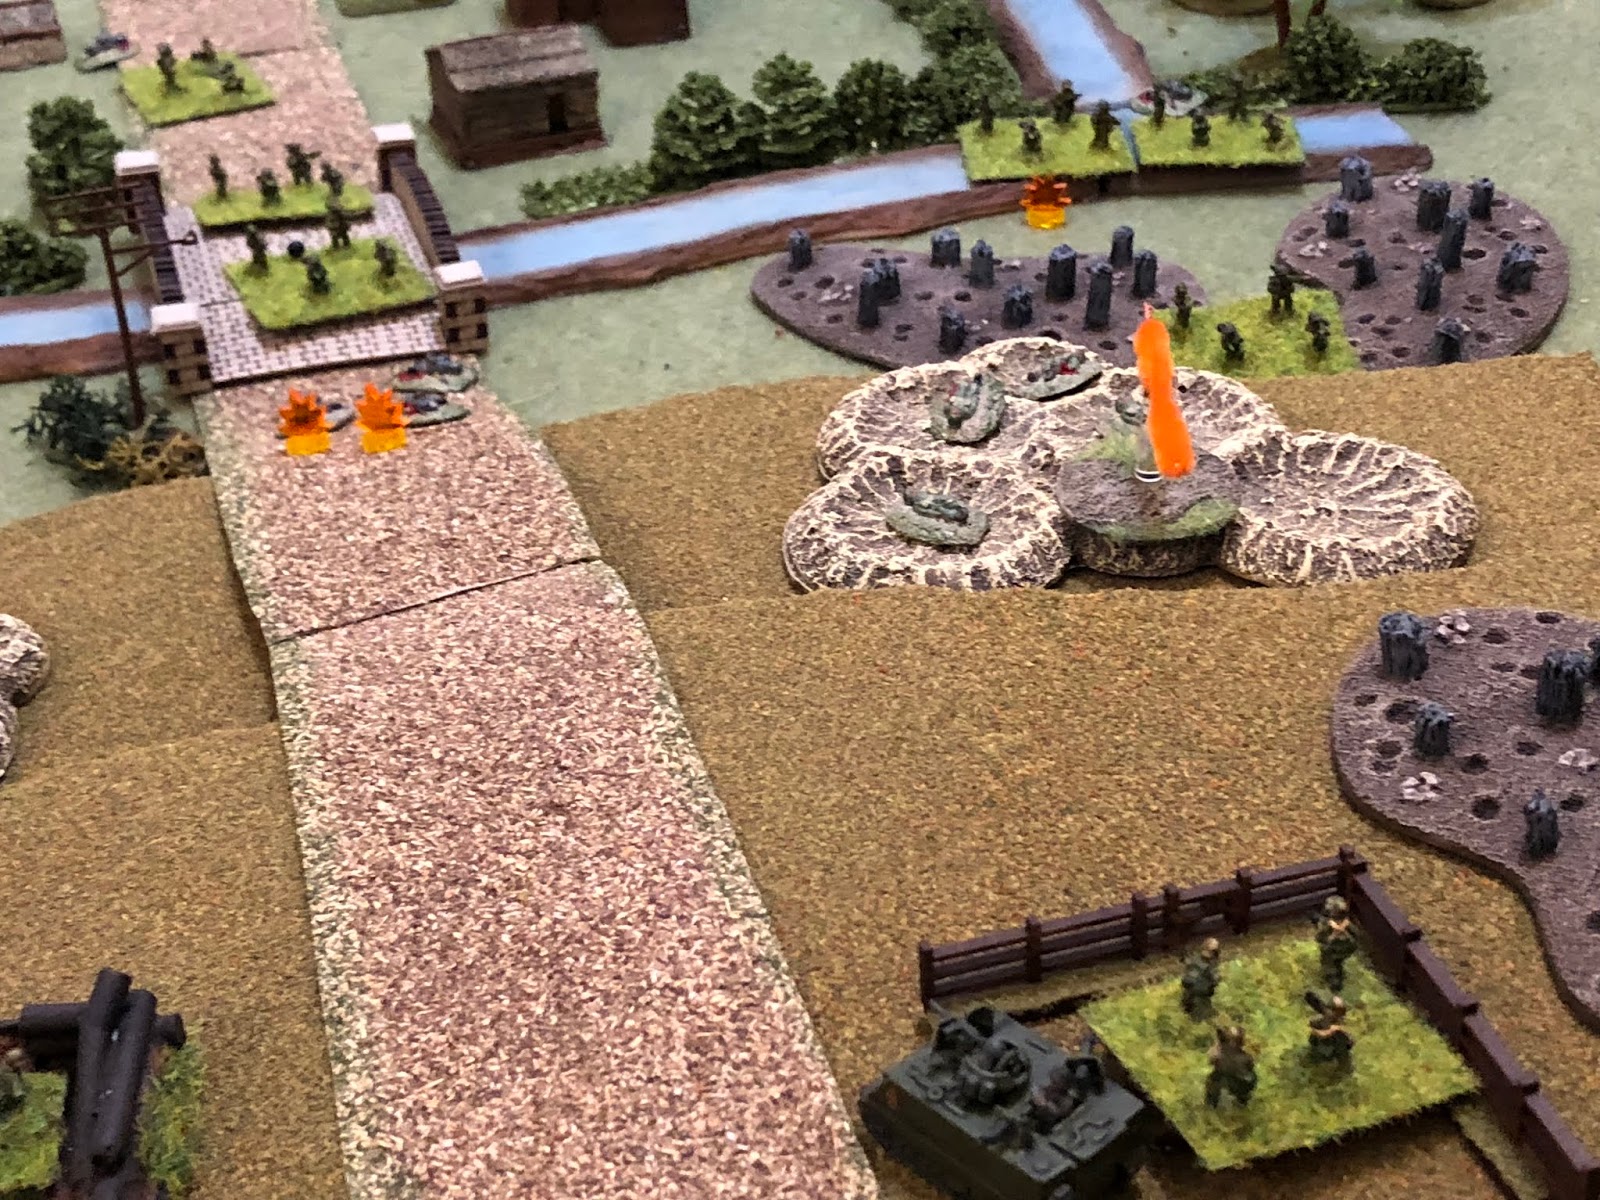
Overview, north is up, with Hill 45 and the remains of the village of Siagnoa at top right, shattered by Cuban air support which aided greatly in B Company securing the hilltop against a dogged enemy defense. At bottom left is Hill 30, with The Church just off camera to bottom left, while at top left is the village of Lasau, with Bridge #1 (the site of the ambush that devastated TF Black in Op Chunky Bandit #8, necessitating this whole push by the SLA mechanized battalion to take Hill 114) at center top.
The opposing forces, with SLA on the right and FSNL (communist neighbors to the north) at left. The troops are all Pendraken 10mm, except the Cuban (singly-based dude at bottom center right), which is Minifigs UK. The M-113 ACAVs are also Pendraken. I'm playing this series of fights (the SLA operation to take Hill 114) using Ivan Sorensen's "Squad Hammer" rules, modified a bit.
The SLA force consists of: their company commander (who pretty much just sat out the last fight, spectating), Sgt "Racer" Palmeiro (the singly based guy in the middle), a .30-caliber Browning MG (left), the remains of 1st Platoon (bottom left, 2nd and 3rd Squads), two M-113 ACAVs (bottom right, Rhino 11 and 13), and all of 2nd Platoon (top).
The enemy force consists of an entire rifle company: commander (top left), three rifle platoons of thre squad (right), a 12.7mm "Dshk" heavy machine gun, and an 82mm mortar (both at bottom left).
Overview, this time with troops: the SLA force is at top right, in and around Hill 45, while the bad guys have their 1st Platoon and their Dshk at bottom left, 2nd Platoon and their CO at left, and 3rd Platoon and their mortar at top left.
The SLA defense of Hill 45: 1st Squad, 2nd Platoon (1/2) is at bottom left), 2/2 and the CO is at center left, the Browning .30-cal is at center right, and 3/2 and Racer are at top left. There was not time for improved positions, so they simply jumped into bombed out houses and craters, as available.
Of note, the two M-113 ACAVs, Rhino 11 and Rhino 13, as well as the two 1st Platoon squads (2/1 and 3/1) are being held off table in reserve. They wouldn't be there long...
On Hill 30, in the southwest, the enemy 1st Platoon and Dshk HMG.
In the west, approaching through Lasau, the enemy CO and 2nd Platoon.
In the northwest, the enemy 82mm mortar team and 3rd Platoon. Time to fight, and a helluva fight it would be!
Looking west to east, in the center the enemy pushes 2nd Platoon up through Lasau (center left, from bottom left).
*I decided to give group moves a try for units that hadn't been/weren't being engaged, but they can only move, not shoot, or move and shoot. However, they can spot, but the enemy 2nd Platoon was unable to locate any of the SLA defenders.
1/2 (left, with the CO and 2/2 at bottom right) is apparently sleeping and DOES NOT spot the entire enemy 2nd Platoon moving up through Lasau (top left)!!!
*So I essentially 'burn' a command point, because I wasn't going to use them to try and spot any other enemy force and shoot, thus giving away their position, on ineffective long range fire.
In the north, on the enemy left, their 3rd Platoon moves up through the dense brush (left, Hill 45 at top center/left). They don't see anything on the hill.
*It seemed like a good plan, a three-pronged attack, but in reality this prong sucks, because they're going to move up (east) and run into the river, and there is no bridge or ford there, so they will be significantly slowed there. Not impossible, but a pretty serious impediment to their advance, probably should have put them on the north side of Lasau, just south (right) of the river running bottom right to center left. I swear I didn't do that on purpose, just didn't realize the bottleneck until later, after I was well into the fight.
And then in the south, on the bad guy right, the enemy 1st Platoon moves up (center right, from bottom right), covered by the heavy machine gun (bottom center right, with 2nd Platoon and the CO at left). They, too, cannot spot the SLA infantry on Hill 45 (
Hill 45 looming at top left).
On the SLA right, Racer taps the squad leader for 3/2 (bottom right), "hey, look," he says, pointing at the enemy 3rd Platoon (top right). "What should we do, ask the commander?" the squad leader queried. "Nah, let's just open fire," replied Racer. Always full of good ideas, 3rd Squad, 2nd Platoon, at Racer's suggestion, opened fire at long range on enemy troops moving through thick vegetation, and they did nothing but give up their position...
With the fight now on, the CO (bottom center left) orders 2/2 (co-located with him, 1/2 above them) to open fire on the enemy 1st Platoon (top left), and they do, causing several casualties (2 hits on the enemy 1/1). Though not the most tactically astute (as evidenced by the assault on Hill 45, last fight), the SLA company commander muttered a curse under his breath, wishing they'd have allowed the enemy to get a bit closer before opening fire, where their rifles and squad machine guns might do more damage.
As predicted, the enemy Dshk HMG on Hill 30 (bottom left) spots Racer and 3/2 on the right flank of the SLA defense (top center) because of their outgoing fire (at enemy 3rd Platoon, in the jungle at top left), and so the machine gunners begin pumping rounds out, over the heads of their 2nd Platoon, but the rounds strike high and 3/2 is okay, so far...
But then the enemy mortar team (bottom left, with 3rd Platoon above them) gets in on the act, targeting 3/2)…
And the mortar rounds hit dead on target, pounding the SLA rifle squad (5 hits, one away from extinction)!
Racer (left) steps up to rally the troops, but he's a douchebag and only manages to pull one down (4 hits total, AKA "dead meat").
Now, with Dshk (top left) tracers flashing over Racer and 3/2 (far right), and 82mm mortar rounds landing amidst them, the SLA machine gun team (bottom center, in burned out building) decides to help out, targeting the enemy heavy machine gun.
And there it is: with one fell swoop, the SLA machine gun has eliminated the Communist heavy machine gun!
*Man, I needed that!
Knowing 3/2 (top left) was in peril, the SLA commander leaves 2/2 (bottom left, with MG at right) and dashes across the road, hoping to get to his beleaguered squad and rally them (center top).
*As you can see, he can't make it there in one turn, and is praying 3/2 will somehow survive long enough for him to get there and rally them. They'll do okay against direct fire because of the cover provided by the craters, but if that mortar hits them again...
Meanwhile, 2/2 (bottom center, with 1/2 above and to the left of them) continues firing on the enemy 1st Platoon (top left), putting more casualties on them (3 more hits, bringing the total of hits on the enemy 1/1 to five)!
But then, as predicted, the enemy mortar team (bottom left) checks their sights and fires another sheaf...
The SLA Commander looks on as Racer and his 3/2 are pounded to dust by the enemy mortar team...
Sergeant "Racer" Palmeiro is killed instantly by a direct hit.
*Yes, okay, I cheated, sue me! When I played the game it was just "the Cuban," but when he got hit and then I rolled for wounds after the game and he was KIA, "the Cuban" was changed to "Sergeant 'Racer' Palmeiro." The cheat was waiting to see which Cuban was taking part in this fight, rather than deciding first, playing it, and living with the results, but I'm just sick and tired of his cowardly ass! Problem solved!
As the enemy mortar team (bottom left, with their 3rd Platoon above them) is doing its dastardly deed, the enemy CO (center) orders his 2nd Platoon forward, where they reach the edge of Lasau and are dangerously (from the SLA point of view) close to Bridge #1.
While on the enemy left, their 3rd Platoon is able to push through the dense jungle, all the way up to the river (bottom center left, from bottom right, with 2nd Platoon and their CO at top right, Hill 45 at top left).
*Since 2nd Platoon hadn't been spotted yet, and 3rd Platoon had been fired on by 3/2 but they were knocked out, I'm still allowing those two platoons to use group movement. But now 3rd Platoon has reached the river, the bottleneck I referred to earlier. The river forced them to stop their movement early, at its edge, they will have to move into and spend a turn in the river, and then move out of it a reduced distance the following turn, and it's only that easy if they get to continue using group movement. If they get fired on they're going to have to use a command point for each individual squad, which will (likely) significantly delay their crossing. All realistic, just could have been avoided if they simply started on the opposite side of the river (straight up from where they currently are), though this could have caused some traffic jams with 2nd Platoon at Bridge #1 (top center).

At the base of Hill 45, 1/2 (finally spots the enemy 2nd Platoon moving towards Bridge #1 and opens fire.
Putting the hurt on the enemy 2/2 (4 hits on the center enemy rifle squad, with their CO at bottom left)!
With the right flank caved in by the loss of Racer and 3/2, the CO (center top left) decides its time to pull in some of his reserves: Rhino 13 enters the battlespace carrying 2nd Squad, 1st Platoon (top right).
While 1/2 (center top) is lighting up the enemy 2/2 (left), the enemy 1st Platoon (bottom right) sends their 2nd Squad forward (center right)…
*These bastards are gonna cause a whole lotta problems for me.
They easily acquire 2/1 and open fire, AKs and RPDs rattling, but the improvised positions in the craters do their job and 2/1 is unaffected.
*Just when I get happy about the bad guys missing at close range, it's time to start a new turn: the enemy has 4 command points, the good guys only have one!!!
There's a lull as the SLA troops try to reorganize and redistribute ammunition, which allows the enemy left prong, their 3rd Platoon, to advance en-masse into the river (top left)!
*Dammit!!!! All I needed was an activation and a spot so I could fire on them, thus depriving them of their group move capability. If I don't do it soon they're going to group move their whole dame platoon back out of the river, too! Ah, my card comes out...
The SLA Commander (right) spots this new, dire threat to their right flank and order the SLA machine gun team (bottom center) to engage. They swing the Browning right and cut loose a long burst...
And run a string of tracers straight into the center of the enemy formation (3 hits on 2/3)!
*Problem solved. Well, sort of...
As their 3rd Platoon is getting machine-gunned (top left), their mortar team (bottom left) can't seem to get the coordinates for the SLA MG team (off camera to top center), so they turn the tube on the SLA left flank, targeting 1/2 (top right)…
*The spotting roll in action, again.
And 1/2 (bottom left) becomes the second SLA rifle squad to get pounded by the enemy mortar team (5 damn hits!!!). The SLA CO, moments caught in the road (top right), dashes left (center bottom, with 2/2 above him) to assist.
But then that dastardly, nearby enemy rifle squad, 2/1, hops into the river, firing as they go. Luckily they hopped in the river, it caused their fire to be ineffective; if they'd have sat still they've probably have put 1/2 out of the fight...
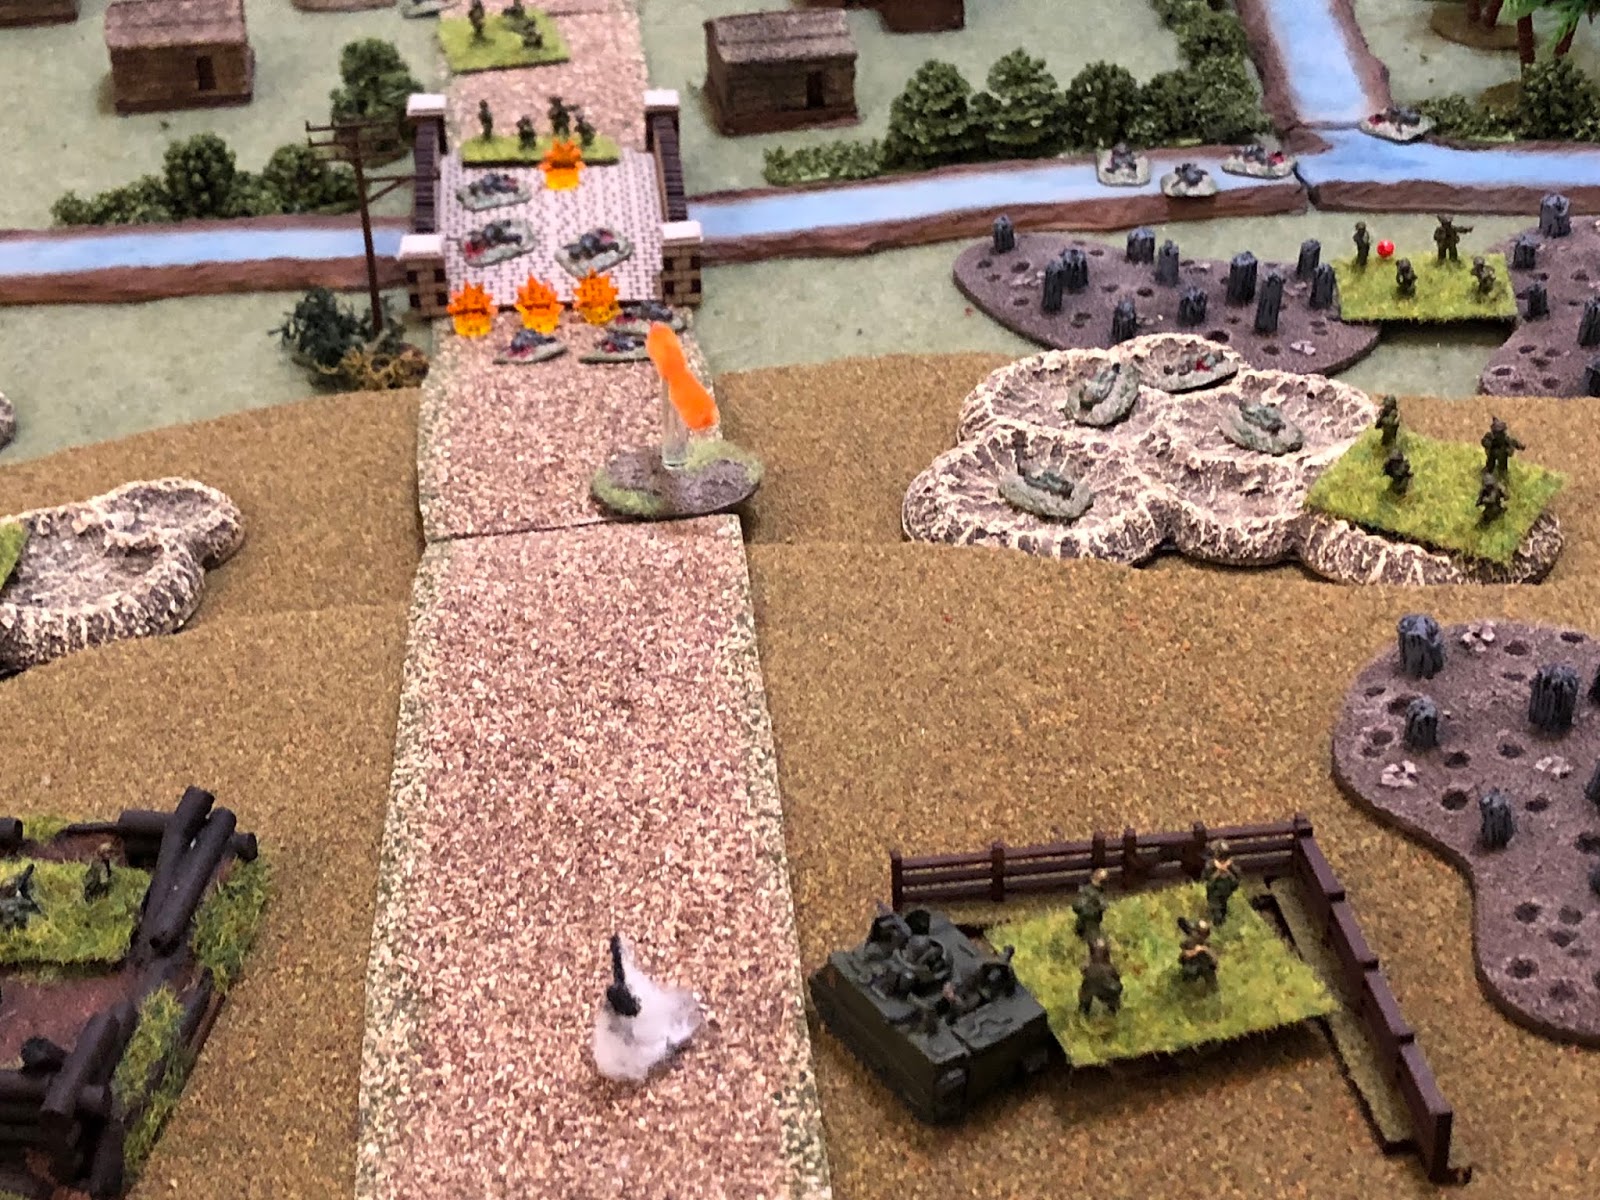
And while the enemy 2/1 (far right) and 3rd Platoon (far left) are working on crossing the river, 2nd Platoon becomes the first to actually do it: they (bottom center right) send their first squad across Bridge #1 (center left, just across the bridge).
*Stuff just got real up in here; I'm marveling at our inability to halt the enemy at the major defensive barrier the river represents, but there they are, all three platoons have elements over or in the river...
The enemy squad, 1/2 (bottom center) is too preoccupied with the Cuban machine gun (top center) spitting lead at their comrades in 3rd Platoon (off camera to bottom left) to notice the SLA CO and 2/2 (right), and they're too far away to use an RPG on Rhino 13 (top left), so they cut loose on the MG team, to no effect.
While back across the river, the enemy CO moves up and rallies 2/2 (drops 1 hit, down to 3 total).
The enemy 3rd Platoon (top right) at least temporarily halted, and with a new, more imminent threat appearing (the bad guy 1/2, top center), the SLA gunners swing the Browning back left and open fire down the hill...
Pumping a full belt into them and nearly wiping them out (5 hits)!
And while the enemy 2/1 (top right) is being machine-gunned to death, the SLA CO moves over to rally 1/2 (center), but doesn't get much done (removes 1 hit, down to 3 total). The enemy's 2/1 (bottom left) is licking its chops...
*Good grief, my rally rolls suck!
The enemy mortar team (bottom left) would love to continue pounding the SLA right flank (2/1, top center), but they now have friendlies too close to engage (just right of 1/2 is the bad guy 2/1, in the river), so they shift fire and engage the SLA MG team (in the burned out house at top center left).
The 82mm mortar rounds fall long, harmlessly, though certainly drawing the attention of Rhino 13's crew (top right).
Back on the SLA left, the CO directs the fire of 1/2 onto the enemy's 2/1. M-16s crackle, but the M-60 is jammed...
So the bad guy are only aggravated (2 hits), and they charge straight into close combat!!!
*What the hell is this?
I'm being close assaulted???
The enemy rifle squad has very little problem putting 1/2 out of the fight, and immediately thereafter crashes into the SLA command group!
Both sides are battling it out, grenades and insults being tossed back forth between craters, but very little being done in terms of casualties (both sides took 1 hit, bottom left). Meanwhile, unable to engage the enemy squad locked up with the command group, 2/2 (far right) turns its weapons on the enemy's 1/2 (top center)…
Ruthlessly gunning them down!
And with that, Rhino 13 moves up, getting into the fight (top center, from far right, with the MG team at bottom left).
But with all the chaos and confusion of battle, Rhino 13 (center right bottom, in the same area where Expo triggered the booby trap in fight #4 that wounded him and Faceman) cannot spot the enemy 3rd (top right) or 2nd (top center) Platoons. They spot the bad guy 1st Platoon (top left) and open fire with the .50-cal HMG...
Causing some casualties on the enemy 3/1 (3 hits, center, with 1/1 beat up at top left).
*If I'd known I was only going to get 3 hits on an enemy squad in the open I would have fired on 1/1 and finished them off...
With Rhino 13's Ma Deuce hammering away, 2/1 pops out.
Across the bridge, in Lasau, the enemy CO rallies 2/2 again, and they are once again in good spirits (-2 hits, taking them down to 1 total).
*That really sucks, I'm having a hard time finishing enemy units off...
Freshly rallied, the enemy CO (left) sends 2/2 up the bridge...
*Hopefully to their death, right behind the knocked out 1/2.
The enemy squad gets up the bridge (bottom center) and spots the SLA MG Team (top center), which causes them to halt and open fire, shaking up the machine gunners (1 hit).
And then the enemy 3/2 follows their brothers up onto the bridge, though they're masked by their comrades and can't fight (center, with CO at bottom center, 2/2 above them, and 3rd Platoon at top left).
*That's not true, they just failed their spotting rolls.
With things clogging up in the middle (right), the CO (bottom right) wants to keep up the pressure, and he knows they've got to get close to use RPGs on SLA armored fighting vehicles, so he directs 3rd Platoon to get across the river (far left). 3/3 is the first to get across, but they can't fight because they can't see anything.
*Technically they could see something and engage if they past the spotting rolls, it's jus that they're very difficult spotting rolls due to the bad guys pretty much being in dead ground. To my point...
The newly arrived 2/1 (bottom right, with Rhino 13) is now in the fight, but they can't see the enemy squad that just crossed the river (between the two shattered tree stands at center top), so they engage the rest of the enemy 3rd Platoon, still crossing the river.
And the SLA rifle squad's fire is devastating, putting the enemy 1st Squad, 3rd Platoon out of the fight!
With the enemy 1/3 getting put out, 2/3 moves up, seeking shelter in the dead ground with 3/3.
The overall situation is dire: the SLA is joined by the last of their reserves, Rhino 11 and 3/1 (bottom right), but they're joining Rhino 13 and 2/1 (top center), the MG team (center), 2/2 (left), and the CO (bottom left, locked in close combat with the enemy 1/1). And that's the point, all three enemy platoon have troops across the river: 2/3 and 3/3 at top left, 2/2 and 3/2 at left, and 1/1 at bottom left.
In the center, the SLA machine gun team (bottom center) opens fire on the enemy 2nd Platoon crossing the bridge (top center, with the SLA 2/2 at left and the enemy 2/3 and 3/3 at top right).
The machine gun fire causes the enemy's 2/2 to add bodies to the growing pile on/near the bridge (two more hits, for a total of three)!
2/2 gets in on the act as well, firing on the bridge, adding a few more bodies to the pile (only 1 more hit!?)…
And then 2/1 (bottom right, next to Rhino 13, with the MG team at bottom left and 2/2 above them) also adds their weight of fire to the enemy on the bridge...
And the enemy 2/2 finally succumbs to SLA fire, though their comrades in 3rd Squad (left) have yet to be kissed.
*That was absolutely ridiculous! I fired at two enemy squads in the open, channelized on a bridge, with a machine gun team and two rifle squads, and only managed to knock out one enemy squad! I had no problem with spotting and to hit rolls, but my damn damage rolls were atrocious!
And with practically the entire SLA defense concentrating on the Communist forces on the bridge, the enemy's left flank looks to capitalize: the enemy 3/3 moves up (top center, from top left), creeping into among the craters, sneaking up on Rhino 13 and 2/1 (top right)…
The enemy rifle squad promptly looses a rocket at Rhino 13!
But it misses!
*See, there was a bit of strategy there: the good guys spent all their activations working over the bad guys on the bridge, because the bad guys on the bridge can come straight up the road at Rhino 13, no problem with spotting or to hit rolls, whereas the bad guys on the good guy right flank (enemy 3rd Platoon) would have to climb the hill, worry about SLA infantry (2/1), and then have an obstructed line of sight/line of fire at Rhino 13, making it harder to spot and hit. Staying in that vein...
Rhino 13 (bottom center) decides to let 2/1 (right next to them) deal with the enemy squad popping RPGs at it (far right) and targets the enemy on the bridge, 3/2 (top center, with their CO behind them). .50-cal rounds find their target, but only a couple go down (2 hits).
*My piss-poor damage rolls continue, and I've got real problems with that squad on the bridge...
So Rhino 11 moves up to augment the MG position (center, from bottom right).
Rhino 11 (bottom center left) is able to spot the enemy 3/2 on the bridge and it cuts loose with its .50-cal. The tracers flash by the enemy soldiers and take large chunks out of the bridge...
B
t no one is hit (bottom left)!!! Over on the right, the enemy 2/1 is still locked in close combat with the SLA commander...
The Communists decide now is the time to make a push: they toss frags, hunker down as they explode, then push themselves up and over the top, just like WWI...
And the SLA command group goes down fighting.
The bad guys then charge 2/2 (center left, from just off camera at bottom left, with Rhino 11 and the MG team at far right).
Quite amazingly, the SLA 2/2 is able to mow the charging fanatics down without even breaking a sweat (enemy only scored one hit on 2/2)!!!
But as the action picks up on the SLA left (2/2 is just visible at bottom right), the enemy pushes again on the right: the enemy 2/3, though roughed up a bit (3 hits on them), moves up and joins their compadres, 3/3 (top center, with 2/1 and Rhino 13 at top right).
And they fire an RPG at Rhino 13!
But that rocket misses, too!
*Looks like the 'focus the fire to the front, force the enemy to the flank gambit is working.
But as his 3rd Platoon (top center) is missing its second RPG shot, the enemy CO moves up to the bridge and rallies his 3rd Squad, 2nd Platoon (bottom left), and it's wildly successful, the boys are ready to storm the castle (removed all three hits).
*But not all's swell in River City: new command points have just been issued, and it's a black Christmas. The bad guys get 5, good guys 1. I'm not sure I'm going to survive this...
The enemy mortar team has just received a resupply (bottom left); they immediately go after the SLA machine gun team again, having fired long last time.
And this set is right on the money, blasting the SLA machine gun out of its fighting position!
As soon as the enemy CO sees the mortar rounds crash down on the SLA MG position (top center), he blows three short, shrill blasts on his whistle, signaling 'charge,' then he grabs 3/2 and dashes across the bridge (center, from bottom center)!
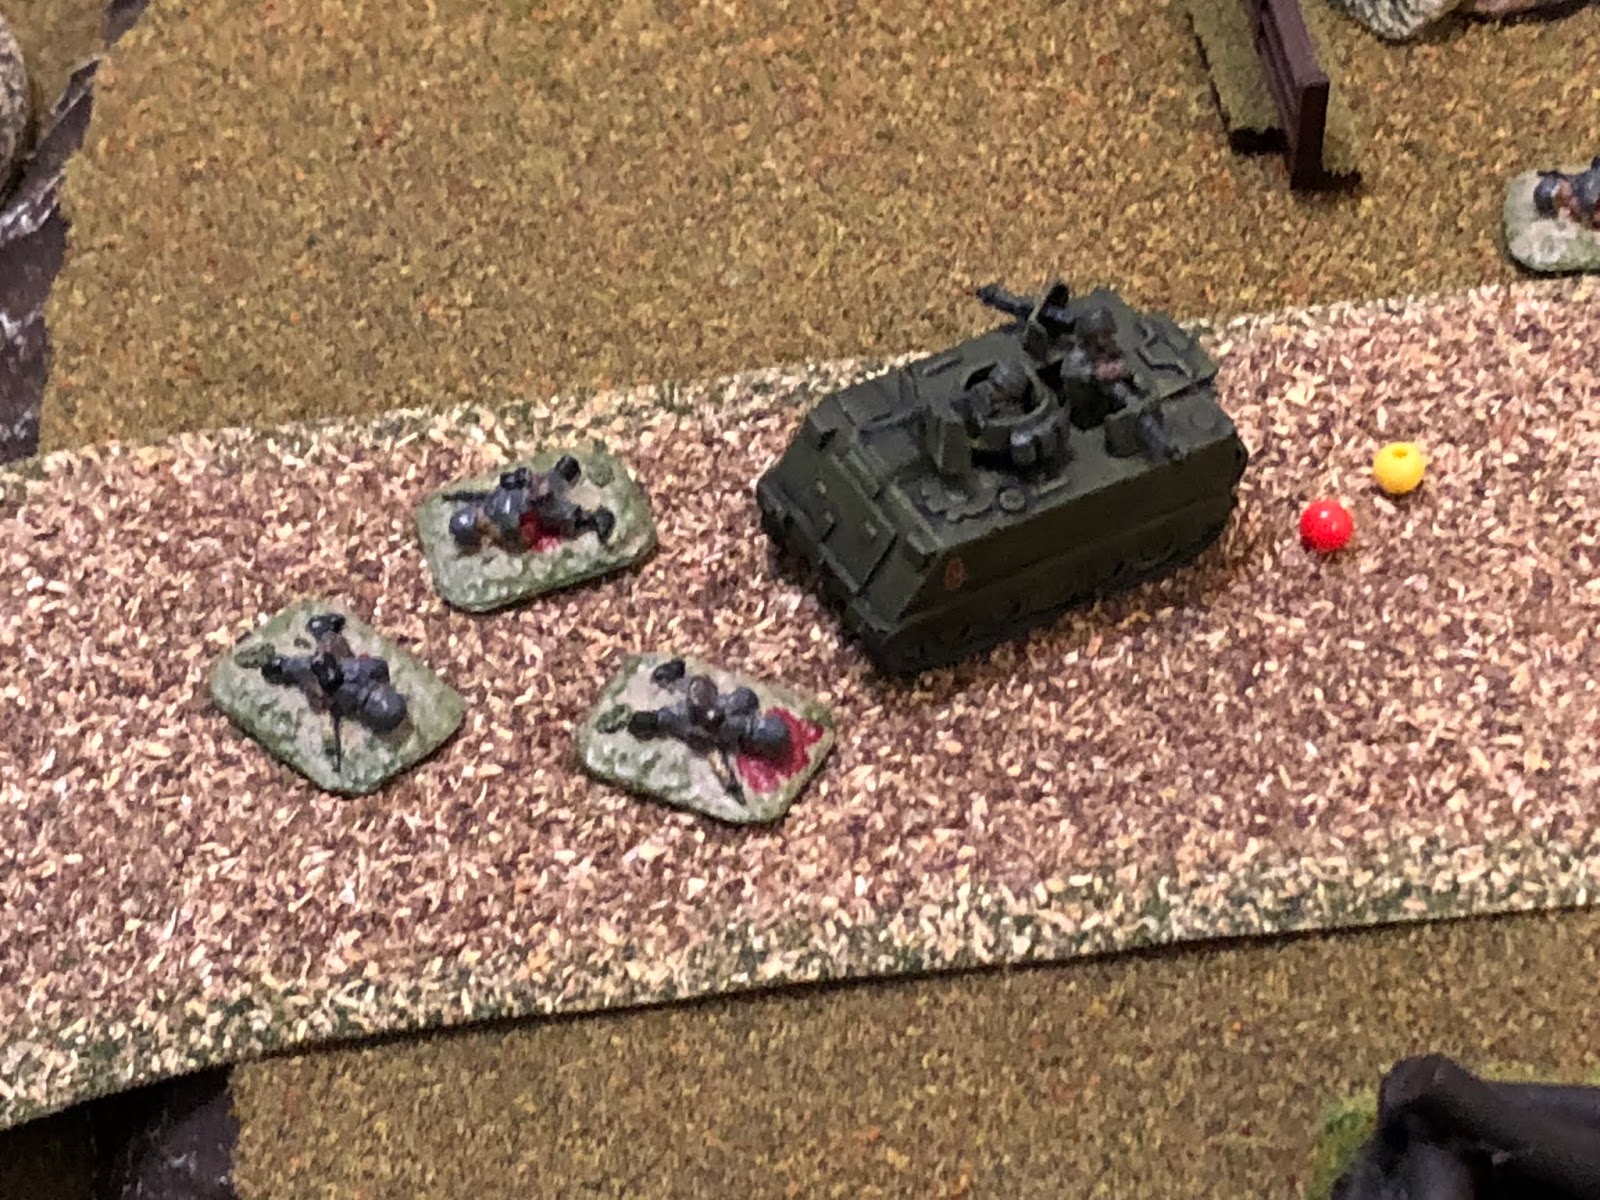
3/2 launches and RPG at Rhino 11...
And blasts them straight to hell.
While on the enemy left, 3/3 pushes up and out of the craters (far left) and charges into close combat with 2/1 (top center, next to Rhino 13)!
The enemy squad makes quick work of the stunned defenders...
Then charges the armored fighting vehicle!!!
*The bad guys just rolled 6 for damage twice in a row, knocking out Rhino 11 and then 2/1...
The fight is straight out of Dante's Inferno, nothing but blood, guts, and spittin' ass! The enemy squad is a getting roughed up (5 hits), while Rhino 13 is a bit hurt and a bit shook up at watching bad guys run over their infantry and then run at them howling like banshees, trying to crawl all over them (3 hits).
With the enemy 3/3 and Rhino 13 locked in close combat (top center), the only other SLA forces left are 2/2 (bottom center) and 3/1 (off camera to bottom right)! The enemy 2/3 moves up (center, from top left), looking to get into a tussle.
They (bottom center, with the enemy CO and 3/2 at far right) decide to swing right and fire down on 2/2 (center top), causing them some casualties (2 hits, 3 total).
But then back up the street, Rhino 13's vehicle commander pulls out his .45 and starts whooping ass!
The enemy's 3/3 is knocked out!
And Rhino 13 charged forward, into the flank of 2/3, already beat up and caught in the wide open...
But the enemy is quickly able to pivot and duke it out with the living, breathing steel monster! Both units are on the verge of collapse (they each have 5 hits)!
*One more hit will put either of them out, so whomever is able to activate first is 99% sure of winning that fight, all they have to do is hit, and the winner of that fight probably determines who ends up in possession of Hill 45.
With the fight on Hill 45 raging (top left), the enemy moves their remaining two squads of 1st Platoon up on the right (center right, from bottom right).
*I allowed them to use a group move since they've not been under fire for quite some time now. But back to the main event; you've got to be wondering, who got the first activation?
You bet your sweet ass, I did! Rhino 13's vehicle commander reloads his .45, lets out another hoot, and they crush the remains of the enemy's 2/3!
Then faces down the enemy CO and 3/2 (top center, with 2/2 at left, and apparently the smoke blew off the burning Rhino 11, bottom left).
Caught in the middle of the road, most of their comrades dead, they've had enough.
The remains of the enemy's 1st Platoon falls back towards Hill 30 (center bottom left, from center top right, Hill 45 at top right).

As the SLA forces consolidate and reorganize their defense. Only Rhino 13, 2nd Squad, 2nd Platoon, and Third Squad, 1st Platoon, remain of B Company. But they've held, and they've accomplished their mission, securing the southern (left) flank of the attack and establishing a support by fire position within range of Hill 114. This battle will go down in the annals of South Leon military history: the entire crew of Rhino 13 was decorated, the vehicle commander receiving his country's equivalent of the Medal of Honor. Similarly, every member of 2/2 was decorated, their squad leader receiving the equivalent of the Distinguished Service Cross. The commander of B Company was also awarded the Distinguished Service Cross, posthumously, and the entire machine gun team received the equivalent of the Bronze Star, most of them posthumously.
Sadly, the Cuban contingent, serving in an advisory role, Sgt "Racer" Palmeiro, was killed in action by mortar fire while holding the right flank with 3rd Squad, 2nd Platoon (because he urged them to fire too soon, which gave their hidden position away).
Things were shaping up for the direct assault on Hill 114, only one task remained: an air assault northwest of Hill 114, to cut the enemy forces off from reinforcement and/or escape. The grim, tired faces of the SLA troops on Hill 45 turned skyward as Cuban F-4 Phantoms thundered overhead, followed shortly by the sound of large rotor beating hot, humid air, and the sight of two Cuban CH-47s hopped into view, heading northwest. On those birds were elements of D Company, along with MSgt "Faceman" Soriano, TF Black's senior enlisted man, preparing to set down in the middle of enemy territory. Face new that they didn't really need to 'win,' this fight, that their job was really just to tie up as many enemy forces as possible for as long as possible, and that some could, conceivably, consider this a 'suicide mission,' but the former US Navy SEAL was quite cool and calm as the Chinook began its descent into the LZ. "We're just going to kick an anthill, then stomp as many as we can, easy!"
V/R,
Jack


Great game report- you certainly get a lot of actionin a small space using 10mm.
ReplyDeleteCheers,
Pete.
Thanks, Pete, and absolutely, I like the smaller tables as it saves time for setup/takedown, though it certainly isn’t as majestic as some other guys’ setups.
DeleteV/R,
Jack
Cool. Love your terrain and characters!
ReplyDeleteThanks Jim, and for me it’s all about the characters!
DeleteV/R,
Jack
Great report Jack. But be sure that since you rigged the KIA result, Lady Luck will now transfer Racer's dice-rolls to one of the characters you do like...
ReplyDeleteThe thought had crossed my mind. Having the coward around for a bit seemed like fun, but it got old real quick when you get ambushed and two guys are hit, only five left, and one (or, for a little while, two) of them is almost assuredly going to bolt.
DeleteV/R,
Jack
BTW, is there a force morale mechanism in these rules or is it all decided at the level of the individual squads/sections?
ReplyDeleteThere is not, really no morale of any sort. Each unit has a number of “strength points,” and when they’re gone the unit is out of the fight, but it’s an amalgamation of losses and failing morale, not discretely one or the other.
DeleteV/R,
Jack
I appreciate it, Andy, and thanks for sharing elsewhere, after you shared the last one I saw a huge jump in interest!
ReplyDeleteV/R,
Jack