All,
It's 1330 on 29 June 1990 and Battlegroup Elias has just taken the town of Abrvo. However, the Cronistrian Communists have established a defensive line just east of the town and river, anchored on their left by Lake Lagoda and centered on Hill 142. Captain Elias sets about quickly reorganizing his troops for the assault on Hill 142.
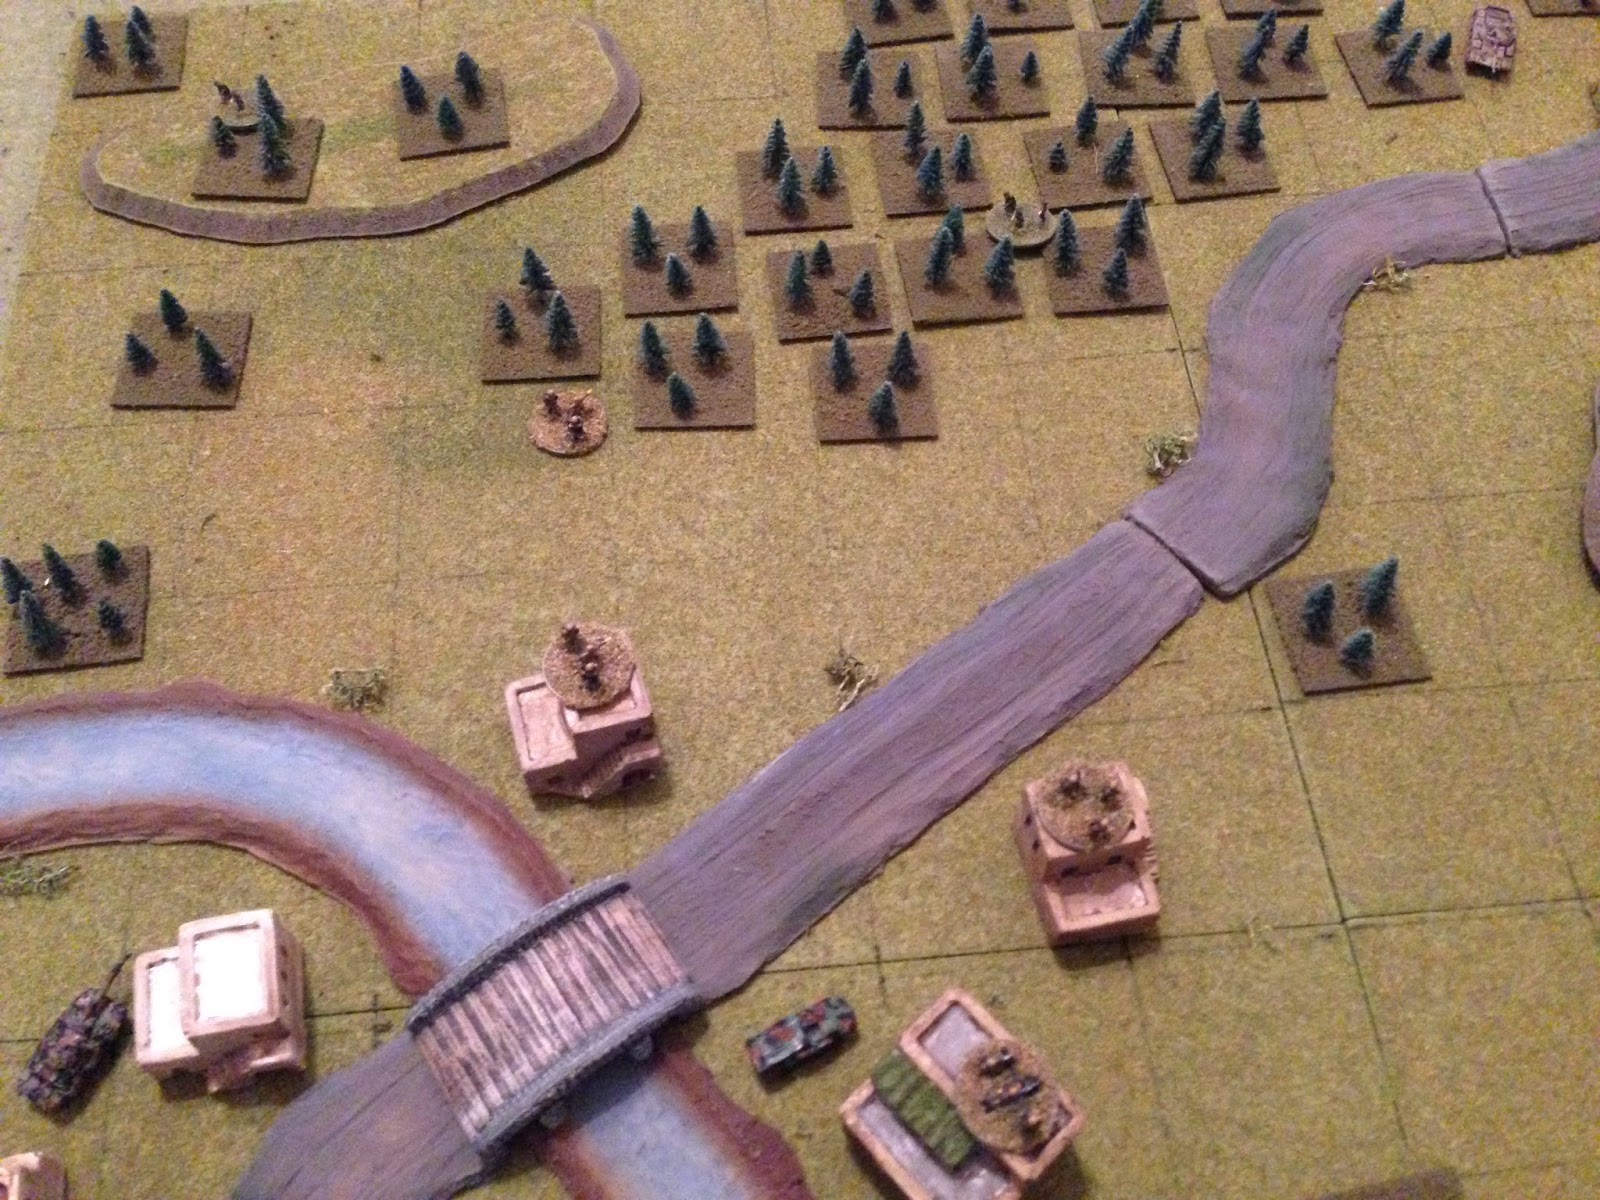
Overiew of map, north is up. Abrvo is at left, Lake Lagoda at bottom right, and Hill 142 at top right.
The opposing forces, with Cubans on the right and Communists on the left.
Captain Elias will ride his LAV Command Vehicle, though he can dismount his HQ section as necessary. He has two rifle platoons, a HMMWV with TOW ATGM, and an AMX-10RC.
The enemy CO rides an MTLB into battle, though he, too, can dismount as necessary. The enemy also has two platoon so infantry, and they are supported by a T-62.
The map, now with troops added. The Cubans are at left, bottom left, and bottom center. The enemy is spread across the rest of the map, having been placed by my usual method of blinds and dummy blinds, and the enemy troops all start the game hidden.
Yes, I need to put some flock on the lake...
The Cuban starting positions in the southwest: the HMMWV is atop a knoll at bottom left. Captain Elias has 1st Platoon and 3rd Squad, 3rd Platoon (3/3) at top center, while he's sending 1/3 and 2/3 around the right flank (bottom center, though he doesn't know the enemy has a squad there as well, bottom right). The command vehicle is in the center of Abrvo, while the AMX is in the buildings at far left.
In the northwest (top left) corner, the bad guys have two rifle squads (top left and top center) and their T-62 (top right).
Looking at the northeast (top right) corner, you can see the enemy troops from the previous picture at top left and top center, but then there are three enemy rifle squads and their CO on or near Hill 142.
And in the southeast (bottom right) corner, the bad guys were sneaky and have a rifle squad hidden in the treeline (center left), right in the path of 3rd Platoon (minus one squad, 3/3; bottom left).
Yes, Captain Elias is actually going to try to have 3rd Plt(-) go all the way around the lake (bottom right) and back up to Hill 142 (just visible at top center).
It is time to fight.
And it begins in the south, where 3rd Plt(-) moves up and stumbles right into an enemy squad; a cacophony of small arms fire shatters the silence. 1/3 is pinned.
From up in Abrvo, 2/1 (top left) hears gunfire to the south, frantic reports of 'contact' on the radio from 3rd Plt(-), and they open fire on the Communists that just pinned 1/3.
The bad guys are forced to fall back (red bead, from explosion at top center).
But enemy troops on Hill 142 (top right) open up on 2/1 (top left).
Forcing them to retreat out of the building (red bead at bottom left).
1/1 (bottom left) returns fire on Hill 142 (top right).
But the Cubans (top left) miss; the enemy returns shifts their fire onto 1/1.
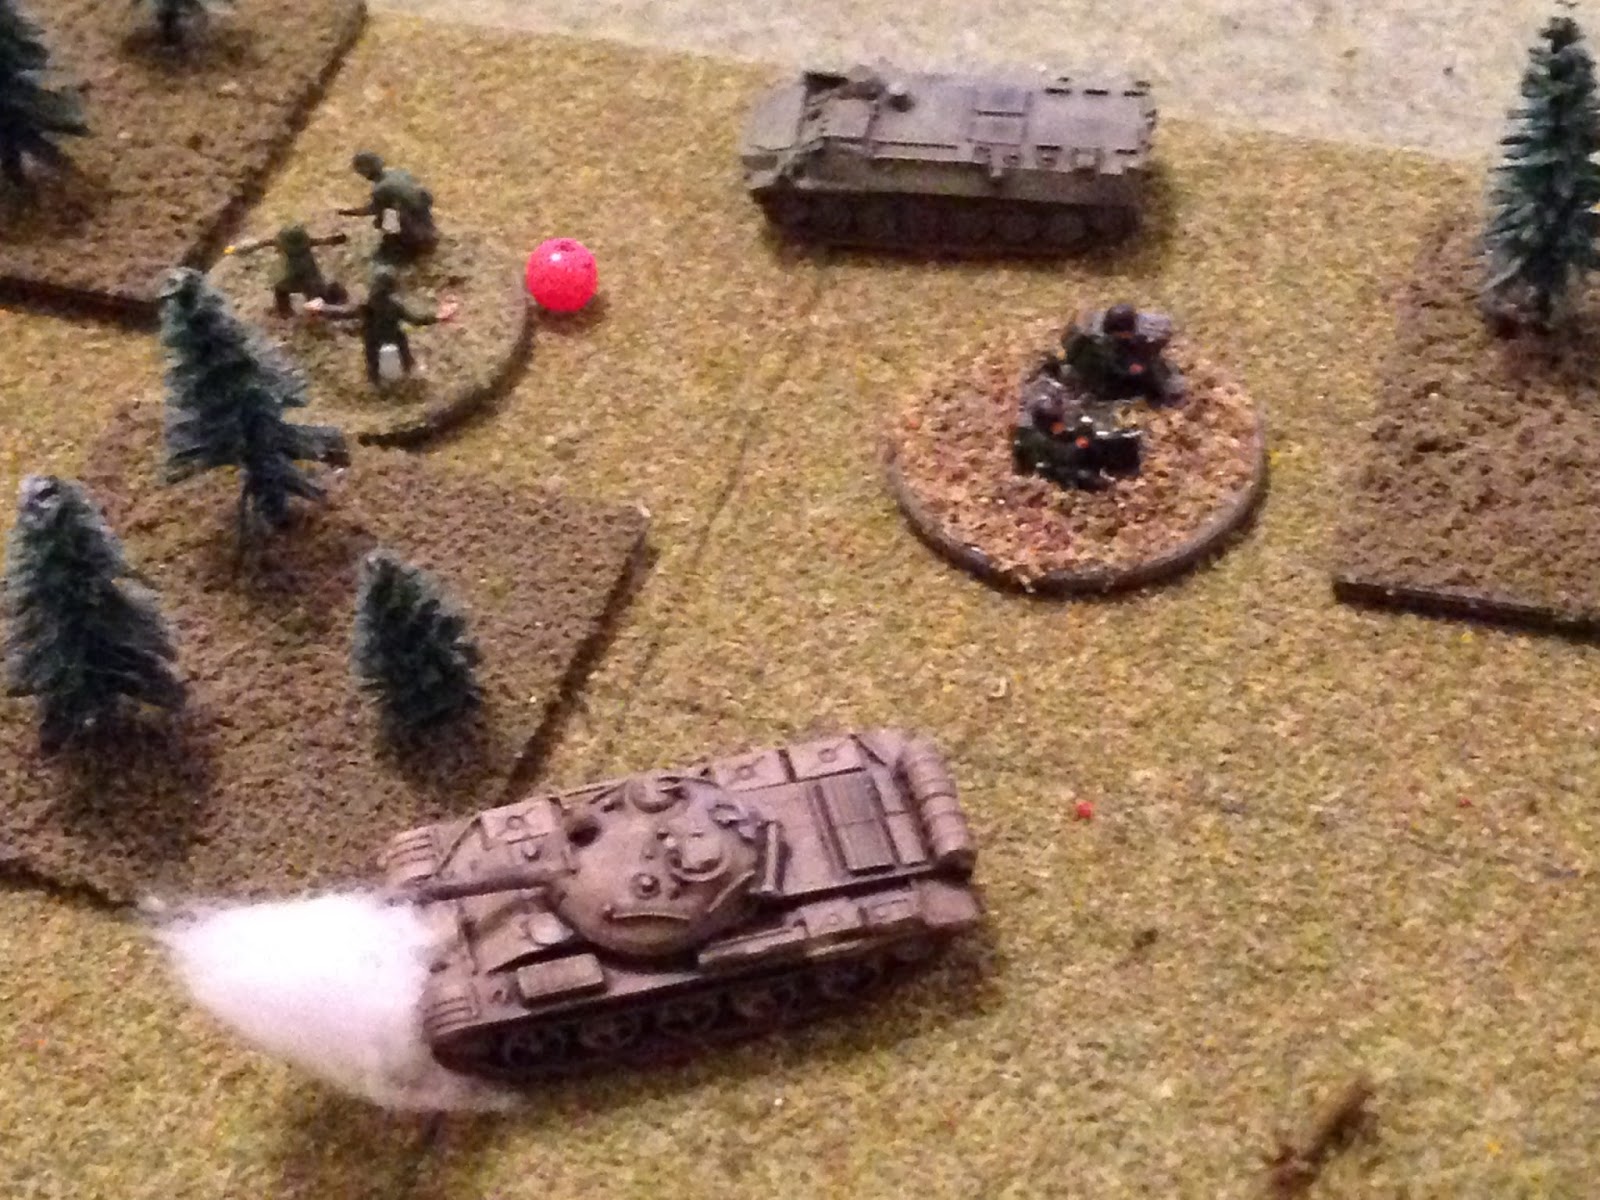
The enemy fire from Hill 142 (right) is ineffective, and 1/1 pushes ahead (bottom left). But as they reach a stand of trees they spot an apparition: "TANK!!!" An enemy T-62 is in the northeast treeline (top right); it fires its 115mm main gun at the Cubans.
1/1 is compelled to fall back into the cover of the buildings in Abrvo (bottom left, from explosion at center, enemy T-62 at top right).
Ahh, my mandatory blurry pic. In the northwest, an enemy rifle squad (top left) ambushes 3/3 (bottom right), which is the far left flank for the Cubans.
The Cubans (bottom center) return fire, but neither is able to land any punches.
And the enemy rifle squad charges down the hill (left, from top left).
Looking to try to isolate 3/3 (top left), an enemy rifle squad at the base of Hill 142 (top right) opens fire on 3/1 (far left, in building just below 3/3).
Don't forget, there is also an enemy rifle squad deep in the trees at center left, between the orange tracer at right and 3/3 at left.
3/3 (top) looks on as their comrades in 3/1 (bottom left) fall back, out of the building.
The bad guys that just fired charge across the highway to support their move to isolate and destroy 3/3 (top left, from trees at far right).
The enemy squad deep in the northern woods moves up (center, from right), but they're apparently a bit clumsy and stumble into 3/3 (left), who opens up and puts heavy casualties on them.
Wow, all that and it's only the end of Turn 1! Things are progressing quite a bit quicker than I expected.
All of 1st Platoon's squads are suppressed in Abrvo (3/1 at center, 1/1 at far right, 2/1 at bottom right), and 3/3 (attached to 1st Platoon) is feeling a bit isolated (straight above 3/1, with bad guys to its left and right, though the ones to its right are suffering negative morale). The AMX (bottom left) decides to get involved, and fires an HE round at the enemy infantry at top left, putting heavy casualties on them.
But there's been a miscommunication!!!
Apparently the sighting of an enemy tank (top right) was only called out on the infantry company's net, not the battalion net, and so the AMX didn't get the word there is a T-62 in the area. The AMX, quite pleased with its marksmanship, decides to move into Abrvo to help get things back on track. But as it crosses the bridge (bottom left) there is a sharp crack...
As an enemy tank round slams into the Cuban armored vehicle and brews it up!
Holy @#$%!!! Captain Elias (right, in the LAV Command vehicle) dodges bit of falling metal from the AMX and gets to work. He rallies 2/1 (bottom right), but they only get up to 'pinned,' then he moves up to 1/1 and gets them back in the fight.
On the Cuban right, 2/3 rallies 1/3.
And then they charge in to close assault the suppressed enemy infantry at far right (from 1/3 at far left).
The enemy squad is knocked out, and 1/3 moves up to join 2/3 (bottom center, looking north at Abrvo on the left and the objective, Hill 142, on the right.
I cheated a little bit: after you win a close combat you're allowed to move again. Rather than move 2/3 again, I let 1/3 move up to join them, consolidating on the ground where the close combat was fought.
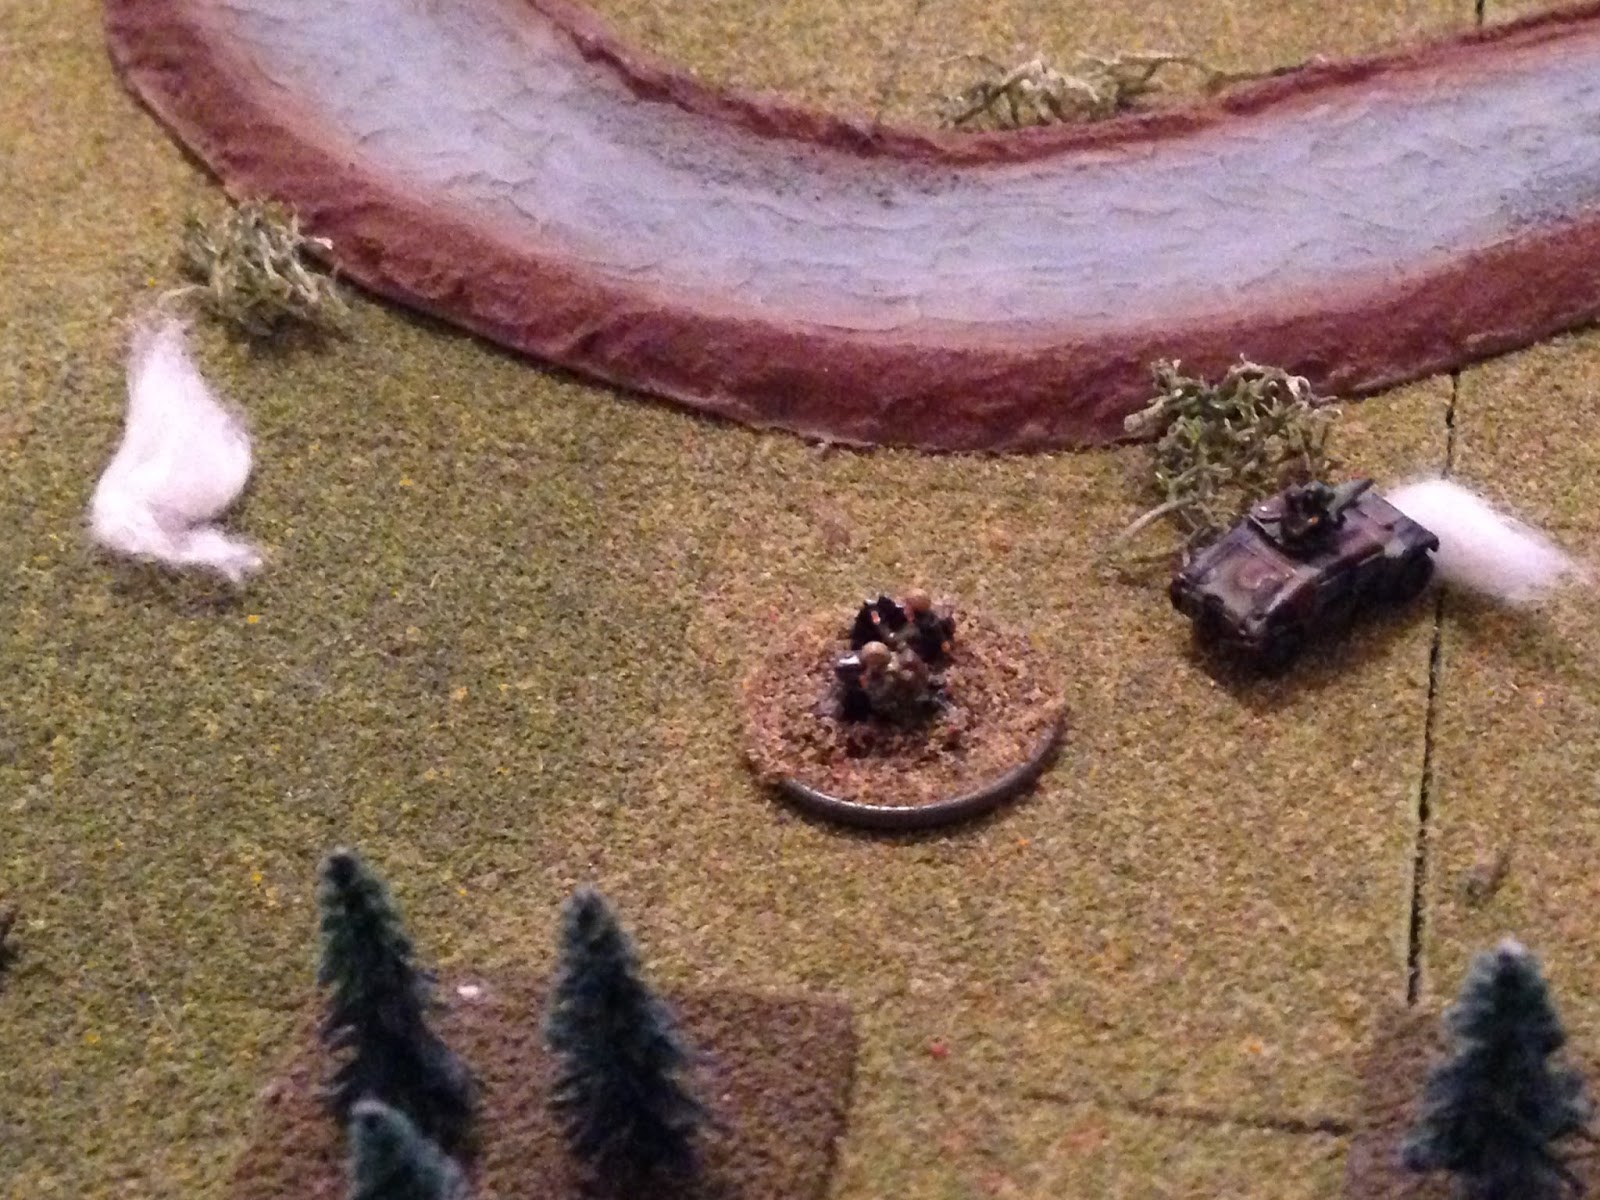
With 3rd Plt(-) at bottom right, the HMMWV moves up to support (left), and get a shot at the enemy tank (off camera to top center), but enemy troops on Hill 142 spot the HMMWV and launch a rocket.
The RPG slams into the ground and the HMMWV darts ahead, then the gunner calls out 'HALT!!!'
The HMMWV skids to a stop (bottom center); the gunner picks up his sights, acquires the target, 'round out!'
The wire-guided missile slams into the turret of the T-62. The tank is not destroyed, but the crew bails out. The explosion suppresses a nearby rifle squad (red bead).
The enemy receives a single rifle squad's worth of reinforcements, which comes on next to their CO, behind Hill 142. This was a random event for the bad guys.
The enemy CO dashes across the highway and rallies a rifle squad.
And they dash forward through the northern woods (center top, from top right), trying to reach their suppressed buddies near 3/3 (3/3 is at far left, bad guys just to their right, more suppressed bad guys just off camera to left). But 1/1, just rallied at bottom center, spots them moving up and cuts loose, knocking the enemy squad out of the fight!
YESSSSSS!!!! Not only do the bad guys lose a rifle squad, but now they still have two rifle squads near one of mine that are ripe for the close assault!
One enemy squad joins the squad already on Hill 142, while another moves up on its north side.
The Commie squad that just climbed up on Hill 142 (top right) fires an RPG at the HMMWV (bottom left)...
The truck is immobilized and the crew bails out.
3/3 (top left) saw the flash and returns fire on Hill 142 (top right).
Forcing the bad guys that just popped the HMMWV to fall back (red bead, from explosion).
Not bad for throwing 1D6 in reaction fire!
Back in the south, 3rd Plt(-) dashes up the right flank, making very good progress (far right, from trees at bottom left).
Great sprint roll! Things are looking up.
Captain Elias moves left, past the burning AMX, and rallies 3/1 (top left).
1/1 moves up the highway into a stand of trees, while 2/1 moves up and occupies the building 1/1 just vacated (center). 3/1 is just rallied at far left, and 3/3 is at top left.
3/1 and 3/3 both charge into close combat!
They both win their fights easily, then move east, deep into the woods (center). The enemy CO and the T-62's crew are at top right, and you can just see 1/1 at bottom right.
The T-62 crew falls back off the table, while the CO guns it and flees back to Hill 142 (bottom right, from top center, with 3/1 at top left). The enemy rifle squad that was on the north base of Hill 142 moves up to the crest (bottom center).
While the unit that was there moves down to rally their buddies (red bead).
And the guys that just rallied move into the cover of the stand of trees at bottom right, looking to brace for 3rd Plt(-), who is coming up from off camera to bottom.
Speak of the devils; the bad guys we were just looking at (top center) take a shot at 3rd Plt(-)...
1/3 again takes the brunt of the enemy fire and is forced back (bottom right), but 2/3 stands their ground and returns fire, putting heavy casualties on the bad guy squad that fired on them.
The enemy CO moves up and rallies the guys (top left) just hit by 2/3 (bottom right), while the bad guys in the trees fire on 2/3...
The enemy fire is ineffective, and 2/3 returns fire.
The enemy in the treeline takes casualties (white bead), and the enemy squad that just took casualties and got rallied by their CO is forced to fall back (red bead).
Suddenly, Captain Elias came on the battalion net: "All units, all units halt and hunker down!"
"Fast movers are on station, making a run on the objective, southeast to northwest!"
"Splash!" Napalm (yes, the Cuban Liberation Expeditionary Force still uses napalm) engulfs Hill 142, and now it's like the Wu-Shi Finger Hold. You know what the hardest part of the Wu-Shi Finger Hold is? Cleaning up afterwards! Sorry, I've got little kids ;)
In any case, I caught a lucky break with a random event for the good guys and finally got my F-4 Phantom on the table. I've been waiting forever for that! Battlegroup Elias' forward element begins policing up the battlefield while the rest of its forces pass through and move up to Hill 142 and start establishing defensive positions. Things are now going swimmingly for TF Galban, getting back on schedule as Battlegroup Aguilera begins passing through Battlegroup Elias on its way to the next objective, the northern town of Dubrovna. Here's the tally for this fight:
Cuban
1 AMX-10RC destroyed
1 TOW HMMWV damaged but recovered and repaired
10 casualties
Communists
1 T-62 destroyed
1 MTLB destroyed
60 casualties
Next up, Captain Aguilera's assault on Pisa, Last time Battlegroup Aguilera was up it took them two tries to take the objective... I'm having a great time, lots of linked fights going rather quickly, moving the story along. I hope you guys are having a good time too.
V/R,
Jack


No comments:
Post a Comment