All,
It's 0830 on 29 June 1990 and Battlegroup Caballero has just crossed the line of departure, moving into the attack on TF Galban's second objective, the town of Premja.
North is up, the village of Brezno is at bottom right, the capital of Miran is off map to the right, directly east of #5 on the map. Each number is a village/town; you can see buildings (black boxes), roads (tan lines), rivers (blue lines), lakes (blue circles), hills (green humps), bridges (gray pairs of lines), and forests (green shaded areas). TF Galban will enter the tactical area of operations in the southwest (bottom left) corner.
1: Brezno
2: Kacak
3: Premja
4: Abrvo
5: Dubrovna
6: Pisa
7: Stanje
Overview, north is up. The town of Premja is at center right, part of Lake Bulodna at bottom right, and Hill 103 at top left. Battlegroup Caballero will enter from the southwest (bottom left).
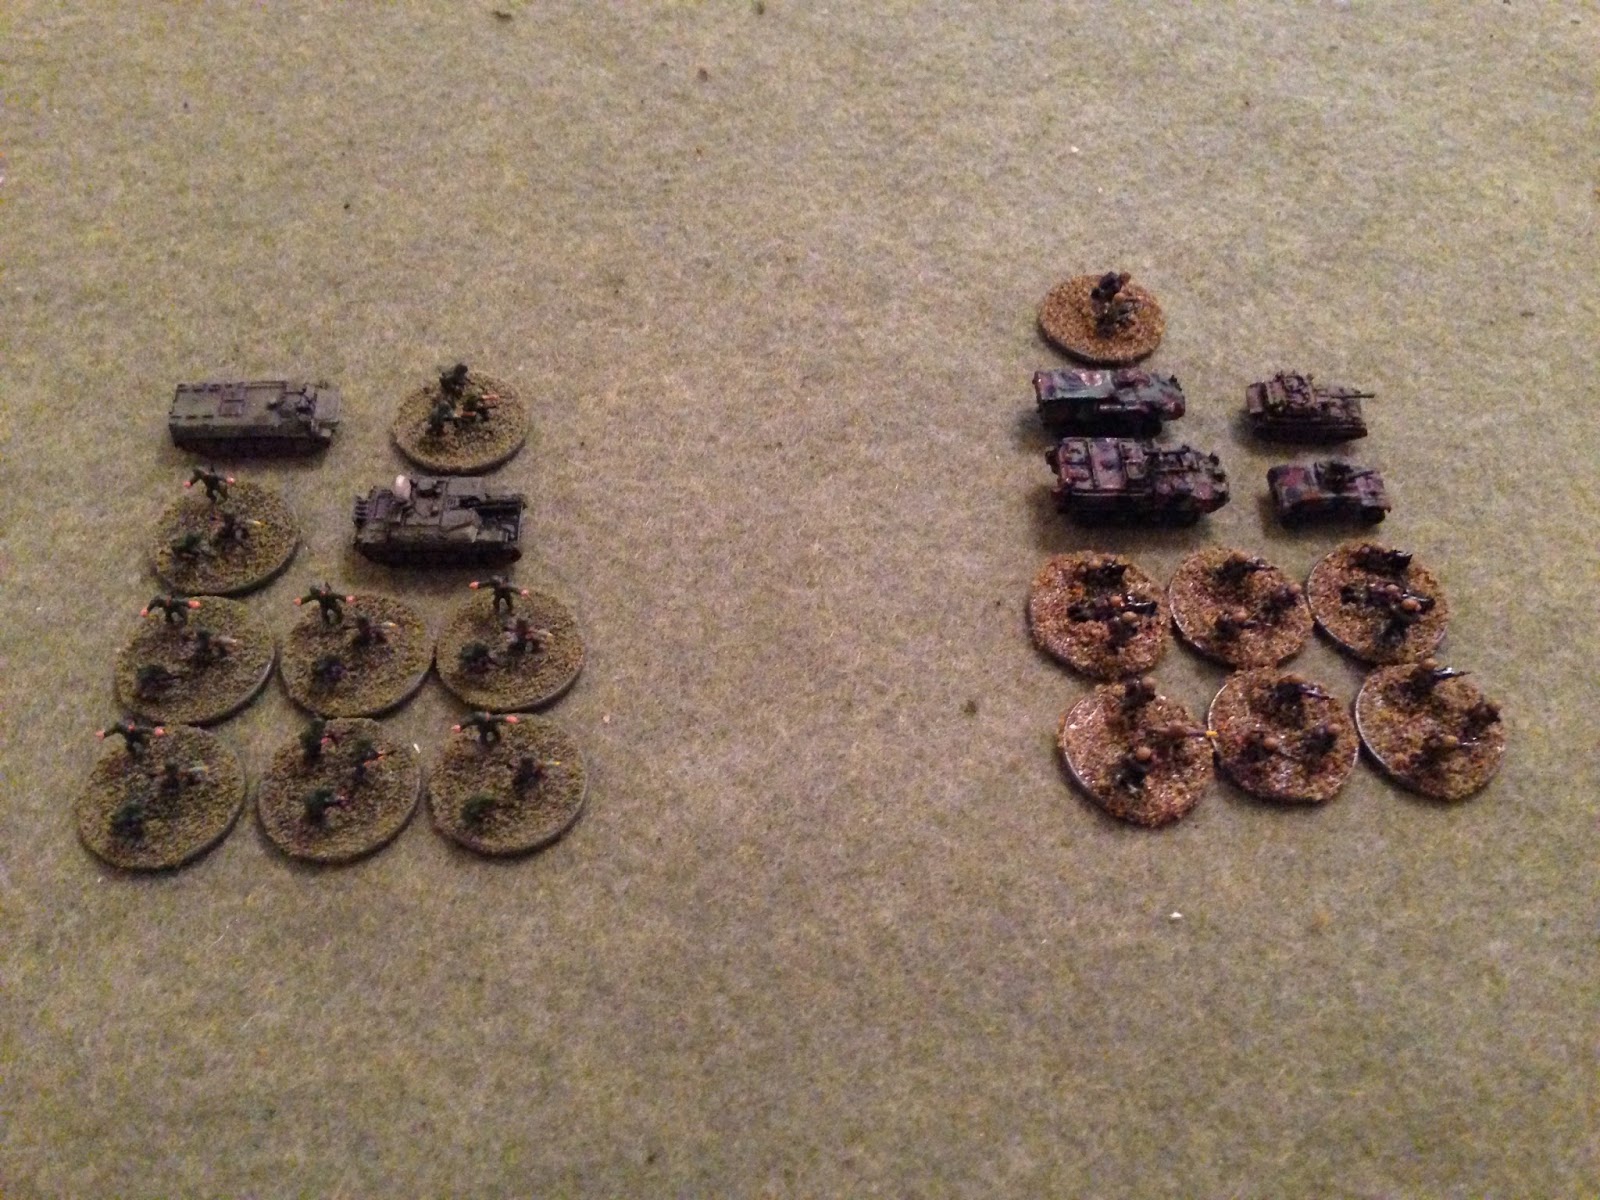
The opposing forces, with Cubans on right and Communists on left.
The Cubans have their CO (Lt Caballero, who rides in his LAV, but can dismount if necessary), a Scimitar armored reconnaissance vehicle, a Stryker wheeled-APC, a HMMWV with TOW ATGM, and six rifle squads (two platoons).
The enemy has their CO (riding in an MTLB), a ZSU-23-4, and seven rifle squads.
The table, with all forces present. The Cubans are at bottom left, the Communists are spread across the top and bottom right. The Communists begin the game hidden. Which has really been making things tough on me...
The Cuban start positions: the CO and Stryker are on the road at bottom left. 1st Platoon is above them and 2nd Platoon is to their right, while the TOW HMMWV and the Scimitar have moved into the center, taking cover behind a stand of trees.
Looking at the top left corner of the table, you see the enemy is heavily invested in Hill 103, with their CO, the ZSU, and two rifle squads there. There's another rifle squad just east (right) of the hill.
The northeast (top right) corner of the table, with Hill 102 at left. The only new enemy unit is a rifle squad on the heavily forested ridge at far right.
The southeast (bottom right) corner of the table, with enemy rifle squads on the knoll at bottom left (with a squad from the Cuban 2nd Platoon visible to the left of them), a rifle squad to the right of them, and a rifle squad in a building at right center.
Let's get ready to rumble!!!
The enemy rifle squad near the lake (far right) opens fire on 2nd Platoon (left). The bad guys on the knoll (bottom center) look on nonchalantly...
2nd Squad, 2nd Platoon (2/2, center right, with yellow bead) is pinned. The Stryker (bottom left) returns fire at the bad guys (top right), suppressing them.
The enemy rifle squad on the knoll (bottom right) ignores 2nd Platoon (left) and launches an RPG at the Scimitar's flank (top left, next to the HMMWV).
Dammit! I was really looking forward to scootin' around and poppin' stuff with that 30mm gun! Alas, 'twas not to be... The HMMWV is suppressed (red bead).
Meanwhile, 1/2 returns fire, but misses...
Back on the left, the ZSU lumbers up Hill 103.
And begins pounding with his quad 23mm guns at the Stryker (bottom right).
Ha! Finally, the bad guys get a taste of what I've been dealing with! And yeah, I gave the ZSU 2K 2S shooting at the Stryker.
The Stryker (bottom left) returns fire with its .50 cal HMG.
Getting a mobility kill; the crew bails.
Back on the right, 3rd Squad, 2nd Platoon (bottom left) looks to skirt around his companions to the south (bottom left), but they draw react fire from the enemy squad in the building at top right.
The rounds miss and 3/2 moves up, then fires at the enemy troops on the knoll, putting them out of the fight!
Now that's what I'm talking about!
The CO moves up to rally the HMMWV's crew and gather up casualties from the Scimitar (right).
On the left, 1st Platoon breaks cover (left), moving towards Hill 103 (top).
Remember, the only enemy troops we're aware of on Hill 103 was the ZSU and it got smoked. We need to hurry and get up there before the enemy has time to react!
But as 1st Platoon (bottom left) moves towards Hill 103 (top left), an enemy squad on the ridge (top right) opens fire on them.
Driving back 3/1 (red bead).
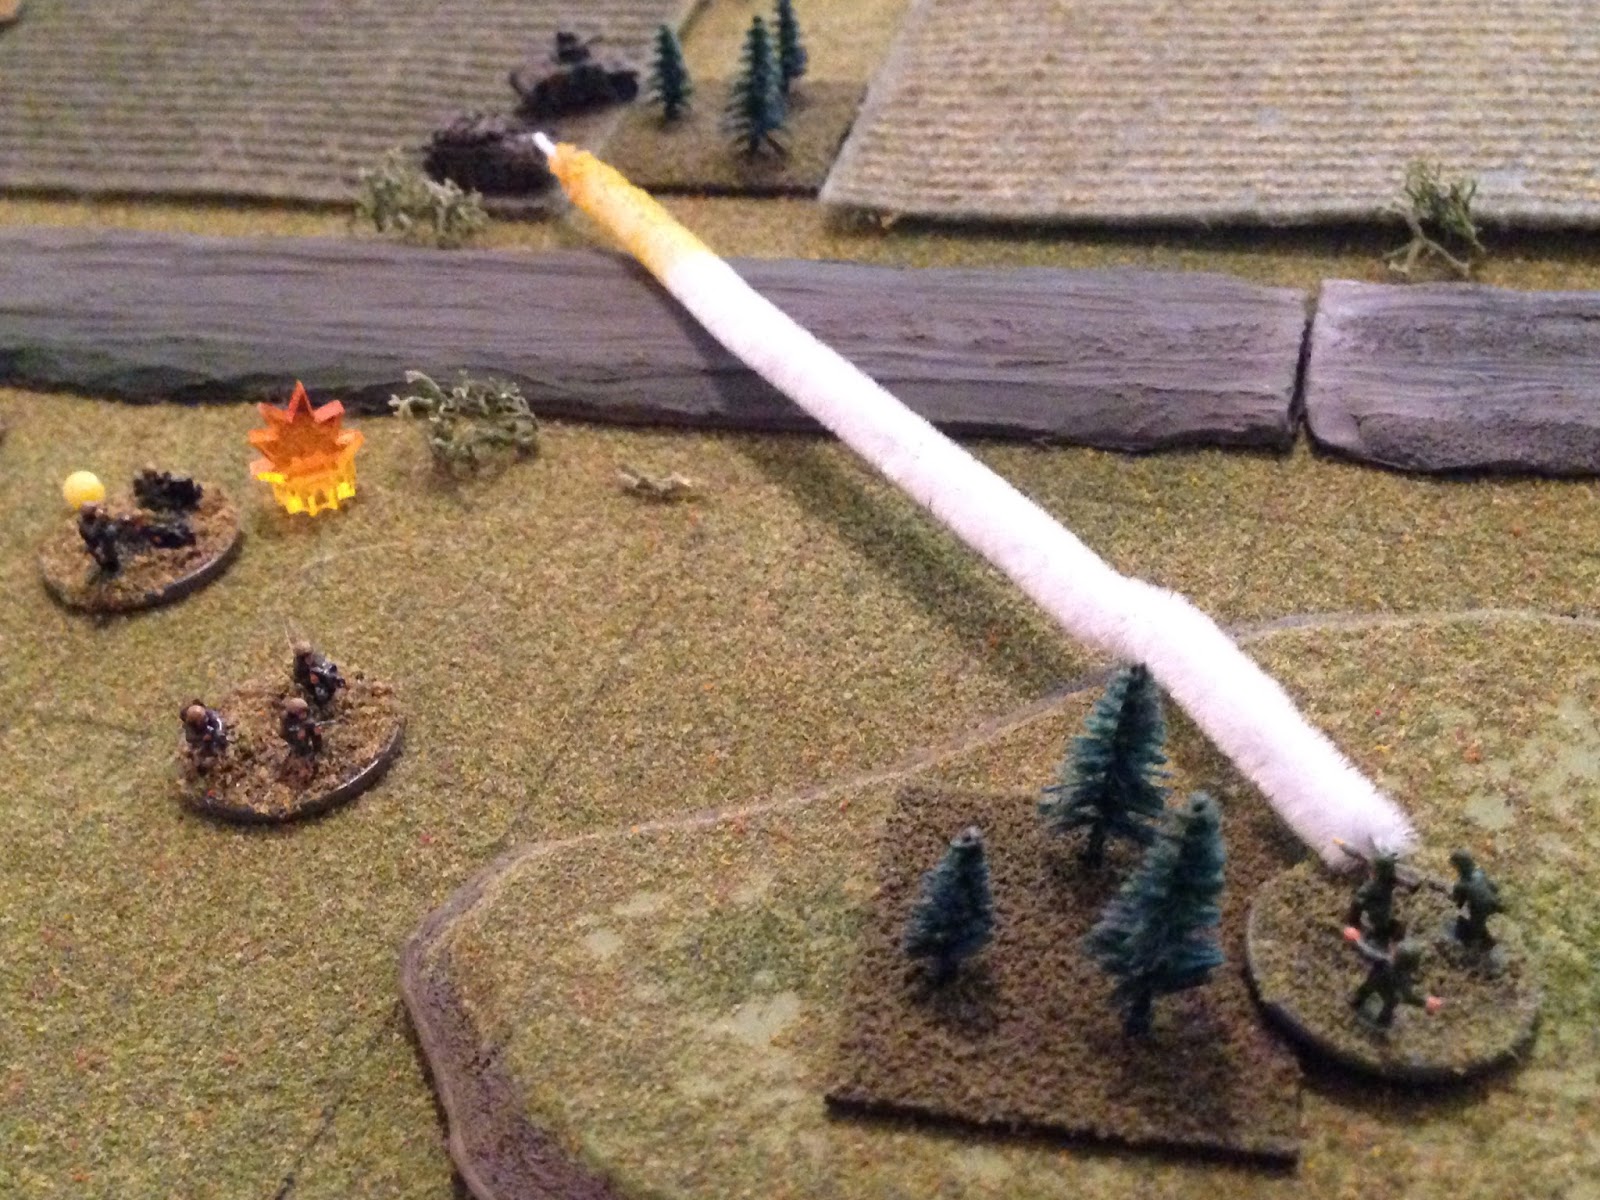
The HMMWV (left) moves up and launches a TOW at the enemy troops in the building at top right.
The TOW misses, and the bad guys (bottom right) return fire, but they miss too.
The bad guys that just dodged the TOW hop out of the building and hustle into the street (top right), looking to get into RPG range on the HMMWV (top left) and help their suppressed comrades (red bead at bottom center), but the HMMWV spots them and fires its machine gun.
The bad guys press through the MG fire, enter another building, and loose a rocket at the HMMWV.
BAM!!!
This is a joke, right? Am I about to get my ass kicked, again???
Once again the enemy squad on the ridge (top right) takes a shot at 1st Platoon (far left), putting heavy casualties on 1/1. 1st Platoon now has two squads in the fetal position.
On the right, the Stryker (bottom center, with Co at left) moves up and rallies 2/2 (yellow bead), then fires on the enemy squad that just knocked out the HMMWV.
Total miss! The bad guys (far right) return fire on the Stryker (far left)...
Forcing the thinly-armored vehicle to fall back (red bead at bottom left, from explosion at top right).
Wow, that's a 6 on 1D6. I'm getting a little tired of firing on the bad guys, missing, then giving them a free shot, which they then use to rough me up.
But with all its squads back in fighting shape, 2nd Platoon moves up, looking to get into close combat with the suppressed bad guy squad (red bead), then get after the bad guys across the street (the ones that busted the HMMWV and just forced the Stryker back).
On the left, the CO moves over (top left, from bottom right) to rally 3/1, but they only get up to pinned. You can see 2/1 tied up with casualties (white bead) at top left.
1/1 moves up to render assistance to 2/1, but they take fire from previously unspotted units on Hill 103, which puts heavy casualties on 1/1!
Back on the right, the apparently genetically modified super soldiers of the squad that knocked out the HMMWV and forced the Stryker back decide to open fire on 2nd Platoon, which is soooooooooo close to rolling up the enemy's left flank.
You have got to be @#$% me!!! If you're not aware, 1s and 6s are good in 5Core rules.
1/2 is out, 2/2 suffers men down (white bead), and 3/2 is pinned (yellow bead). The enemy troops, looking to capitalize on their success, come out of the house and rush into the street; 3/2 snap fires, hoping to halt the enemy charge...
But they fail, and the Commies crash into 2/2 (white bead)...
The bad guys wipe the floor with 2/2, then charge 3/2 (yellow bead).
After destroying the entire 2nd Platoon, the bad guys fall back and rally their buddies.
For those keeping count, this single enemy squad has knocked out my HMMWV, forced the Stryker back with an RPK, destroyed one squad with small arms, destroyed two more squads in close combat, rallying and saving one of their squads from certain destruction...
Back on the left, sensing impending victory, the enemy CO leads a rifle squad forward (top right), then fires on 3/1 (yellow bead at bottom left, with CO next to him and two other squads 'men down' next to them, which are ripe for the pickin' in close combat).
The enemy fire is ineffective, so 3/1 returns fire, pinning the enemy riflemen.
But the squad leader for 3/1 panics and falls his men back (bottom left, from top right).
Just when there's a whiff of something 'okay' (not even good, just okay) happening, I roll a random event that panics my only squad in fighting shape.
Lt Caballero calls for smoke...
Gathers up casualties...
And leaves town.
For Goodness' sake! Three fights, two losses!!?? I am having a rough-ass time with the dice, couldn't possibly be my tactics ;) This fight I had some bad shooting dice, but more than that, it was the enemy having fantastic shooting dice! Either way, it was still a helluva lot of fun, I thoroughly enjoyed it. Even though I've lost two out of three, they've been awesome, and my only regret is that, in my yearning to win, I've pushed the guys further (in terms of casualties) then I should. But I'll get over it ;)
Well, it's the same drill as after game one: Battlegroup Caballero immediately sets about preparing itself for a second push into Premja. Lt Caballero reports in to the Colonel, takes his ass-chewin', then returns to his men to finalize the plan and go over any last minute details. And the squad leader of 3rd Squad, 1st Platoon, becomes the second man to be executed for cowardice during Operation Chokehold. Perhaps a bit unfair, but you've got to realize how much that occurred at absolutely the worst possible moment. Momentum is a hard thing to capture in batreps, the feeling you have about things sinking or rising. I was expecting 3/1 to get eliminated, but then the bad guys missed and 3/1 returned fire, pinning them. Not sure what I thought would happen exactly, but I got a sudden feeling that I could turn things around, at least a little bit. I had 1/1 and 2/1 'men down,' the Stryker suppressed, just the CO and 3/1 okay. But I could get the CO up to 1/1 and 2/1, get them back in the fight (with a little luck), get the Stryker rallied, and at least make a push up Hill 103. Who knows?
Well, I know: none of that happened because my only serviceable squad panicked and fell back! Here are the casualties:
Cubans
1 Scimitar destroyed
1 HMMWV (TOW) destroyed
30 casualties
Communists
1 ZSU-23/4 damaged, but recovered and repaired
10 casualties
Well, fight number 3 of 4 from this weekend is in the books, one more to post, then more games this weekend.
V/R,
Jack


No comments:
Post a Comment