All,
0930 on 6 Aug 1990
Mini-Campaign Fight #53
TF Redleg vs FLA 6th Company

1st Lt Ordonez
Bronze Star w/V, War of Liberation and South Leon campaigns
Commander, TF Redleg
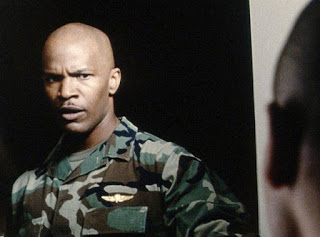
Major Fulgencio
Navy Cross, Bronze Star w/V, Purple Heart, War of Liberation and South Leon campaigns
Commander, TG Fulgencio
1st Lt Ordonez is leading his Task Force Redleg east, attempting to breakthrough the Communist defensive line on the River Shalabi, defended by the Free Leon Army's (FLA) 6th Company, which is dug-in and expecting trouble. This is a simple attack/defend scenario; the Cuban goal is to cross the river, dig the enemy out of their entrenched positions, and establish a foot-hold on the other side, while the Communist goal is to repel the Cuban force.
Lt Ordonez has the assistance of his Task Group Commander, Major Fulgencio, who has attached himself to the Task Force. Major Fulgencio is leaving Lt Ordonez in overall command of his Task Force but will assist as necessary, essentially performing as a second command stand in the game.

This was probably the most 'traditional' tabletop game I played during this entire campaign, a good, old-fashioned slobberknocker. You've got bad guys entrenched at right, on the other side of the river, while the good guys, supported by armor, have to cross a lot of open ground AND the river in order to close assault the enemy out of their positions.

The opposing forces, allies on left and Communists on right.
The figures are all 10mm from Pendraken, Minifigs UK, and Butler's Printed Models. I'm using Ivan's "5Core Company Command," playing on a 3' x 2' surface with simple terrain to speed up the process. The hootches are from Jimmi at Flashpoint Minis, the roads are from Fat Frank, the hills are from Warzone, the fences are from Sarissa, the fields are from Hotzmats, the trees are cake toppers, and when you see the rivers, they're from Wargamers Terrain. I'm playing solo and will randomize enemy deployment using a system of blinds borrowed from Joe Legan's "Platoon Forward."
In terms of caliber of forces, the SLA, FSNL, and FLA troops will all be treated equally, except for the fact the FLA troops will be treated as fanatics, in terms of their willingness to advance into close combat. The Cubans are more tactically and technically proficient, and so they will receive extra firing dice, better rallying capability, bonus in close combat, and sometimes will have a second command stand on the table.

1st Lt Ordonez' force consists of: a command stand, six rifle teams, and three M-48 Patton tanks. They are also accompanied by Major Fulgencio (lone figure at top left). These troops are Minifigs' Marines from their Vietnam range, while the tanks are from Takara.
TF Redleg has some heroes amongst its ranks, as well:
The CO was awarded the Bronze Star w/V
Major Fulgencio was awarded the Navy Cross and Bronze Star w/V
Redleg 02's team leader was awarded the Silver Star
Redleg 05's team leader was awarded the Bronze Star w/V
Redleg 02's team leader was awarded the Silver Star
Redleg 05's team leader was awarded the Bronze Star w/V
Redleg 06's team leader was awarded the Bronze Star w/V

The dashing Task Group Commander, Major Fulgencio by himself...


An auspicious start...


The Cubans have no targets and so simply push everyone ahead using group moves, and then the Communists roll up a 'scurry,' which is totally a waste and costs them the opportunity to at least keep pounding the Cubans with their mortar team.

But the quiet is not to last...


*For goodness' sake...


*At this point I really should have ended the fight, had the Cubans fall back to re-group and attack again later, but I didn't, because they're Marines! And because I'm 28 fights into this damn campaign and just want it to be finished... ;)


TF Redleg's counter-counterattack was successful, with the Cubans eliminating FSNL5 and thus able to advance to the west (F3, from F4). It looks like nothing can stop TF Redleg now from reuniting with Task Group Halabrio and replenishing.
Goodness, I'm exhausted! I wasn't sure what to expect from that fight, but that turned into a damn bloodbath, both sides fighting to practically the last man! Man, too much happened in that fight to really nail it down, with both sides getting more than their fair share of lucky and unlucky breaks. The big moment that turned this from a 'normal' fight that sees the superior Cuban forces bend then break their opponent's defense was when the decision was made for the Communist mortar team to abandon their tube, grab their personal weapons, and charge into close combat. Sure, most of the time the bad guys are going to be at a disadvantage in close combat (which is an opposed die roll with modifiers for troop quality, morale, and tactical situation) due to the Cubans being better troops and the Cubans generally only closing with Communist troops that pinned or suppressed, but if you give the dice enough tries they will eventually bite you. So the bad guys threw the mortarmen in to stop Major Fulgencio and Redleg 06 and failed, then threw in a rifle team and failed, and then the damn AGL team rose up and fought them off (a draw that forced the Cubans to fall back, suppressed) which changed the entire complexion of the fight. Hell, having said that, don't forget about Redleg 04 beating a Communist rifle team in close combat and advancing on the exposed and alone enemy commander, and getting gunned down by reactive fire! That was a heckuva fight, lotsa fun!
Casualties:
Cuban: ~20 men
Communist: ~30 men, with ~10 more captured
Decorations:
1st Lt Ordonez was awarded the Bronze Star w/V for exposing himself to enemy mortar, automatic grenade launcher, and small arms fire countless times to rally his men and for repelling the enemy's assault to save the left flank of the Cuban line.
Redleg 04 Team Leader was awarded the Bronze Star w/V posthumously for leading a close assault on the enemy's centeral defensive position, eliminating a Communist rifle team and forcing the enemy commander to retreat.
Redleg 06 Team Leader was awarded the Bronze Star w/V for leading the assault that destroyed the enemy command team, mortar team, and two rifle teams, and captured an enemy AGL team and rifle team.*
*This certainly reads like more than a Bronze Star, but I'm not giving anything to Major Fulgencio (who was with Redleg 06 the whole time) and I'm not going past Bronze Star for Redleg 06 because it wasn't as sexy as it sounds. Don't forget that they were repulsed by the AGL team, which stalled the entire Cuban attack, and the "...captured an enemy AGL team and rifle team" part occurred after other Cuban teams had already done the heavy lifting. But I wanted to do something to recognize the young NCO in charge of Redleg 06, so there you go.
Next up we have Captain Soares' Task Force Razor fighting a rear-guard action against the Free Leon Army's 3rd Company. TF Razor is the other part of Task Group Fulgencio, which was cut off from friendly forces and is now fighting to break out and return to friendly lines. Unfortunately the withdrawal was halted when FSNL5 decided to counterattack TF Redleg on Hill 261, which allowed the pursuing FLA3 to catch them.
V/R,
Jack

No comments:
Post a Comment