Current situation: It's 2300 on 27 July 1990 in South Leon. Free Cuba has had a small force, Task Force Fulgencio (a company of Marines, a company of paratroopers, and a detachment of Special Forces), on the ground since 1 May, assisting the government of South Leon with its internal insurgency by the Free Leon Army (FLA), supported by its Communist neighbor to the north, Fédération Socialiste Nationale de Leon (FSNL), which not only supports the FLA against the South Leon government, but has quietly infiltrated troops, weapons, and supplies to them across the DMZ for years. But all of that became not so quiet on 24 July 1990, when the FSNL Army launched a cross border invasion that marched all the way to the center of the country, capturing the capital city of Pendrakenville and the major regional hub to its east, Diwala. The Cuban forces in country were quite fortunate at the timing of it all: the company of Marines, AKA Task Force Redleg, under 1st Lt Ordonez, had recently fought a series of short, sharp fights on the DMZ, followed by the company of paras, AKA Task Force Razor, under Soares, being sucked into a series of hellacious fights in the urban sprawl of Diwala, against a suddenly very aggressive FLA.
Following the fights in Diwala, TF Razor was in very bad shape, so Captain Soares pulled his company out of Diwala to lick its wounds, falling back to the northwest, just north of Pendrakenville, and TF Redleg withdrew south from the DMZ to cover them. This was quite fortunate: soon after the FSNL Army stormed across the border, running roughshod over the South Leon Army units in its way, pushing south to capture the capital, then east to capture Diwala. Task Forces Razor and Redleg found themselves isolated and cut off, but relatively safe for the time being.
Back in Havana, troops were immediately marshalled and dispatched. The heavy forces, tanks and infantry fighting vehicles of Major Chavez' A Company, 4th Armored Infantry (AKA Task Force Hammer) and 1st Lt Madre-Animral's F Company, 8 Commando (AKA Task Force Bowie) required a beach or a port in order to put ashore, so 1st Lt Villagrosa's SF Detachment 212, AKA TF Dusty, was ordered to parachute in north of the landing beaches to draw FSNL/FLA forces away (Operation Currahee), and then 1st Lt Espinale's paratroopers, AKA TF Hawk, jumped in to screen the landing beaches (Operation Geronimo). Both airborne drops were successful, allowing TF Hammer and Bowie to brings their vehicles and heavy weapons ashore. They immediately began pushing east, towards Pendrakenville, bagging large numbers of FSNL/FLA prisoners, which actually slowed their advance and allowed enemy forces in the Pendrakenville area to face about and prepare a defense. The newly arrived Cuban forces went firm, securing their lodgment in South Leon and beginning the task of stockpiling ammunition and supplies for the upcoming fight. Meanwhile, TF Razor and Redleg remained cutoff north of Pendrakenville, as FSNL forces continued to flow across the border into South Leon.
The immediate focus of Brigadier Habanero (commander of all Cuban forces in South Leon) became to repatriate his wayward Task Forces, and to stop the FSNL Army in the north from reinforcing Pendrakenville and Diwala. 1st Lt Gouveia's ODA 313 (AKA TF Black), located with TF Razor and Redleg, and TF Dusty were tasked with Phase 1 of Operation Chunky Bandit, the reconquest of South Leon. Phase 1 would see TF Black attack east of Route 1 (the major north-south route in the center of the country, running from the DMZ to Pendrakenville), establishing commanding observation points to aid in the delivery of interdictory strikes by Cuban tactical air support. Phase 1 would also see TF Dusty and Captain Stelosavo's B Squadron, OD Phoenix (TF 23, Cuban Tier 1 operators) attack west of Route 1 in order to locate and neutralize the FSNL command, control, and communications nodes there.
Phase 2 would see Major Fulgencio lead Task Forces Razor and Redleg in a breakout to the west, where they would link up with Cuban forces that just landed, and then Phase 3 would see the combined force push east to liberate the capital city of Pendrakenville, and then Diwala.
This series of fights sees Lt Gouveia's TF Black move into an area northwest of Pendrakenville, just east of Route 1. To their immediate northwest is Hill 114, the dominating terrain feature they're looking for to establish an OP on and call in Cuban tactical air. The past two days have seen South Leon Army forces attacking FSNL troops occupying Hill 114, to no avail, and so the Cubans have stepped in to take over the area of operations. Knowing they have time as freshly landed Cuban task forces (Hammer, Bowie, Dusty, Hawk, and 23) form up and prepare for the attack on Pendrakenville, and being severely outnumbered, Lt Gouveia has made the choice to carry out operations to reduce the enemy forces in and around Hill 114 only at night, where he figures his highly trained Special Forces troops will have a significant advantage.

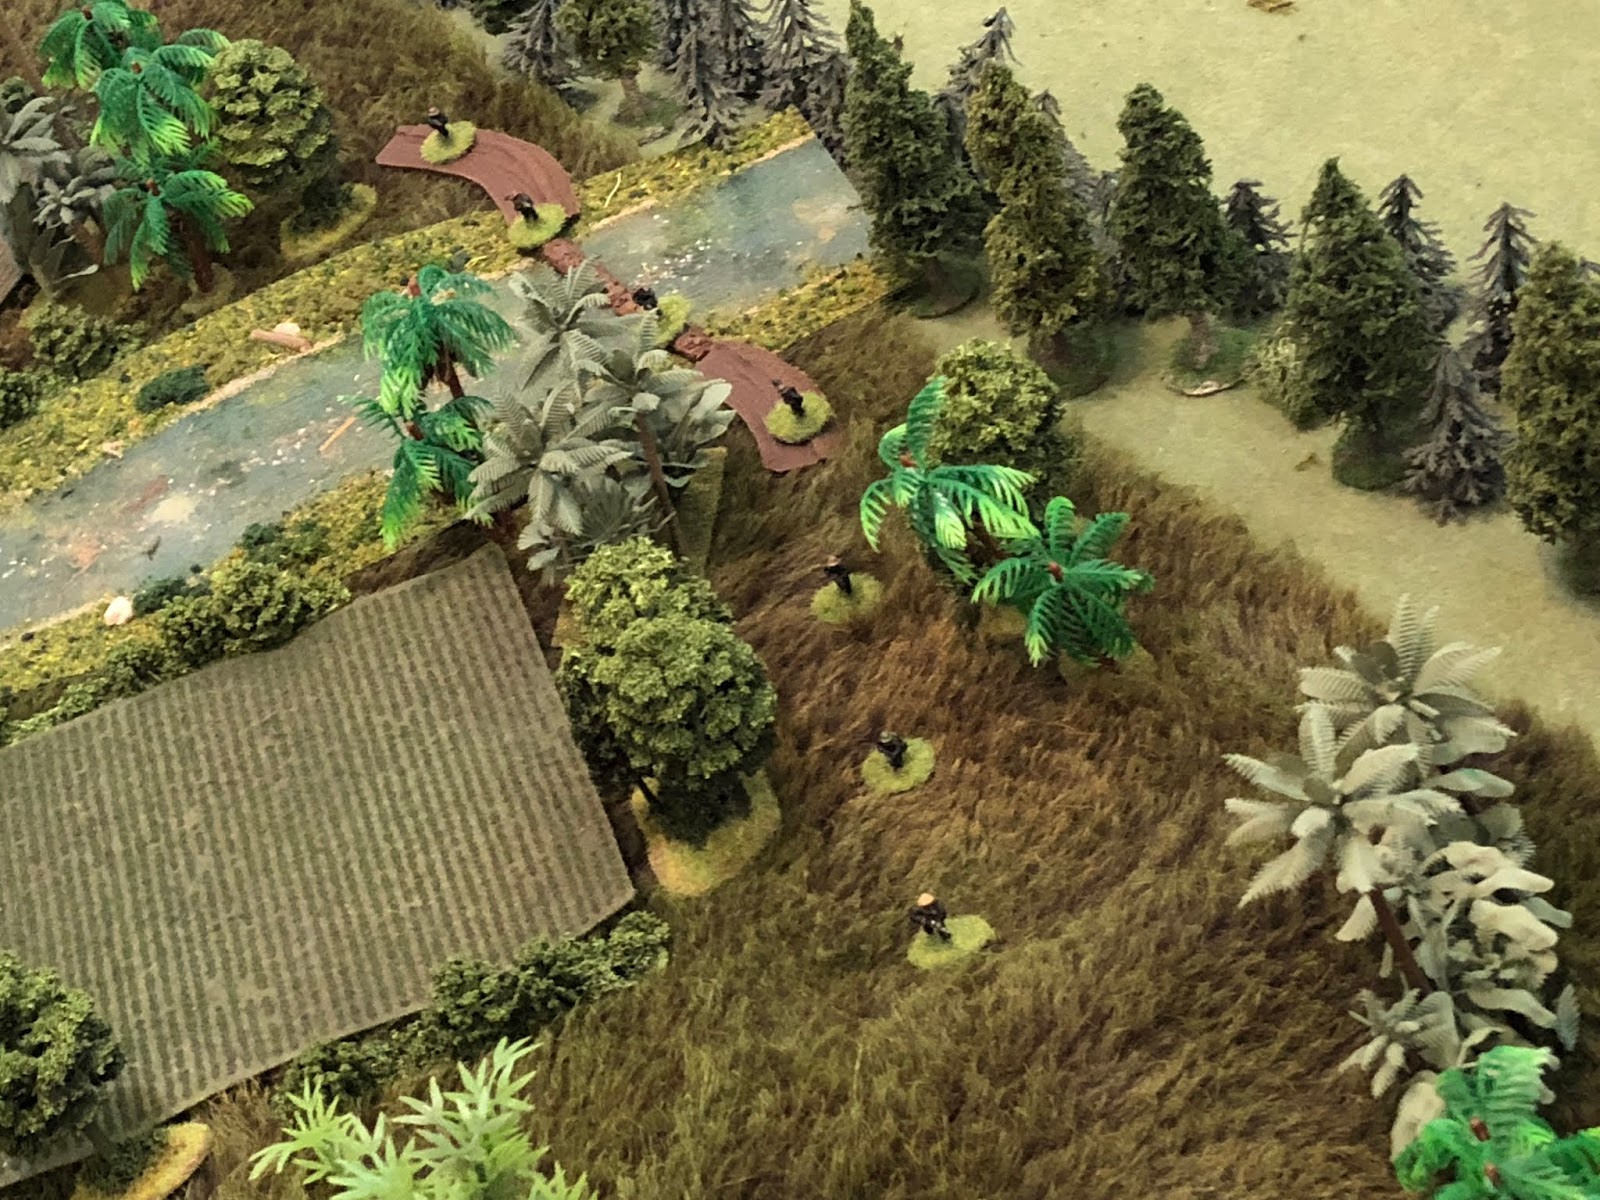
And here it is, our little patch of No Man's Land in South Leon, north is up. The enemy entry point is in the northwest (top left), on Hill 114, and the Cuban entry point is in the southeast (bottom right). A deep, swift river crossable only at the four bridges (left, top center, center, and bottom center right) dominates the landscape, running north to south, with a branch heading west (left) to the sea. There is an old colonial, bombed out church atop a small hill (Hill 30, bottom center), and there is an old garage/junkyard suspected of harboring insurgents in the northeast (top right), aside from four villages spread across the landscape (far bottom left, bottom left center, center left, and center right, atop Hill 45). There are also two weapons caches on the table, one in the northeast, in the junkyard, and one just east of the bottom right bridge. A dirt road traverses the terrain from west to east, with a feeder coming in from the southwest (bottom left). Villages:
Far bottom left: Village 1 (Danfra)
Far bottom left: Village 1 (Danfra)
Bottom left center: Village 2 (Marambokro)
Center left: Village 3 (Lasau)
Center right (atop Hill 45): Village 4 (Siagnoa)
Center right (atop Hill 45): Village 4 (Siagnoa)

1st Lieutenant "Lobo" Gouveia, Detachment Commander (holder of the Silver Star and Purple Heart)
SFC "Cougar" Vizquel (WLC, SLC)
SSG "Caesar" Alomar (WLC, SLC)
SSG "Starburst" Aparicio (WLC, SLC)
SSG "Expo" Minoso (WLC, SLC)
SSG "Mutha" Pagan (WLC, SLC)
SGT "Snoop" Concepcion (WLC, SLC)


Very quick and violent, textbook ambush on the part of the Cubans, worked out in terms of right place/right time with the patrol overlays. I was very happy with the whole mess, how all the pre-game stuff worked out, how it created the situation/circumstances of the engagement, and how the actual table-top fight went down. I love it when a plan comes together ;)
Next up is essentially a replay: tomorrow night the Cubans set out on another patrol, while the FLA looks to secure some weapons/ammo from a cache.
V/R,
Jack
Great stuff Jack.
ReplyDeleteHow did you work out the patrol routes?
John,
DeleteI drew up the map, set the table up, put my missions in order, then drew up my patrol routes. Then I showed the map/table to the boy, walked him through the mission sets, had him put the missions in order, and had him draw up his patrol routes, then overlayed them to figure out where/when contact would occur.
V/R,
Jack