All,
AKA, Unit 101's 5th Fight of Operation Payback
It's 0315 on 11 Jul 1990, and Unit 101 is in Lebanon, closing in on The Mayor in the village of Jezabyl. The village is very small, and inhabited only by people that are well armed and loyal to The Mayor, and the tactical problem is that the platoon needs to take The Mayor alive. They're plan is simple and straightforward: Team 1 will bust the door down (this fight), and then Team 2 will dart through and grab the target (next batrep, at least assuming this works). Meanwhile, the sniper and MG teams will be to the southwest, in position to isolate the enemy compound (keep reinforcements from getting in) and prevent escape (keep the target from getting out).

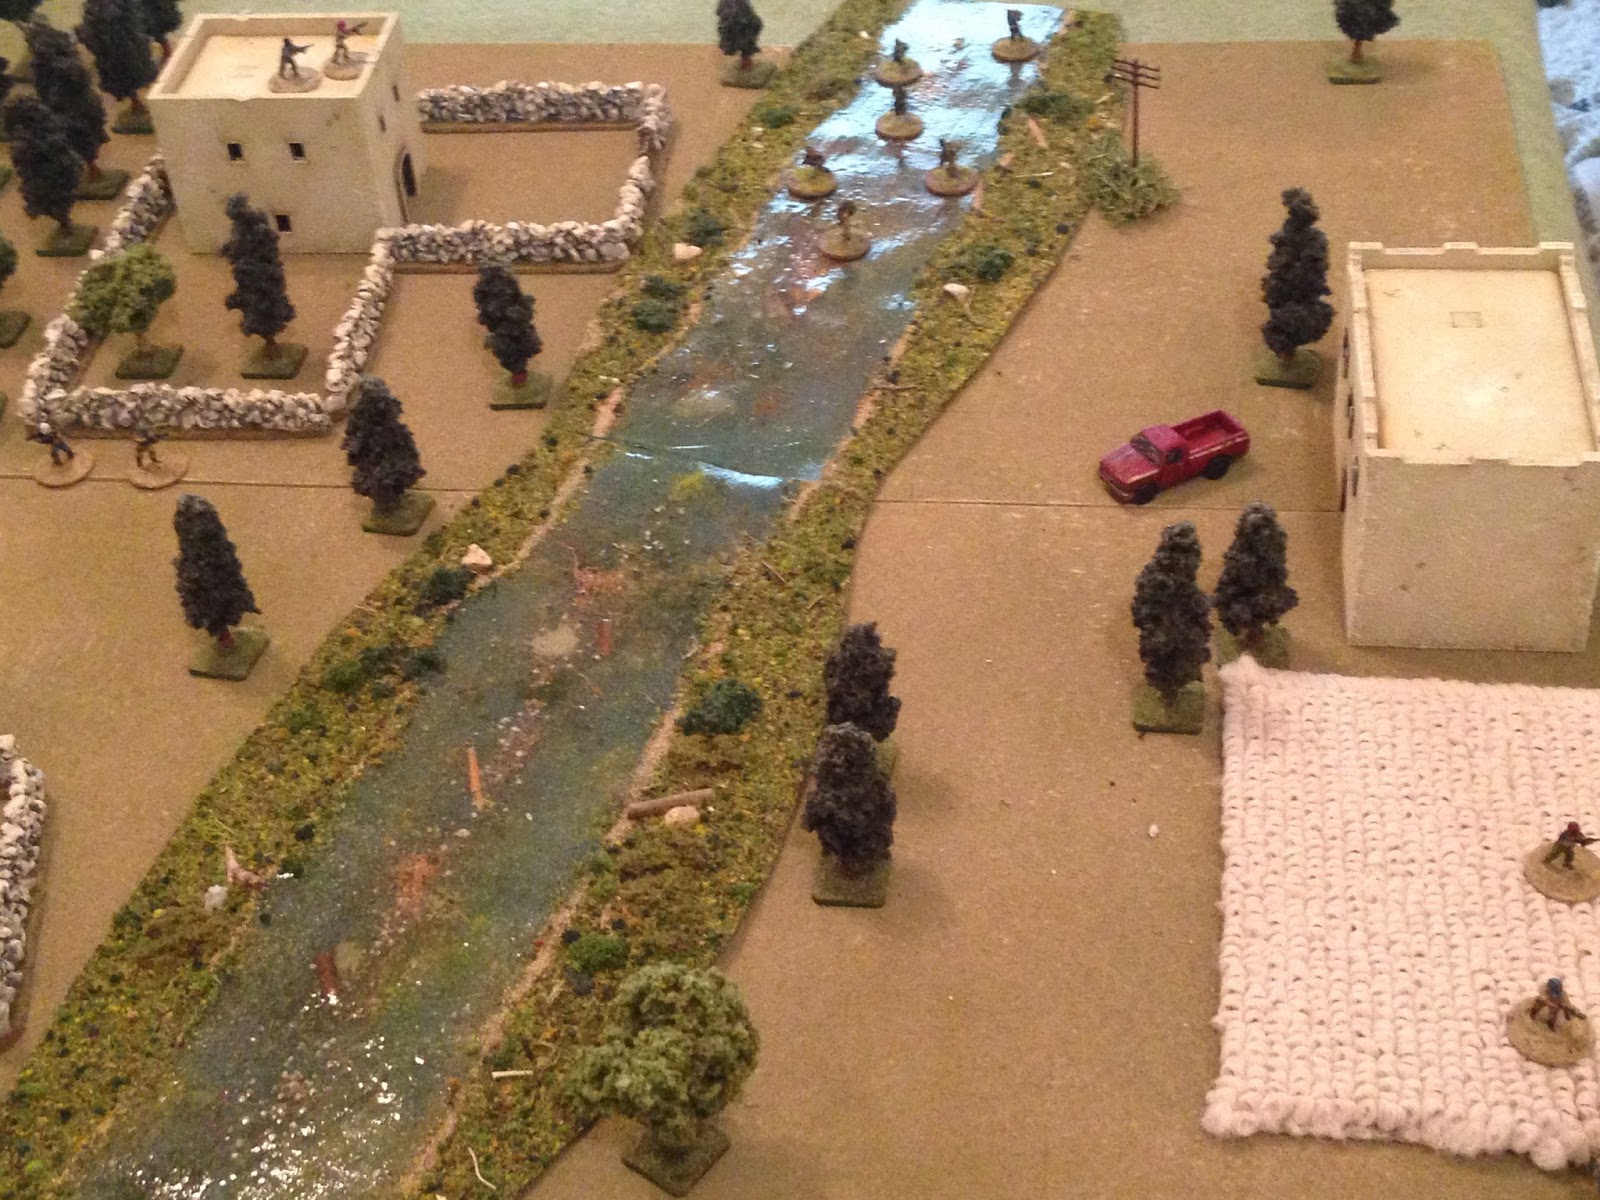
Overview of the table, north is right. You see a shallow stream running north-south, with an orchard at top right (northwest), several walled compounds, and a few crop fields. I'm playing this solo, using Ben Lacy's skirmish rules "Final Combat." These are super detailed, and you know I'm simple, so I'm using the activation system as written, and I'm using the movement, spotting, morale, casualty determination, and firing pretty much as written, though simplified just a hair. This game was fun, and didn't take as long as I thought it would, but was still longer than I generally am looking for. I really like the activation system, so I'll probably work to make shooting, spotting, morale, and casualty determination. Oh, and I didn't really mess with postures too much, everyone just kept moving forward. Part of that was I don't have figures to reflect the different postures (standing, kneeling, and prone) and I didn't really want to use more markers for it, though I'm considering getting some more Peter Pig US Marines so I can do this. The only problem is, I can't find suitable bad guys where I can do the same thing (no one makes modern prone bad guys!).

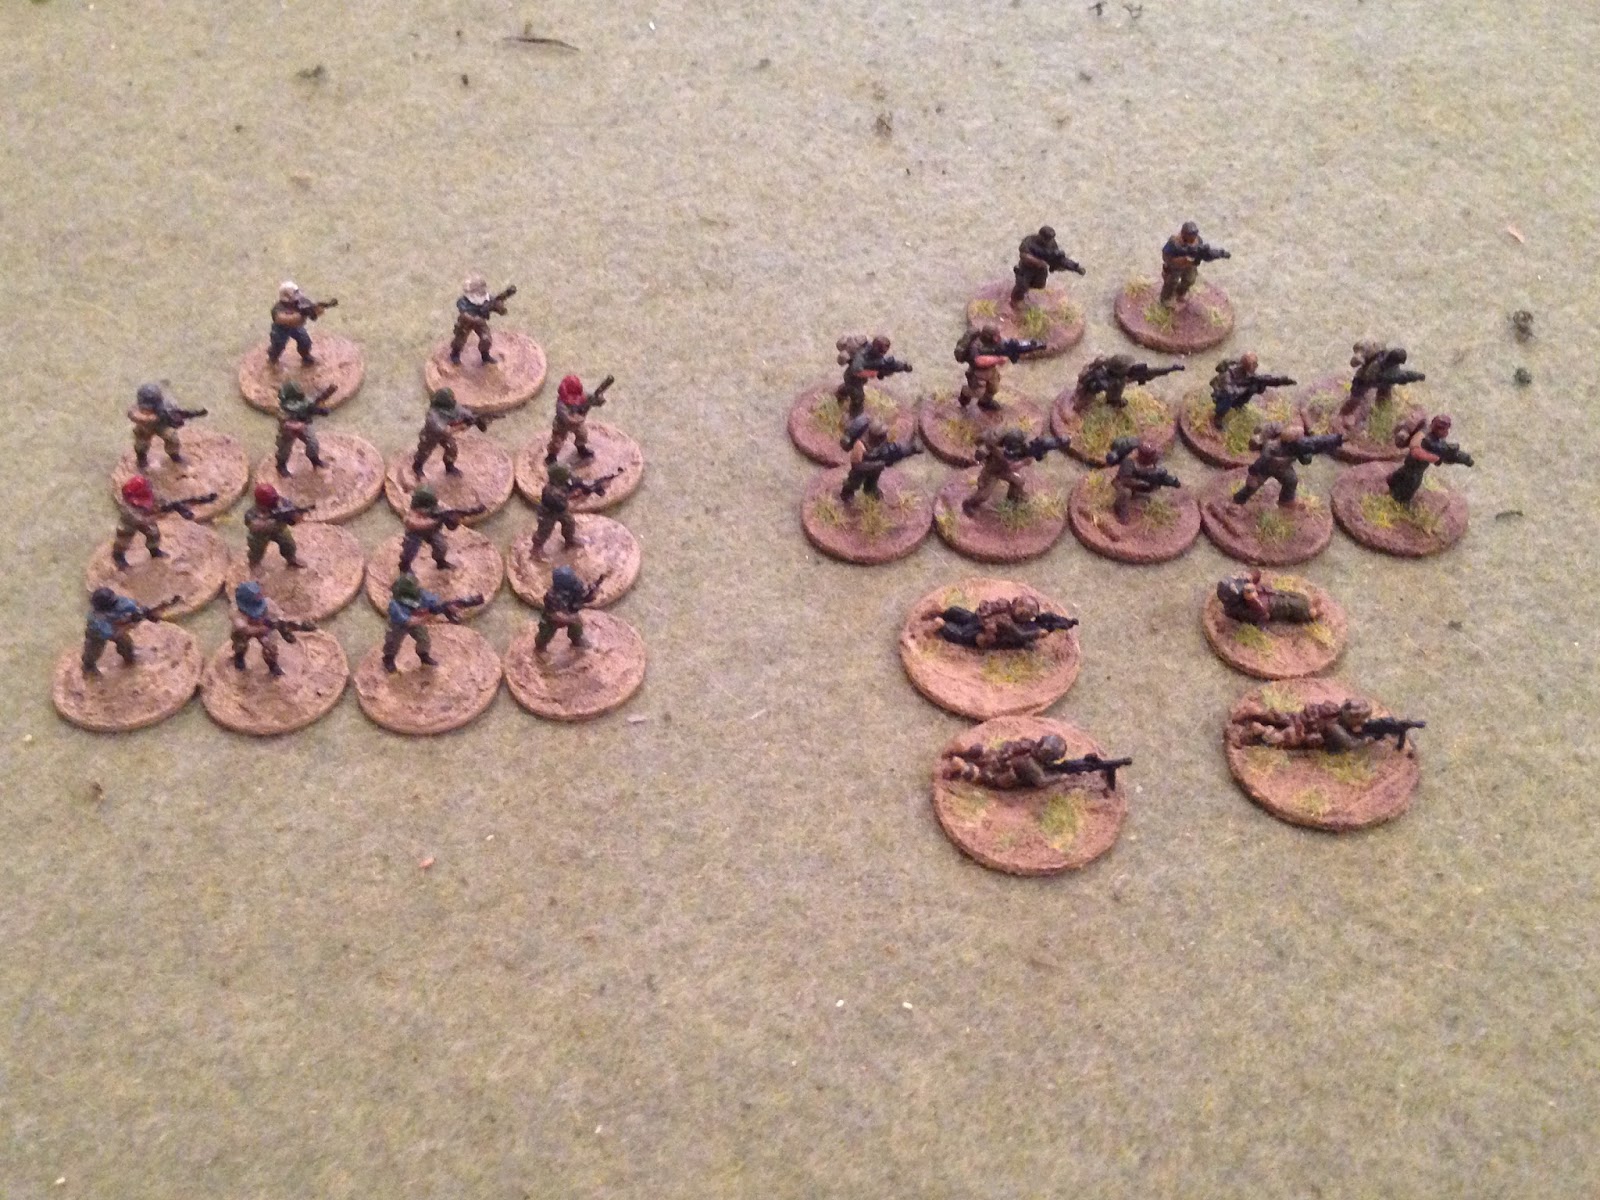
The opposing forces, with good guys on the right and bad guys on the left. The Cubans will have but a fraction of the force displayed, while the terrorists will have everything shown. That's right, I'm going to give Ben's activation system a good workout.
Ten of the Cubans are from Khurasan's PMCs, with two men from Battlefront's US Navy Vietnam-era SEAls, and the sniper and MG teams are from Eureka. The bad guys are Rebel Minis' insurgents.
The Final Combat/SOF Warrior activation system is built around better troops activating more frequently, so I should be able to pit a small force of highly trained, highly experienced dudes against some local riff-raff, no problem. Right? ;)
The Cuban entry team, from left: Tank (TQ 4), Rung (TQ 3), Dozer (TQ 4), Switch (TQ 3), Rake (TQ 5), and Cypher (TQ 4).
The bad guys guarding the gates, fourteen men in total. Two are squad leaders (top), with TQ 3, the rest are straight rabble, TQ 2 (though there are actually TQ 1 guys in the rules).

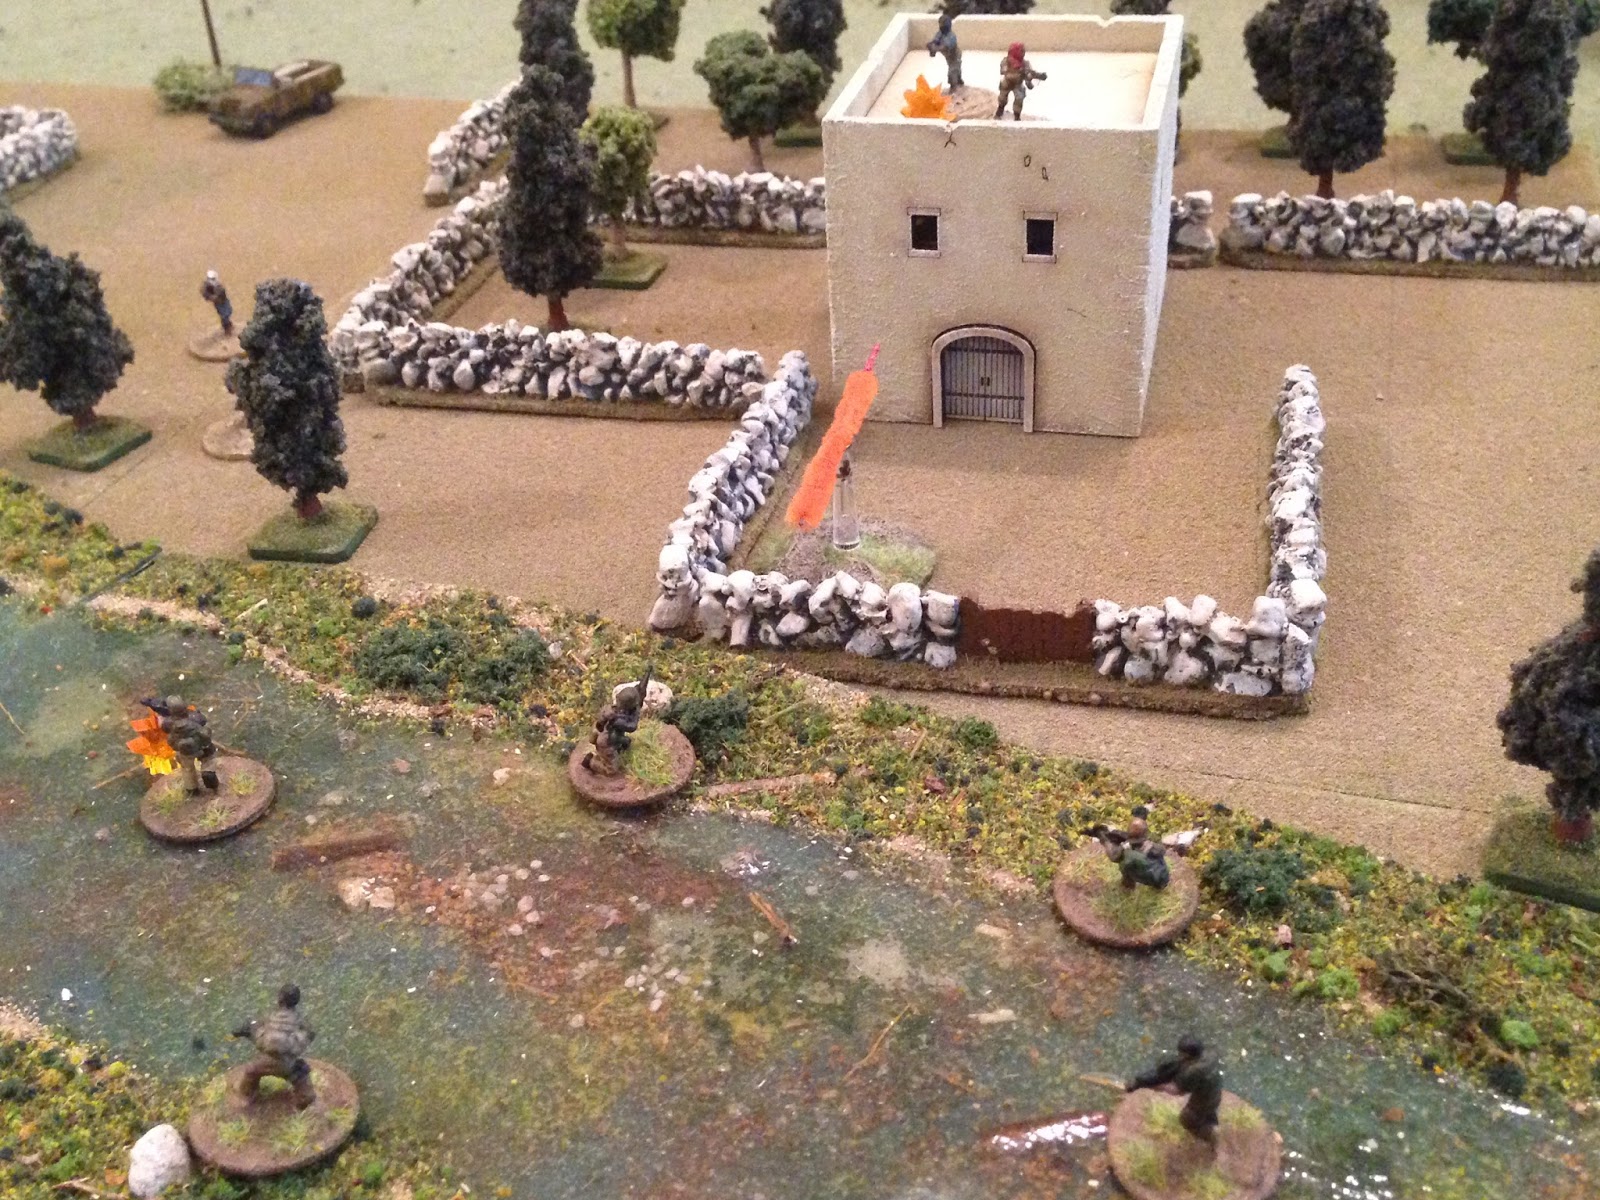
The table, with troops, north is still right. It's the middle of the night and the bad guys have no reason to suspect anything is amiss, but, because of The Mayor's popularity, security is constantly high. The Cubans are moving forward in the stream (far right), while the bad guys are scattered throughout the table. I put them in seven pairs, then placed seven blinds with seven dummy blinds, then flipped them over. You've got bad guy pairs at: the building at top right, the wall just left of them, two pairs in/around the building at top center, a pair at the building at top left, a pair between the field and stream at far left, and a pair in the field at bottom center. I was kinda surprised by the blinds, was really expecting problems from the big compound at bottom left center, but no bad guys turned up in there.
The Cuban team, from left: Switch, Cypher, Dozer, Rake, Tank, and Rung. There are bad guys in the building at top left.
Looking south to north at the north end of the table, you see the Cubans at top right, and two pairs of bad guys (top center and center).
Scooting back some, you see two more bad guys in the field at bottom right.
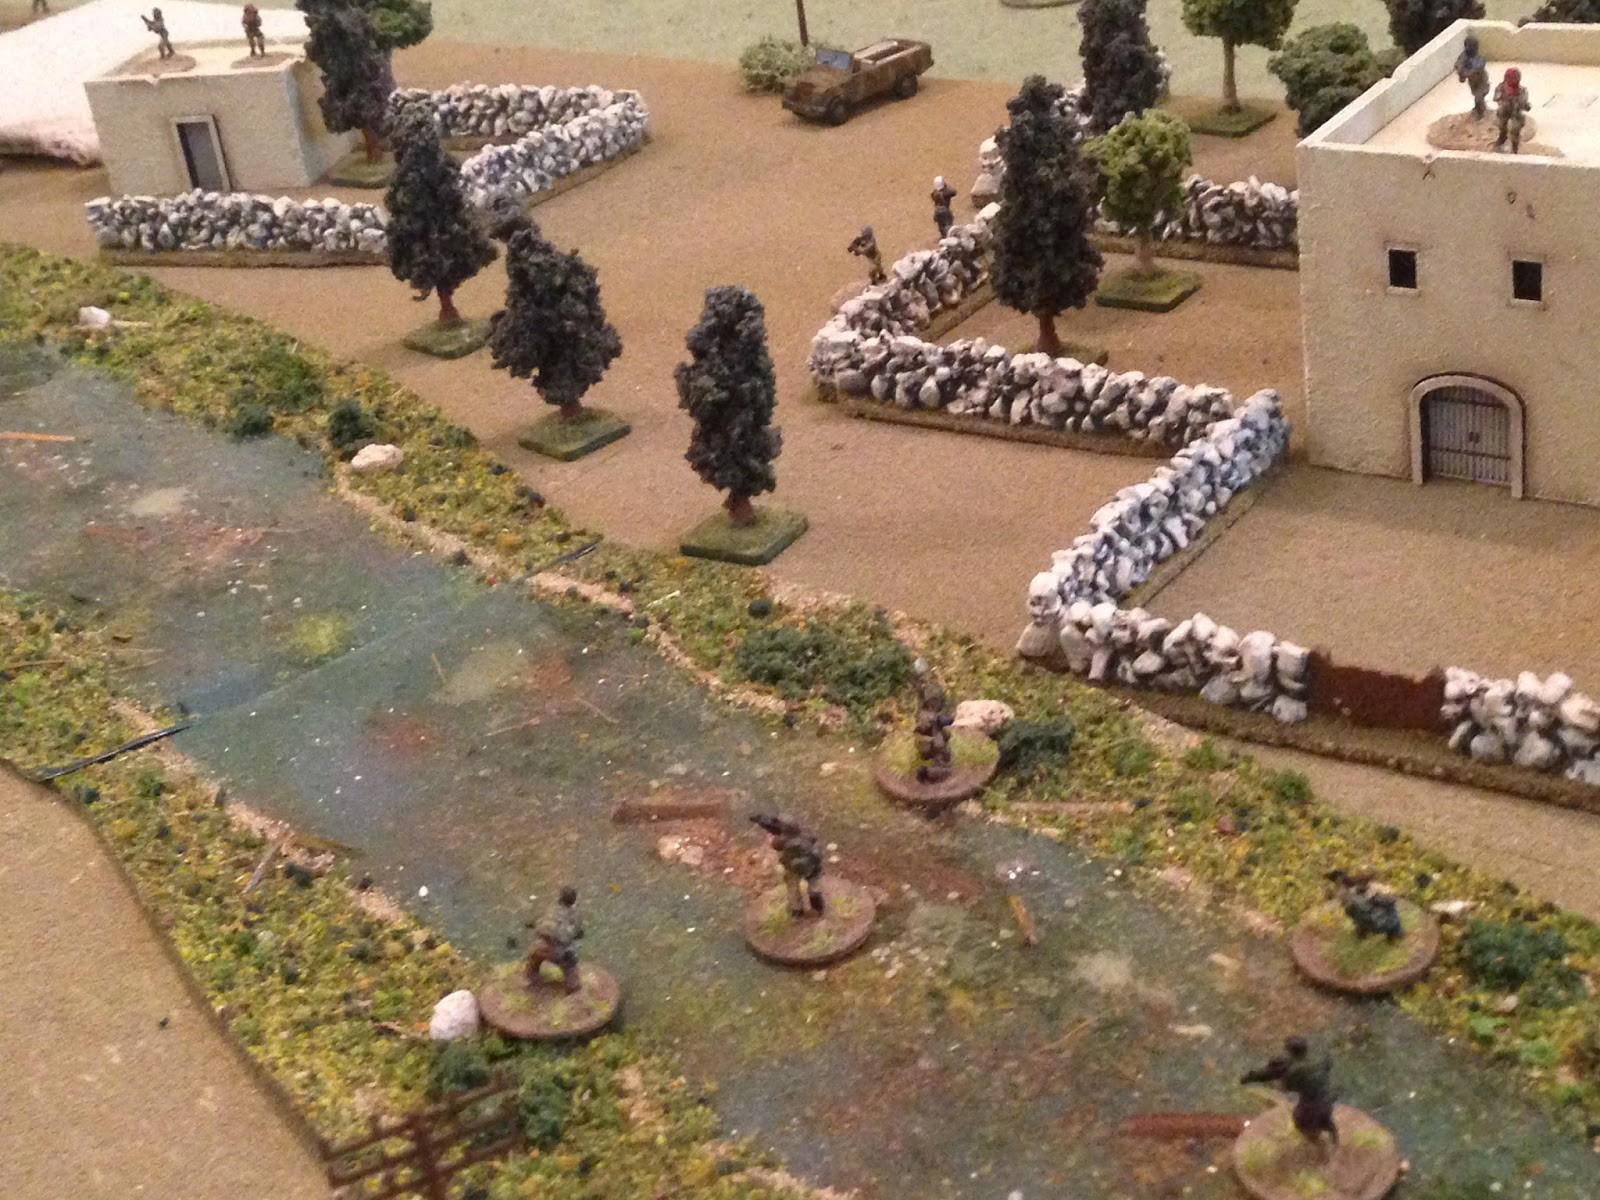
Looking southwest (bottom right) to northeast (top left), you see two bad guys in the bottom right corner, four at center (including one bad guy squad leader; the other is near the wall at far left), and four at top left.
Moving back to the right (east), you see two bad guys in the south (bottom center), two bad guys in the east (top right), four bad guys at far left, the two bad guys on the ground at top left (with two more just above them in the building off camera), and the Cubans just visible at top center, in the stream.
Somewhere in the southeast, a goat searches for its lover...
But it's time to fight.
Cypher moves up next to Switch (top center)...
Where he (bottom center) spots two bad guys atop the building, but not the two at top left.
Tank moves up next (far right, on bank, with Rake just below him), but he can't see anything. Dozer, too (bottom left, with Switch just right of him).
Switch continues pushing up the stream (bottom left), oblivious.
The insurgent 1st Squad Leader hears something and moves up (bottom right), spotting Switch (guy in river at top right). The enemy leader calls his man forward...
The bad guy moves up and fires on Switch! The rounds zip by, but Switch is cool as a cucumber, standing his ground! However, he's disoriented a bit from the sudden starfire in his Night Vision Goggles (NVGs).
Further south, the other enemy Squad Leader moves up (bottom right), but neither he nor a sentry on the roof can spot the sudden cause of the gunfire (top center).
Rung sloshes forward (bottom right), spotting the bad guy (top left) that just fired on Switch (far left).
Rake (bottom right) calls out over the intra-squad radio: "who's got targets?" Cypher (center left) and Rung (off camera to bottom center) both replied "roger." "Take'em down." Cypher fires on the bad guys atop the building.
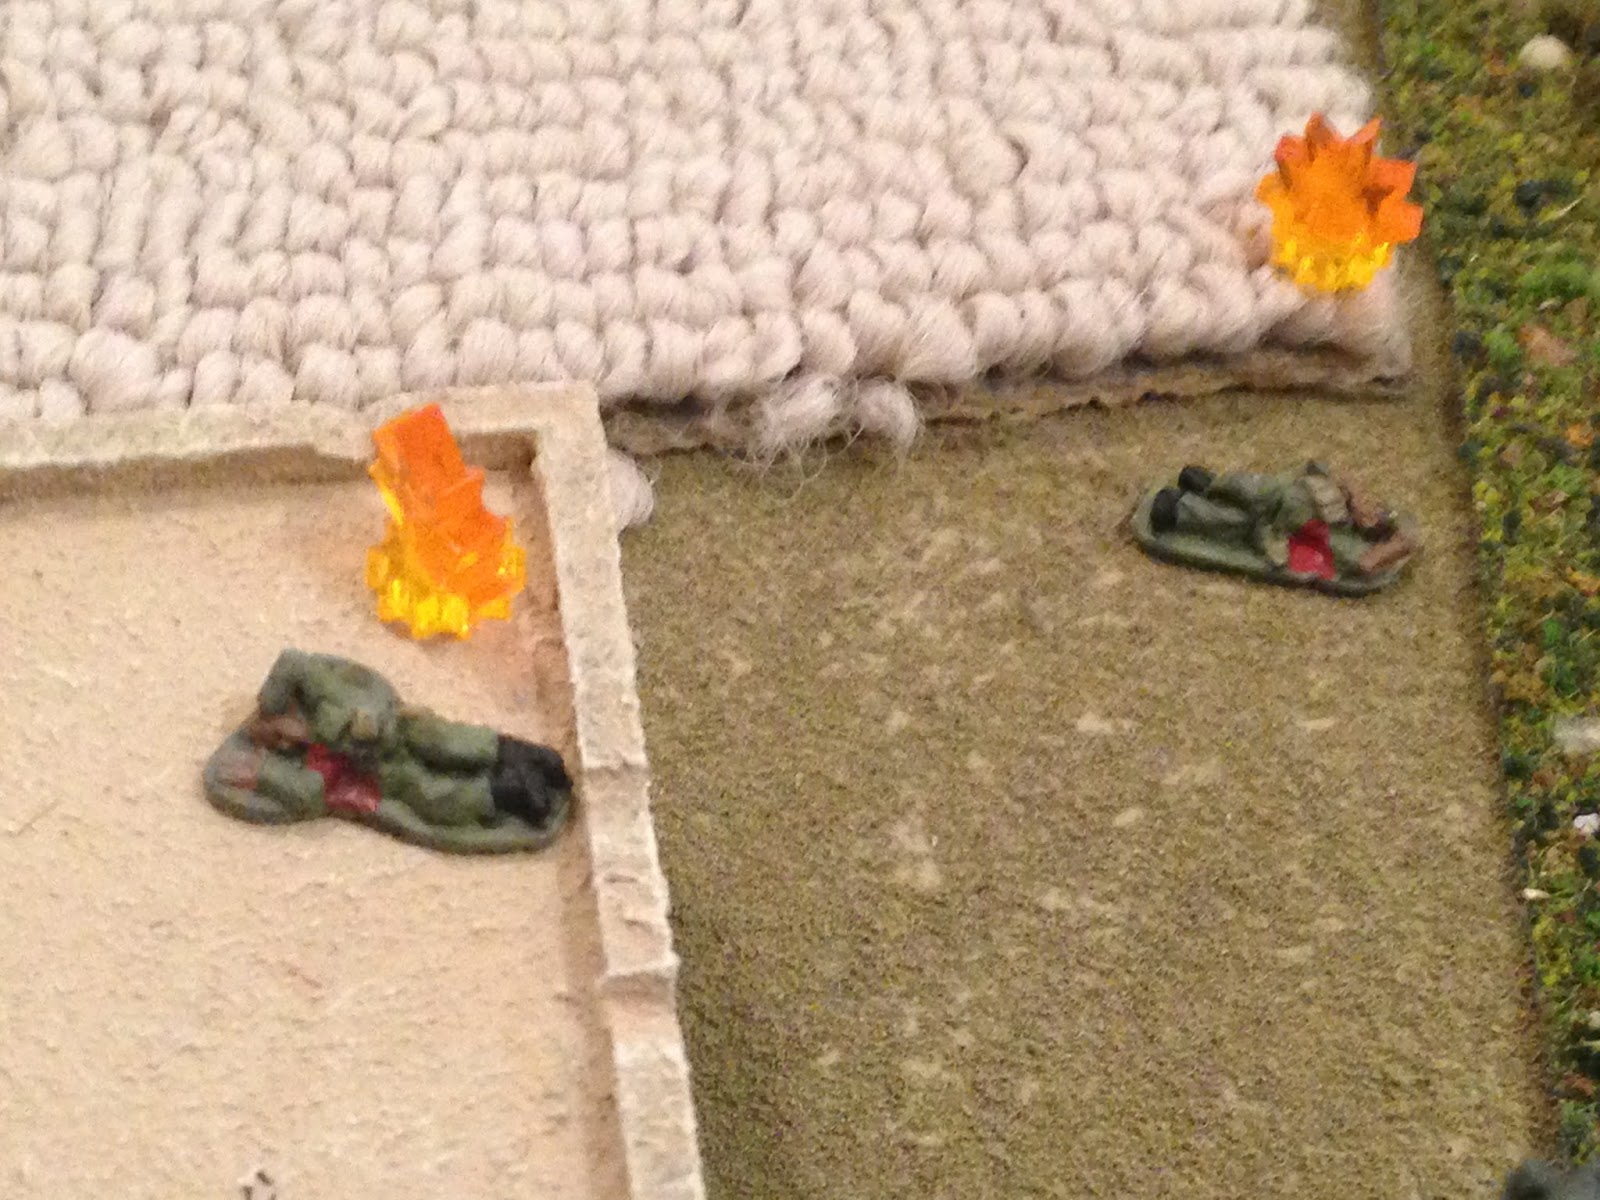
Bad guy #1 is hit in the shoulder (top center) and goes down, bleeding out, while his buddy has his left hand mangled and jumps down, looking to escape (red bead at bottom center). He's done, focused solely on escape from this point forward.
As Cypher (center left) hammers away, Rung (bottom right) opens fire on the bad guys at top left.
The enemy rifleman (center) is gutshot and goes down, out of the fight, while his Squad Leader is shaken up a bit (hesitate for one phase, a temporary discombobulation, if you will; black bead at center left).
Rake moves up (center, in stream, just below Cypher).
Where he (bottom left) spots the enemy's 2nd Squad Leader (on ground at top left, with two bad guys on the roof of the building next to him).
Despite all the shooting and commotion, the enemy 2nd Squad Leader (bottom center) and his sentries on the roof can't make out any targets (top center). The enemy 1st Squad Leader (center top left) is back in the fight...
Which is fortunate for him (top left) as he comes face to face with Switch (bottom right), who is emerging from the stream.
Rung moves up on the Cuban left (bottom center, below telephone pole, with Switch and the enemy 1st Squad Leader both scrambling to bring their rifles to bear at top center). Rung spots movement atop the building at top left!
The enemy 1st Squad Leader reacts just a bit quicker than Switch; his AK rattles off a string of 7.62mm x 39mm rounds.
Switch is hit in the left shoulder and goes down, out of the fight!
With Switch down at top center, Rung (bottom right) ignores the mayhem on his right and calmly fires a couple bursts at the bad guys on the building at top left.
One terrorist is hit in the shoulder, but he stays in the fight, pinned (yellow and purple beads atop the building). But his partner is hit in the left calf, crawls over to the edge, and drops to the ground, looking to get the hell out of dodge.
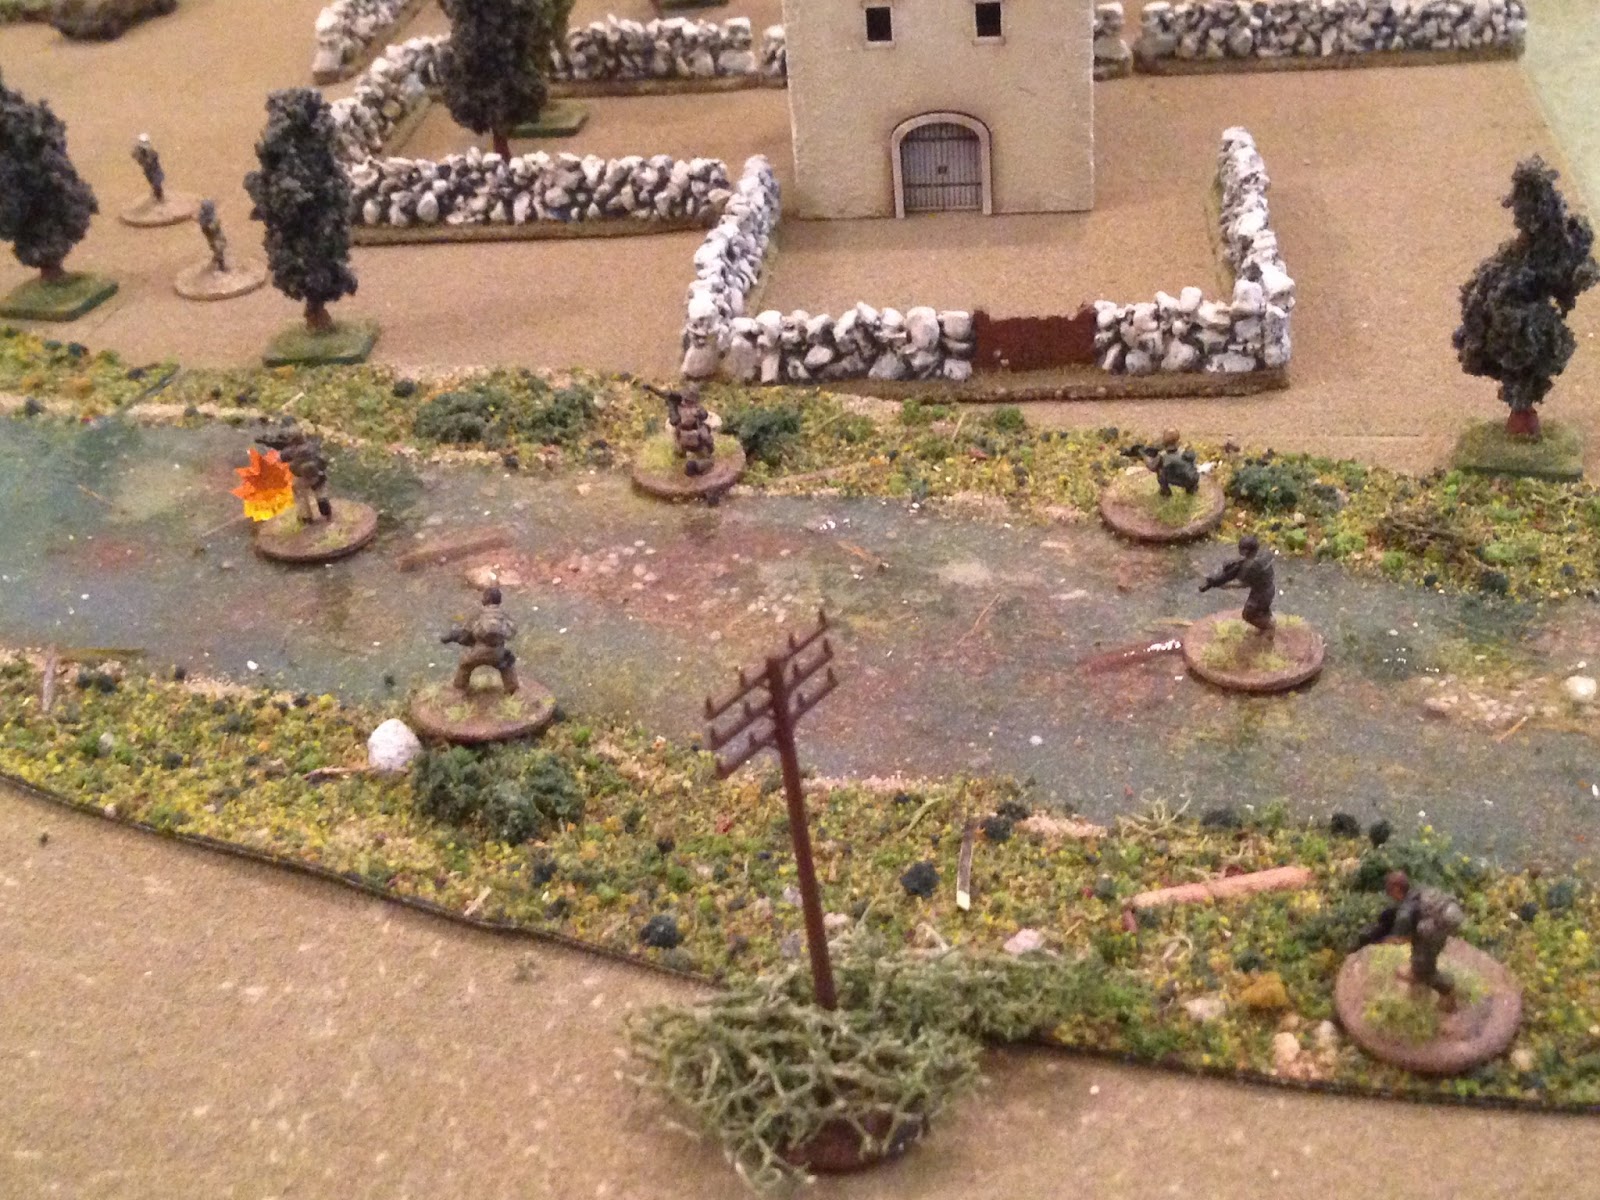
With Rung (off camera to bottom center right) rockin' and rollin' on the bad guys on the roof at top left, Rake (bottom center, with Cypher to his right) sights in on bad guy Squad Leader #2 (on ground at top left) and fires...
The enemy Squad Leader is hit in the jaw! It's not that bad actually; physically, he could remain in the fight if he had the heart. But, with one man hit atop the building and another dragging his bleedin' ass to safety (left), the Squad Leader grabs his face and begins hoofing it to safety through the corn field (bottom center, from explosion at right).
With Rake (bottom left) laying down fire, Cypher moves right (right), but he doesn't see the enemy's 1st Squad Leader (top center).
As Cypher is fumbling around in the dark (center right top, with Rake at center, Dozer just below him, Tank at far right, and the bad guy at top center), Rung dashes up on the left flank (bottom left).
His vision adjusted, Cypher spots the enemy squad leader, moves to the wall, and fires.
A controlled pair to center mass and the bad guy 1st Squad Leader is no more (bottom center, Cypher at top left, and Switch at top center).
Dozer (center left, on bank) and Tank (far right, with Cypher above him and Rake to his left, and Rung at bottom left) move up, but don't see any new bad guys.
Rake (in stream), Dozer (center), and Rung (far left) keep pushing forward.
Rake (bottom right) spots bad guys in the trees at top left, while Dozer (bottom center)...
He (bottom right) spots bad guys through the trees in the east (top left).
Rake (bottom left) surveys the area as Tank (bottom center) and Cypher (far right) move up.
Dozer keeps shuffling forward (center, with Rake at bottom right and Rung at bottom left), lining up and firing his rifle at the bad guys at top left.
Dozer only manages to hit one bad guy, but he's hit bad. The terrorist falls, right thigh spurting blood, and he begins crawling away, desperately trying to reach safety.
Rung moves up (top left), and as the remaining bad guy in the east turns to face about, Dozer lines up and fires. The bad guy is hit in the right arm and left calf; he goes down, out of the fight.
With Dozer cranking it up at far left, Rake (bottom center) pushes forward and fires on mere shadows in the trees at top center
One of the terrorists (bottom right) is hit in the left knee and begins dragging himself to safety. He and the wounded bad guy at top left both manage to crawl off the map.
*I forgot to check the other bad guy at bottom right's morale; I'll do it next time he activates.
In the west, one wounded bad guy crawls for safety (red bead at far left), while another hauls himself over a wall (top right) in an attempt to escape.
The pinned, wounded bad guy atop the building (top right) self rallies, and is almost ready to get back in the fight, while his squad leader (bottom left), shot in the jaw, scurries away to safety. The able-bodied bad guy at left (next to a wounded bad guy)...
Moves up (bottom left), where he and Cypher (top left) spot each other.
In the southwest (bottom left), one terrorist climbs atop the building while his buddy skirts the corn field.
And in the south, the bad guy Rake shot in the knee crawls off while his buddy becomes pinned, hunkering down next to a corn field.
Back in the west, the bad guy at bottom center) fires on Cypher (top left).
The rounds sail by harmlessly, but they're close enough to cause Cypher to hop back behind the wall for a quick breather.
With the bad guy at far left banging away at Cypher (top center left), the two bad guys in the southwest (bottom left) move up and take a look around.
The guy on the ground (bottom left) spots Rake (top center).
The 'shaken' bad guy in the southeast keeps trying to talk himself back into the fight, but decides to sit tight (yellow bead at bottom right).
Tank moves up next to Cypher (bottom right), but can't spot where the rounds are coming from (top left).
Dozer moves up on the left (bottom left), but can't see anything (Rake is at bottom right).
So he moves up again (bottom left), but he still can't see anything...
Back on the right, the bad guy stops firing to reload (top left). Cypher (bottom right, with Tank to his left) sets in, and when the bad guy pops back up Cypher fires...
Busting his melon (bottom left). With Cypher firing (top left), Tank moves up (top center), and spots the wounded bad guy on the roof (bottom center).
Wow, all that, and that's just the end of Turn 1!!! But I'm digging it; my SOF troops are feeling very effective, but no untouchable (obviously, Switch took a round straightaway).
With Dozer already up there (far left), Take (center) and Rung (bottom left) move up, as Tank (far right) eyeballs the situation. Rake spots the bad guy in the cornfield at top center.
Rake (bottom right) looks on as Tank (center) moves up and fires on the wounded bad guy atop the building. The terrorist is his in the right thigh; must've hit the femoral artery as he bled out rather quickly...
With Tank blazing away at far right, Rake below him, and Dozer at bottom left), Rung moves up (bottom center).
Then Cypher sprints up on the far right (top right, with Tank at center and Rake at bottom center left).
As Cypher catches up (bottom right), Tank creeps forward to the wall (center right), and spots the 'shaken' bad guy at top left.
Rung (bottom right) looks on as Dozer moves up to the wall and fires on the bad guy atop the building in the southwest (top left)...
Dropping him (bottom center) with a round in the groin!
Damn, these rules are disgusting! ;)
Things are not looking good for the bad guys; they are down to the guy next to the cornfield (bottom center right), and a 'shaken' guy off camera to bottom right.
Rung moves up to the gate (far left, with Dozer just above him), as Rake finally gets out of the stream (center, between the trees). Tank is at top center, Cypher at top right.
Switch is bleeding off camera to right, and for all of you whining about not sending someone over to help him out, the first rule is 'win the firefight.'
Rake (bottom center) sights in and fires on the bad guy at the cornfield.
Two rounds slam into him, piercing his right arm and left thigh, leaving him lying there helpless (right).
Rung covers as Dozer passes through the gate (far left), and Cypher and Tank move up on the right.
Dozer looks around (bottom left) as Tank (bottom right) fires on the last bad guy still in the fight (top left).
A 5.56mm round slams into the bad guy's left knee, and he is not happy.
Well, he's happy to surrender to Rake, Tank, and Dozer.
Ben, if you're reading this, that dude failed his morale roll by 16!
Cypher and Rung fall back to police up Switch and get him treated. He'll survive, but he's going to be out awhile, about a month and a half.
Cypher and Rung treat Switch (bottom left) as Major Villanueva leads Team 2 forward. Rake and Team 1 did their job, breaking through the outer crust of the enemy defenses. Now all they need to do is brush back a whole bunch more bad guys, capture The Mayor, then get out of there.
The rules worked out great. The game was kinda long, but that's true anytime you play a set of rules for the first time, and there are a lot of modifiers to look up (firing, spotting, morale, hit location, figuring out impact). And I couldn't find my D20, so I was rolling two D10s, which I like better anyway (I always hate rolling only one dice, just a personal hangup).
The rules let me throw six Special Forces good guys on the table against fourteen Mediocre bad guys, and the good guys won, losing one man seriously wounded, while the bad guys suffered eight KIA, five WIA that managed to escape, and one WIA that was captured. The phased activations throw some 'stuff' in the game, which also allows the matchup of disparate forces, as do the spotting rules. I like the hit location stuff, just for fun, but it doesn't really effect gameplay (it can, in terms of if you roll up hitting a guy in the foot, and he can't be hit in the foot, then you just missed, but that didn't happen to me), and it's a little bit of a pain in the butt (not too much) tracking bad guys that were wounded but are seeking to escape (whereas, in my normal rules they'd just be marked by a casualty figure, out of the fight).
In any case, the next fight will be using the same rules, the same way, then I'll look at changing things up if I think I need to. Hope you liked it, I certainly did!
V/R,
Jack


No comments:
Post a Comment