Current situation: It's 0730 on 4 August 1990 in South Leon. Lt Gouveia has been promised a SLA mechanized battalion, and he has secured (limited amounts of) Cuban air support. The desired end-state is joint Cuban/SLA possession of Hill 114; to that end, the SLA battalion scheme of maneuver is to probe to the northeast of Hill 114 (this fight, which is taking place directly north of the map used for Operation Chunky Bandit fights 1-8), seeking to find an opening in the enemy defenses and exploit it with a hasty attack on the objective, or go firm and secure the right flank of the attack. While this is occurring, Cuban air support will pound Hill 30 (at center right of the Op CB fights 1-8), and then SLA forces will assault and hold Hill 30 (will be Op CB #10) to secure a position to support the Hill 114 assault by fire and secure the left flank of the attack. The SLA command, of course, expects the enemy to vigorously counterattack Hill 30 (will be Op CB #11). Then SLA forces will conduct an air assault to the northwest of Hill 114 (off the map for Op CB fights 1-8 to top left) to isolate the objective, preventing withdrawal and reinforcement (this will be Op CB #12), and then the assault on Hill 114 will commence (will be Op CB #13). Again, SLA leadership presumes the enemy will vigorously counterattack if Hill 114 falls (will hopefully be Op CB #14, assuming the attack on Hill 114 succeeds, but that applies pretty much to all of these).
Two hours ago (0530 local time) Staff Sergeant "Tahoe" Gallarraga accompanied the SLA mechanized battalion's A Company on a probe northeast of Hill 114, where they discovered the enemy had prepared defenses in that zone, though they were able to secure Hill 27 and thus fulfill their mission of anchoring the right (northern) flank of the upcoming attack on Hill 114. Tahoe was awarded the Bronze Star for his actions taking Hill 27.
Ninety minutes ago (0600 local time) Staff Sergeant "Gundog" Baerga accompanied the SLA mechanized battalion's B Company in the assault on Hill 45, which succeeded, but with heavy casualties, including SSgt Baerga himself, lightly wounded and evacuated. The remaining SLA elements quickly established defensive positions atop Hill 45.
Thirty minutes ago (0700 local time) Master Sergeant "Faceman" Soriano, with elements of D Company, air assaulted into LZs northwest of Hill 114. The SLA force landed in the middle of a hornets' nest, getting a CH-47 shot down and taking heavy casualties (including Face, himself, who...), though they eliminated a bunker and two entire enemy platoons of infantry, accomplishing their mission of tying up enemy forces northwest of Hill 114 and cutting, at least temporarily, Route 1, blocking reinforcement to, and escape from, Hill 114.
Now (0730 local time) we join 1st Lt "Lobo" Gouveia with C Company (reinforced), assaulting the eastern central slope of Hill 114, who needs to hurry. They need to take the hill and establish their Observation Post so close air support can be called down on enemy elements on Route 1; if this is not accomplished, D Company will be quickly overrun, the breakout attempt by Task Forces Redleg and Razor will be imperiled, and the enemy will continue to reinforce the capital of Pendrakenville, making the offensive to re-take the capital that much more expensive.

Overview, north is up. At left are two fingers running east off of Hill 114, with its mass off camera to left. Off camera to bottom center would be the southeast slope of Hill 114, which featured in fights 1 through 8, off camera to top center would be the northeast slope of Hill 114, which featured in fight number 9, and off camera a ways to top left would be the northwest slope of Hill 114, which featured in fight number 12. Cuban F-4 Phantoms have worked over Hill 114, you can see the craters and bombed out stands of trees. The area is largely comprised of rice paddies, with a stream running north to south, fordable (at a penalty) in all locations by infantry, but vehicles can only pass at the actual fords (bottom center right, center right, and center top right). At top right is the village of Biafra.

The opposing forces, with SLA on the right and FSNL (communist neighbors to the north) at left. The troops are all Pendraken 10mm, except the Cuban (singly-based dude at bottom center right), which is Minifigs UK, while the M-113 ACAVs are also Pendraken, but the M-48s are plastics from Takara. The two bunkers at far left are from Flashpoint Miniatures. I'm playing this series of fights (the SLA operation to take Hill 114) using Ivan Sorensen's "Squad Hammer" rules, modified a bit.
The SLA force in the assault, C Company, minus 3rd Platoon, which is in reserve, reinforced by two tanks (Rhino 11 and Rhino 12) and three M-113 ACAVs (Cheetah 21, 22, and 23). The two rifle platoons, 1st and 2nd, are at bottom center, the Company Commander is at far right, with Lt Gouviea just below him, and Weapons Platoon is at far left, consisting of their platoon leader, a .50 caliber Heavy Machine Gun (HMG), and an 81mm mortar team.
**Weapons Platoon will actually be off table: they are dug-in atop Hill 45, on the west end of the village of Siagnoa, which was fought over several times during Phase 1a (the first eight fights of Operation Chunky Bandit), and was seized by the SLA in Op CB #10). This fight (what you see on the table itself) is occurring north of the TF Black area of operations, which had the southeast spur of Hill 114 at its extreme northwest. As the SLA's C Company is attacking, its Weapons Platoon will be off table to the southeast, approximately 800m away.
The FSNL Communist force, consisting of two machine gun bunkers, two understrength rifle platoons, a recoiless rifle, a 12.7mm Dshk HMG, an 82mm mortar, and their company commander. The rifle platoons will be dug-in in two trenchlines.
Overview, this time with troops, showing the FSNL deployment in the west (left) and the SLA deployment in the east (right). The SLA CO, 1st Platoon, Rhino 11 (tank), and Cheetahs 21 and 22 (tracks) are at top right, while Lobo, 2nd Platoon, Rhino 12, and Cheetah 23 are at bottom right. The enemy Dshk HMG is in a pillbox at top left, Bunker #1 is at top center left, and their CO, 1st Platoon, and 82mm mortar in the trenchline at far left top, while their recoiless rifle is in a sandbagged emplacement at bottom left, 2nd Platoon is in the trenchline at bottom left center, and Bunker #2 is at bottom center left.
The enemy positions atop the northern finger, pillbox at top left, Bunker #1 at top center right, and CO, mortar, and 1st Platoon in trenchline at left. Here you can also see I added concertina wire.
The enemy positions on the southern finger, with recoiless rifle at bottom left, 2nd Platoon in trenchline at center, and Bunker #2 at far right.
Looking west to east at the SLA forces, with CO and 1st Platoon in the north (far left), Lobo and 2nd Platoon in the south (far right), and you can see Weapons Platoon represented off table in a sandbagged position at top right, amidst the flotsam and jetsam of wargaming detritus...
A close up of 1st Platoon's order of march: 1st Squad, 1st Platoon (1/1) is at far left, then the CO, then 2/1, 3/1, Rhino 11 (tank), Cheetah 21 (track), and Cheetah 22.
In the south, 2nd Platoon has already shaken out into line, leading the armored vehicles. The infantry platoon is, from top to bottom: 1/2, 2/2, and 3/2, with Lobo at center right, Rhino 12 above him, and Cheetah 23 behind him.
Weapons Platoon, sitting comfortably atop Hill 45, eating some C-rat peaches while the rifle platoons sweat their asses while crossing the line of departure. Their Lieutenant has made sure there is plenty of ammo on hand, water to dump on the mortar tube, headspace and timing checked on the Ma Deuce. It's time to fight!
*I did change up the rules for this game, just to give it a shot. Rather than roll for command points, then draw that many cards for activation, I simply gave each side a number of cards equal to their number of units, so every unit will activate every turn. We shall see how it goes.
The fight begins in the north, where 1/1 crosses the ford and moves up, staying careful to stick to cover as best they can (center, with the rest of 1st Platoon at far right and Bunker #1 at top left).
The enemy machine gunners were hoping to let the SLA troopers get closer, but the wary pointman spotted the bunker: "Contact front, enemy bunker!" The SLA riflemen fanned out and began firing, but the thick, earthen walls duly protected their occupants.
Immediately the SLA CO grabbed 2/1 and moved up on 1/1's left (center left, from right).
They (bottom center) were preparing to engage Bunker #1 (center right) when they spotted the enemy's northern trenchline (top center, with Pillbox unseen at top right) and opened fire. Wildly and striking nothing.
Momentarily stunned, the enemy in Bunker #1 (bottom left) get in the fight. Their PK machine gun rattles off a long burst at 1/1 (top center, to left), but the SLA troops are making good use of the thick brush and are unharmed.
Further up the slope, the Communist 1/1 (bottom left) cuts loose on the SLA CO and 2/1 (top right), aggravating them a bit (1 hit).
While the fight is developing for the bulk of 1st Platoon (center left), 3/1 crosses the ford and moves left (left), looking to see if the enemy flank is open, or at least looking to secure their own flank. It is a major coup that all three squads got across the ford without being chewed up!
3/1 (bottom center) gets in on the act, opening fire on Bunker #1 (top left) but not causing any havoc.
With that, the TC of Rhino 11 spurs his driver on. They plunge into the water then back up and out of it, lurching to a halt in the center of 1st Platoon.
The TC has his head up, following the fire of 1/1 and 3/1 to spot Bunker #1 (top center). He gives the command and the tank rocks as a 90mm HE round darts towards the bunker.
Just short!
As the tank (far left) engages Bunker #1 (top left), Cheetah 21 dashes up to the ford (center left, from far right, where Cheetah 22 is sitting).
Cheetah 22 (bottom center right) doesn't have a great view, but opens fire on Bunker #1 (top center) with its .50 cal HMG, to no effect.
And then Cheetah 22 dashes up on the left (left, from bottom right)…
And does the same thing. Bunker #1 is proving quite impervious to fire...
And that's when the enemy HMG in the pillbox (bottom center) decides to enter the fray, firing downslope on Cheetah 22 (top center)…
The 12.7mm slugs rip through the thin armor of the M-113, nearly knocking it out (5 hits)!
While in the northern trenchline, the enemy 82mm mortar team begins making adjustments...
They (bottom left) are unable to get accurate firing data on 1st Platoon (center top left), and so they are soon tossing rounds in 2nd Platoon's direction (top right).
Though they are a little short (1 hit on 2/2).
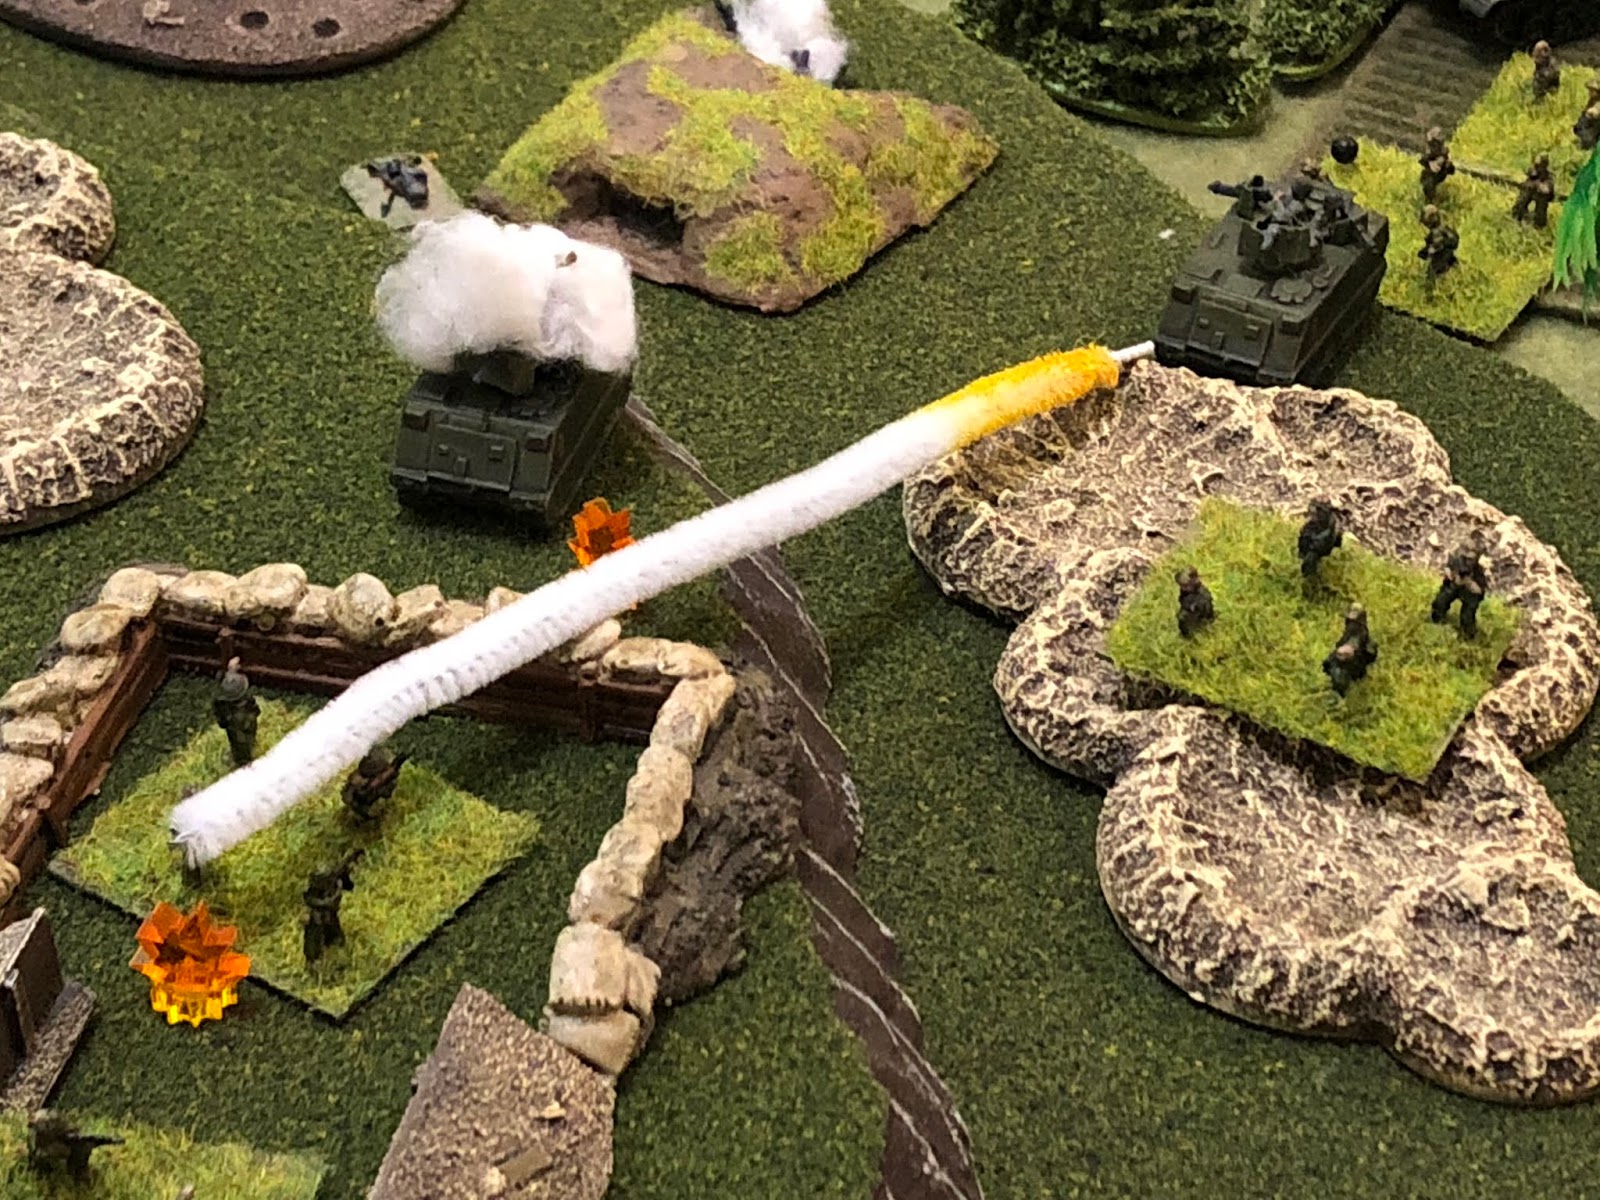
While on the southern finger, the enemy recoiless rifle (bottom left) sights in on Rhino 11 (just visible at top center) and fires, sending a 106mm armor piercing round their way...
The tank takes a direct hit, nearly putting it out of the fight (5 hits)!
Back on Hill 45, the Wpns Plt leader spotted the source of the round that just hit Rhino 11, and directs his HMG to engage...
.50 caliber rounds zoom in from the southeast (off camera to bottom far right), but they zip harmlessly past the enemy recoiless rifle emplacement (top left).
The Wpns Plt leader directs the 81mm mortar team to engage, but the rounds are short, landing between the recoiless rifle emplacement (left) and the southern trenchline (right).
Under mortar fire and fearing what must be waiting for them at the ford (far left), 1/2 scurries north, into cover (top center left, from center), looking to cross the river there. Sure it will take longer, but it least they won't be exposed to enemy fire.
Well, that's what they thought (bottom left). Some very keen lookouts catch sight of enemy troops dug in (the enemy's 1/2, top center) and the squad opens fire, to no effect.
And as 1/2 (in the jungle at center top) is letting Lobo (top right) know the right flank is covered, Bunker #2 (bottom left) opens fire with its machine gun. They can't really get a look at the SLA infantry because of the falling mortar fire, so they open up on Cheetah 23 and score a couple hits.
And as the MG bunker chatters away (center), the enemy's 2/2, further up the hill in the trench (bottom center), opens fire on 2nd Platoon (top right).
The fire is ineffective and 3/2 dashes across the ford and into cover on the west bank (far left, from center bottom).
Under mortar, machine gun, and rifle fire, Lobo rallies 2/2 and pushes them forward into cover (center, from far right), though it's a bit indecisive, not getting to the ford (bottom center left) nor joining 1/2 on the right (in the jungle at top left).
They (bottom right) open fire on the enemy recoiless rifle position (top left), but the rounds slam harmlessly into the sandbags.
The enemy's 1/2 (bottom left, with their 2/2 at bottom right) is under fire from the SLA's 1/2 (in the jungle at top center), but they're more concerned about the SLA's 3/2 (top right), which has crossed the river, so they focus they're fire there, but the SLA troopers are making good use of cover and concealment and are unaffected.
As Cheetah 23 moves up to cover on the south side of the ford (bottom center left, from far right), scanning for targets.
They (bottom right) spot and open fire on the enemy recoiless rifle position (top left), but their machine guns do no harm...
Back on the northern finger, the Communist 2/1 is sitting tight in the trench (second unit from bottom), unable to see anything (the SLA 1st Platoon is mostly off camera to tp center), but they know armored vehicles are up there and further south (off camera to top right), so they decide to move out aggressively...
They push downslope and slink into the center, between the SLA 1st (top left) and 2nd Platoons (top right), hiding in some underbrush (center right, from bottom center left).
While back in the south, Rhino 12 dashes across the ford (bottom left, from far right), looking to come to the aid of their infantry.
3/2's squad leader points out Bunker #2, and Rhino 12 immediately fires its main gun.
The HE round slams into the bunker's firing embrasure, stinging the enemy and causing some casualties (3 hits)!
*Thus ends Turn 1.
In the north, everybody is doing pretty well, except for the armored support! The SLA CO shifts over (center) and sets to rallying the crew of Rhino 11 (-3 hits, dropping them to 2 total)…
And then he promptly leads 2/1 forward (left, from center right, above the tank), looking to clear the field of fire and flank Bunker #1 (top center left), but then they realize they've got problems with the enemy northern trenchline (top left)…
The CO and 2/1 shoot uphill, but can't levy effective fire on the enemy's 1/1.
They're outside the bunker's field of fire (center bottom), which turns its gun on 1/1 (top left), but the SLA troopers are dug-in there like ticks and remain unfazed by the close range machine gun fire!
Having said that, they're not too keen and sitting there (explosion at bottom center) and be a punching bag, plus the CO (center) is motioning them to exploit the gap, so they dash uphill and shelter amongst the craters (center top), near the enemy trenchline!
While back on Hill 45, the Wpns Plt Lieutenant is working his boys back into the fight. He wants the mortar team to engage the northern trenchline, but the .50-cal team points out that he thinks friendlies just jumped into the craters adjacent the trench, so they are directed to shift fire...
So the mortars (off camera to bottom right) engage the enemy recoiless rifle team (far left).
And mortars begin impacting very close, causing a bit of consternation on the part of the enemy recoiless rifle crew (1 hit).
Meanwhile, back on the northern finger Cheetah 22 dashes up the hill (center top, between the trench and Bunker #1), looking to help out the infantry (1/1 in craters at left, CO and 2/1 just below the bunker, 3/1 still lagging at bottom right)!
The track's machine guns blaze away at point blank range, causing a few casualties (2 hits).
Bolstered by seeing Cheetah 22's fearlessness in charging the trench (center top left), Rhino 11's TC pushes his tank up in the center...
Where they practically stick their main gun barrel into the Bunker #1's firing port and fire!
Causing heavy casualties in the bunker (5 hits)!
Under heavy tank fire and worried they're about to be overrun, the crew of Bunker #1 fall back out the bunker's exit, where they run straight into Cheetah 22!!! A melee ensues...
That sees the enemy bunker crew toss hand grenades into Cheetah 22, destroying it (far right), before they fall back into the craters near the pillbox (top center)!
With fighting raging at point blank range on the northern finger, the commander of Cheetah 21 figures he'd better get into the fight, so he directs his driver forward (center left, between 2/1 in the craters and the CO and 1/1, just left of the tank, from across the ford at bottom right). But the dash is fraught with peril, the crew having to keep their eyes peeled to make sure they don't squish any friendlies rather than keeping their eyes up to spot and engage the enemy!
*They failed to spot the pillbox, the bunker crew (top left), or anyone in the trench (far left)…
In the north trench, the enemy CO rallies his 1/1 (center)…
And he's successful (
-2 hits, 0 total)…
Their spirits buoyed, they promptly launch an RPG at Cheetah 21...
A brilliant flash, a thunderous explosion, and Cheetah 21 is no longer with us...
*You probably think I'm an imbecile, charging the track up the hill like that, and you're probably right, but... 1) This is a point-blank type fight, the heavy weapons can't sit back and support from afar, the bunkers, pillbox, and troops in trenches are very difficult to spot, and even harder to hit, even with main guns and HMGs), and 2) you know me, I love to be super aggressive, to push the action, to be dramatic. Either my guys or going to come out of this heroes, or theirs are.
With both tracks burning, one could argue things are not going so well on the northern finger, but the tank is still in action (and proving my point, it was able to knock out Bunker #1), as are all three rifle squads. The CO (center) directs 3/1 forward; the snake through the opening in the wire (left, from the trees at bottom center). Their squad leader senses danger, something off to their left (the enemy 1/2, at bottom left)…
They (center, with the CO and 2/1 at center right, 1/1 in the craters at top right) spot the enemy squad on their flank (top left) and cut loose through the jungle undergrowth...
*Helluva spotting roll for 3/1!
The fire is withering, causing the enemy heavy casualties (four hits).
They promptly fall back (bottom left, from explosion at center top right, saving themselves a hit, as well).
Meanwhile, the SLA Wpns Plt on Hill 45 (off camera to bottom right) is proving very active. The enemy recoiless rifle team (on the southern finger, far left), already being pounded by the 81mm mortars, is again engaged by the SLA .50-cal HMG...
And a few more casualties is enough to convince the recoiless rifle team to throw in the towel, its survivors fleeing the west (left) off the battlefield.
*They'll be seen again in the next fight.
Back on the northern finger, the enemy pillbox (bottom center) hasn't been much of a factor, despite the heavy machine gun it contains. First, the SLA's 1st Platoon moved like greased lightning to close the distance, rapidly advancing uphill. Second, the dust, debris, and smoke from two burning M-113s obscuring the battlefield, and the confusion caused by enemy fire and friendly and enemy infantry being interspersed meant there was little they could do.
Somehow, through it all, the pillbox spots movement at the base of the finger; "there (top center), net to the tank! Those must be enemy soldiers!" The Dshk began spitting 12.7mm rounds at the CO and 2/1, but they didn't hit anything!!!
Unable to get a bead on the nearest SLA troops breaking through their defenses (1/1, in craters at center top), the pillbox (bottom left) hammers away at SLA troops further downslope. Similarly, the Communist mortar wants to stem the breakthrough, but can't drop their rounds that short, so they fire downslope, too, hoping that between them and the pillbox they can cutoff the SLA spearhead and their infantry can finish it off...
But the mortars pass over 2/1, 3/1, and the SLA Co, impacting long.
Back in the south, Rhino 12 (bottom left), having popped a 90mm round into Bunker #2 (center left), thinks it's out of the fight, so they open fire on enemy infantry further upslope, in the trench (top left).
*Rhino 12 failed to spot the damn bunker, even though they'd seen it before and thus had a very low target score on 2D6...
The 90mm HE round hits right in front of the trench, causing the Communist 2/2 a couple casualties (2 hits). At the other end of the trench (top center)…
The enemy 1/2 continues firing on 3/2 in the bushes near the ford (top center right), causing them a little trouble (1 hit).
Further right, 1/2 hops in the river (top left, with 3/2 at center left and Lobo and 2/2 at right).
The smoke and dust clears on the enemy's southern trenchline, so the FSNL 2/2 pop their heads back up and continue engaging 3/2 (top center right)…
And the combined fire is enough to put 3/2 out of the fight, leaving Rhino 12 unsupported!
Lt Gouviea, AKA Lobo, sees 3/2 get roughed up (left) and figures Rhino 12 will just have to take care of itself, there's no way he's going to push across the southern ford, straight into the teeth of the enemy defenses (a lot more of them survived the morning's airstrikes than hoped!), so he grabs 2/2 and they dash right, crossing the central ford and pushing west (top center, from center), looping past 1/2 (just visible in river, amongst the jungle, at center left). Cheetah 23's commander (bottom center) knows a good idea when he sees it...
So he pivots the M-113 and they dash right, too, pulling ahead of Lobo and 2/2 (right, from off camera to bottom left).
Confused at why they've suddenly been left alone, and without a viable target in sight, the enemy's Bunker #2 crew decides to sit tight and not draw the attention of the damn SLA tank again (right).
*They can see Lobo and 2/2 at top left but can't get the MG that far over, and they can see 1/2 in the river at top center, but it's a terrible shot and they don't figure they should give away their position now that the SLA troops think their bunker is out of action.
While in the northeast, the SLA XO brings 3rd Platoon, the reserve, up. At far left is 1st Platoon, at bottom center is Lobo, 2/2, and Cheetah 23, with the rest of 2nd Platoon off camera to bottom right.
With things having gone suddenly quiet in the south, the enemy infantry again decide to act aggressively and decisively: the Communist 1/2 leaves the shelter of the southern trenchline, creeping forward (left top, from center left, with Lobo, 2/2, an Cheetah 23 at top center, 1/2 in the river at top right)…
Transformed into a hunter-killer team, they launch an RPG at Cheetah 23! Not long range, per se, but substantial...
Nevertheless, the rocket slams into the SLA M-113 and blows it up, Lobo and 2/2 sheltering as pieces of the tracked vehicle fall to earth around them...
Back in the north, the enemy mortar team (bottom center) continues pumping rounds downslope, trying to isolate 1/2 (center top, in craters) from the rest of the platoon (top center).
The rounds are still not on the money, but they continue to build on 2/1 (1 hit, for 2 total).
Further upslope, the enemy CO dashes north out of the trenchline and into the craters, where he sets about rallying the crew of Bunker #1 (top center, from center bottom, with their mortar team at bottom left and their 1/1 at far right). He does a good job, bringing them back from the edge (-3 hits, down from 5).
Back on Hill 45, the SLA Weapons Platoon scans for targets, but the fight is at close range and is extraordinarily confused. They can't find anything on the northern finger at all, just dust, smoke, gray apparitions moving too and fro, while the southern finger has fallen quiet, nothing stirring at all, no firing. Until a rocket slammed into Cheetah 23...
They can't see anything, but the Wpns Plt commander remembered the CO's concerns about enemy infantry moving up/holding the draw between the two fingers (far left), so the 81mm mortar team (off camera to bottom far right) begins pumping rounds into the draw.
Landing amidst the enemy's 2/1, knocking them out (they were already significantly weakened from 3/1's fire)!
Watching the mortar rounds land in the draw, and scanning for the source of the rocket that knocked out Cheetah 23 (center top), the SLA .50-cal HMG crew spots it, the Communist 1/2 (left top). They manipulate the T/E and fire, but don't manage to hit their target... Meanwhile, Rhino 12 (bottom right) is feeling a bit uncomfortable. Despite Bunker #2 (far left) being knocked out (it's not, they just think it is), they know there's a trench up there (off camera to left) that had some enemy infantry in it earlier, who knows what's up there now...
So they fall back across the river (far right, from bottom center left), hopefully out of RPG range. They begin scanning for targets...
Yup, thinks the Rhino 12 TC to himself, I knew there were still infantry in that damn trench (top left)! The main gun roars again.
It's tough to get any casualties because of the trench, but those 90mm explosions right outside sure are making the Communist 2/2 very uncomfortable (2 more hits, 4 total, with 1/2 at top center).
Back on the northern finger, having just rallied them, the enemy CO (far left) orders the Bunker #1 crew forward. They creep up, stalking Rhino 11 (top center), taking up position just outside the bunker (center left top), creeping up the SLA flank...
Where they promptly launch an RPG at the SLA tank!
The RPG hits a bit short, but close enough to cause some light damage and shake the crew up a bit (2 more hits, 4 total).
Covering their buddies, the pillbox crew (bottom left) slams a fresh belt of ammo into the Dshk and continues firing downslope (top center), between the bunker crew (top left) and 1/1 (center, with their CO at far left).
And this time their aim is true: the heavy machine gun rounds tear into 2/1, nearly putting them out of the fight (3 more hits, 5 total)!
With things seemingly going their way, the enemy 1/1 gets a bit overly aggressive. With the pillbox (off camera to left) ripping into 2/1 (top center) and the bunker crew (top left) popping the tank with an RPG (top center right, with 3/1 just below them), the squad leader is getting a bit froggy. He lets out a yell: "Follow me!" and leads hit men out of the trench (left), down into the craters sheltering the SLA's 1/1 (center)!
The fighting amongst the craters is ferocious: hand grenades are tossed from one crater to another, pistols, bayonets, and e-tools are brandished, each side exacting a heavy toll on the other (4 hits on the enemy, 5 hits on 1/1).
3/1's squad leader sees the inferno in the craters just ahead (center left); he looks right, the CO and 2/1 are besieged, rockets zipping past, mortars landing amongst them, and 12.7mm rounds pulverizing their flesh (bottom right). He takes it upon himself: "We must save 1st Squad, follow me!" And with that, the young South Leonian Sergeant leads hi men forward, into the melee (center)!
They take a couple casualties (1 hit), but the enemy 1/1 is swiftly destroyed!
Leaving 1/1 to regroup in the craters (bottom right, -2 hits, 3 total), 3/1 pushes further ahead, into the enemy trench (center, with the pillbox at top left and the enemy CO at top center).
And with SLA troops (3/1, far right) now in the trench, the Communist 82mm mortar team (far left) runs, leaving the battlefield!
Inspired by 3/1's actions (off camera to left), needing to rescue Rhino 11 from more RPGs, and looking to finally finish this damn fight, the SLA CO leads 2/1 forward, past Bunker #1 and into close combat with the bunker's crew, while Rhino 11's TC rallies his crew (-1, 3 total).
In a short, sharp fight, the enemy crew is annihilated, but they fought like caged animals, knocking 2/1 out of the fight and putting a severe hurt on the company command group (3 hits)!
Further south (looking east to west), Rhino 12 is holding down the left flank (bottom left) as Lobo leads 2/2 up to the wire (center, with 1/2 still in the river at left).
The enemy's 1/2 (top center) has been taking fire from the .50-cal HMG on Hill 45 (off camera to far, far, far bottom left), and now they have a squad of SLA troops (2/2, with Lobo) in their face, firing at point-blank range.
Caught in the open, they are put out of the fight!
1/2 finally gets their soggy asses out of the river, moving up in trace of Lobo and 2/2, next to the burning Cheetah 23 (right, from bottom center).
Up in the trenchline on the southern finger, the Communist 2/2 (bottom center) sits tight and attempts to regroup, but they've been taking tank fire for awhile now (off camera to top right) and they just watched their comrades in 1/2 get gunned down (top left, SLA 2/2 at top center) so it doesn't get too far (-1 hit, 3 total).

The fight has turned: while not in possession of either finger, it's only a matter of time. The SLA XO moves up and across the northern ford (center right, from bottom center); 1st Platoon has knocked out Bunker #1 and is in the enemy trenchline on the northern finger, and while the pillbox (top right) remains, at this point the SLA troops can pretty much roll the tank (Rhino 11) up to point-blank range and pound it into submission. On the southern finger (top left), only a single, beat-up rifle squad remains (in the trenchline), and the other tank (Rhino 12, off camera to bottom left) has them pinned in place while the remains of 2nd Platooon (center left) are in position to flank. Bunker #2 (far left top) is actually still in the fight, but has been nullified by the flanking maneuver.

The enemy CO (left, in the craters, with the SLA CO at top left, Rhino 11 at top center, 2/1 in the craters at center top, and 3/1 in the trenchline at center) scans the area and reviews his tactical options...
Before falling back into the pillbox, joining the Dshk crew.
3rd Platoon moves up the northern finger, links up with 1st Platoon, and closes in on the pillbox, moving Rhino 11 up to pound the pillbox into submission with its main gun. Four 90mm HE rounds is all it took for the dazed survivors, blood streaming from their noses and ears, to appear with their hands up. The SLA infantry moved in to secure the northern finger.
While in the south, Rhino 12 moves right and joins Lobo and 2nd Platoon (bottom right) as they make the final push on the southern finger.
With SLA forces moving in strength on their flank and the northern finger already in enemy hands, the enemy troops on the southern finger (Bunker #2 crew at bottom left, and 2/2 at top left) decide discretion is the better part of valor and retreat. We'll see them again, but with that, the assault on Hill 114 by C Company is a success! Now all they've got to do is consummate the relationship by installing Lobo and his remaining Special Forces troops on the military crest, where they will start running the air interdiction battle. Which is the next, and hopefully last, fight of Phase 1b of Operation Chunky Bandit.
Well, a helluva fight. Probably would have been a bit easier on the SLA forces if the Communist hadn't been so aggressive, leaving their trenches to sally forth and destroy SLA ACAVs with RPGs, and almost bust the tank in the north, Rhino 11! Having said that, if that one squad (1/1) had just sat in the northern trench, rather than charge the SLA 1/1 and get wiped out by the SLA 3/1's counterattack, things probably would have been a bit tougher. Bad aim by their HMG and mortar teams certainly helped the SLA attackers, as did the SLA's incredibly lucky fire from its Weapons Platoon that knocked out the enemy's recoiless rifle after only one shot!
The fight was certainly bloody: the SLA suffered 45 casualties and three totally destroyed M-113s, while the FSNL lost 45 KIA and 10 captured, though their mortar team (sans mortar) and two squads were able to escape. While 1st Lt "Lobo" Gouviea was relatively quiet, several SLA troops distinguished themselves: the squad leader for 3/1 was awarded his country's version of the Silver Star for leading his men into the close combat in the craters to save 1/1, and then taking the enemy trench, which essentially broke the back of the enemy defense on the northern finger. The SLA Company Commander was also awarded the Silver Star for his leadership under fire (the various rallying of 2/1 and Rhino 11 to keep them in the fight while being pounded by enemy mortars and the HMG in the pillbox), and for leading the close assault that removed the RPG threat to Rhino 11 and finally cleared the northern bunker. The SLA squad leader for 2/1 was awarded the Bronze Star for that same close assault, though his was awarded posthumously as he was killed in the melee.
In any case, the war goes on, and movement was quick to consolidate. From C Company, 1st Platoon and Rhino 11 immediately began moving north along the spine of Hill 114 to clear it and link up with A Company, to the northeast (the probing attack from Op CB #9). 2nd Platoon and Rhino 12 began clearing south, joined by the remains of B Company, coming forward from Hill 45 (Op CB #10). To the northwest, D Company, who air assaulted in to cut Route 1 and isolate Hill 114 from reinforcement (Op CB #12), faced about and began moving up the west slope of Hill 114 to link up with the rest of the battalion.
Most pressing at this juncture, though, is to get the Forward Air Controllers in action atop Hill 114. Lt Gouveia links up with the remaining members of his team; there are not enough of them, so they have to 'borrow' some SLA troops to help them carry all their gear up to the proposed Observation Post (OP), and they've linked up with 3rd Platoon, C Company, who's mission is to escort them to the OP. "Should be no big deal, piece o'cake, just a bunch of stragglers between here and there." He was correct on one thing: there were a lot of stragglers between them and the proposed OP location.
V/R,
Jack


Great game report- very aggressive of you to push that hard.
ReplyDeleteLoved the entrenched and shello holed hill- reminicsent of hamburger hill.
Cheers,
Pete.
Thanks, Pete, I’m glad you enjoyed it. Not sure I was meaning to be that aggressive, but with that many troops on that small a table, it was bound to get a bit physical ;)
DeleteAnd yes, Hamburger Hill was exactly the look I was after. Wish I had more time, I’d have played a dozen attacks/counterattacks for it, but too many other fights/projects to get to!
V/R,
Jack
Always enjoy your batreps! Keep them coming!
ReplyDeleteThanks, Jim, will do!
DeleteV/R,
Jack